
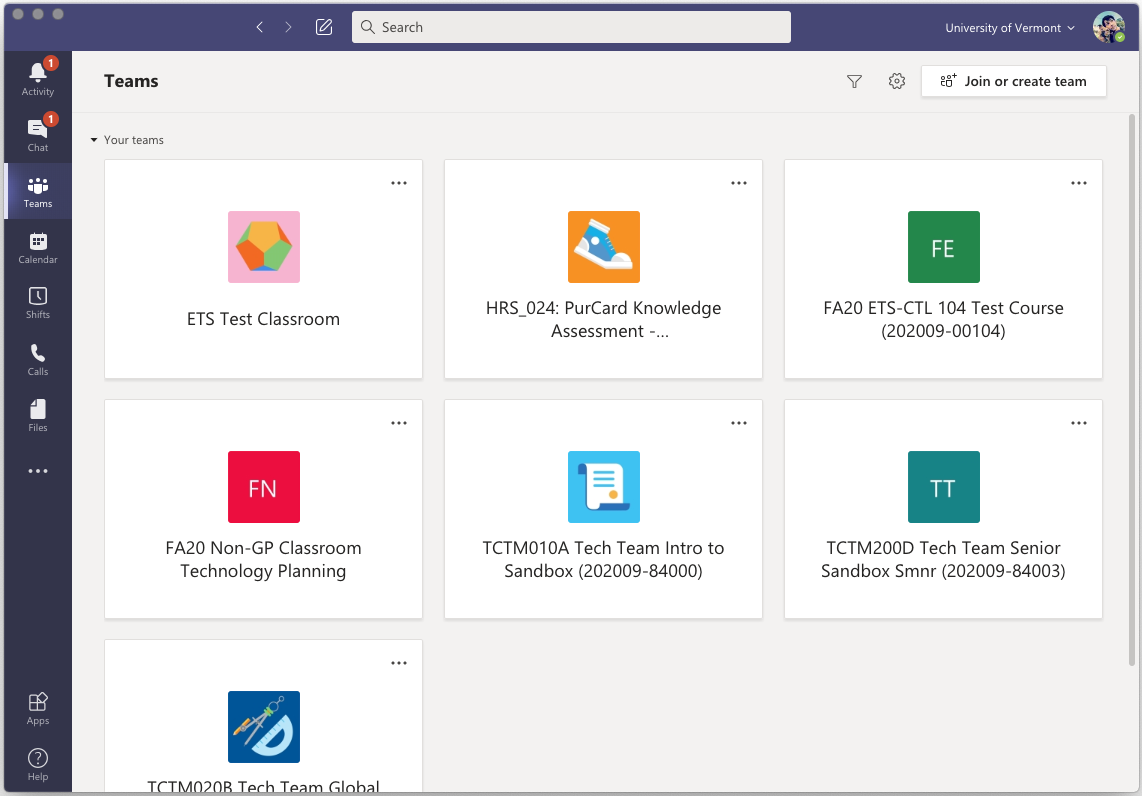
 Instructors will discover they are an owner of Class Teams that correspond with their normal courses. Students cannot see or interact with courses until they are activated by an instructor.
Students enrolled in your course through Banner have also been added to the class team automatically, and the class roster will update your class team membership based on the feed from Brightspace which will run at least once every 24 hours, but likely more frequently.
Student membership can also be managed manually – for example, adding or removing a student from the class team – but keep in mind that if you do add or remove a person from the Team, that person will need to be managed manually from then on in that course. (This is because the system is avoiding undoing something you set up intentionally.)
Getting Started
The suggestions outlined in this section of the guide are flexible. It is more important that you organize your course content in a way that suits your course than to strictly follow these guidelines.
Your Class Teams
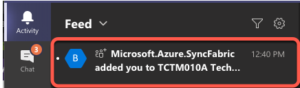
- When a team is created for one of your courses you’ll receive a notification in your Teams activity feed that looks like this:
- To see all of your teams, select Teams from the sidebar, or select Chat and scroll down.
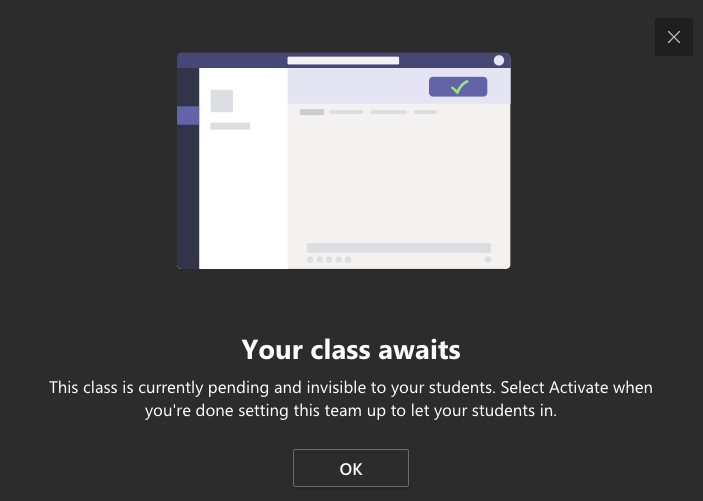
- When you open a class team for the first time you’ll be reminded that the team is currently hidden from students. This will give you time to configure and organize the team to fit your specific needs.
- The default class team consists of the following items:
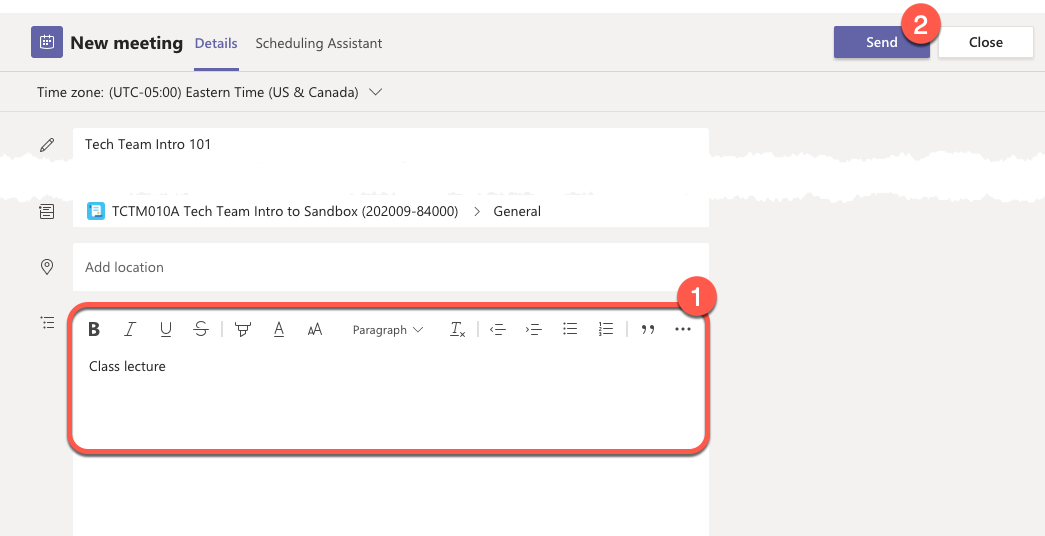
- General Channel – This is where you can start conversations, post content, or make announcements to your students. All teams come with a general channel, but you can also create channels to give your class additional structure.
- Posts tab – This is where you can start conversations, post content, or make announcements to your class. Be mindful of using posts to share content with your students – it is important to be consistent with your use of Brightspace and Teams throughout the semester (so students can easily refer back to materials in a consistent location).
- Files tab – The files tab is where you can upload documents and other content to share with your students. Class teams come with a “Course Materials” folder that is built into the Files tab – this folder allows you to share files with read-only access for students.
- Home page tab – The home page tab acts as a landing page where students can get quick access to upcoming calendar events and recent files shared to the Team. More information about setting up the home page tab can be found in this Microsoft Support article. The Assignments and Grades features have been intentionally disabled to avoid confusion with Brightspace and Banner.
- Class Notebook tab – Every class team comes with its own OneNote class notebook. This will allow you to take notes in the classroom using the recently installed Wacom One pen displays with the added ability of letting your students access to the notes later.


Structure your course with Channels
There are many ways to organize and arrange content in your class team. One such method is to use Channels to add structure to your course. The use of channels is quite flexible and can be adapted to fit your desired use case. You can also stick with the default General channel and avoid using additional channels all together – it’s really what you feel will work best for your course.
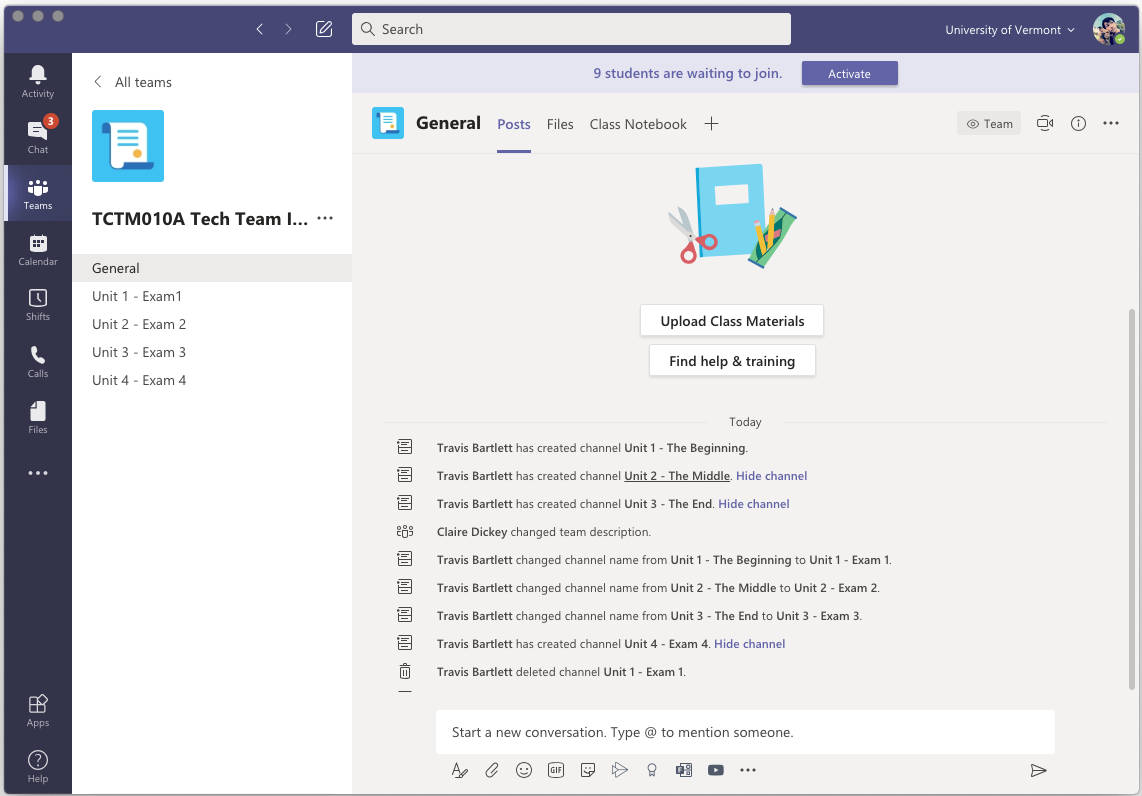
In this example scenario, our 16 week academic semester will consist of 4 exams including the final. For the sake of simplicity, we’ll be using channels to divide our course content into 4 different sections, one for each exam. Dividing the content up this way can make it easier for students to find materials relevant to the current topic.
As you’ll see later in this guide – channels are used to invite your class to online meetings for lecture. When you invite a channel to a meeting and record it, the recording for that meeting will be available within that particular channel’s Posts tab – amazing!
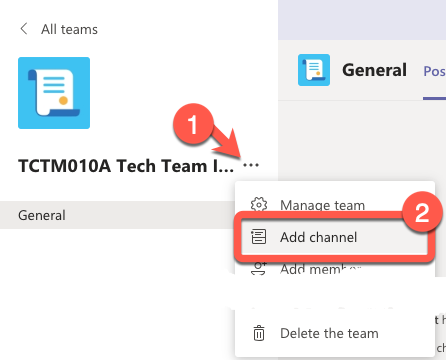
- From your class team, click the More Options menu. From the list that appears, select Add Channel.

- Enter a name, provide a description if necessary, keep the privacy settings as standard, and make sure the “Automatically show this channel in everyone’s channel list” is checked. Click Add to create the channel.
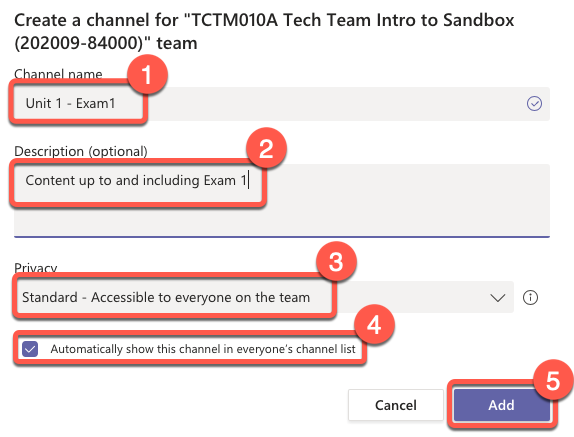
- Repeat this process for all channels you wish to create. We recommend that you keep it simple – too many channels may make things overly complicated.
- We now have our General channel which can be used for announcements and sharing class materials, as well as the four additional channels we created to organize our content throughout the semester.

- At this point you can select a channel and upload content to it, or keep it as is for now and add as you go. Channels will also be used to scheduling online meetings for lecture in the Activation and Scheduling Lectures portion of this guide.

Class Notebook/OneNote
A OneNote Class Notebook tab is generated automatically with every Class Team. This feature is designed primarily with K-12 organizations in mind, but cannot be disabled or deleted, so most UVM faculty (and their students) simply ignore it.
Some faculty may find the Class Notebook specifically to be a useful space for collaboration, or for compiling journal writings from students (since individual and collaborative spaces are automatically created).
However, it may also duplicate functionality provided by UVM’s LMS (Brightspace) and cause confusion for students. Teams Assignments and Grading functionality has been disabled, with the approval of the Faculty Senate, to minimize confusion and duplicate functionality with the LMS—so some Class Notebook features may not be available.
On-Demand Provisioning of Your Class Team's SharePoint Site
When you open your Class Team for the first time, you’ll notice several tabs across the top—Posts, Files, Home page, and more. While the team itself is automatically created for your course, the SharePoint site that powers file storage and collaboration is provisioned on-demand.
To trigger the provisioning of your SharePoint site:
- Open Microsoft Teams.
- Navigate to your Class Team.
- Click on the Files tab at the top of the General channel.
Allow some time for the site to provision. If it does not provision within a few hours, please contact the Tech Team by submitting a ticket.
Hide a Class Team
- Select Teams from the left sidebar, or select Chat and scroll down.
- Scroll down your list of teams and locate the one you would like to hide. Click the 3-dot More Options menu.
- Click Hide. You will now see this team in your list of Hidden teams.

Unhide a Class Team
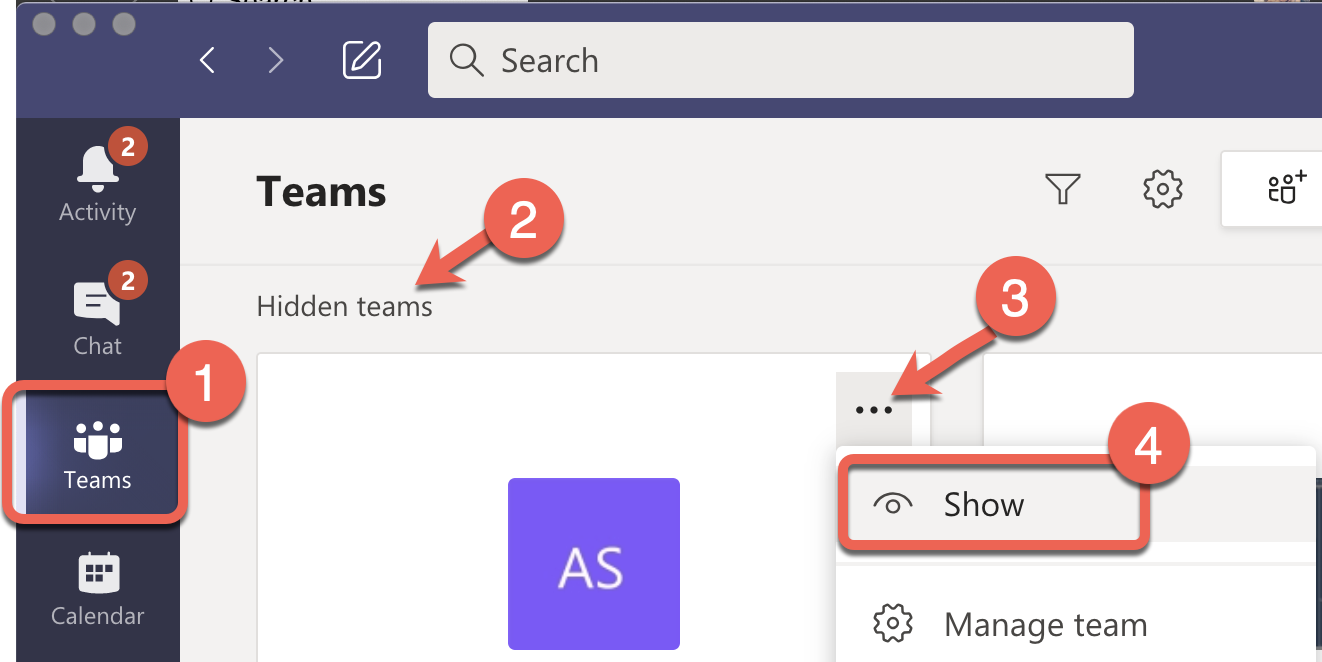
- Select Teams from the left sidebar, or select Chat and scroll down.
- Scroll down your list of teams and select See all your teams.
- Locate the team you’d like to unhide and click the 3-dot More Options menu.
- Click Show. You should now see your team back in your list of Teams.

Activating Your Class Team
This guide assume that you are ready to make the class team visible to students.
Activating your Class Team
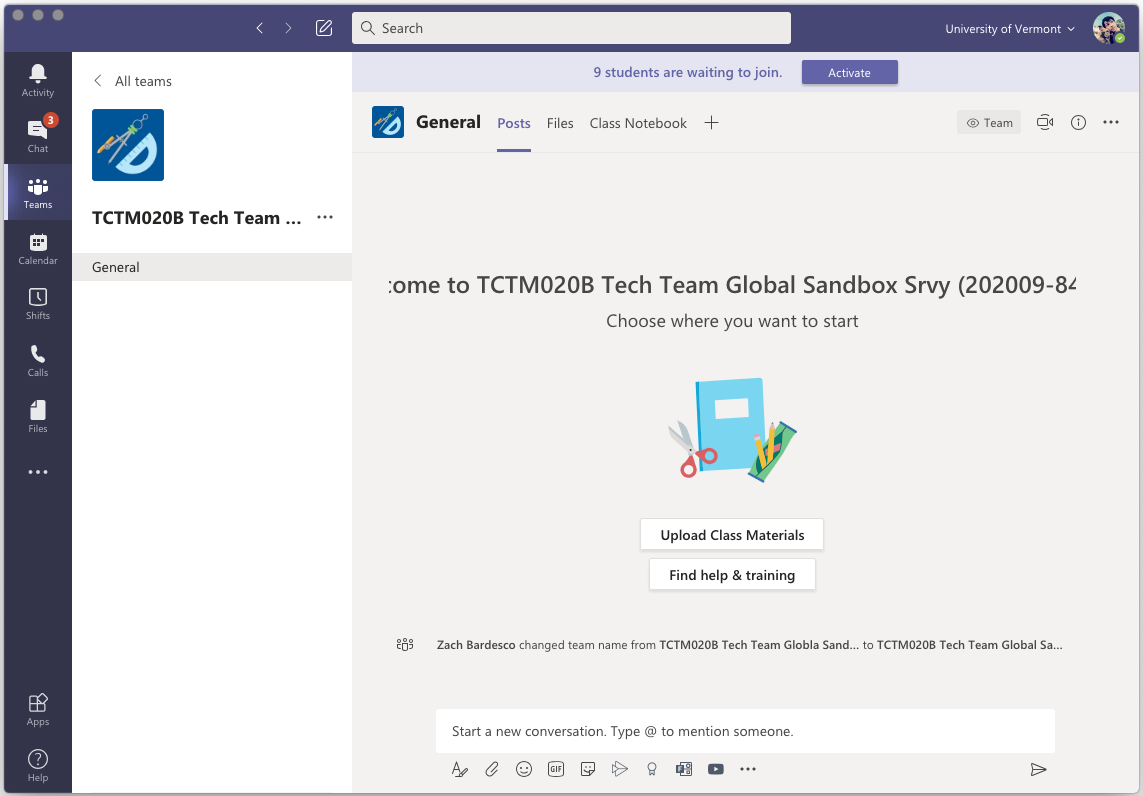
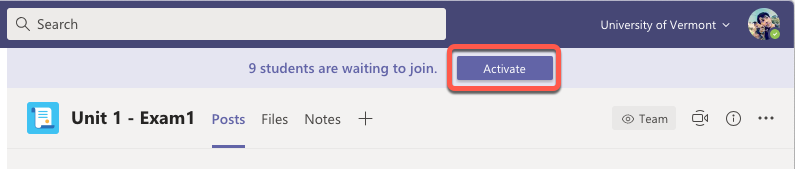
When you’ve finished configuring your class team and you’re ready to make it visible to your students, it’s time to activate the team.
Please be aware that there is currently no “deactivate” function – once the team is activated it will remain that way. We recommend waiting at least until the week before classes begin to activate your class team.
To activate your class team:
- Open Microsoft Teams and select Teams from the sidebar, or select Chat and scroll down.
- Locate the class team you’d like to activate and click to open it. At the top of the class team, click the Activate button.

- You’ll receive a prompt asking if you’re sure that you’d like to make the class team visible to students, click Activate to continue.

- Repeat this process for each of your class teams.
- After you’ve activated your class teams you can schedule your lectures as online meetings in the Teams calendar. See the guide below for more details.

Scheduling Lectures
This guide below assume that your class team has been activated and you’re ready to begin scheduling online meetings for class lectures.
Scheduling Online Meetings for Lectures
Before you schedule online meetings for your lecture it is important to know which dates you’ll be scheduling meetings for.
As an example, if a course meets every Monday, Wednesday, and Friday at 10:00am, and the first day of lecture is on February 1st, 2021 and last day is May 11th, 2021 – we could use the recurring meeting option to schedule all of our meeting for the entire semester.
If you decided to structure your course using different channels as described in the Getting Started section above, you can simply repeat the process below for start and end dates of units, etc.
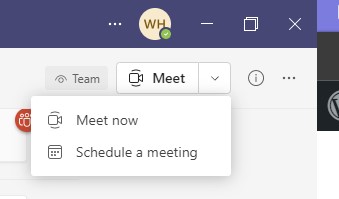
- Open Microsoft Teams and select Calendar from the sidebar.
- Click the arrow next to Meet, then click Schedule a Meeting.
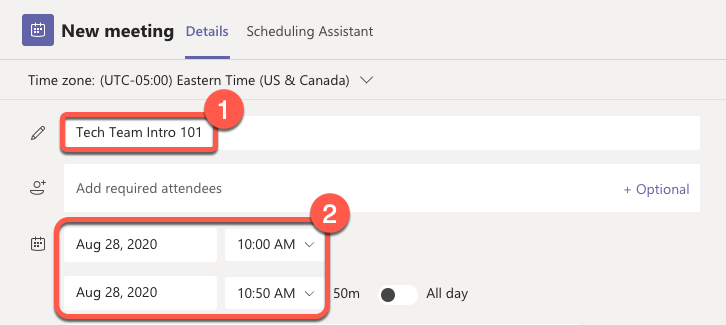
- Start by giving your meeting a name that clearly associates it with your course. Select the first day of lecture, and then add the start and end time.

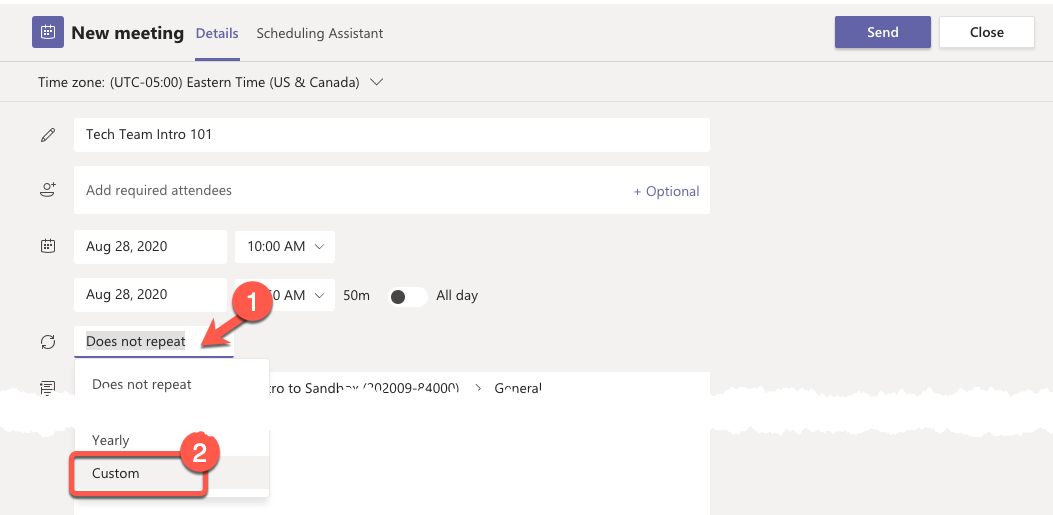
- Click the recurring meeting drop-down menu, then select “Custom“.

- Note that the start date should coincide with the first day of lecture for your course. Courses repeat weekly, and in this example our class is held on MWF. We then set the End date to the last class-day of the semester (Link to UVM’s Academic Calendar).
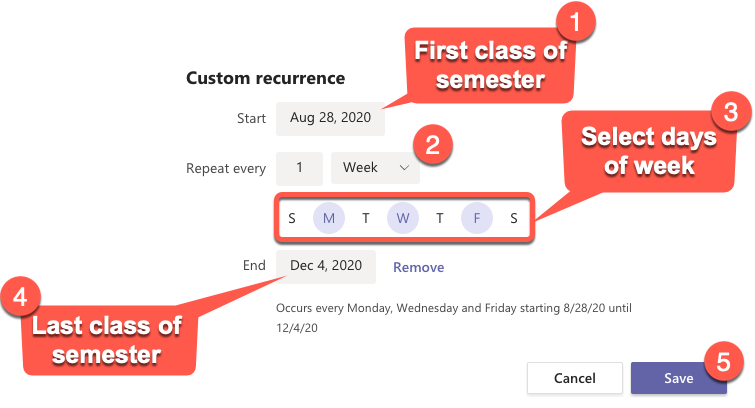
- Note that the start date should coincide with the first day of lecture for your course. Courses repeat weekly, and in this example our class is held on MWF. We then set the End date to the last class-day of the semester (Link to UVM’s Academic Calendar).
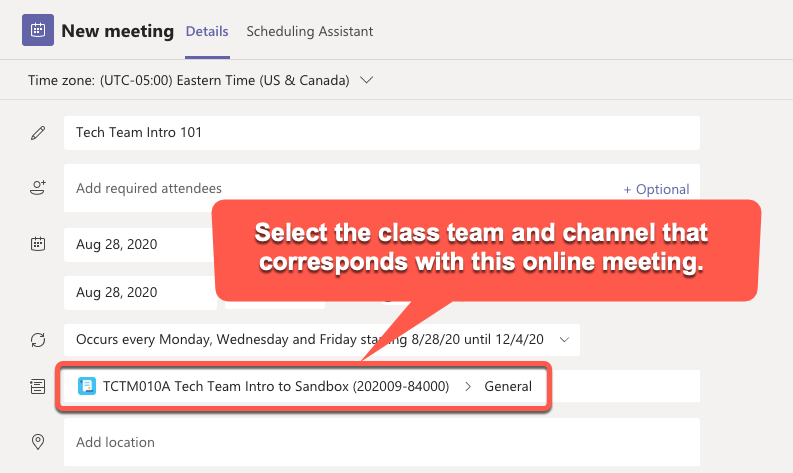
- Use the Add Channel field to browse through your list of teams to select the class team and channel that corresponds to this online meeting. In this example we’ll simply add the General channel of our Tech Team Intro class team.
- Enter a description if desired. Double-check that you’ve entered the correct time and dates for your meetings, then click Save to send the meeting invitation.
- Repeat this process for all of your classes.


Adjusting Meeting Options
This guide assumes that you’ve already created meetings for your lecture. For more detailed information on Teams meeting options, see this page.
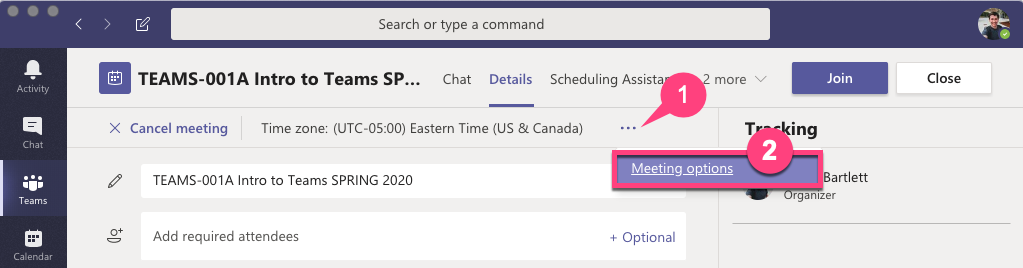
- From the meeting details window, click the More options
 menu of the meeting, then select “Meeting Options“.
- You’ll be redirected to a webpage. If you’re asked to sign in – enter your netid@uvm.edu email address, this will redirect you to a familiar UVM login window. After logging in, you’ll be able to adjust settings for who can present during the meeting.
- RECOMMENDED: change the “Who can present?” setting to “Only Me” – this will prevent students from being able to share their screens or take over presenting during the meeting. This will also prevent students from being able to start the recording of a meeting. Students will still be able to use their webcam and microphones to participate in the meeting.
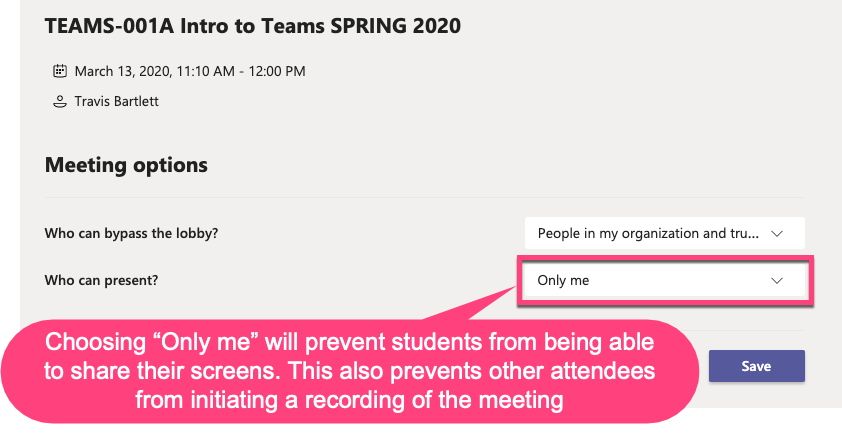
- If your lecture will involve asking students to share their screen, or to take over presenting for a portion of the lecture – use the “People in my organization” setting instead.
- RECOMMENDED: change the “Who can present?” setting to “Only Me” – this will prevent students from being able to share their screens or take over presenting during the meeting. This will also prevent students from being able to start the recording of a meeting. Students will still be able to use their webcam and microphones to participate in the meeting.


Teaching with Teams
Assignments in Teams
Based on feedback from the student population, the widespread adoption of Teams as a remote learning tool has added to the already long list of applications and services with which a student must be familiar, and enabling this feature would result in more confusion and inconsistencies around how an assignment should be completed, submitted, etc.
This feature was intentionally disabled as a result of this feedback. This change is made at the organizational level – it is not possible for a team owner to enable this feature for their class team on an individual basis.
Managing your Old Class Team
Around three to four weeks after the end of a semester, all Class Teams for that semester are archived. The archival process includes the following:
- The Class Teams is renamed with the prefix “ExpMMYY_”
- Example: An archived Fall 2020 course would be prefixed with “Exp0121_”
- All students are removed from the Class Team
- The Class Team is moved out of your list of Active and Hidden Teams
Click here to view our dedicated guide on Restoring and Archiving your Class Teams.