1. Home
  2. Email and Calendar
  3. Add a UVM Email Account to Your Device
  1. Home
  2. Smart Phones and Tablets
  3. Add a UVM Email Account to Your Device

Add a UVM Email Account to Your Device

Microsoft Exchange iconThe University of Vermont utilizes Microsoft Exchange as our primary email, calendaring, contacts, scheduling, and collaboration platform. All current UVM affiliates with an active NetID account are provisioned with Exchange access.

The guides below will walk you through the process of adding your UVM Exchange account to various devices and mail clients. You can also access your UVM email from any web browser by visiting outlook.office.com.

Windows 

Outlook for Microsoft 365

  1. Open the Outlook application
  2. If this is your first time launching Outlook, you should be automatically prompted to enter your email address
    Not getting the prompt?

    If Outlook does not automatically prompt you to add an account, you can click File and then find + Add Account under Account Information.


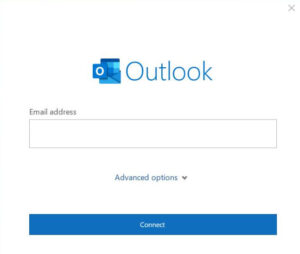
    Outlook for Microsoft 365 Email address entry window

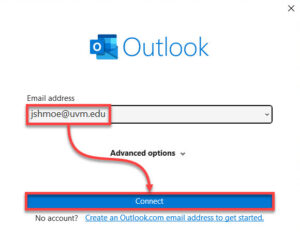
  3. Enter your email address in the format of NetID@uvm.edu and click Connect
    Email address format matters

    Using the firstname.lastname@uvm.edu email address format may result in errors. Please enter your address in the NetID@uvm.edu format instead.


    Email address entry window prefilled with Connect button highlighted

  4. If required, proceed through the normal Duo MFA prompts
    You do not need to remember the device for 7 days

    After completing this setup, you should not be regularly prompted to re-enter your credentials unless they change, even if the box is left unchecked.

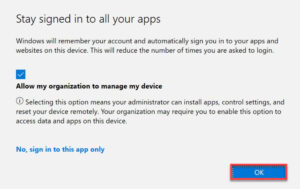
  5. Click OK to allow Windows to use these same credentials to sign into other Microsoft 365 servicesMicrosoft 365 app setup Stay signed in and Allow management options with OK button highlighted
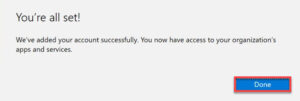
  6. Your account should now have been added successfullyYou're all set! screen with Done button highlighted
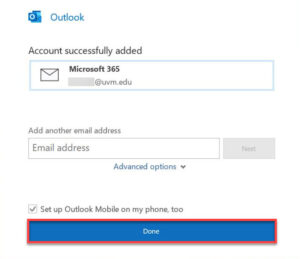
  7. You can either add another account, or click Done to finishAdd another email address chance window with Done button highlighted

Outlook 2019

  1. Open the Outlook application. If this is the first time launching Outlook, you’ll automatically be prompted to enter your email address. You can also add accounts via the File –> Account Settings menu.
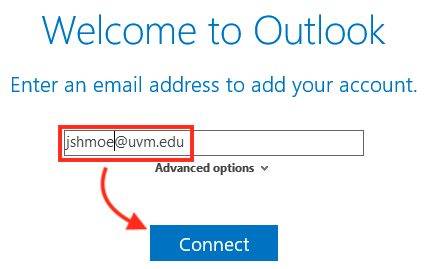
  2. Enter your email address in the NetID@uvm.edu format, then click Connect.

    Please note, using firstname.lastname@uvm.edu when setting up your account may result in errors. Please enter your email address in the NetID@uvm.edu format.


    Outlook 2019 email address entry window prefilled with Connect button highlighted

  3. Click on Exchange as your account type.
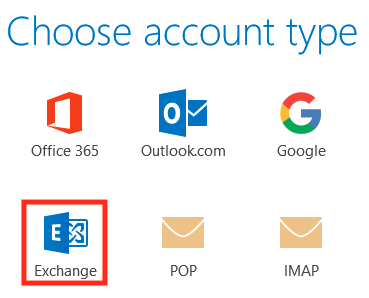
    Choose account type choices with Exchange button highlighted
  4. Enter your NetID password, then click OK.
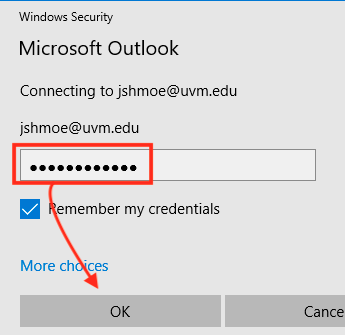
    Windows Security password window with email address text box and OK button highlighted
  5. Click OK to complete the account setup wizard.
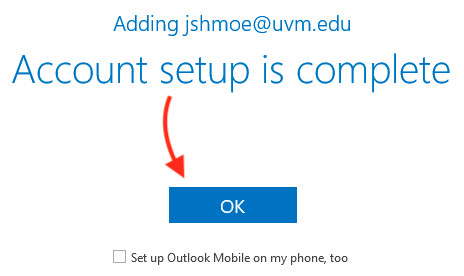
    setup is complete with OK button highlighted

Outlook 2016

  1. Open the Outlook 2016 application.
  2. If this is your first time launching Outlook, you’ll receive a prompt to add an email account. You can also add accounts via the File –> Account Settings menu.
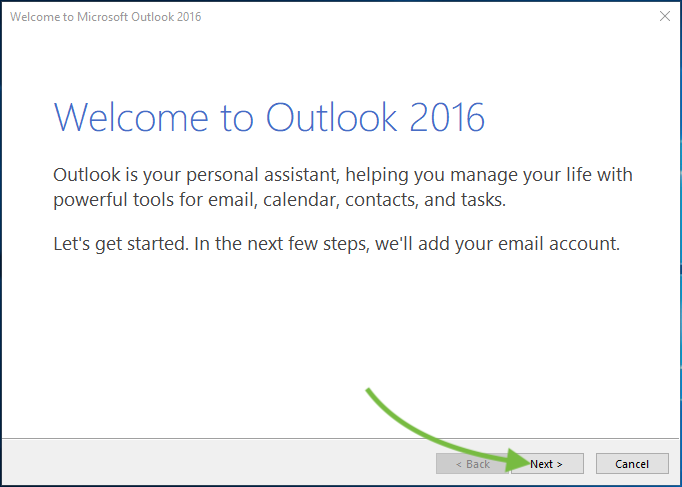
    Welcome to Outlook 2016 window with Next button highlighted
  3. Choose to add an email account, then click Next.
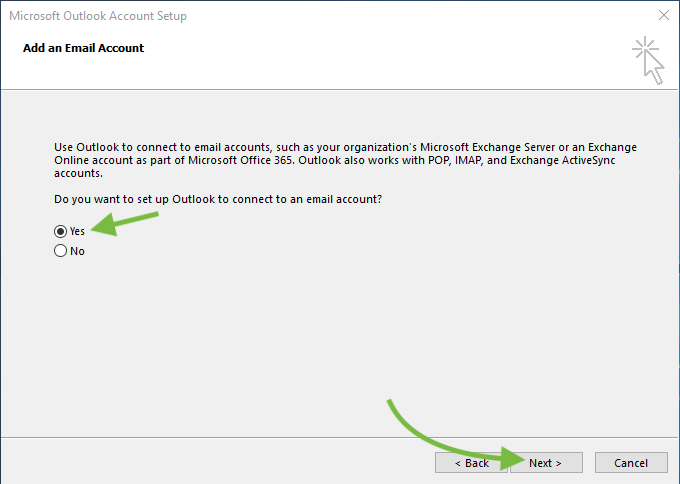
    Outlook Account Setup Window with Yes radio button and Next button highlighted
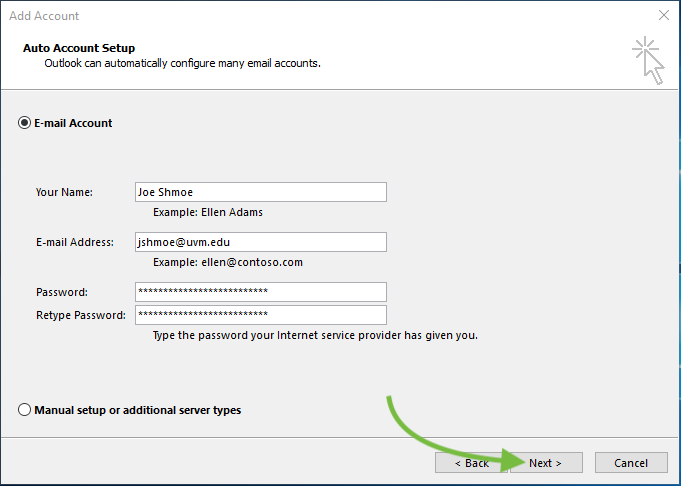
  4. Enter your UVM account information. The E-mail Address should be entered in NetID@uvm.edu format. Enter your NetID password in the Password fields, then click Next.

    Please note, using firstname.lastname@uvm.edu when setting up your account may result in errors. Please enter your email address in the NetID@uvm.edu format.


    E-mail Account entry screen prefilled with Next button highlighted

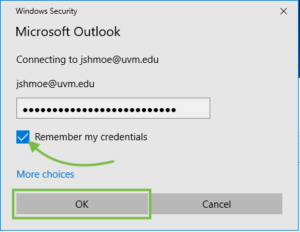
    • You may receive an additional prompt for your NetID password. If you do, enter your NetID password and choose the Remember my credentials checkbox, then click OK.
      Windows Security password entry window with Remember my credentials checkbox and OK button highlighted
  5. Click Finish to complete the account setup wizard.
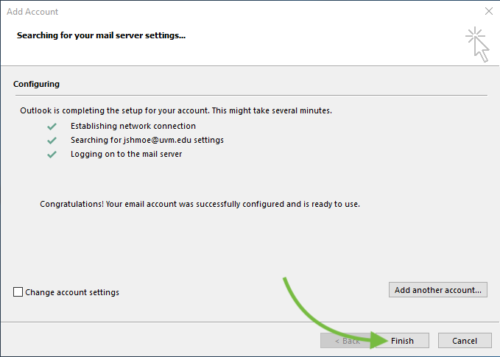
    Account ready to use window with Finish button highlighted

macOS 

Outlook

  1. Open the Microsoft Outlook applicationOutlook for Mac icon
    First time launching Outlook?

    When you launch Outlook, you may be prompted to enter your email address right away, without needing to go into Settings. If that happens, you can skip to step 4.

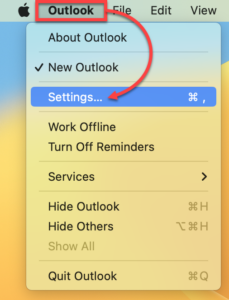
  2. Click on the Outlook menu in the top left, and then select SettingsMac OS Outlook menu with Settings highlighted
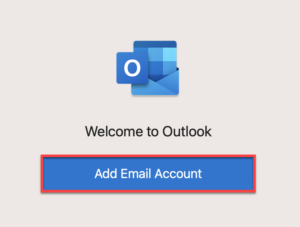
  3. Click Add Email AccountWelcome to Outlook window with Add Email Account highlighted
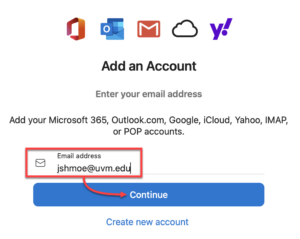
  4. Enter your UVM email address in the NetID@uvm.edu formatOutlook for Mac Add Email address box and Continue button highlighted
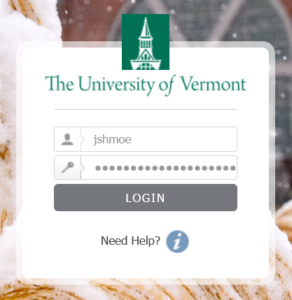
  5. If prompted, proceed through UVM’s Single Sign-OnUVM NetID Login screen
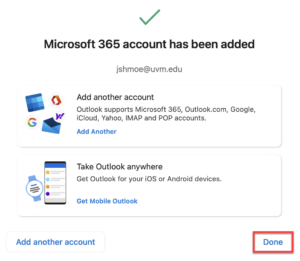
  6. When you get a message saying “Microsoft 365 account has been added”, you can click Done in the bottom right corner of the window to finishAccount added window with Done button highlighted

Mail

  1. Open the Mail applicationApple Mail app icon
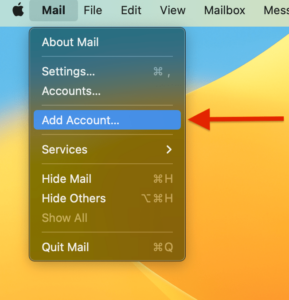
  2. In the Mail menu, select Add AccountApple Mail Mail menu with Add Account option highlighted
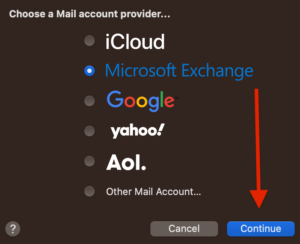
  3. Choose Microsoft Exchange as the account provider, and then click ContinueMail account provider selection screen with Microsoft Exchange radio button and Continue button highlighted
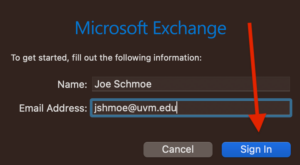
  4. Enter your full name and your UVM email address in the NetID@uvm.edu format, and then click Sign In
    Email address format matters

    Using the firstname.lastname@uvm.edu email address format may result in errors. Please enter your address in the NetID@uvm.edu format.


    Apple Mail Name and Email Address entry window with Sign In button highlighted

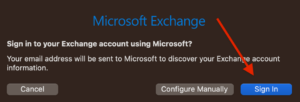
  5. Click Sign In againSign in confirmation window with Sign In button highlighted
  6. If required, proceed through the normal Duo MFA prompts
    You do not need to remember the device for 7 days

    After completing this setup, you should not be regularly prompted to re-enter your credentials unless they change, even if the box is left unchecked.

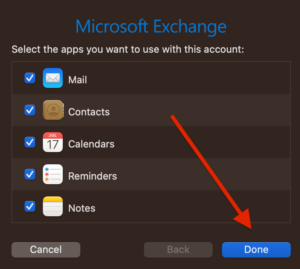
  7. Select the content you’d like to sync with your Mail client, and then click Doneapps selection screen with all boxes checked and Done button highlighted

You’ve successfully added your UVM Exchange account to your Apple Mail client.

iOS

Outlook

  1. Search for and install Outlook from the app store, then open the app.iOS Outlook app icon
  2. Enter your UVM email address, then click Add Account to be redirected to the UVM sign-in screen.
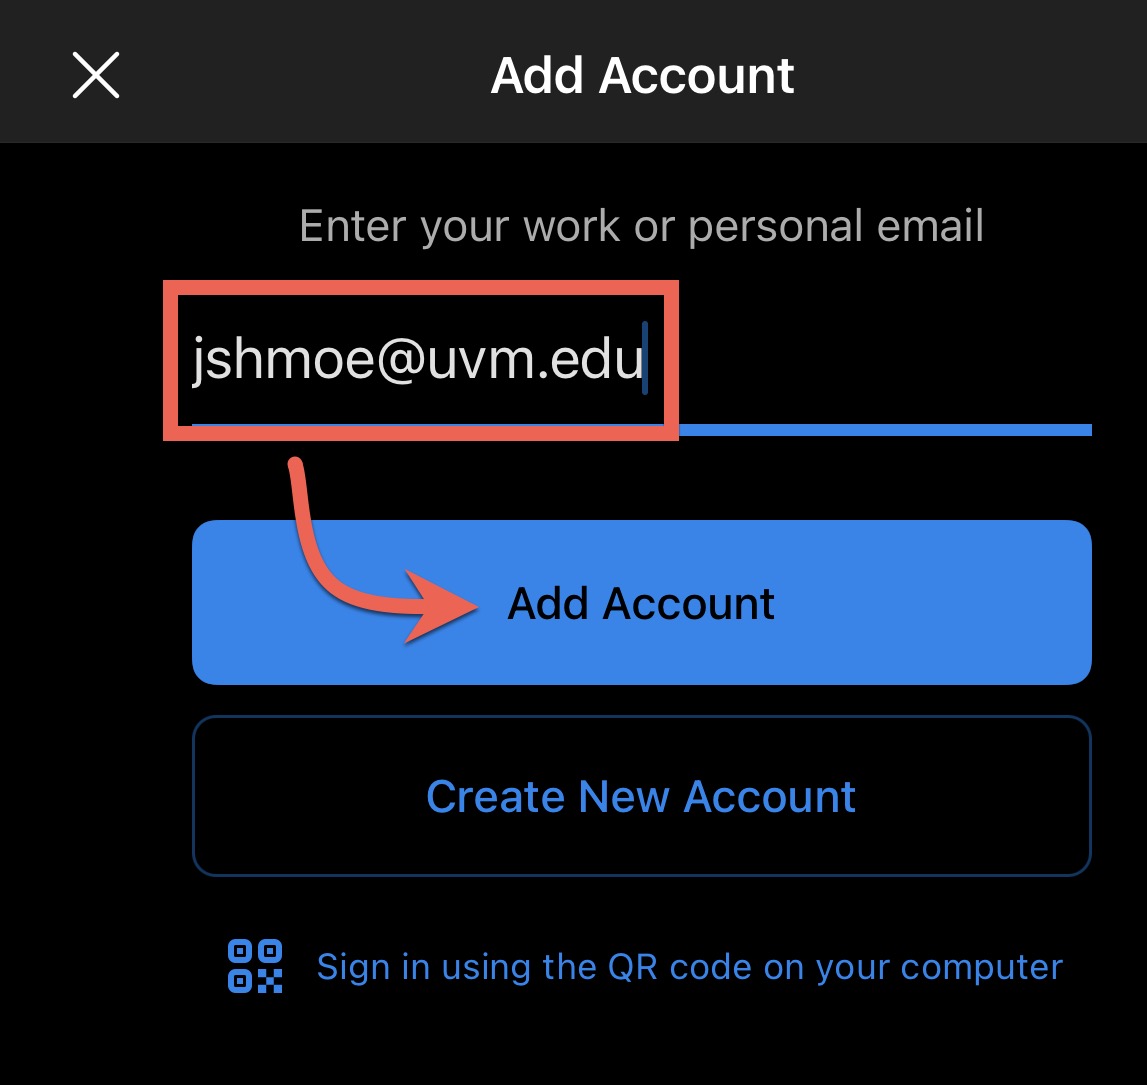
    Add Account screen with email address box and Add Account button highlighted
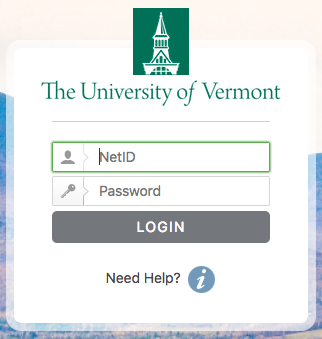
  3. Enter your UVM NetID and passwordUVM NetID Login screen
  4. If required, proceed through the normal Duo MFA prompts.
    You do not need to remember the device for 7 days

    After completing this setup, you should not be regularly prompted to re-enter your credentials unless they change, even if the box was left unchecked.

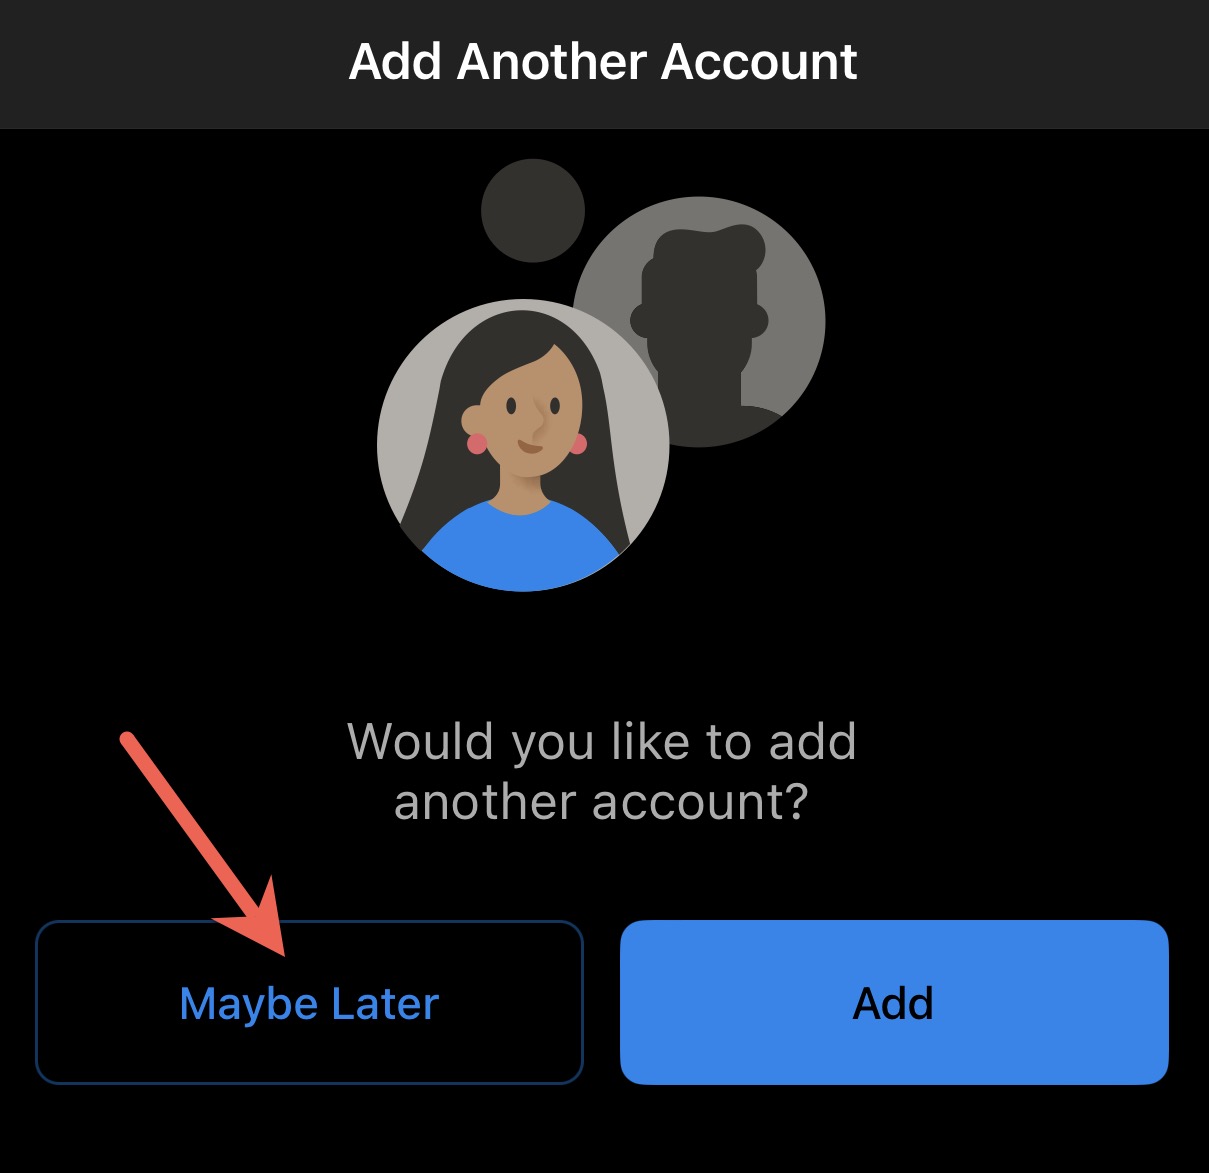
  5. Tap Maybe Later to proceed to your inbox.Add Another Account screen with Maybe Later button highlighted
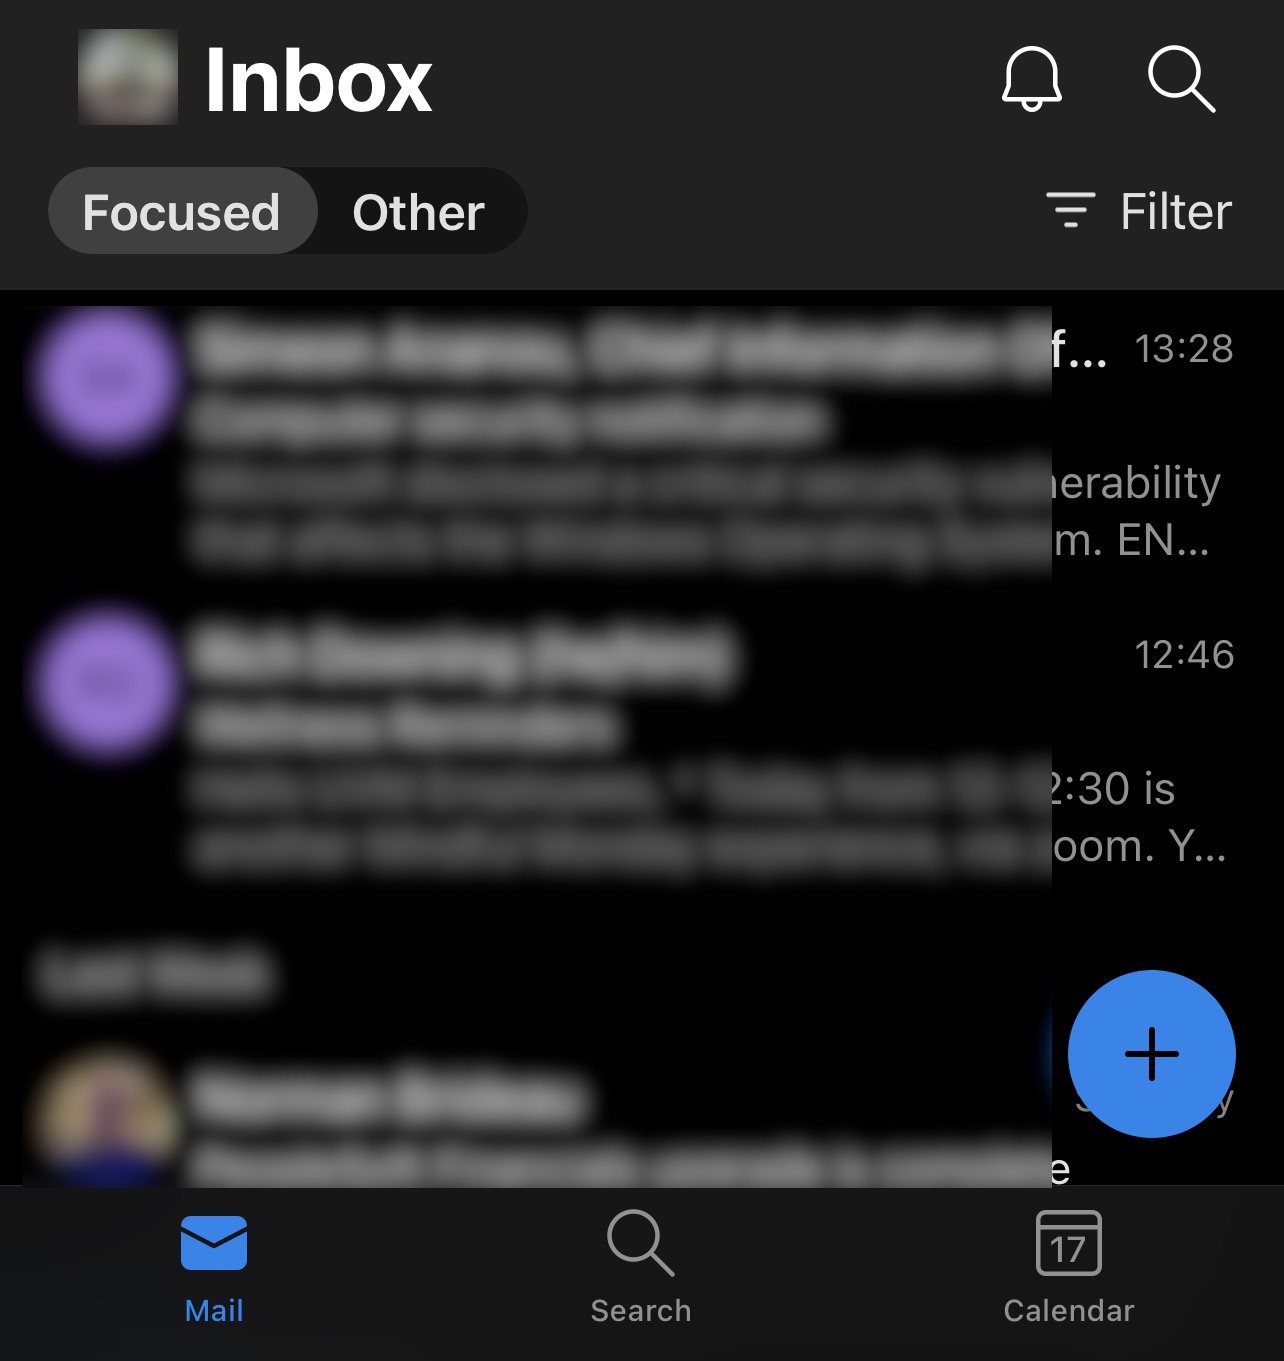
  6. You should now begin to see your inbox populate. It may take some time for all of your emails and folders to appear. Outlook for iOS Inbox example

Mail - Default iOS App

This guide was created on a device running iOS 11. Before proceeding, ensure your iPhone or iPad device has an active connection to the Internet.

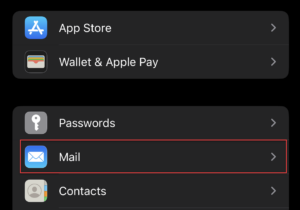
  1. Open the Settings app and tap on the Mail menu.
    iOS Settings screen with Mail highlighted
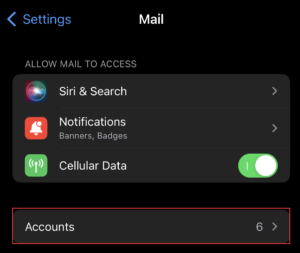
  2. From the Mail menu, select Accounts
    iOS Mail Settings with Accounts highlighted
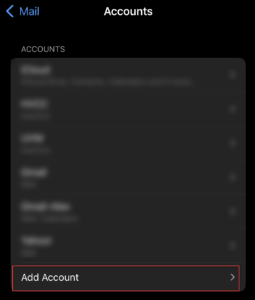
  3. Tap on Add Account.
    Accounts screen with Add Account highlighted
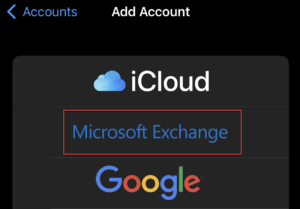
  4. Tap on the Microsoft Exchange option.
    email provider selection screen with Microsoft Exchange highlighted
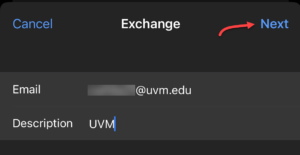
  5. In the “Email” field, enter your UVM email address in NetID@uvm.edu format. In the “Description field, enter “UVM“, then tap “Next“.

    Please note, using firstname.lastname@uvm.edu when setting up your account may result in errors. Please enter your email address in the NetID@uvm.edu format.


    Email address and Description entry screen with Next highlighted

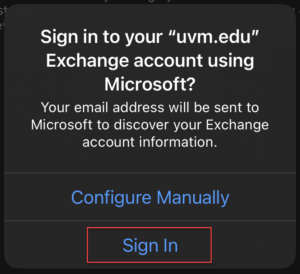
  6. You’ll receive a prompt asking if you’d like to sign in to your Exchange account using Microsoft. Tap the “Sign In” option.
    Sign in confirmation screen with Sign In highlighted
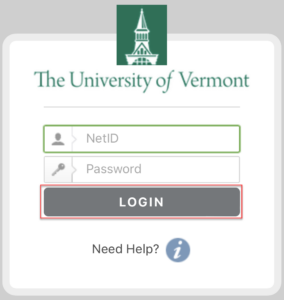
  7. Sign in with your UVM NetID and password.UVM NetID Login screen with Login button highlighted
  8. If prompted, proceed through the normal Duo MFA prompts
    You do not need to remember the device for 7 days

    After completing this setup, you should not be regularly prompted to re-enter your credentials unless they change, even if the box was left unchecked.

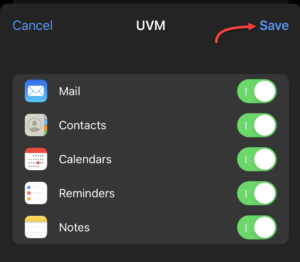
  9. You’ll be asked to choose which items you’d like to sync with your device. ETS recommends leaving all toggles switched “On”. When you’ve finished adjusting your sync settings, tap Save.
    iOS apps to sync choices with everything checked. Save button highlighted

That’s it! You’ve successfully added your UVM Exchange account to your iOS device.

Android

Outlook

  1. Search for and install Outlook from the Play Store, and then open the appAndroid Outlook app icon
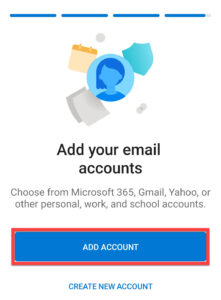
  2. Tap Add AccountOutlook for Android Add Account button highlighted
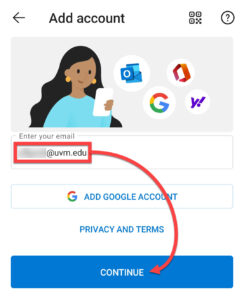
  3. Enter your UVM email address in the format NetID@uvm.edu and tap ContinueOutlook for Android Add account screen with email address and Continue button highlighted
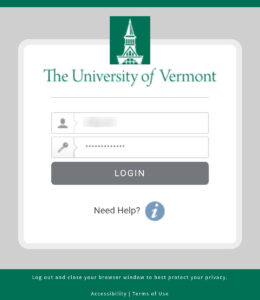
  4. Sign in with your UVM NetID and passwordUVM NetID Login screen
  5. If prompted, proceed through the normal Duo MFA prompts
    You do not need to remember the device for 7 days

    After completing this setup, you should not be regularly prompted to re-enter your credentials unless they change, even if the box was left unchecked.

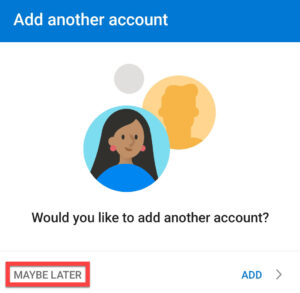
  6. Tap Maybe Later to proceedAdd another account chance screen with Maybe Later highlighted

You should now begin to see your inbox populate. It may take some time for all of your emails and folders to appear.
Gmail

Some Android devices may have slightly different menus and settings when adding an Exchange account. However, in general the process should be similar enough to follow the steps outlined here.

  1. Open the Settings app on your Android device.
    Android Settings app icon
  2. Scroll down and tap Accounts.
    Android Settings app Accounts category highlighted
  3. Scroll down to the Add account option.
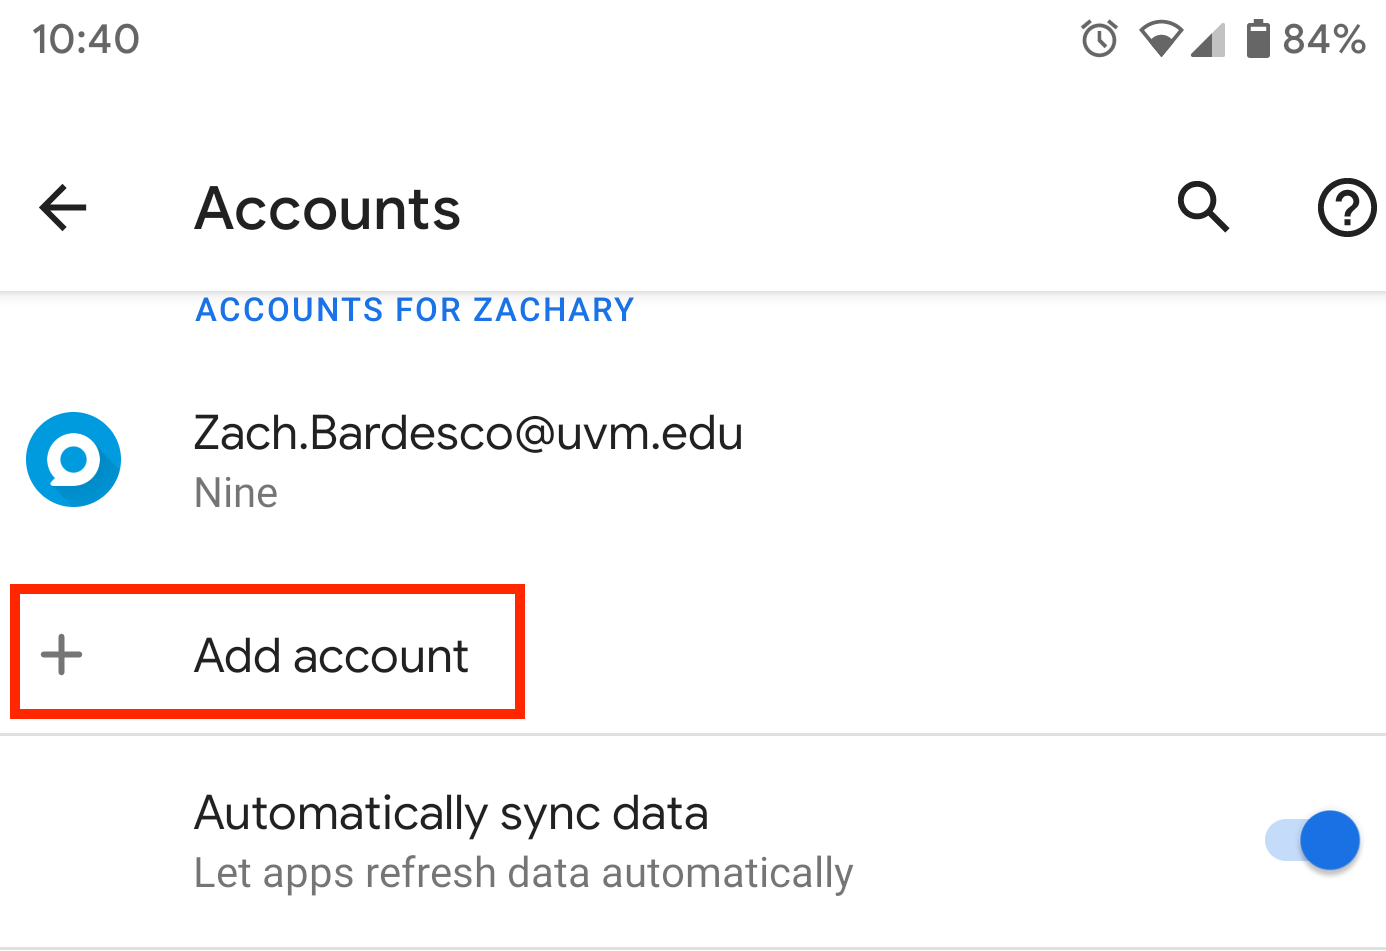
    Android Accounts Settings with Add account highlighted
  4. From the list of account types, select Exchange.
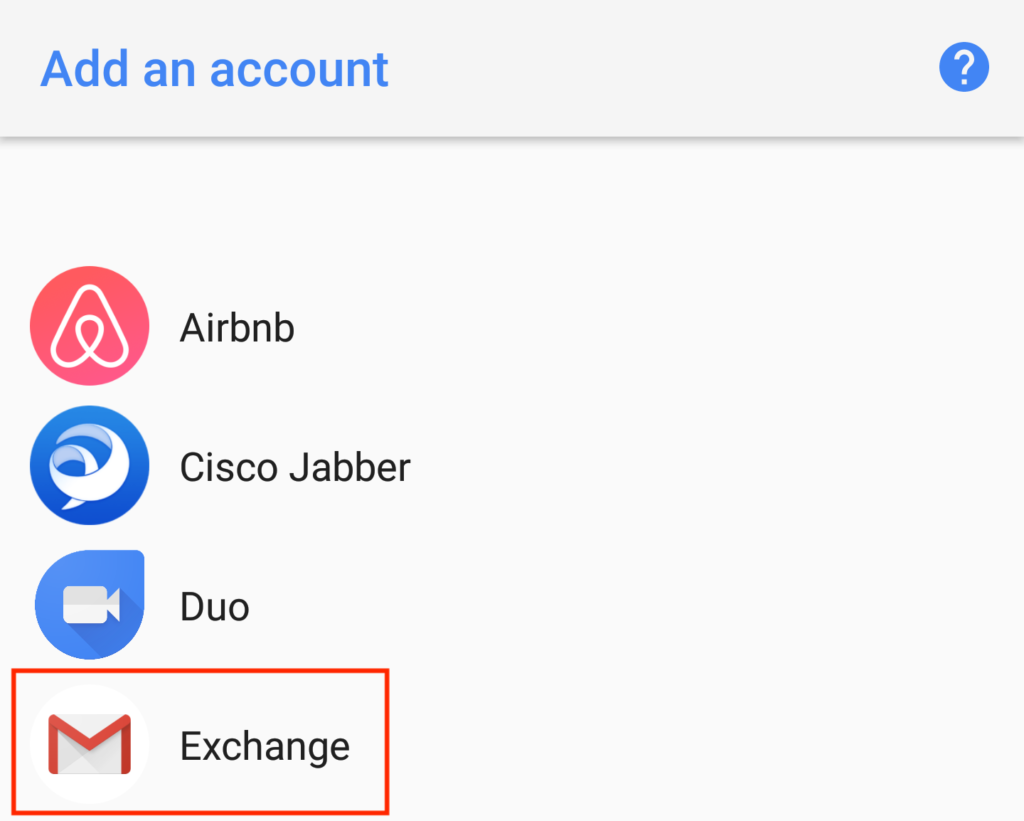
    Android Add an account with Exchange option highlighted
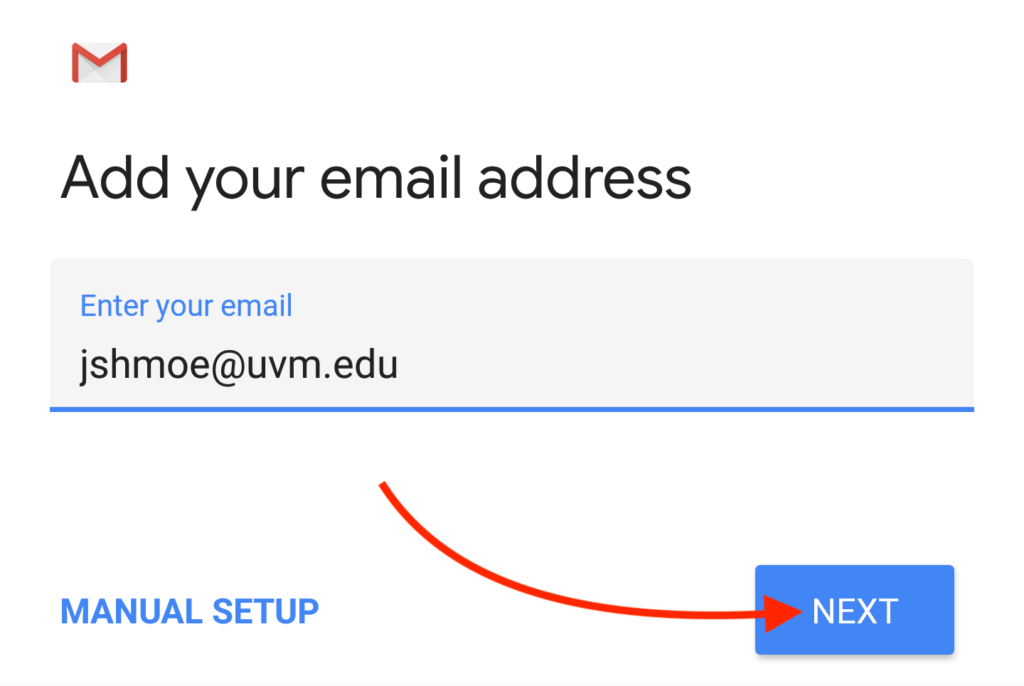
  5. Enter your UVM email address in NetID@uvm.edu format. Then tap Next.

    Please note, using firstname.lastname@uvm.edu when setting up your account may result in errors. Please enter your email address in the NetID@uvm.edu format.


    Android Add your email address screen with Next button highlighted

  6. Enter your UVM NetID password. Then tap Next.
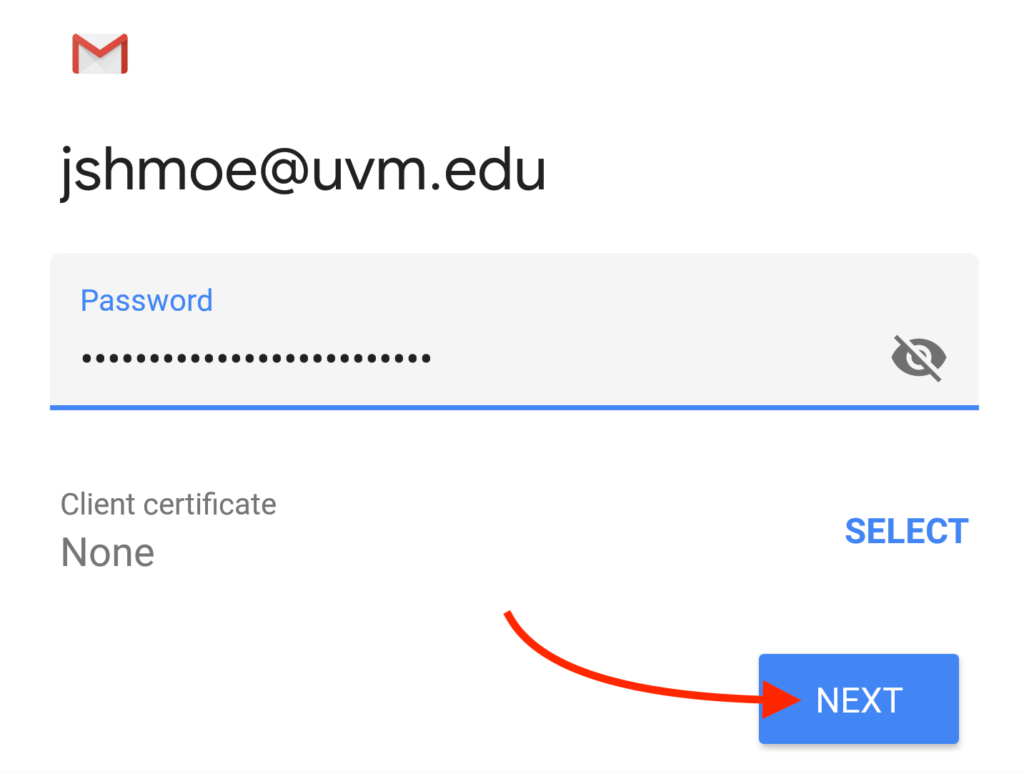
    Password entry screen with Next button highlighted

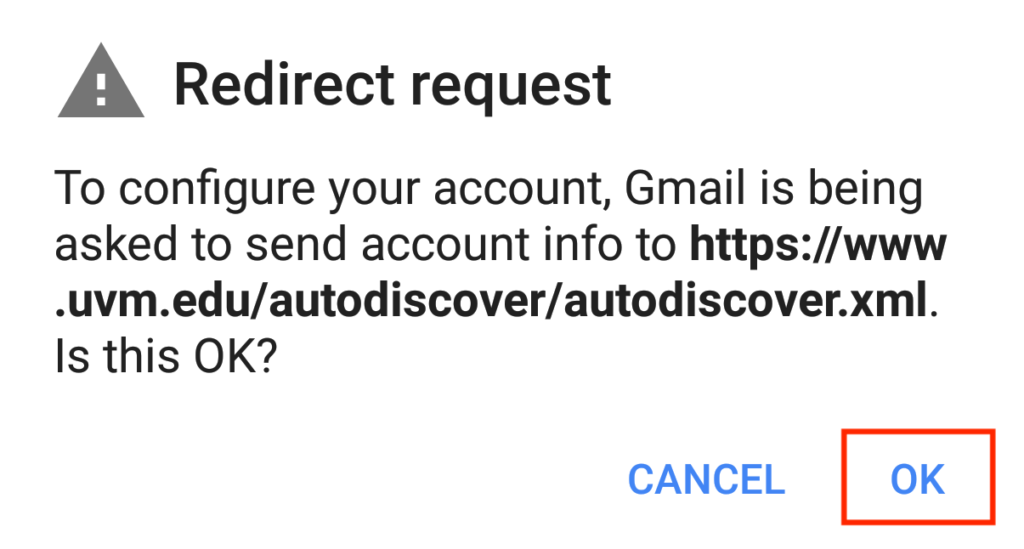
    • You may receive a Redirect Request prompting for permission to send account info to uvm.edu/autodiscover, tap OK.
      Redirect request screen with OK highlighted
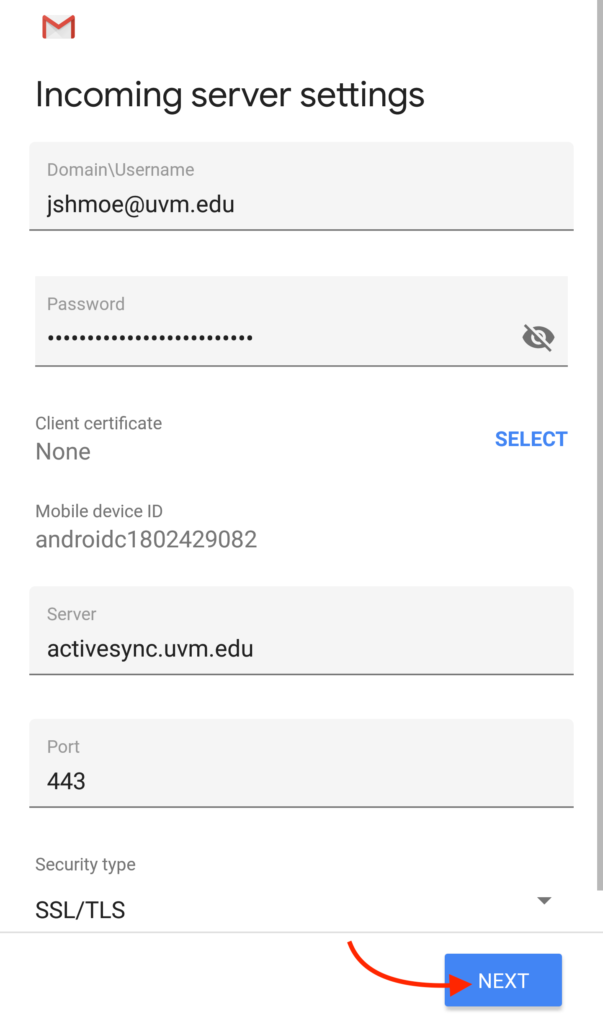
  7. Account configuration should complete automatically. Tap Next to continue.
    NOTE:

    If your account information is not configured automatically, please try re-entering your password and/or check your Internet connection.


    Android email Incoming server settings with Domain\Username, Password, Server, and Port fields filled in. Next button highlighted

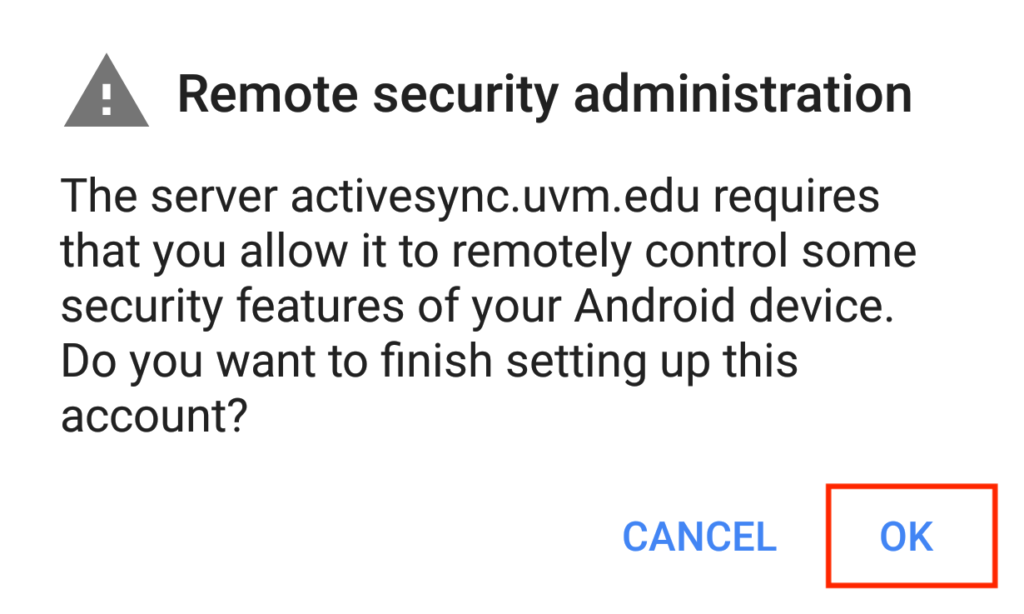
    • You may receive a Remote Administration request, tap OK.
      Remote security administration confirmation with OK highlighted
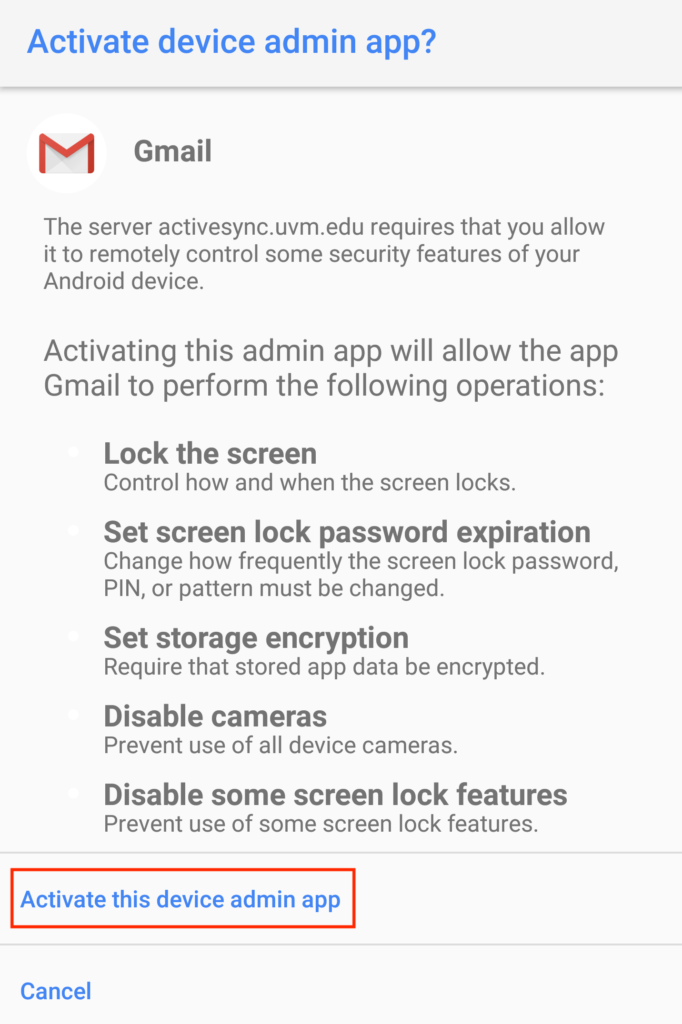
    • Allow remote security features by scrolling down to and tapping on Activate this device admin app.
      Activate this device admin app confirmation
  8. Tap Next to complete the setup process. You have successfully added your UVM Exchange email and calendar account to your Android device.
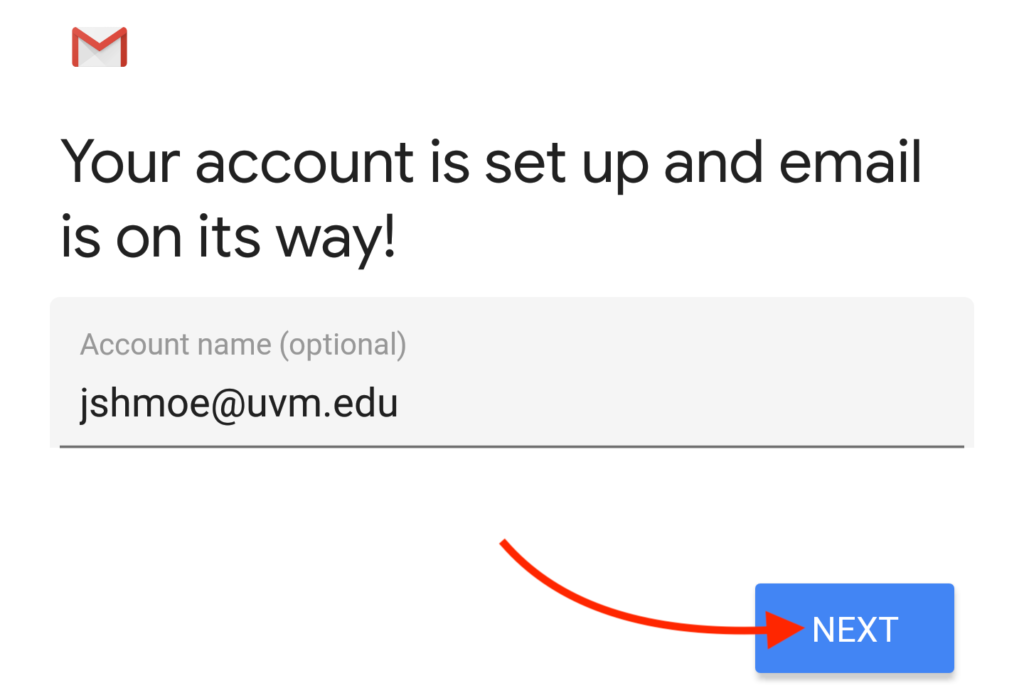
    Account is set up screen with Next button highlighted

Updated on January 31, 2024

Related Articles

Not the solution you were looking for?
Don’t worry we’re here to help!
Submit a Help Ticket