
Set up your Grade Book
Accessing Grades Center
On the Navigation bar menu click on Grades & Feedback and Select Grades. 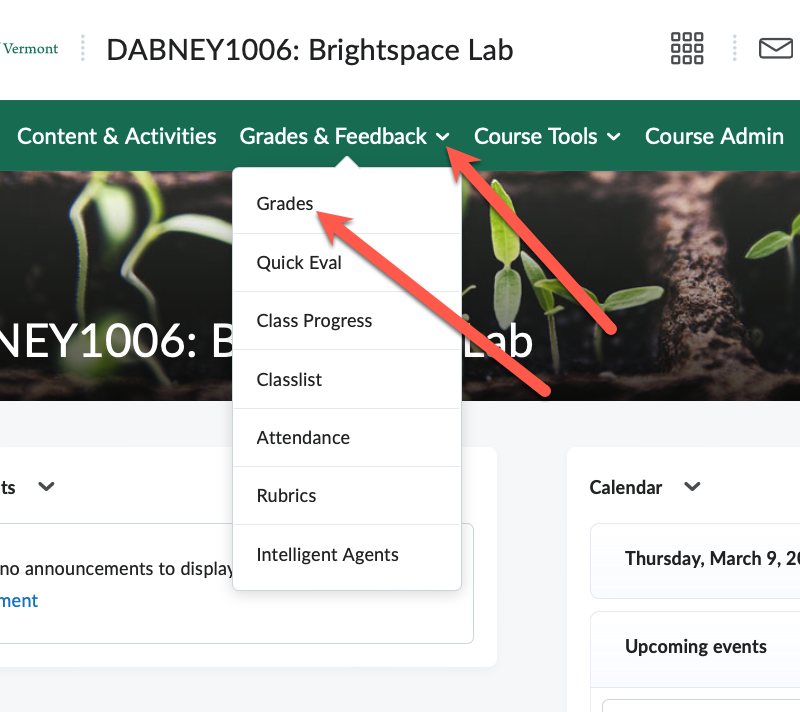
Personal Settings in Grades
You can control some features of how your Grades display: Managing View Display Options (personal to you) or Student View Display Options (student view). Please follow the link below.
Link to D2L Brightspace Community Documentation
Grading Systems
Selecting a grading system is the first step in setting up your grade book. This page describes systems that are available in Brightspace (Weighted, Points, Formula). Please follow the link below.
Link to D2L Brightspace Community Documentation
Set up your Grade Book: Wizard
If a grade book is not set up or imported for your course, you will see the Grades Setup Wizard page when you first navigate to the tool. We recommend using the Wizard to set up your Grade Book. You can edit your settings at any time. Please follow the link below.
Link to D2L Brightspace Community Documentation
Create a Grading System
This page provides an overview of Brightspace grading terminology and functions (Items, Categories, Final Grades). Please follow the link below.
Link to D2L Brightspace Community Documentation
Manage Grades
The Manage Grades tab enables you to create and edit grade items and grade categories, reorder your grade book, and more. Please follow the link below.
Link to D2L Brightspace Community Documentation
Create/Delete Grade Categories and Items
Grade categories sort your grade items and allow you to create restrictions and conditions for grade items. Common categories include assignments and quizzes. Please follow the link below.
Link to D2L Brightspace Community Documentation
Extra Credit
Brightspace uses the term “Bonus” for extra credit items. Bonus items are designated by a star in Manage Grades. You can make a Grade Item a bonus item (extra credit) from the Grades tool.

To create a new “bonus” grade item:
- Go to Grades
- Click on Manage Grades
- Click on New and select Item from the dropdown
- Click on Numeric for the Grade Item Type
- Add a name for your grade item and the point value for the bonus item (total amount bonus points student can receive)
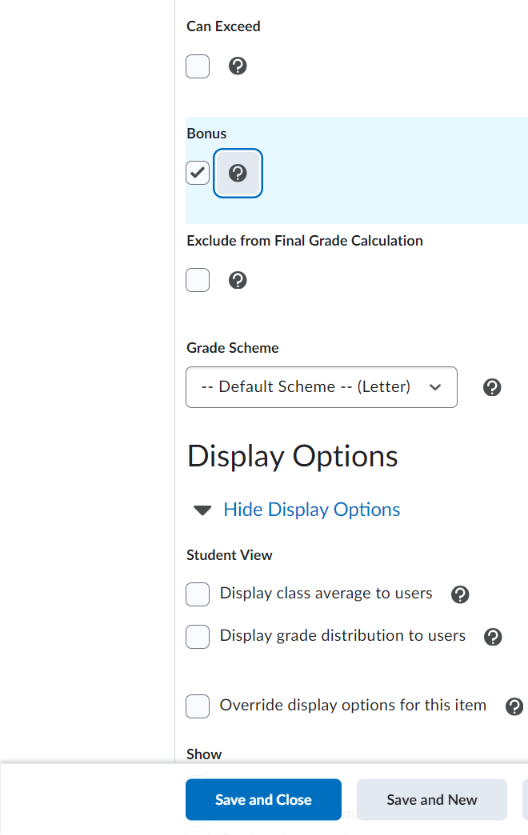
- Check the box for Bonus.
- Click Save and Close
To edit an existing grade item:
- Go to Grades
- Click on Manage Grades
- Locate the grade item you want to be extra credit, click on the dropdown arrow, and select Edit Item from the menu
- Check the Bonus box
- Click Save and Close
Give extra points on an existing item/assignment (the whole assignment is not extra credit)
In this case, you would not check “bonus” but you would check “can exceed.” For example if you have an assignment that is worth 20 points, but students can earn up to 25 points on it, you would NOT check Bonus, but instead check the box Can Exceed which allows you to enter a value above the “max points” value when entering grades.
Give extra credit on a quiz
For information regarding designating a quiz question extra credit, see Brightspace -Quizzes
Important Caveats about Deleting Grade Items
If you need to delete an item from your grade book that is already associated (linked) to another course object, such as an assignment or a quiz, it is a multi-step process. Please follow the link below.
Link to D2L Brightspace Community Documentation
Display Course Grades to Students
Display Course Grades to Students
Display Cumulative Course Grades to Students
To let students track their course grades throughout the semester, a few things must be set in place. See Brightspace – Grades: Display Cumulative Course Grades to Students for step-by-step instructions.
Which total column should you choose to display?
When setting up your grade book, you’ll see the option to display either the Final Calculated Grade or the Final Adjusted Grade. The Final Adjusted Grade column is the option you would choose only at the very end of the semester when all grades have been calculated. With a few clicks, you can transfer all the grade data in the Final Calculated Grade column over to the Final Adjusted Grade column and make adjustments to those grades, as you like. Then, go to Settings (top/right of grade book), go to the tab “Calculation Options” and choose to display the Final Adjusted Grade to students.
How do you transfer grade data from the Final Calculated Grade over to the Final Adjusted Grade? column?
- At the top of the Final Adjusted Grade column click the down arrow and choose “Enter Grades.”
- Next to the title at the top of the page, click the down arrow and select “Transfer All.”
- NOTE: If more data is added to the grade book after you’ve done this, there will be a discrepancy between the Final Calculated Grade and the Final Adjusted Grade. In this case follow steps 1 and 2 but instead of “Transfer” choose “Recalculate all”
Curving Grades
Brightspace doesn’t have a dedicated function to curving test/quiz scores, but here are a few ways to accomplish this.
-
Set the highest grade as “100%”.
Edit the grade item points
Use if grade item is no longer synched to quiz.
For example, if the highest score was 88%. Change the grade item points from 100 to 88.
OR
Create a formula grade item
Use if grade item, “Original Score,” is still be updated.
Here’s the formula you’ll need to input:
( ( Original Score * 4 ) / 5 ) + X = Curved Score
For the Original Score, select the grade item for the assignment.
X is a number of points, and the amount X equals is determined by the highest grade achieved in the class.
Further information on this formula with a real explanation is available on the Division by Zero blog.
-
Implement a flat-scale curve
Drop a select assignment or Update questions in a Quiz Attempt
Use if a particular question was an issue.
-
Set a bottom limit for F
Use categories to drop lowest score.
Relevant Articles
- Brightspace – Grades: Display Cumulative Course Grades to Students
- Brightspace – Grades: Export the Gradebook
- Brightspace – Grading
- Brightspace – Grading Schemes
- Brightspace – Grading: Granting Exemptions
- Brightspace – Grading: Manually Enter into the Gradebook
- Brightspace – Grading: Publishing Options