The Attendance tool enables you to create registers that track attendance for activities within your course. You can track attendance for any number of activities and customize your registers to suit your needs.
Use the Attendance tool to create sessions to track attendance and define attendance statuses for your activities. NOTE: The Attendance tool is not a self-reporting tool. Instructors (or TAs) will need to enter attendance for each session within a register. You can use this tool to view attendance results, track users who have poor attendance, and create a grade item to enter overall attendance for a register.
Create an Attendance Register
Create an Attendance Register
To create an attendance register:
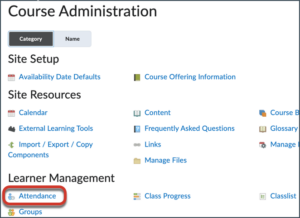
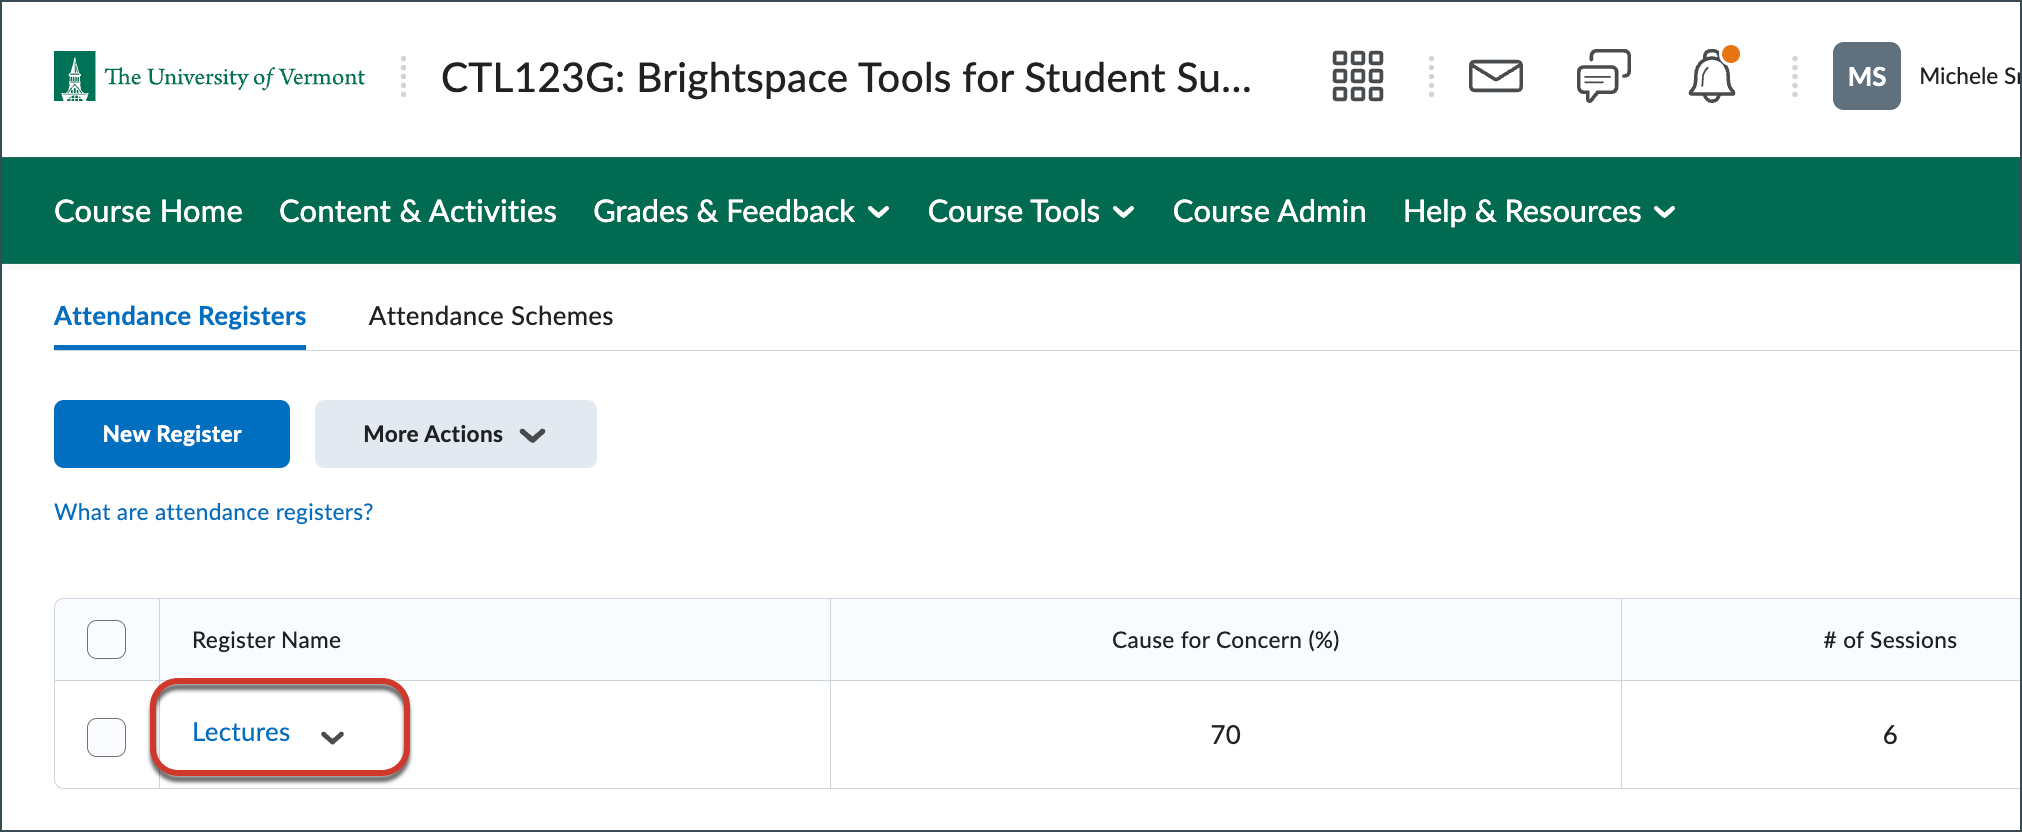
- From the course Navbar, click Course Admin and select Attendance.
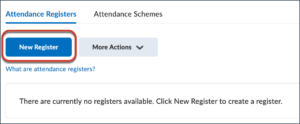
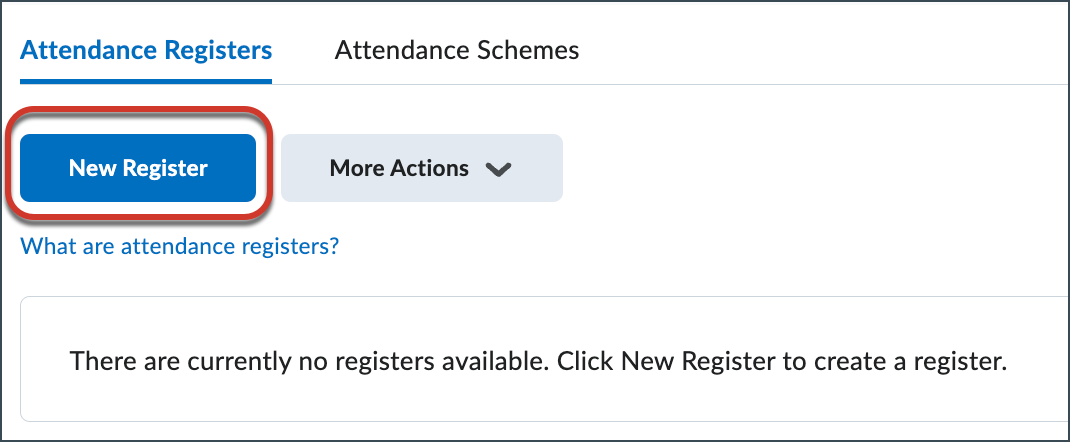
- Click New Register.
- Enter the register details using the following steps:

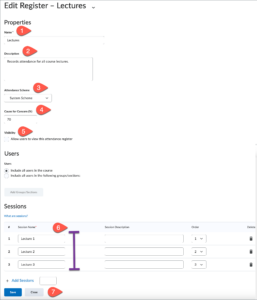
- Step 1: Enter a name for the register.
- Step 2 (optional): Enter a description for the register.
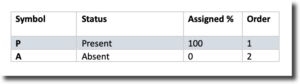
- Step 3: Choose System Scheme. The image below shows the default System Scheme.
- Step 4 (optional): Enter a number in the Cause for Concern (%) field.
- Step 5: NOTE: “Allow users to view this attendance register” is currently not an option in UVM’s instance of Brightspace; students cannot view attendance automatically. You can leave this box unchecked.
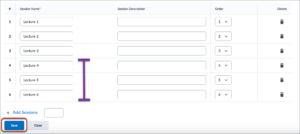
- Step 6: Enter session names for each Session Name field (e.g., Lecture 1, Lecture 2, Lecture 3). You may choose to include session dates in the Session Name title. If you do this, keep in mind that attendance registers copy over every semester. To avoid changing session dates each semester, consider excluding session dates from the session names.
- Step 7: Once you have entered session names for the three Session Name fields, click Save. (Click the image to enlarge.)
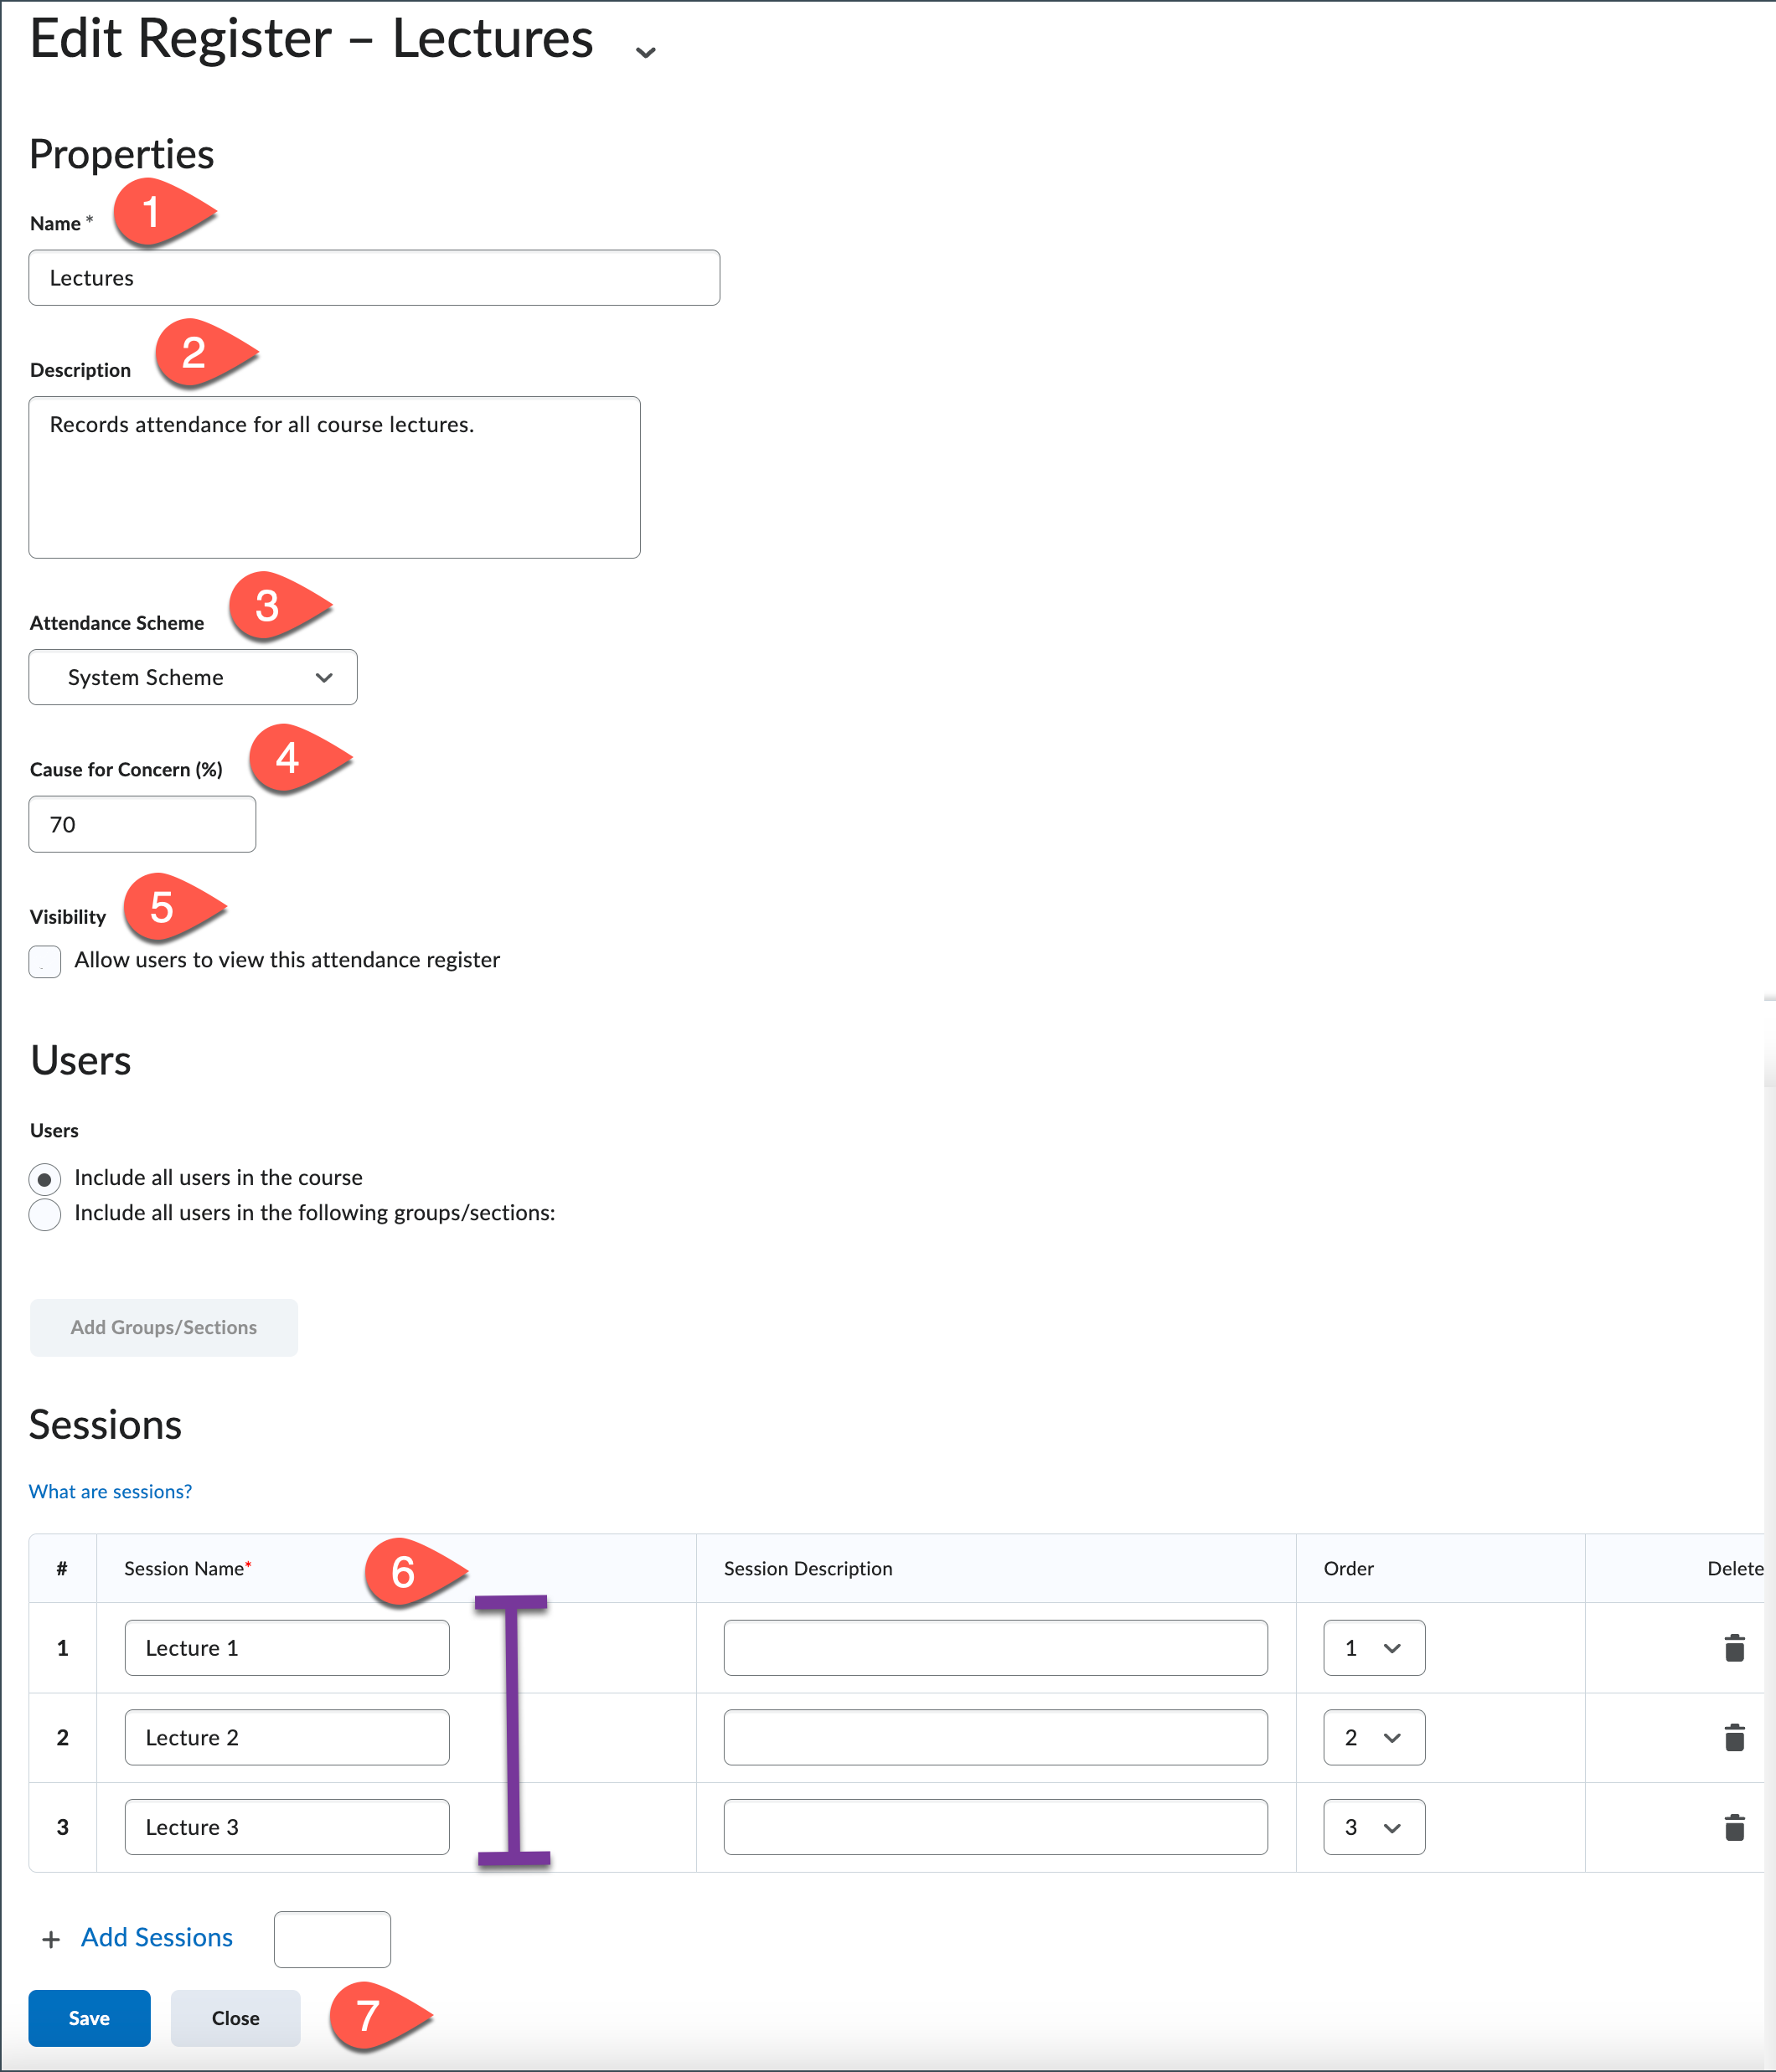
- Step 8: Add more sessions by entering the number of sessions you want to add in the +Add Sessions field and clicking + Add Sessions.
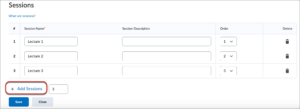
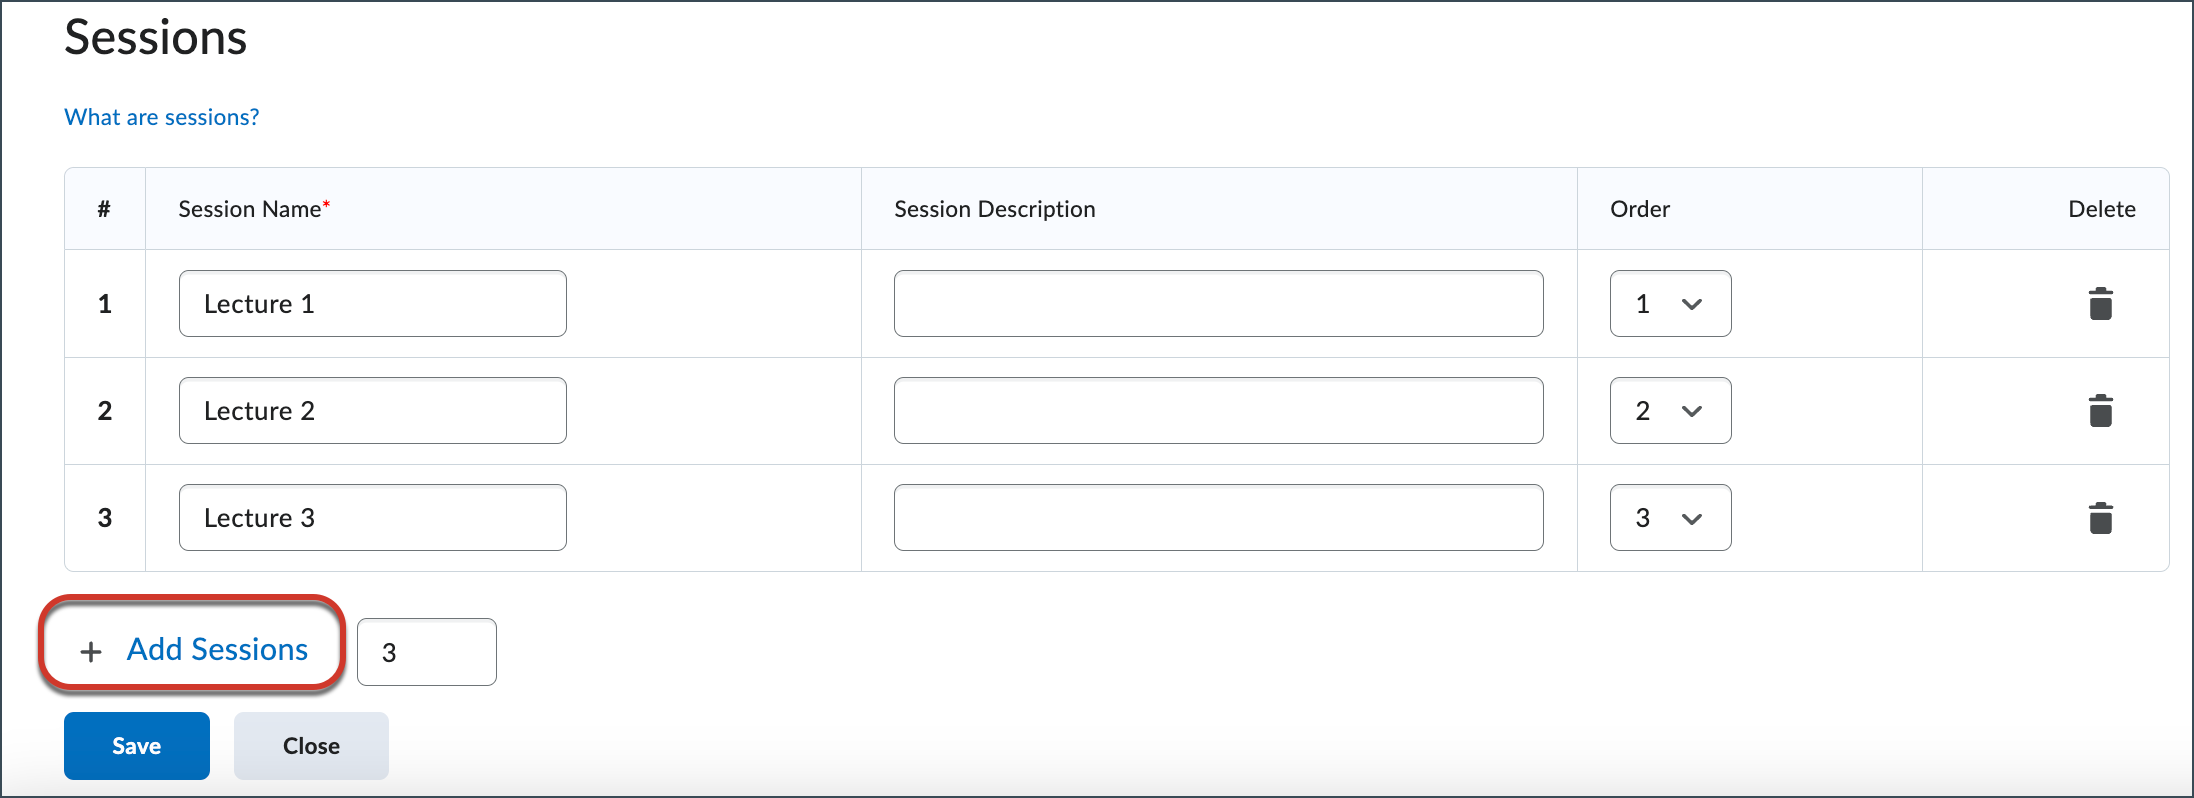
- Step 9 Enter names for the added sessions and click Save.
Record Attendance
Record Class Attendance
To record attendance, click Course Admin from the course Navbar and select Attendance. Click on the attendance register.
- Click the icon next to the first session in the register.
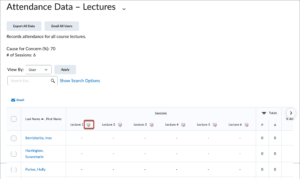
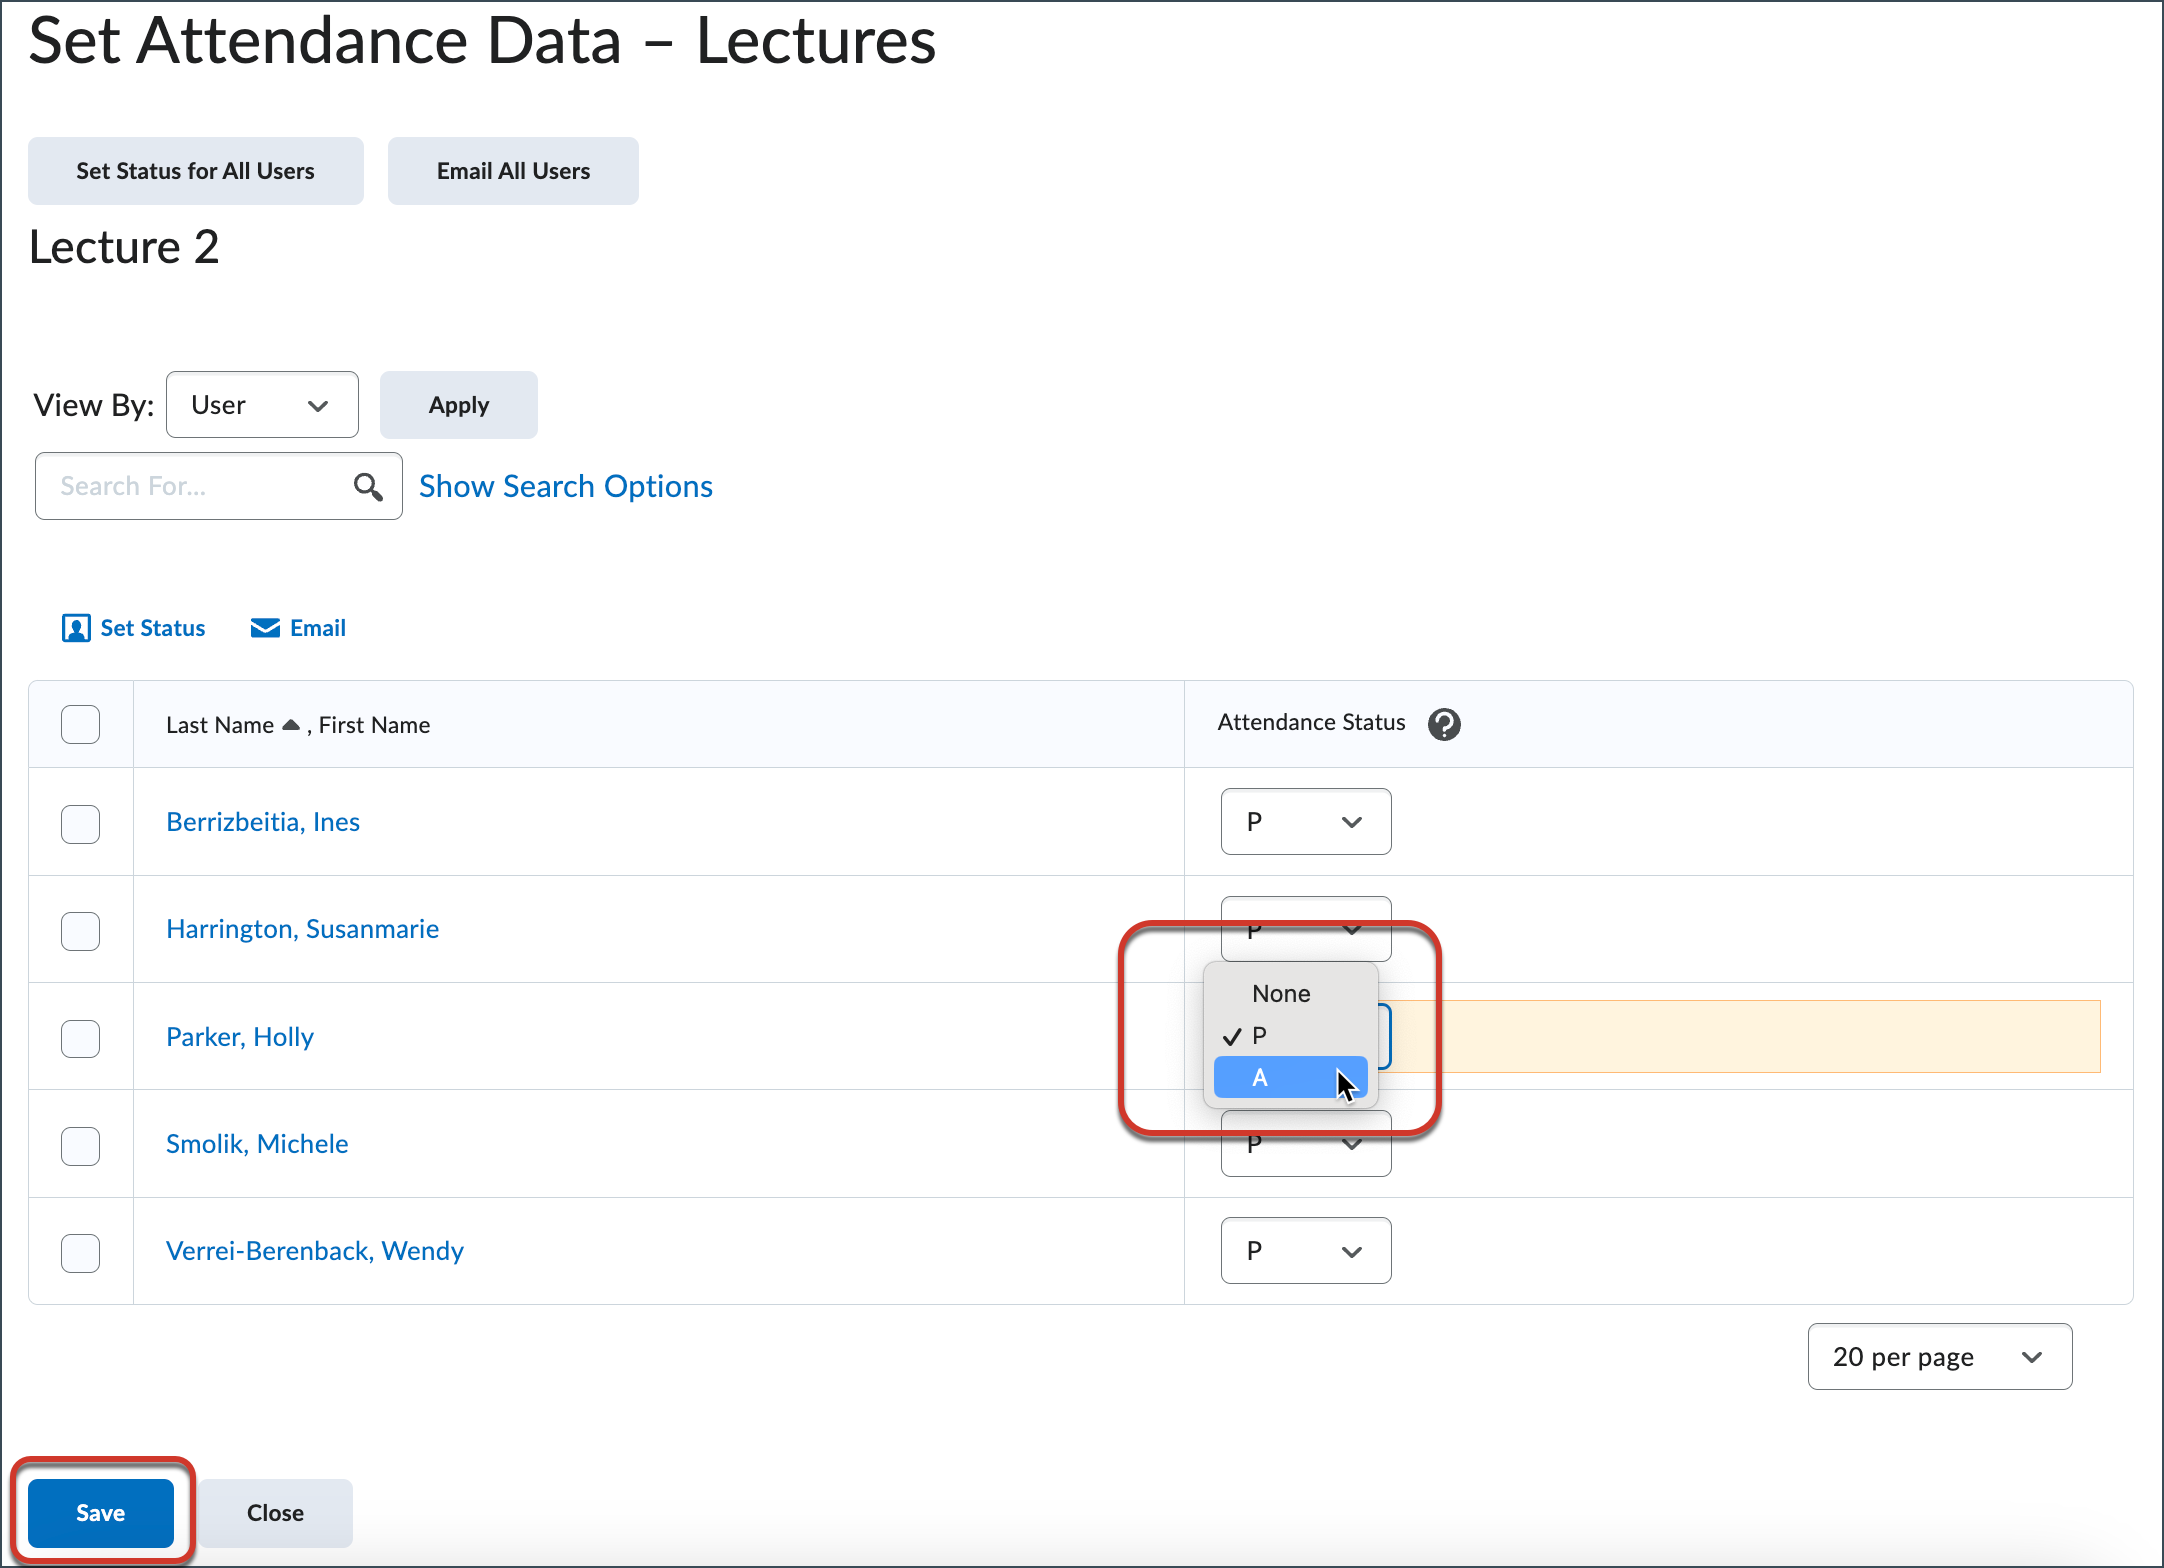
- Record attendance in the Attendance Status column and click Save.
TIP: Change the number per page to view all students on one page.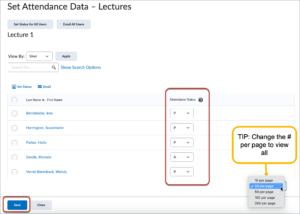
- TIP: To save time, you can Set Status for All Users to P-Present, then manually mark students absent following the steps above.
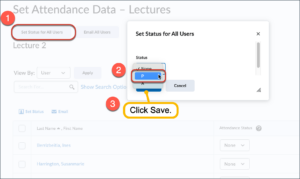 Change the status from P-Present to A-Absent for students who were absent, then click Save.
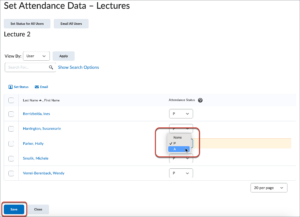
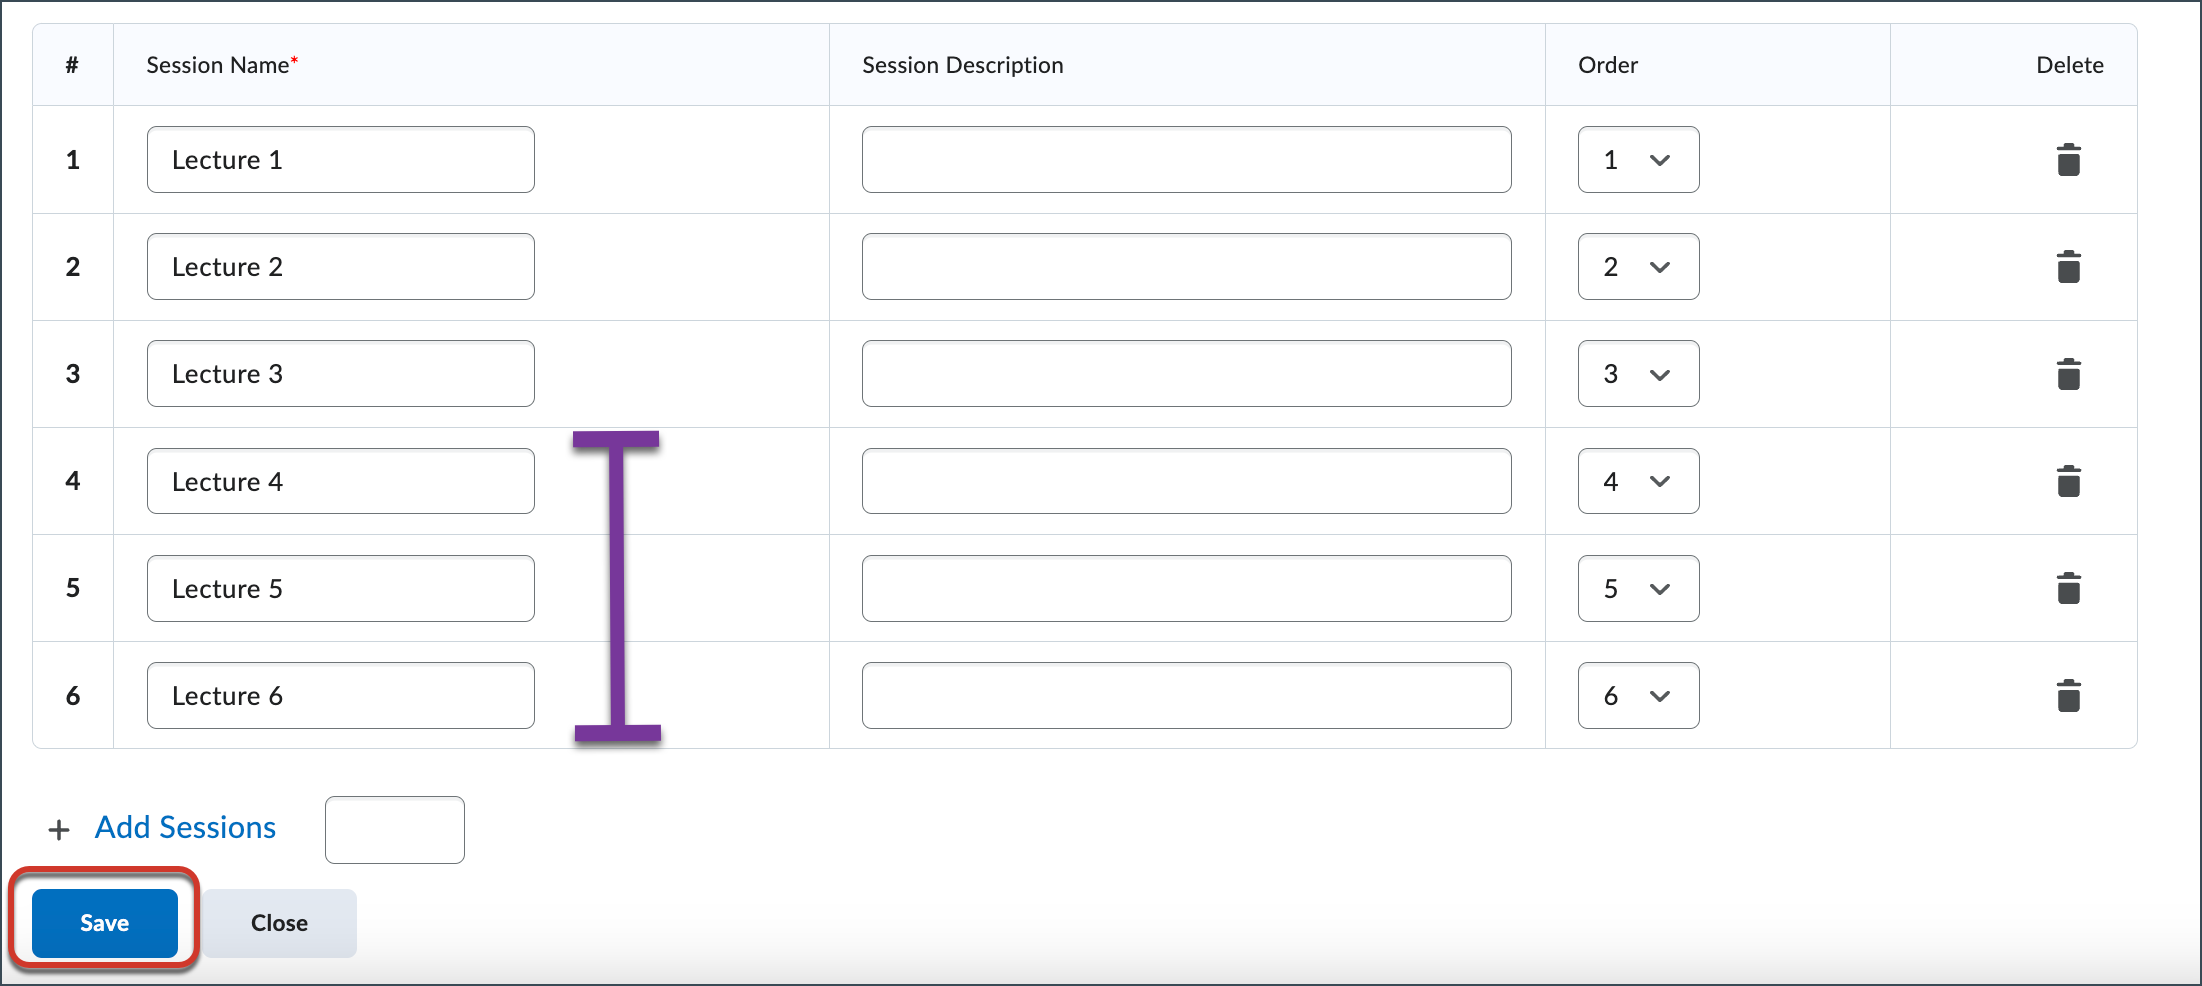
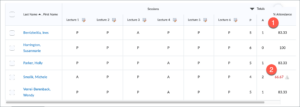
- The following screenshot illustrates a completed attendance register, displaying 1) an Attendance grade and 2) a Caution icon for a student who fell below the 70% Cause for Concern percentage.


Create a Grade Item for Attendance
Create a Grade Item for Attendance
To add the % Attendance value from the Attendance tool to the gradebook, first create a grade item.
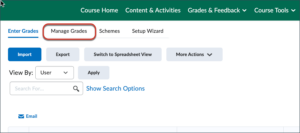
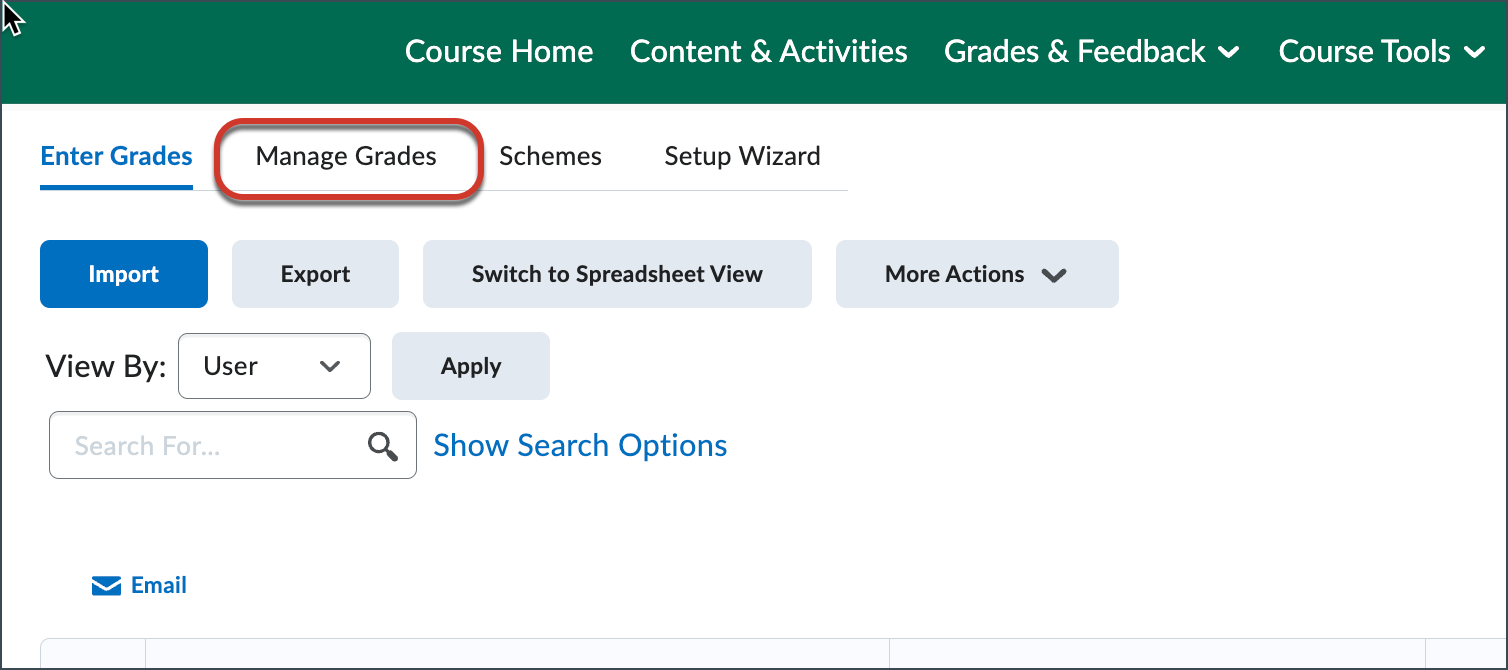
- Click Grades & Feedback from the course Navbar and click Manage Grades.
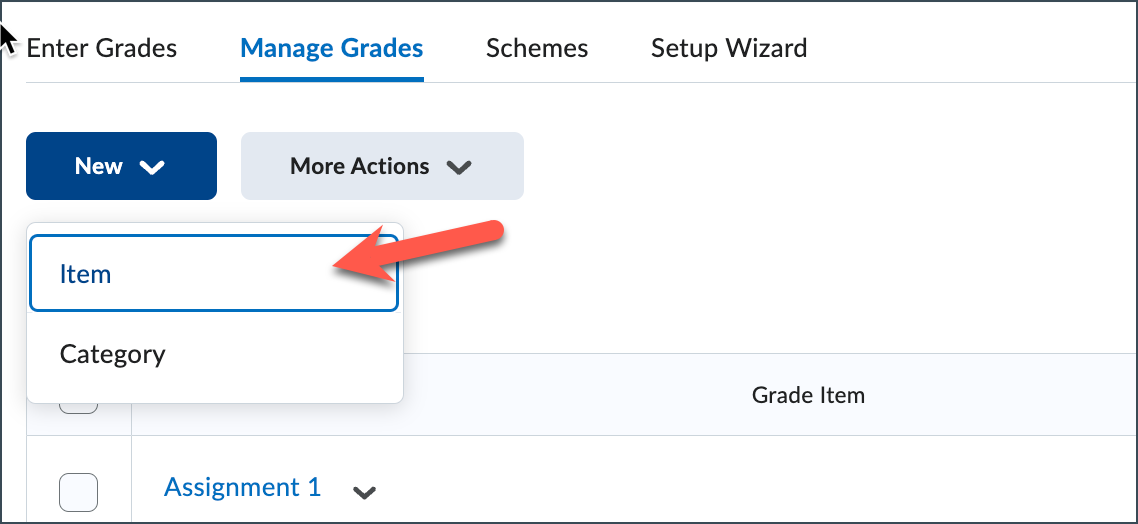
- Click New then select Item.

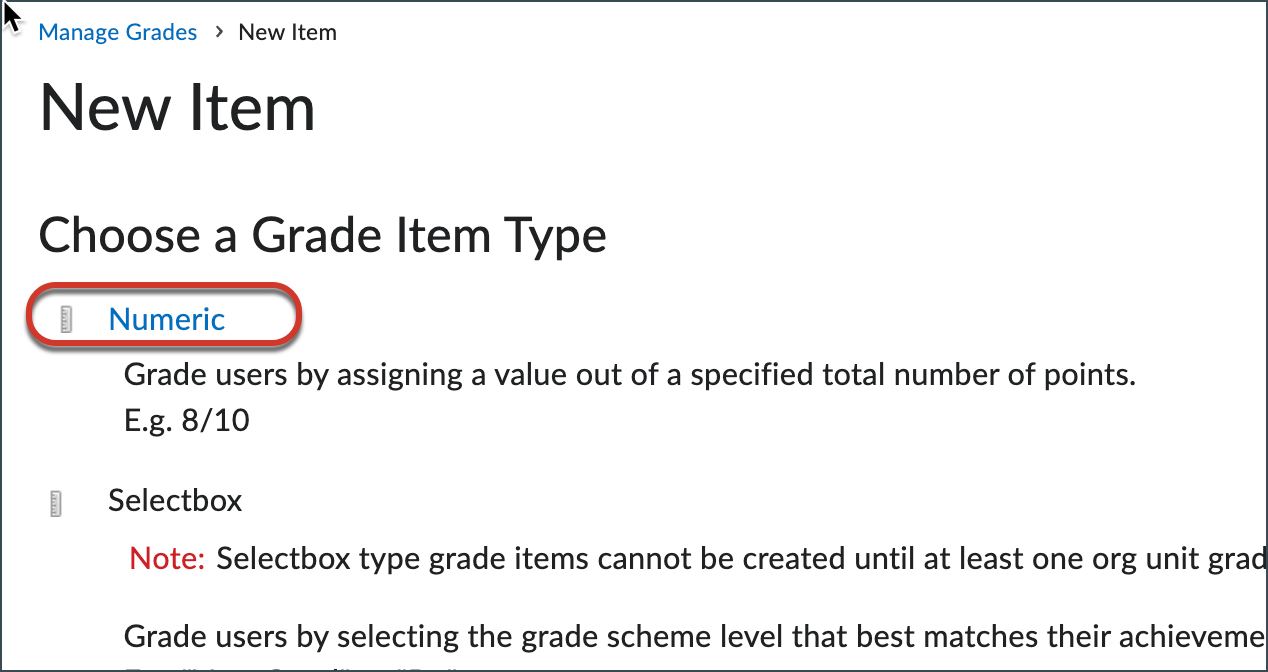
- Select the Numeric Grade Item Type.
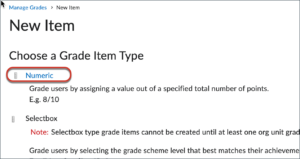
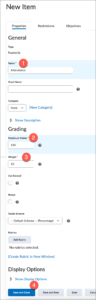
- Enter the following information on the New Item page:
- Name
- Maximum Points
- Weight (if desired)
- Click Save

When you are ready to add attendance grades to the gradebook, click Grades & Feedback on the course Navbar. While in Enter Grades, click Switch to Spreadsheet View.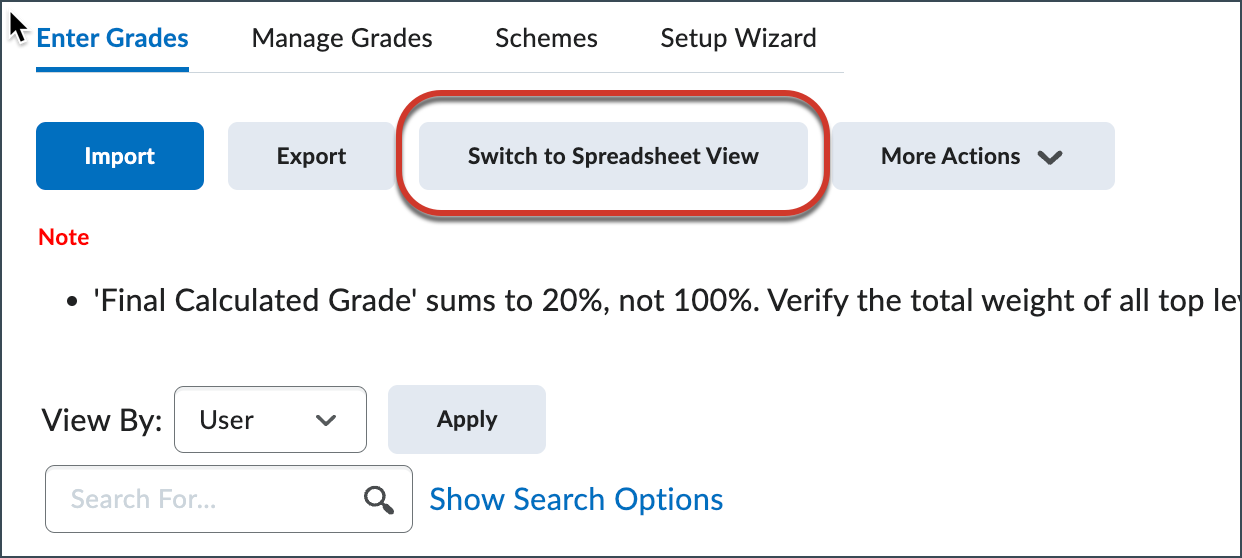
Add the percentage score from the completed attendance register to the grade item, Attendance. Click Save.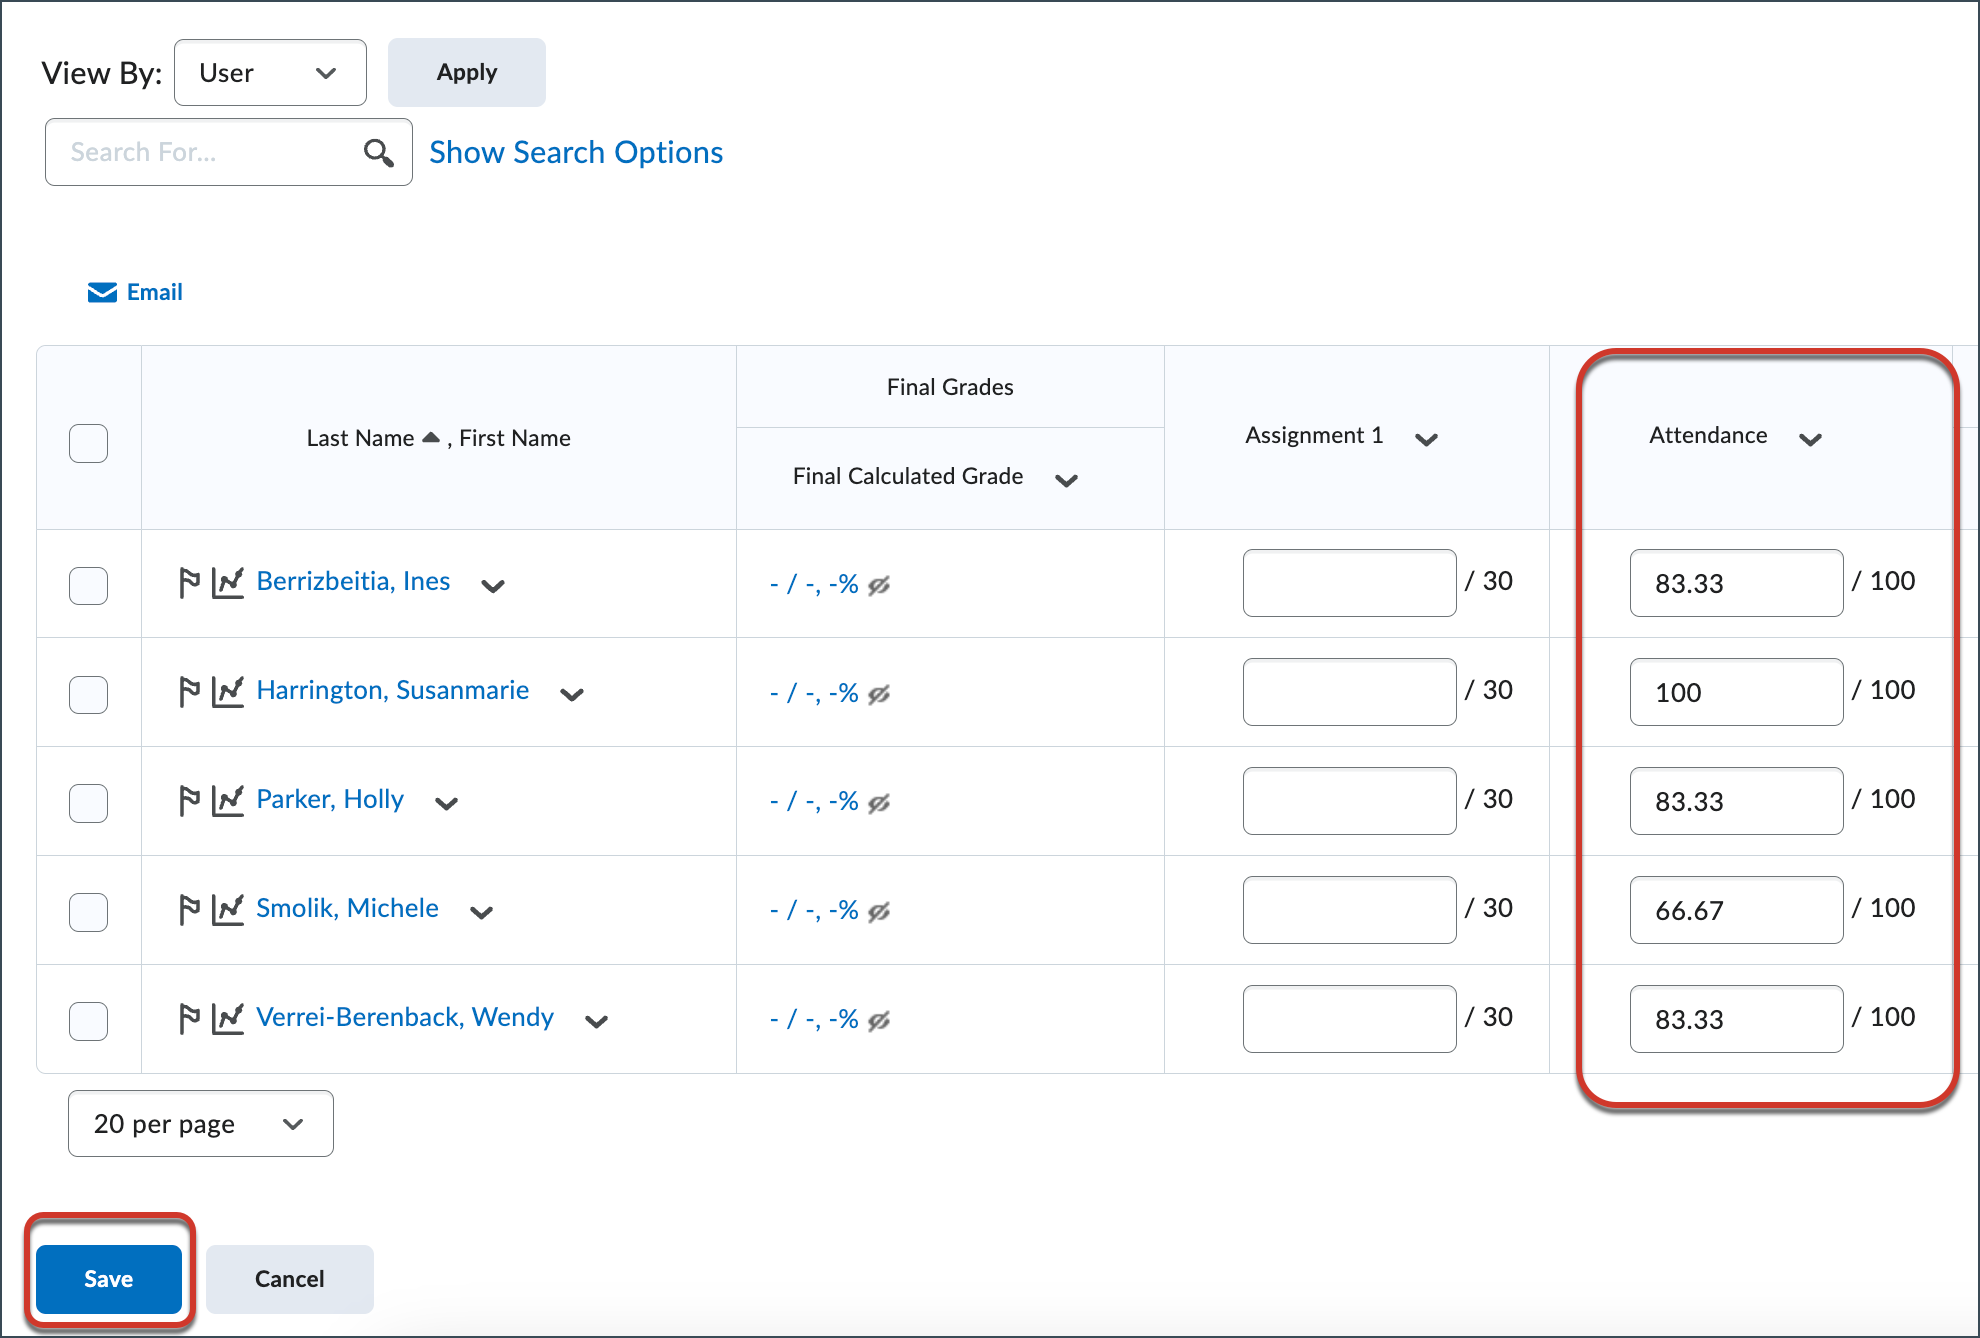
Allow Students to View Attendance
Allow Students to View Attendance
Students cannot automatically view the attendance register; however, instructors now have an easy way to add a link to the Content & Activities area of the course that allows students to view their attendance.
Add a Link to Allow Students to View Attendance
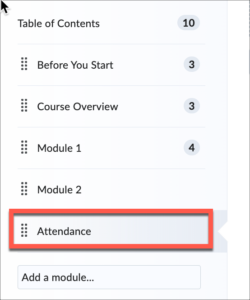
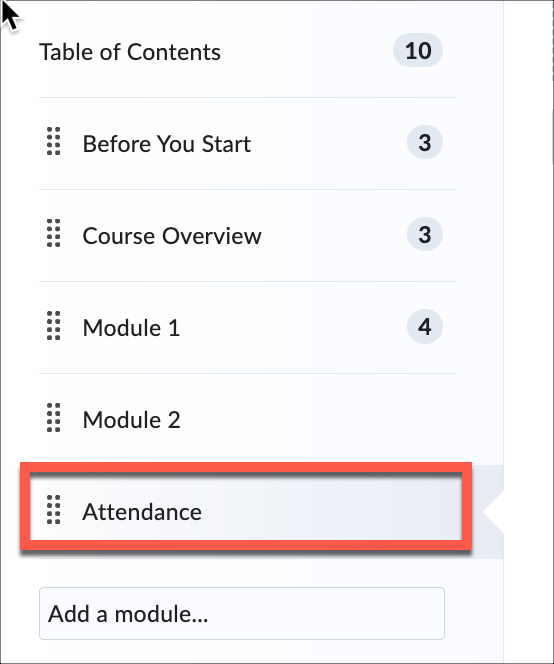
- Create a new module in the Content & Activities area titled Attendance.
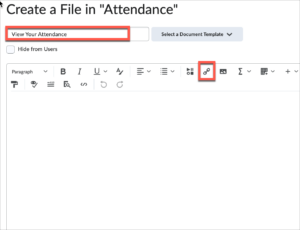
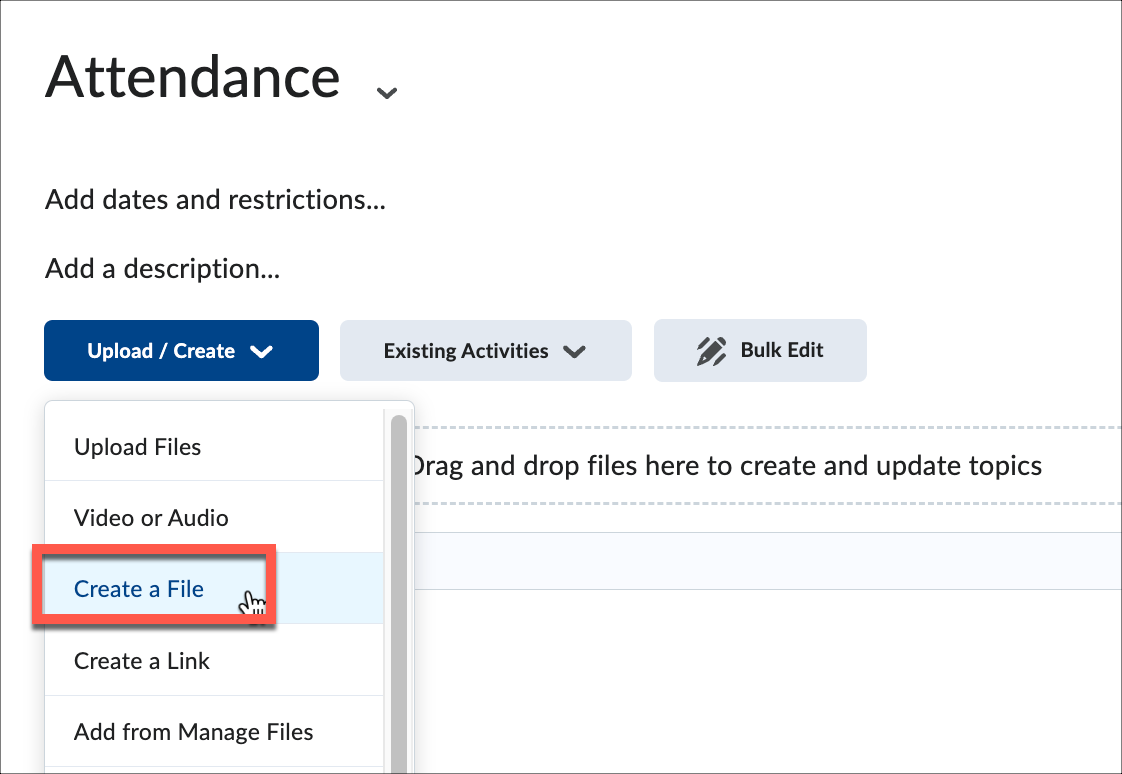
- While in the newly created Attendance module, click Upload/Create and select Create a File.

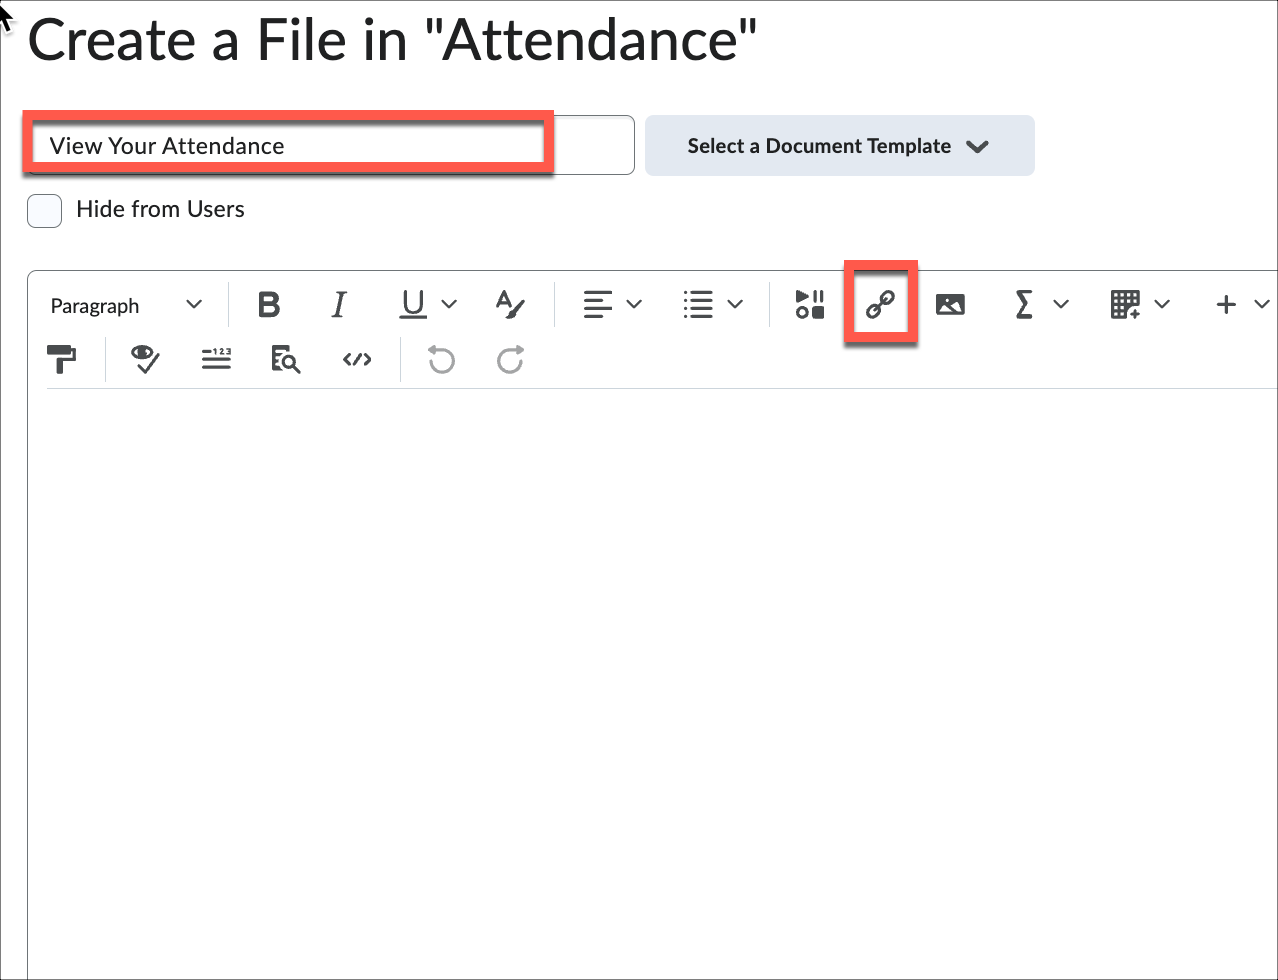
- Enter a title for the file. Create a descriptive title, such as “View Your Attendance.” Click the Link icon to insert a link.
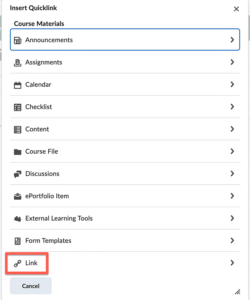
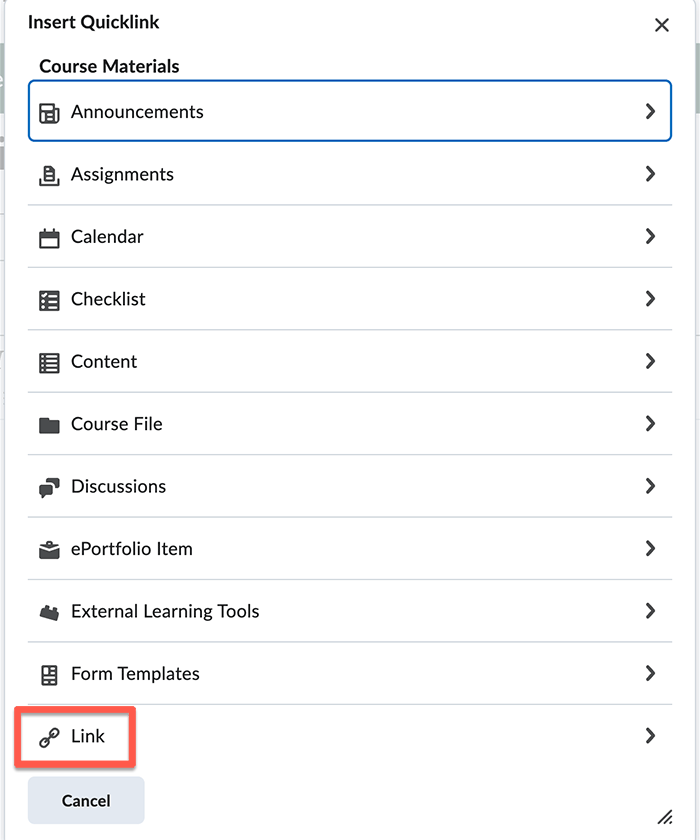
- Scroll to the bottom of the Insert Quicklink menu and select Insert Link.
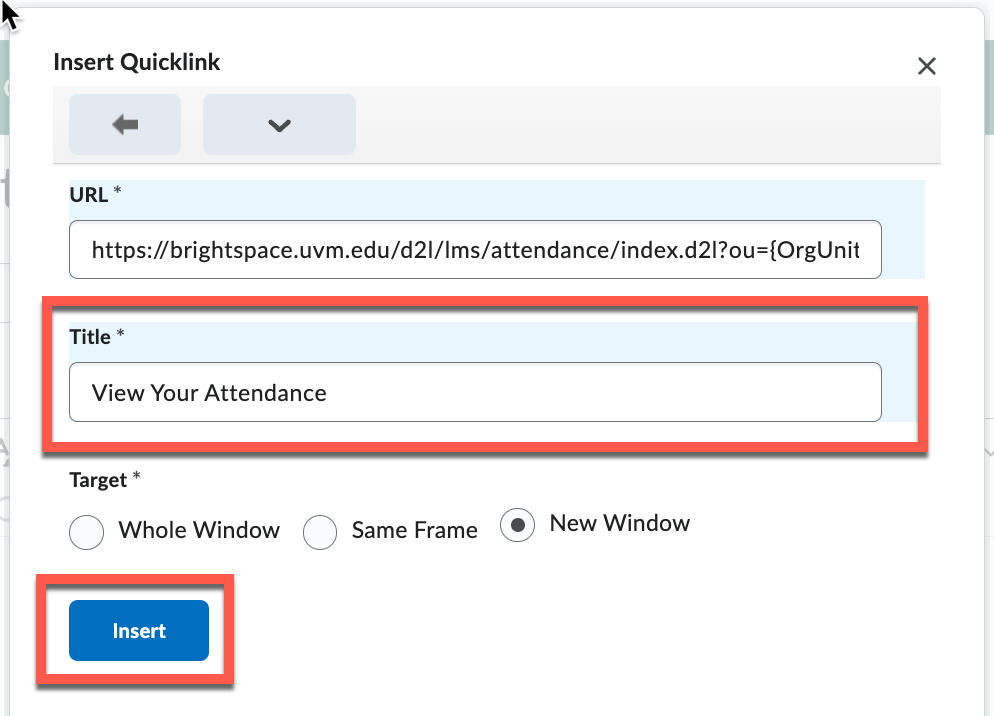
- Select, copy, and then paste the following URL in its entirety into the Link* field:
https://brightspace.uvm.edu/d2l/lms/attendance/index.d2l?ou={OrgUnitId}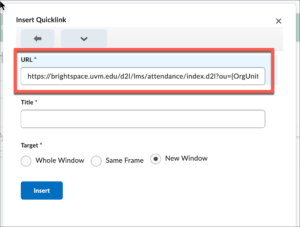
- Enter a name for the link in the Title* field. Create a descriptive name, such as “View Your Attendance.” Click Insert.

- The link will be displayed in the Attendance module. IMPORTANT: Let your students know that they can view their attendance by clicking on the link in the Content & Activities area.

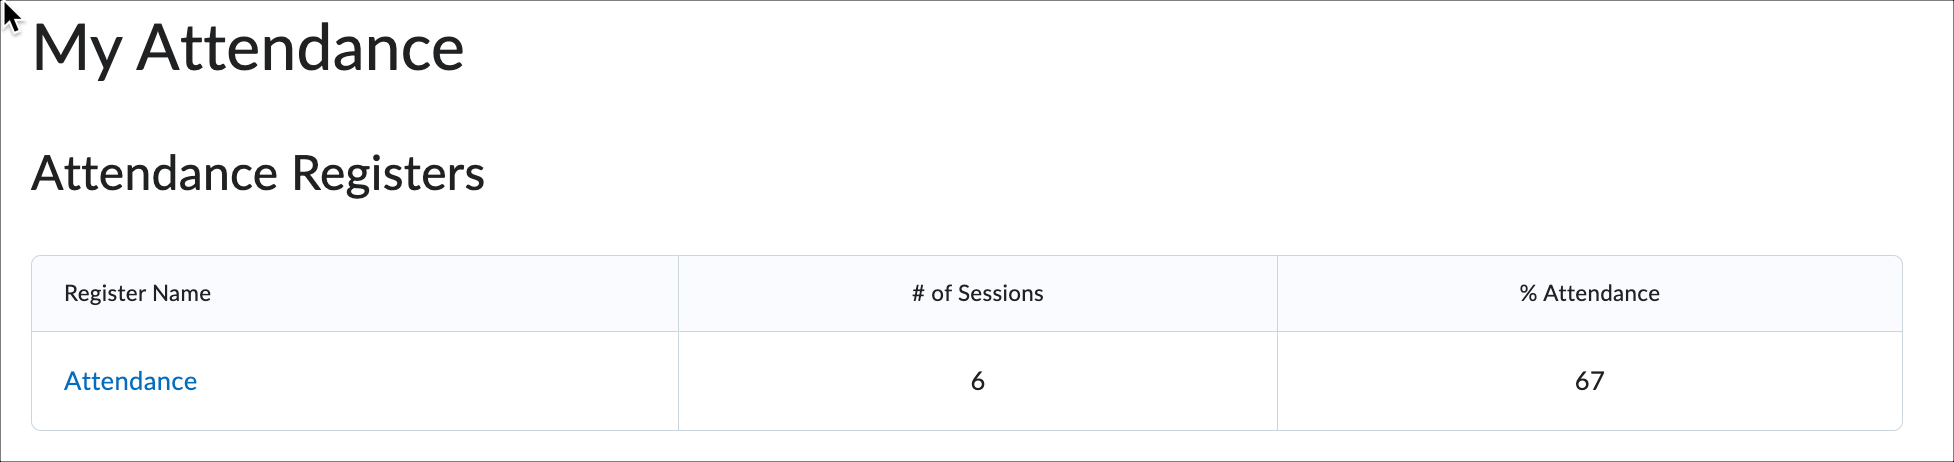
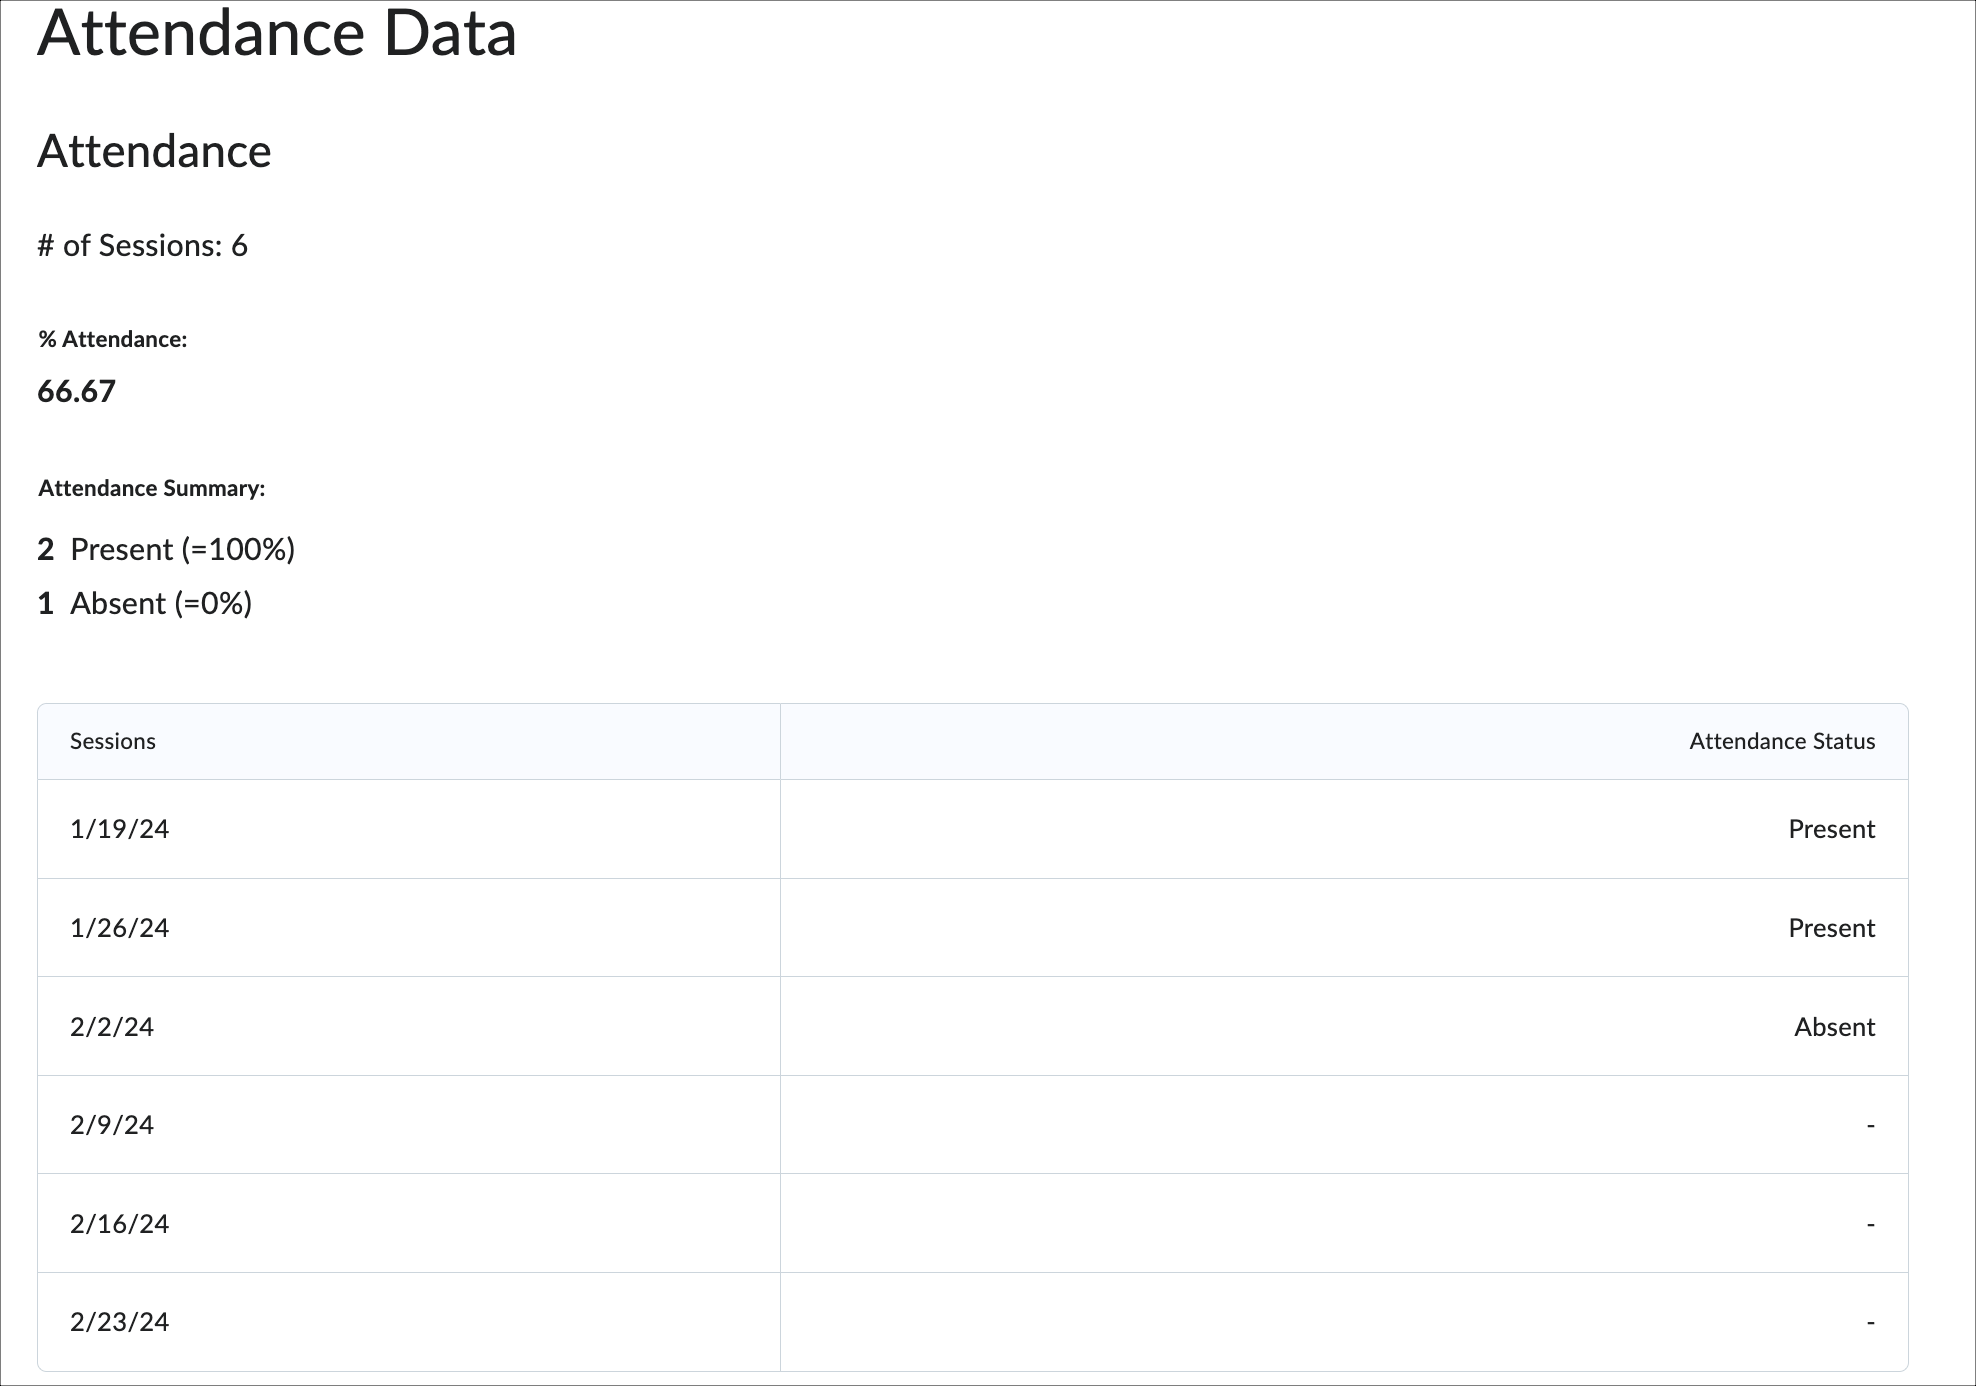
View Your Attendance: What Students See
The following screenshots show what your students will see when they click the View Your Attendance link from the Content & Activities area.