
Create Assignments
Assignments can be created in two ways:
- Click Course Tools on the green navbar, then click Assignments. This method places a list of assignments in the Assignment dashboard. (Students also have access to this page.) If you want to make a link to the assignment to Content & Activities, you’d open a module and select the “Existing Activities” button.
- Or, go to a module within Content & Activities, click the “Upload/Create button,” then choose Assignment. This method adds it both to the content module AND the Assignments dashboard.
Option 1: Create a New Assignment in Course Tools Area
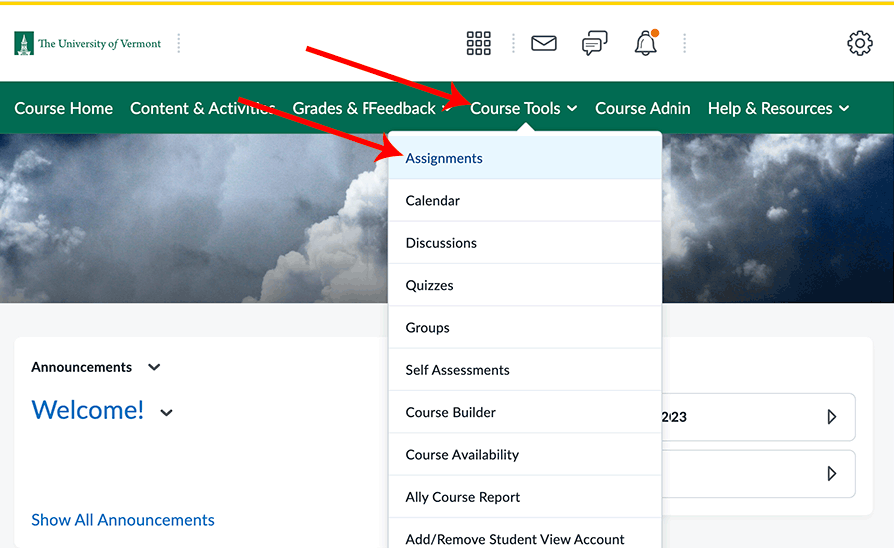
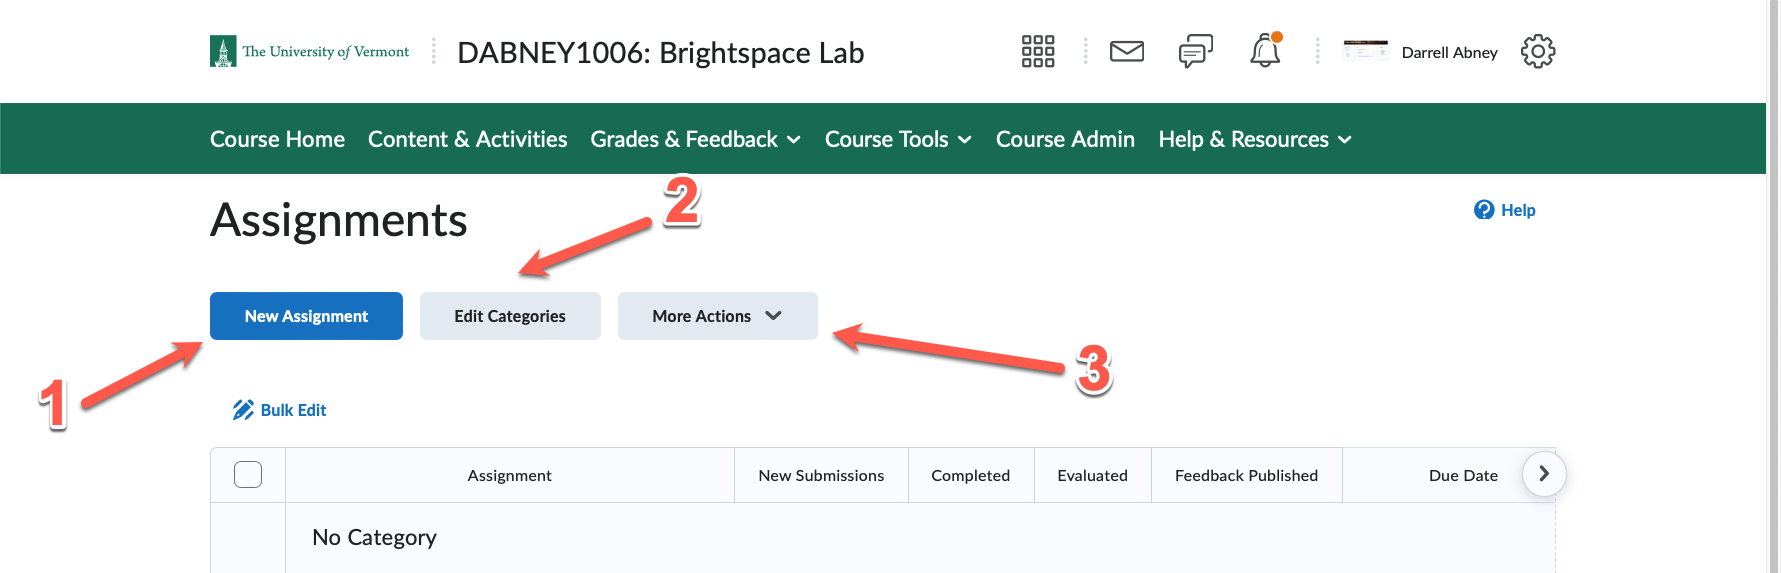
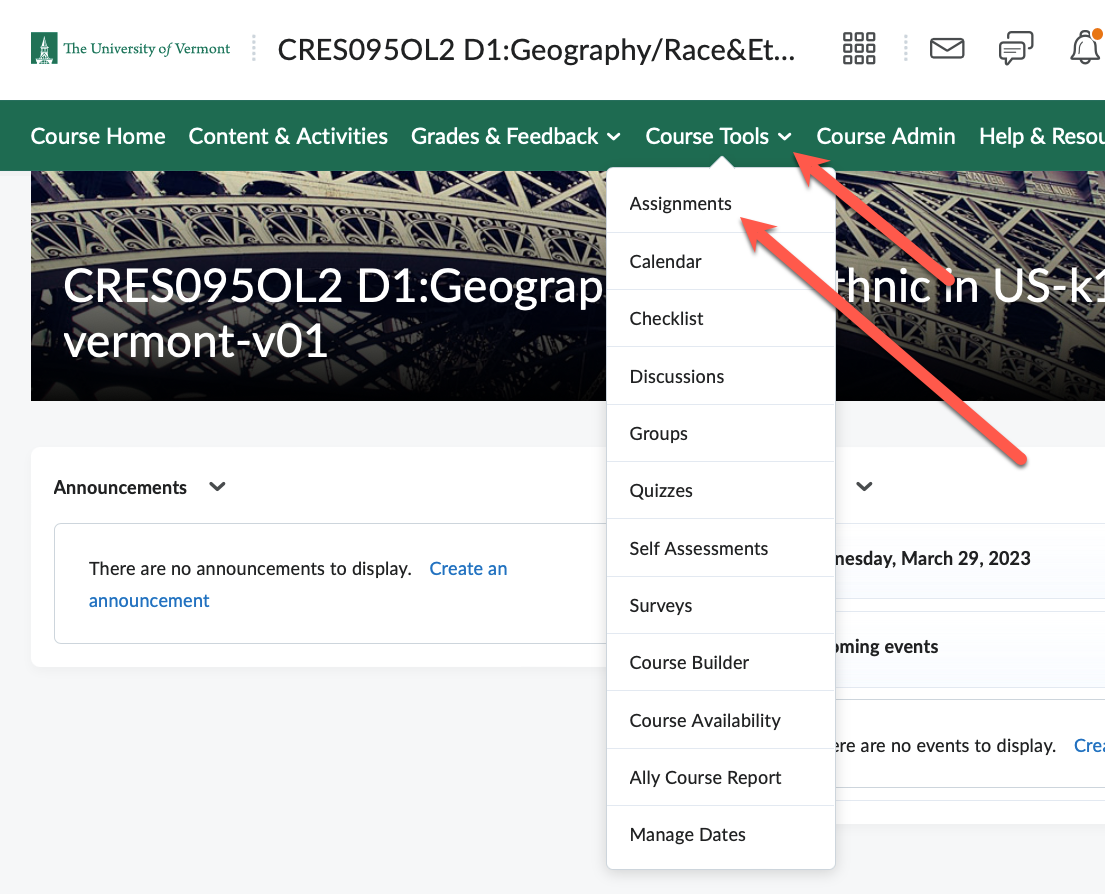
- On the green course nav bar, click Course Tools.
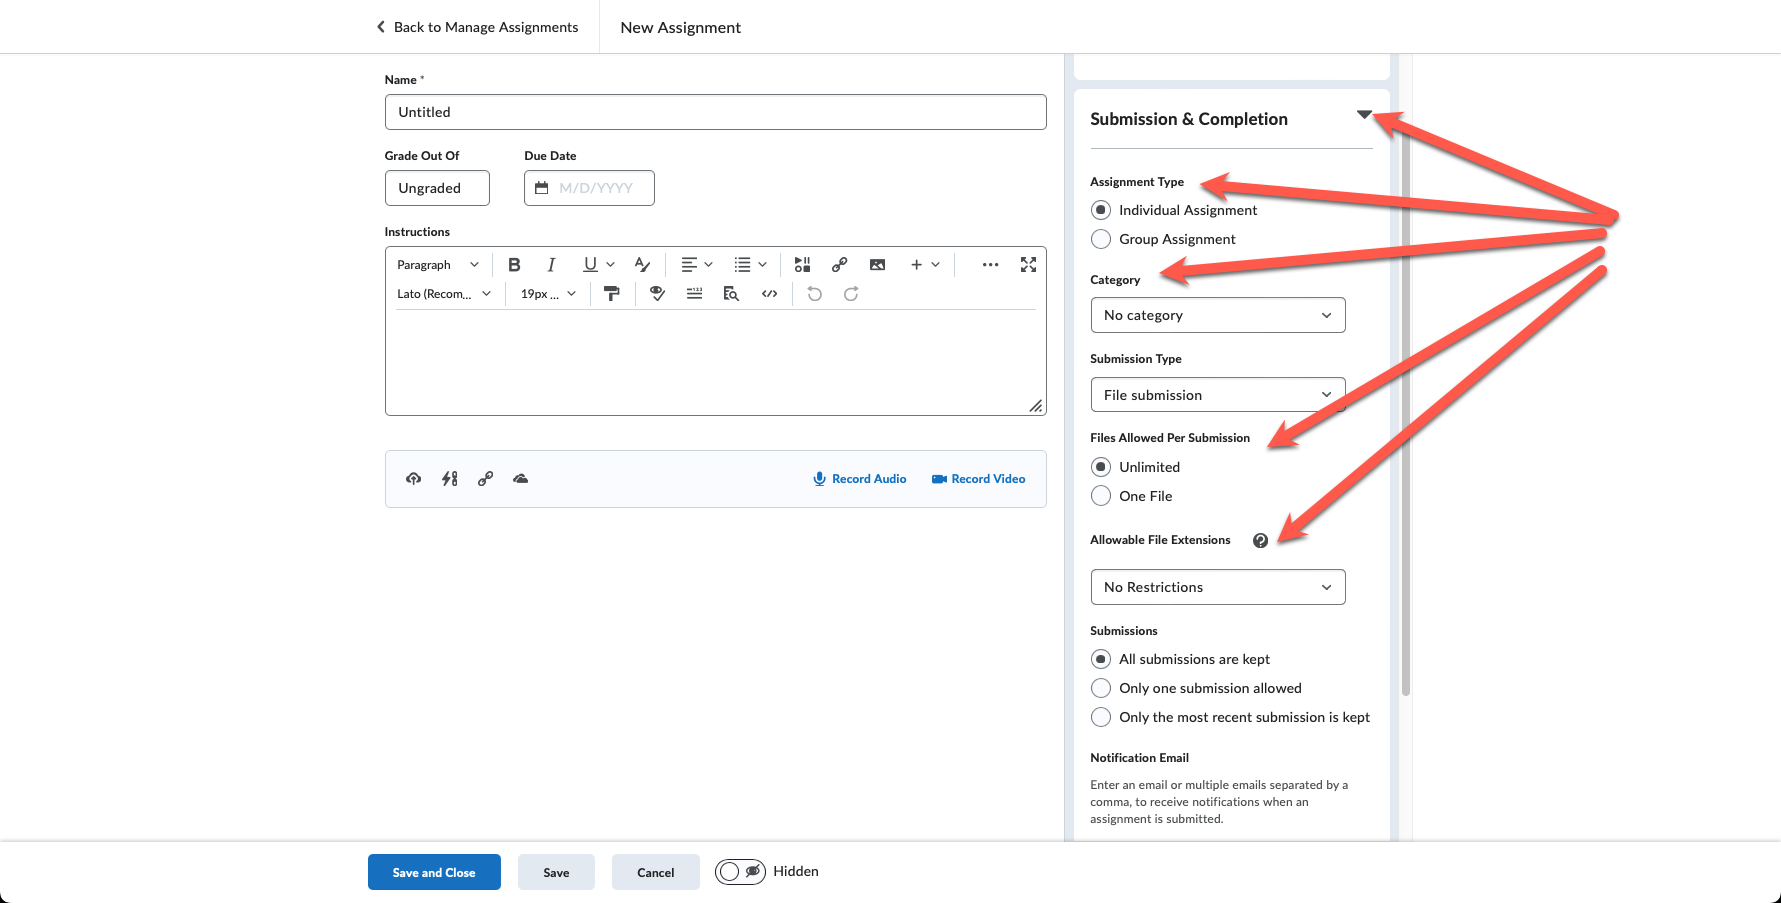
- On the Assignments page, click New Assignment. You will see the following options:
- Enter a Name, Instructions, and add any attachments.
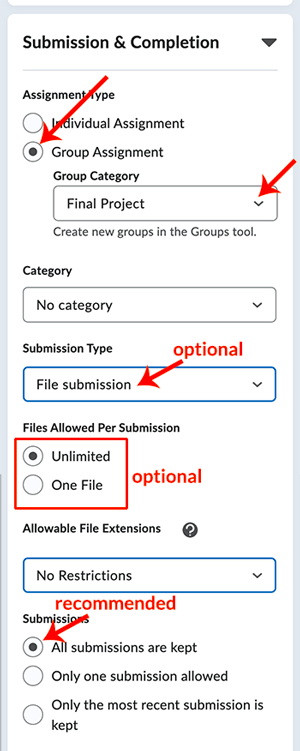
- In “Submission and Completion,” select an Assignment Type: Individual assignment or Group assignment. Read more about Group Assignments below.
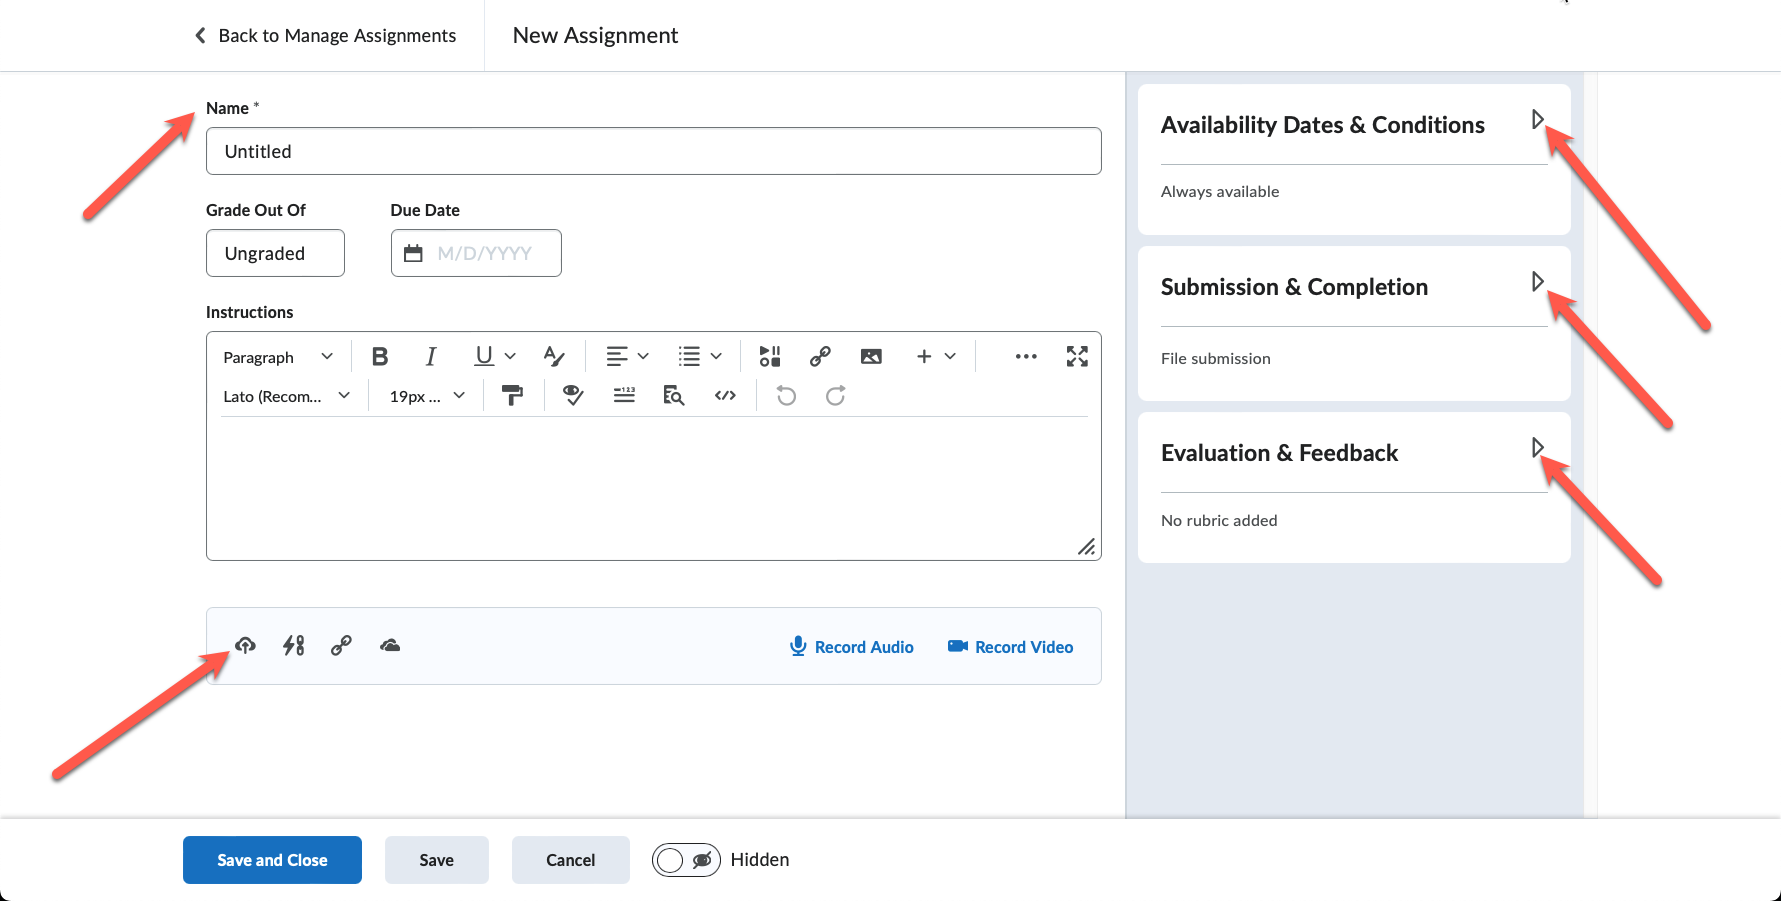
- Select a Submission type.
- For “File submissions,” set the number of Files Allowed Per Submission and the Submissions rules.
- For “Text submissions,” set the Submission rules.
- For “On paper submissions,” set Marked as completed to one of the available options: Manually by learners, Automatically on evaluation, or Automatically on due date.
- For “Observed in person” assignments, set “Marked as completed” to one of the available options: Manually by learners, Automatically on evaluation, or Automatically on due date.
 Click to enlarge ↑
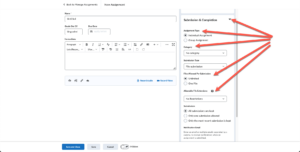
- You also have these following options:
- To receive an email message when a new submission is uploaded to this assignment, in the Notification Email field, enter your email address. (Note: This field is only available when the assignment Submission Type is set to File submissions or Text submissions.)
- To associate the Assignment with a category, select a Category or click New Category. Note: This means organizational categories on the Assignment page list (not grade categories).
- To assign a score, in the Grade Out Of field, enter a value.
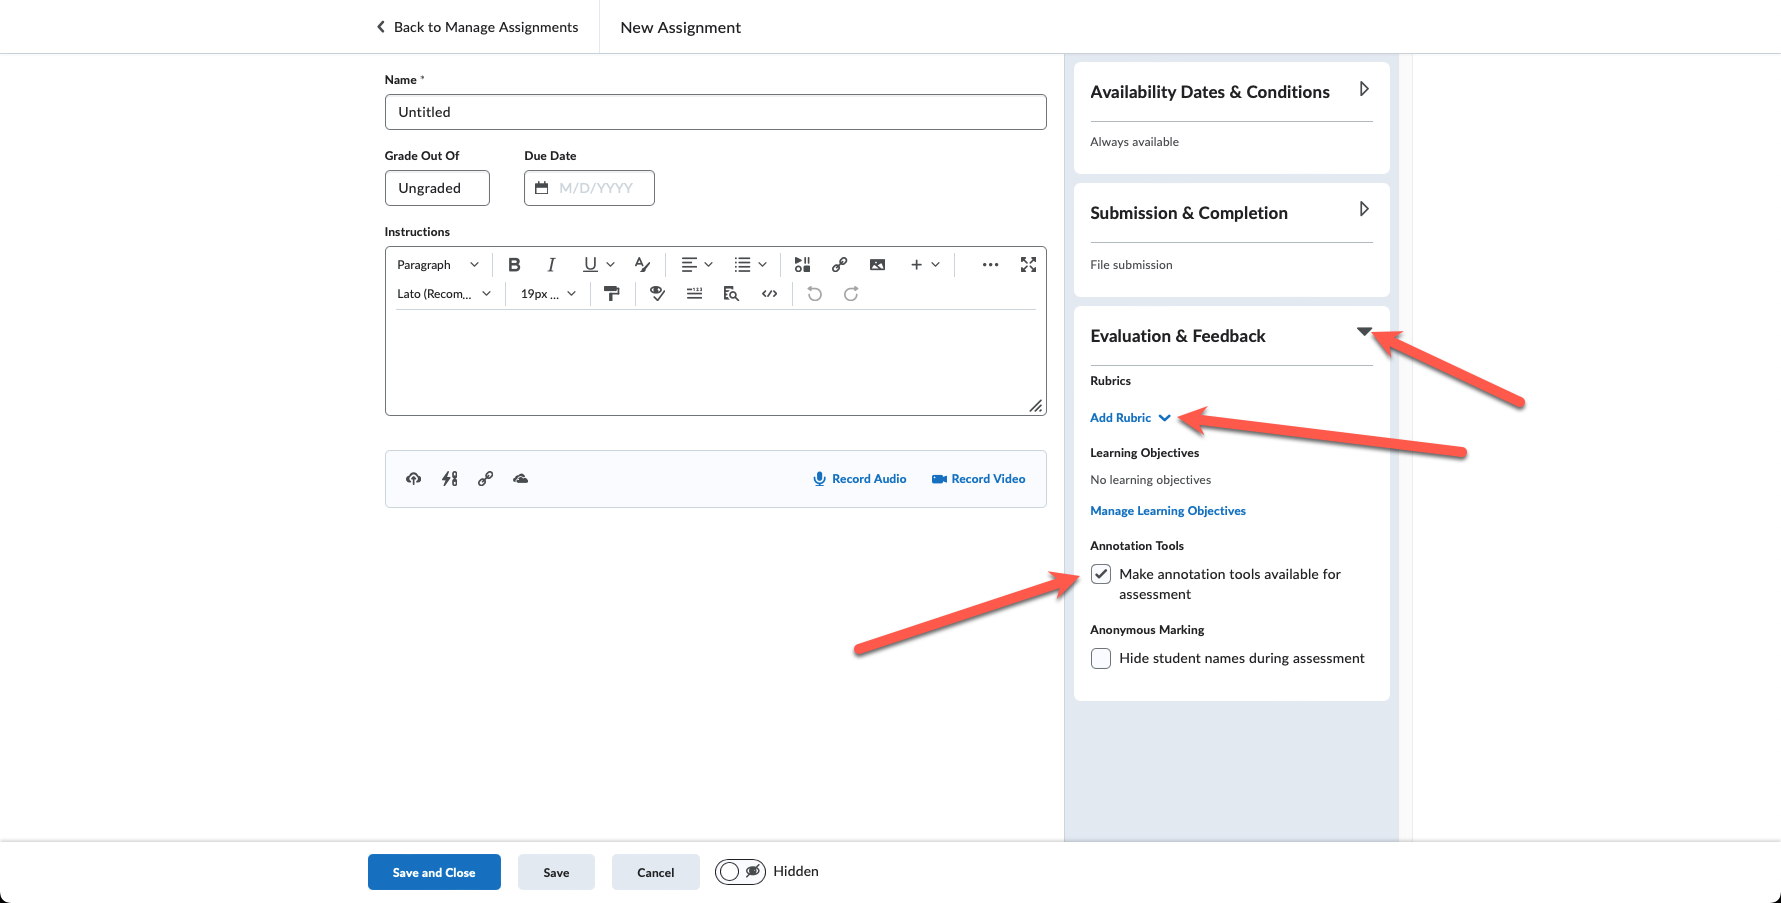
- To associate the assignment with a grade item (column) in your grade book, select a Grade Item, or click New Grade Item. Note that only numeric grade items can be associated with Assignments.
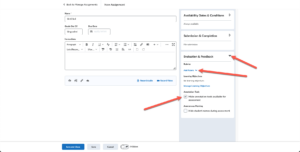
- To associate a rubric to the assignment, click Add Rubric, or Create Rubric in New Window.
- Most faculty use annotations tools to provide students with feedback. However, you can hide annotation tools in the document viewer, under Annotation tools, uncheck the Make annotation tools available for assessment check box.
 Click to enlarge ↑
- Click Save.
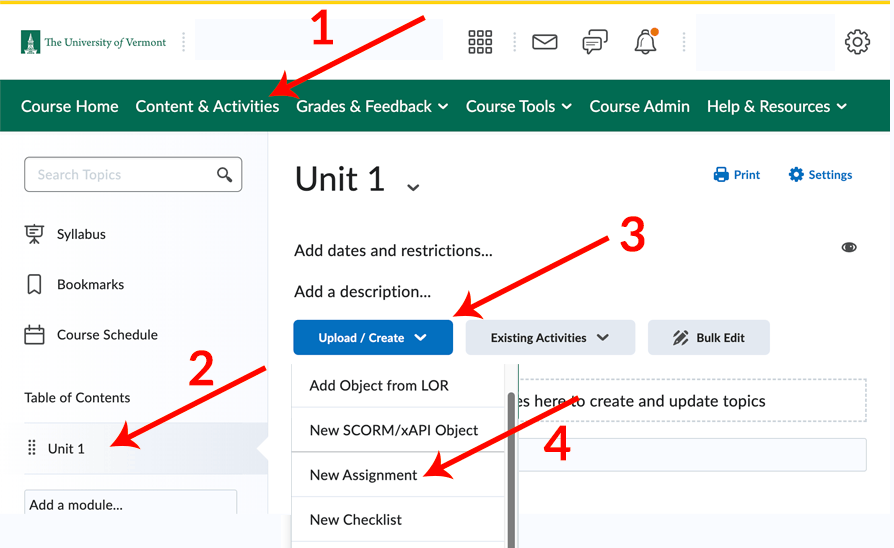
Option 2: Create an Assignment in Content & Activities
- On the navbar, click on Content & Activities.
- Select the Module in the Table of Contents where the Assignment should go.
- Click on Upload/Create.
- Select Assignment. Follow the steps above starting with #3 to create the assignment.
Reorder or organize assignment lists
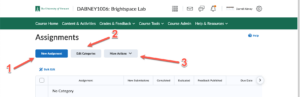
To organize your list of Assignments:
- Go to Course Tools > Assignments
- Edit Categories – Allows you to Categorize your assignments (Note these categories pertain only to your Assignments page, not in the Grade Book).
- More Actions – Allows you to preview, reorder, check event log, hide, unhide, and delete items in bulk.
 Click to enlarge ↑
Group assignments
 Group assignments are created by selecting “Group Assignment” during the assignment setup process. Other things to know about group assignments:
- The first step is create the groups. See Groups KB Article
- Any student in a group can make the assignment submission in behalf of the group. Note that if you’ve chosen to allow unlimited submissions, then other group members can also submit work.
- All group members will be able to see, when they click on the assignment, that a submission has already been made, and they can also read/download it.
- When you grade the assignment, every student in that group will get the grade you’ve given. In the grade book, you can see which students in the group actually submitted the file, because an icon appears in their grade cell. However, if more than one student has submitted a file for the group, you can see all the submissions this way:
- Go to Grades and scroll to the assignment column.
- Click the down arrow at the top of the column and choose Enter Grades
- Scroll to that group and see icons next to different group members names indicating they’ve submitted. Click the icon and it lists the submissions by all students in that group. You can choose which submission to grade for that group’s assignment.
- In this same view, you can modify individual group members’ grades.
- In the case where you may want each group to get a different assignment, you will need to create a group category (in the groups tool) for each assignment. You would choose one group for that category and then manually enroll the students who will have that assignment.
Provide Alternate dates to an Assignment (Special Access)
See this article on the Brightspace D2L Community site to set release conditions and special access in Assignments.
Bulk Edit and Reorder Assignments
Bulk Edit within the Assignments Tool allows you to edit one or more items Titles & Categories, Availability and due dates all at once. The Reorder feature allows you to reorganize your assignments in one place as well. To begin navigate to your Assignments tool area.
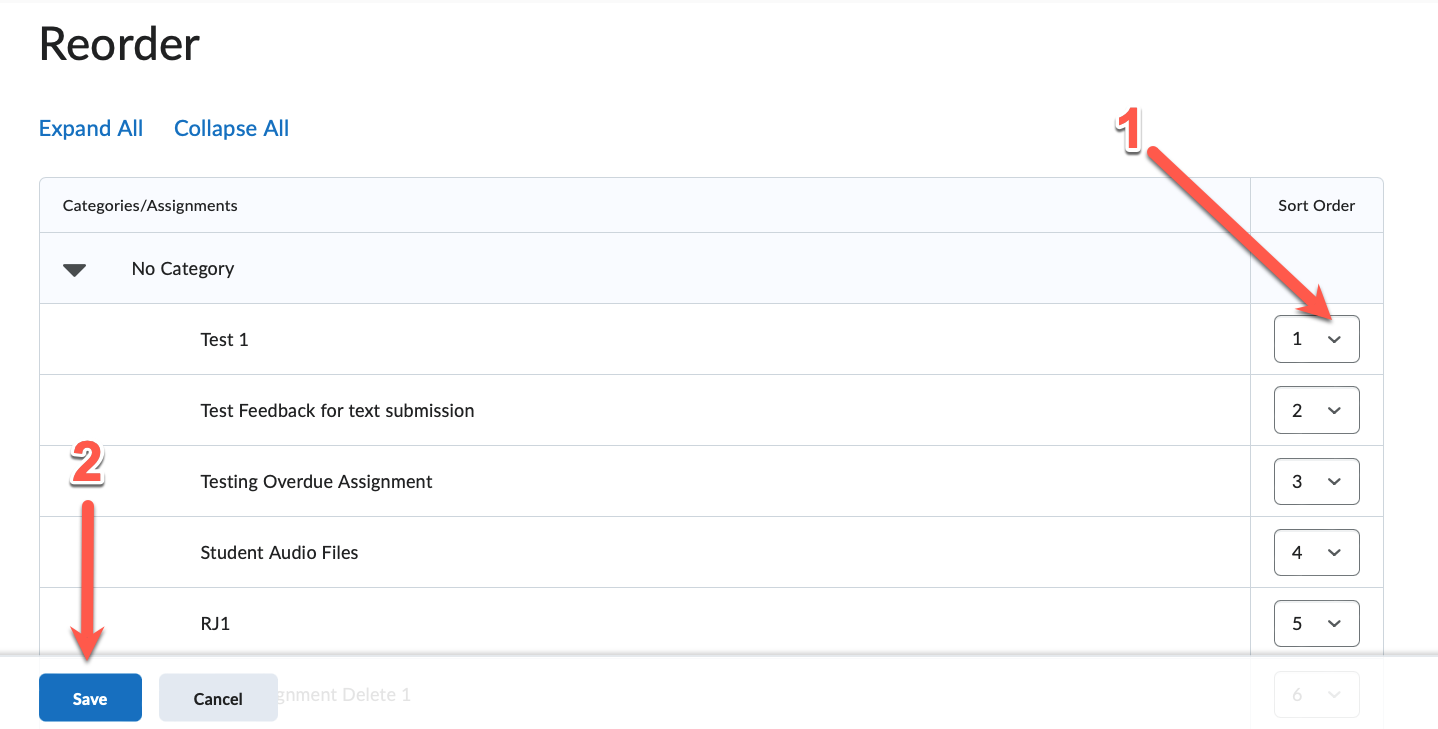
Reorder
- Click the “More Actions” button and choose “Reorder”
- Select dropdown icon next to the item number and change number sequence order.
- Click Save.
 Click to enlarge ↑
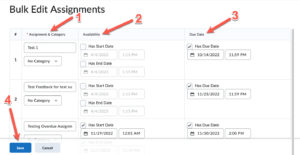
Bulk Edit – Select all or choose individual items to bulk edit.
- Edit the Title/Category
- Edit Availability dates
- Edit Due dates.
- Click Save.
 Click to enlarge ↑

Submission Troubleshooting
- Wait for all the assignments to fully upload when submitting. There is a green progress bar right after you select and upload files from your computer into the Brightspace Assignment submission screen.
- Double-check if an allowed file extension is requested on the Assignment submission instructions (e.g. pdf, etc).
- Double-check that the assignment files contain no spaces or special characters. Use only letters, numbers, and periods.
- Use a supported browser. At this time Chrome has proven to be most compatible with Brightspace.
- For multiple files, select all the files in the upload screen.
- Close browser and re-open new windows
- Restart your computer
- Be sure to clear cache/cookies
- If needed, install updates to browser or OS
Grade Assignments and Give Feedback
There are two ways instructors typically access student submissions for grading:
- Within the Assignment Tool (Course Tools > Assignments)
- Quick Eval
1. Grading within the Assignment Tool
- On the navbar, click Course Tools and Select Assignments.
- On the Assignments page, from the context menu of the assignment you want to evaluate, click View Submissions.
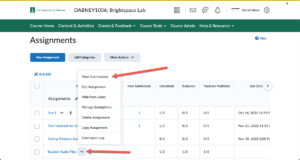 Click to enlarge ↑
 - On the Submissions page, do one of the following:
- Use the document view to add annotations to the assignment file.
- Enter a score in the Overall Grade field.
- If desired, enter overall feedback in the Overall Feedback field.
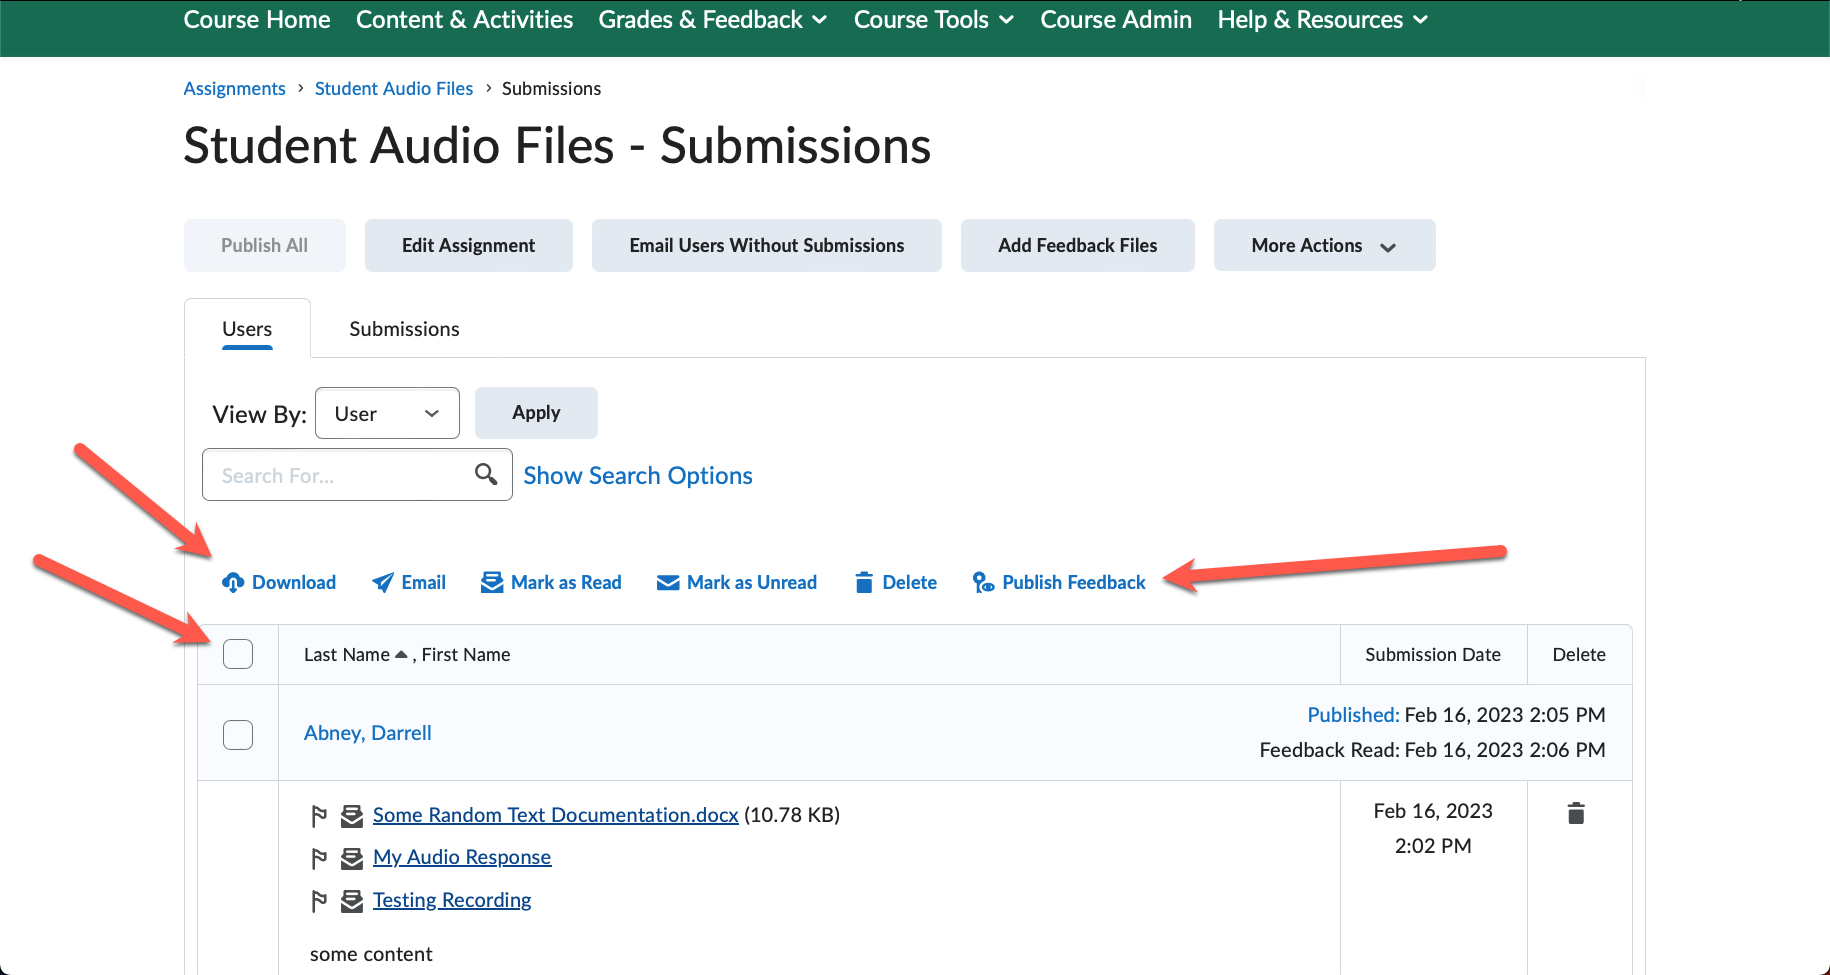
- When you are done grading the submission, click either Save Draft or Publish.
- When you are ready to publish feedback for all students, click Publish All from the submissions page.
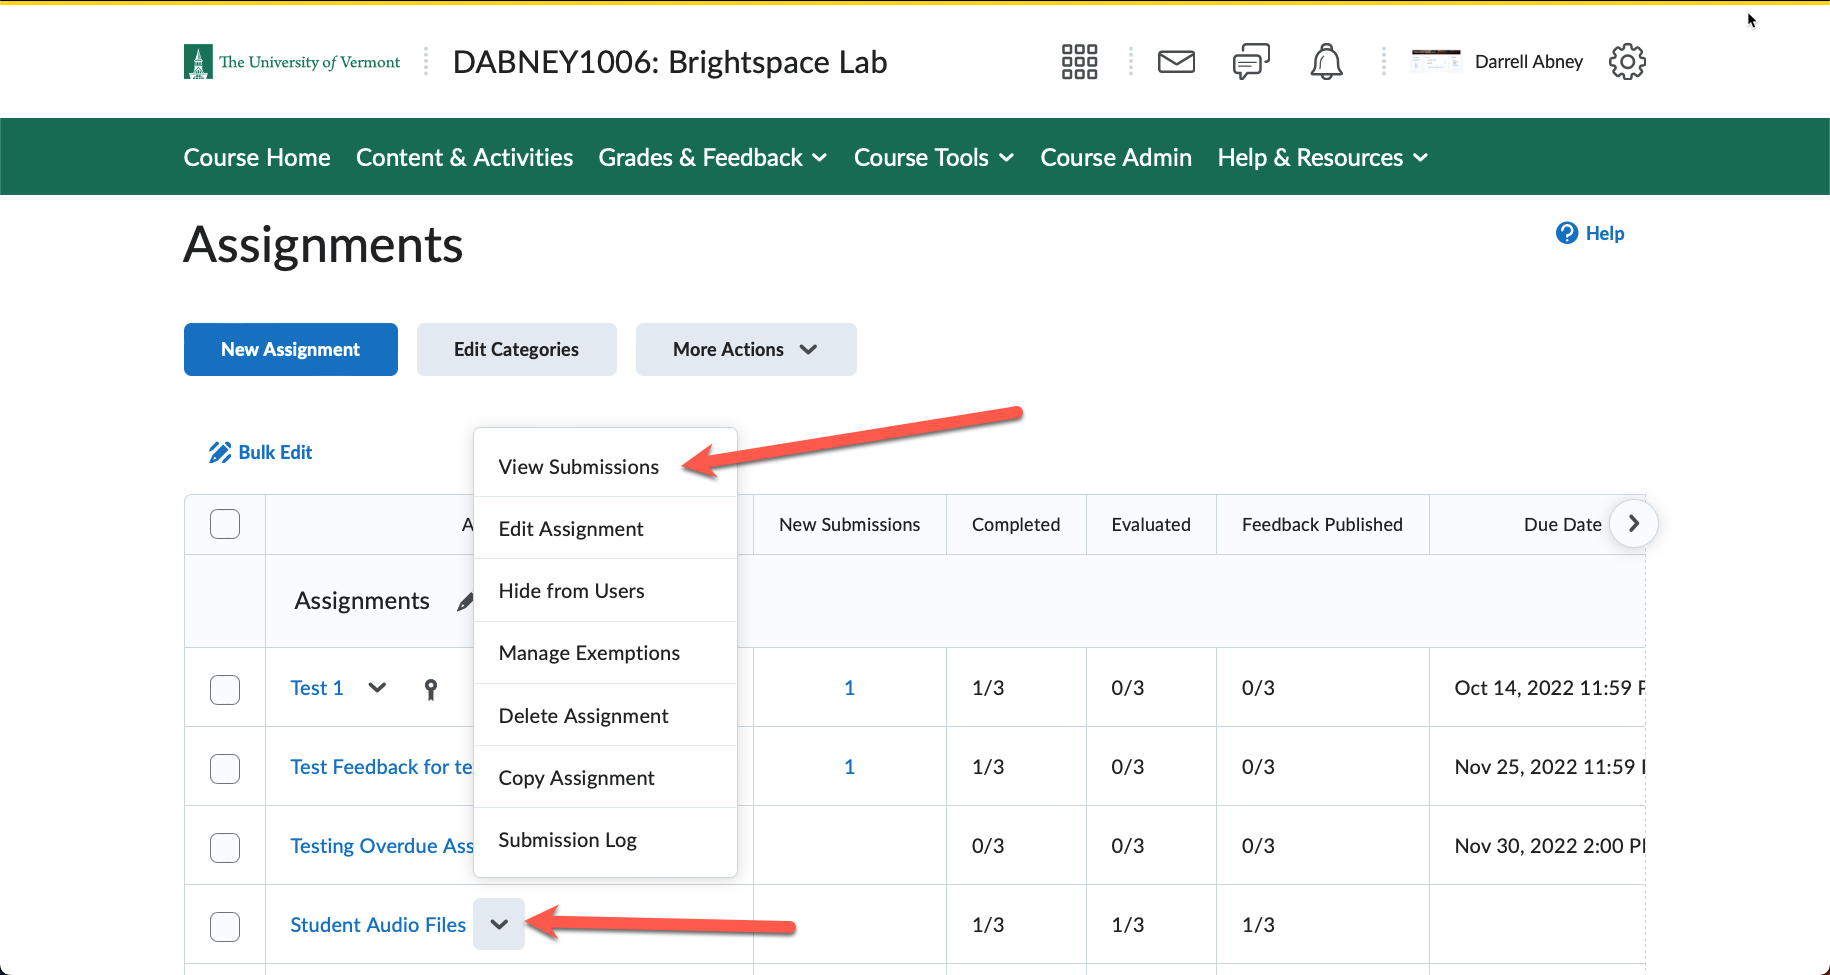
You will see a dialog box that includes key information about learner evaluations. Click Publish if you are ready to publish. Click Cancel to resume grading submissions.
2. Evaluate and grade submissions offline
- Click the Select all rows checkbox, and then click Download. A zip file is created.
- Click Download.
- Extract all the files to a local folder.
Note: Each user submission folder has a numeric ID prefixed to the folder name. This ID is key when you are uploading the evaluated submission files and it should not be changed. Example downloaded file name with the numeric ID: 30230-29 – John Doe – May 29, 2025 122 PM - Open each assignment, evaluate the assignment, add your feedback, and then save the file.
-
 Click to enlarge ↑
Once you have evaluated, added feedback and saved all the downloaded files, highlight all the updated folders and create a .zip folder.
Note: If you have any learner names with characters that cannot be used in a compressed folder, such as Ø, rename that folder and reattempt to create a.zip folder. Do not change the ID prefixed to the name of the folder. - On the Submissions page, click Add Feedback Files. Select your newly created compressed.zip file and then click Add.
- To publish feedback to selected learners, select these learners, and click Publish Feedback.
- To publish feedback to all learners, click Publish All Feedback.
Note: If the Publish All Feedback button is grayed out, that indicates that you have no draft feedback to publish. - If you have any rubrics attached to learner submissions and if these learner submissions have not been evaluated on all rubric criteria, a Confirmation dialog box appears indicating the same.
- Click Continue Grading or Publish Anyway, as applicable.
3. Quick Eval
- Quick Eval is found by clicking “Grades & Feedback” in the green nav bar. You can also access it on the Brightspace landing page and it will display students’ submissions for all of your courses.
- There are two tabs within Quick Eval: Submissions and Activities:
- Submissions shows all ungraded work, no matter what tool was used in the course
- Activities organizes the submissions by tool type
- Click on the new submissions icon and view student assignments. Leave feedback using the document viewer. This tool allows you to add annotations to the submission. You can also leave feedback in the Overall Feedback field which is located under Overall Grade.
To learn more about adding annotations via the document view, please read this article from the Brightspace Community.
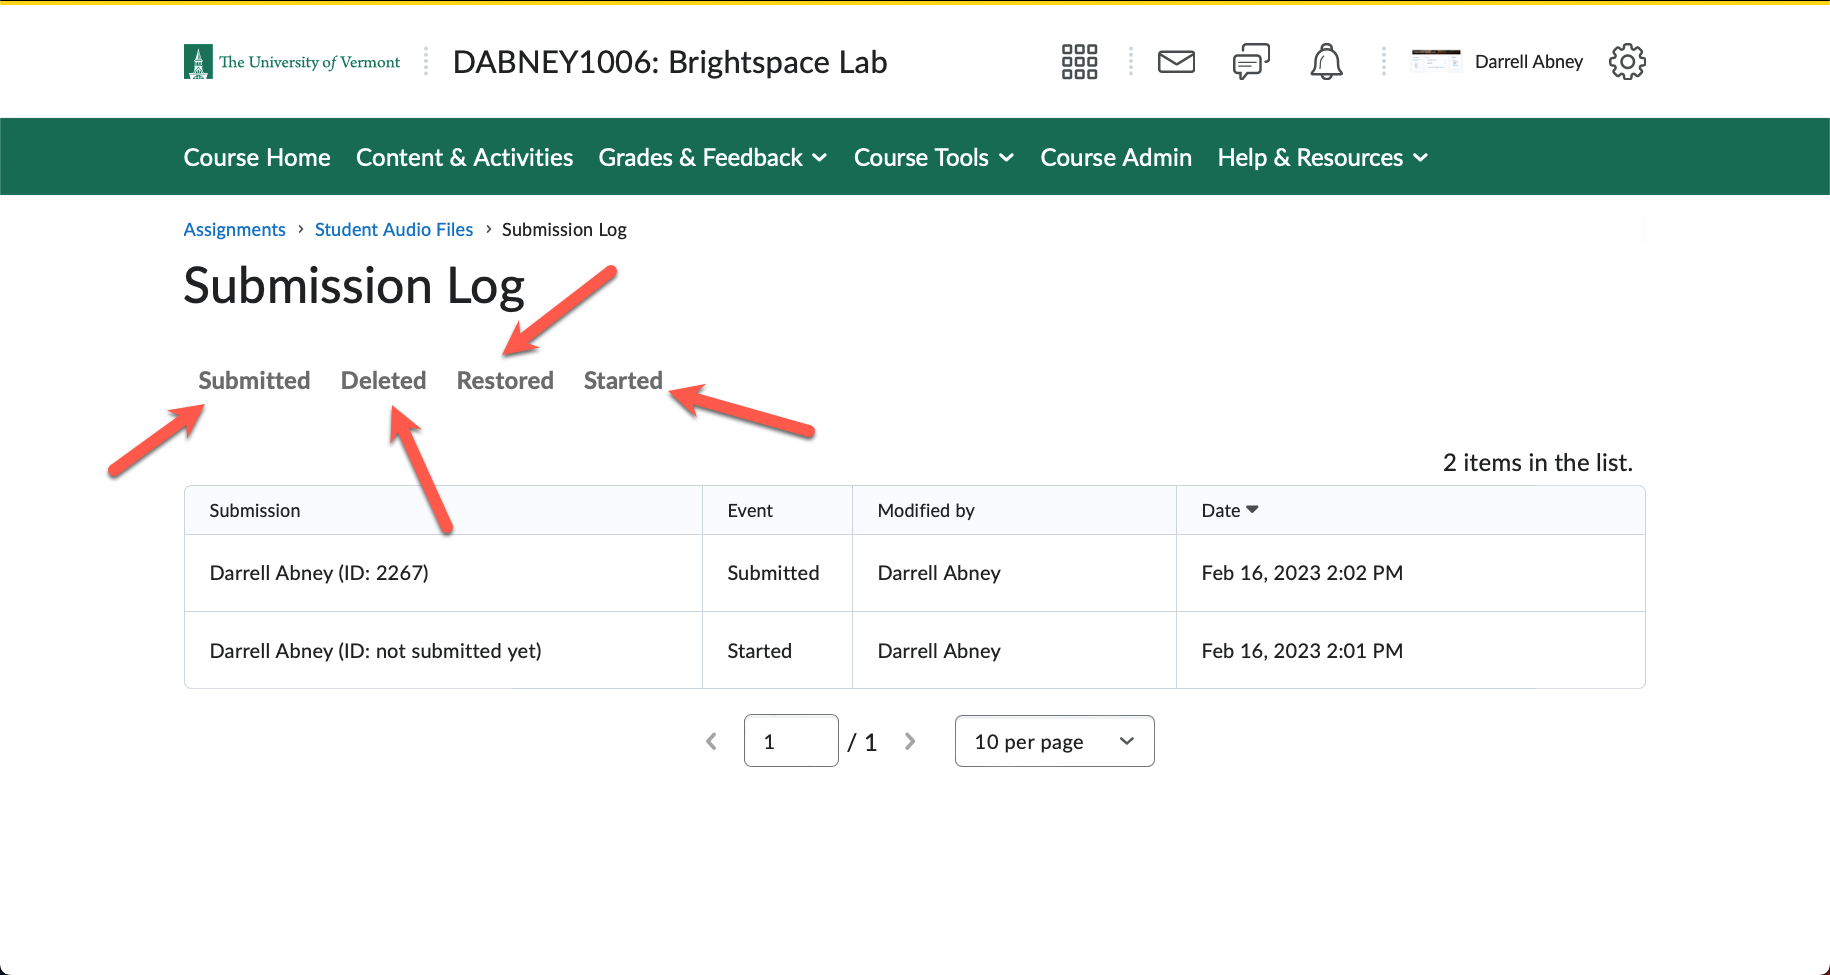
Access Submission Logs to Track Student Work
On the general page of the Submission Logs, you can see which students have submitted or started an assignment. You are also able to delete or restore an assignment.
To go to the Submission Logs, Click on Course Tools and click on Assignments.
- Click on the down arrow for the assignment you would like to see.
- Click on Submission Log.
In The Submission Log window you can view Submitted, Deleted, Started Assignments and even Restore Assignments.