Team Channels vs Breakout Rooms
| Channel Meetings for Small Groups (described below) |
Breakout Rooms (described at this link) |
| Channel Pros: | Breakout Room Pros: |
| Can be used for stable groups across class sessions (e.g., the same students are in the same group for multiple classes).
Stores collaborative documents within the Channel. You can assign TAs to Channels in advance. |
Flexible: Includes options for randomly or manually assigning students into a group, on-the-fly. Manual assignment is not fast; consider only doing this when the whole group is 15 or smaller.
Easy for students to navigate between the breakout room and the main meeting room, if you select the option to allow students to go back and forth. For one class session, groups remain stable (e.g., the same students are in the same group, but only for that one class session) until they are “recreated” (which will shuffle people into new rooms). |
| Channel Cons: | Breakout Room Cons: |
| Requires advance set-up.
Students can get lost navigating between meetings. Requires clear communication about which student is starting the meeting. Requires good communication to bring students back into the main meeting; the meeting organizer can’t “end all Channel meetings and bring everyone back.” |
Cannot be set-up in advance.
Only the meeting organizer (the person who schedules the meeting or starts an ad-hoc meeting) can create and manage the rooms. Only the students who are in the meeting at the time the rooms are created are placed into a breakout room; if a student joins late, they are just waiting in the main class meeting for the meeting organizer to assign them to a breakout room. If using random assignment, you need to manually re-assign TAs to breakout rooms; they won’t be automatically distributed across rooms. Mobile devices are unreliably functional. |
Using Teams Channels
Setting Up Channels
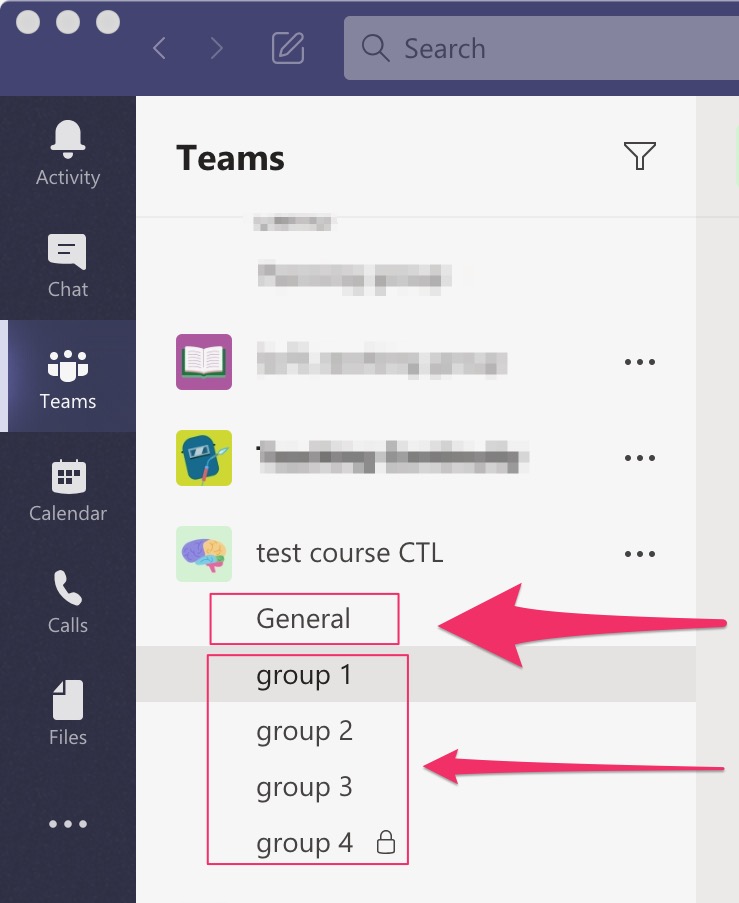
After creating a Team, you can add Team Channels, organized by topic, week, or by small groups. Each team can have up to 200 open channels.
In general, it’s recommended to have specific purposes for each channel, as excessive or unfocused channels can create confusion for Team member and owners. For example, you may want one Channel for each lab section, or you might use channels to divvy up team members into small groups. The subgroups can then use their assigned channel to hold group meetings, share documents, and to otherwise collaborate with each other.
By default, a Team starts with a General channel that is available to all members of the Team.
Additional channels can be added as needed, but you’re limited to 200 open channels.
Starting a Small Group Meeting in a Channel
Joining an In-Progress Channel Meeting
If a channel meeting has already started, other members of the Team can join it by selecting the channel, clicking Join, confirming their audio and video settings, and then clicking Join now.
During a meeting, participants can collaborate simultaneously on documents and files shared to channel members. Click here for instructions on collaborating with files and documents.

