![]() Microsoft Book with Me (Bookable Time) is a personal scheduling tool, enabling you to create a specific service or meeting type (ie. Office Hours or Course Consultation), specify available hours, and create a user-friendly, shareable web page.
Microsoft Book with Me (Bookable Time) is a personal scheduling tool, enabling you to create a specific service or meeting type (ie. Office Hours or Course Consultation), specify available hours, and create a user-friendly, shareable web page.
Through integrations with your Exchange calendar, you’ll only be bookable if you don’t have a conflicting meeting. You can also assign certain services as public or private, creating restrictions on how your time can be reserved. It offers a fast and friendly alternative to what is typically the frustrating, time-consuming process of meeting coordination.
Creating a New Bookable Time
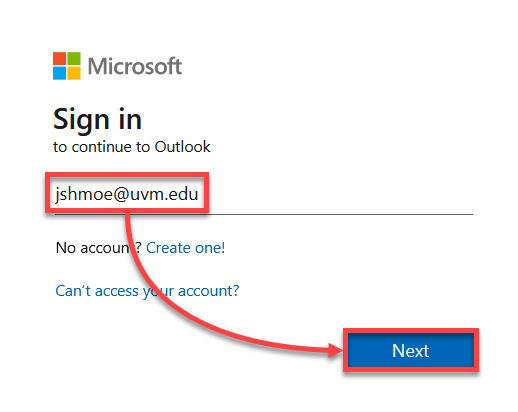
- Visit Bookings With Me and sign into your UVM account, if prompted.
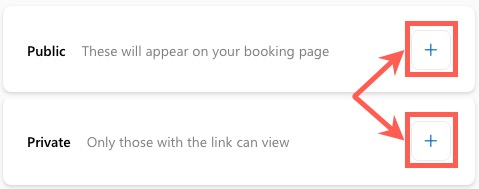
- Click the plus (+) sign in the appropriate section under Public or Private. Public bookable time will appear on your booking page, while Private bookable time is only visible to those with a link.
- Fill out the basic meeting information:
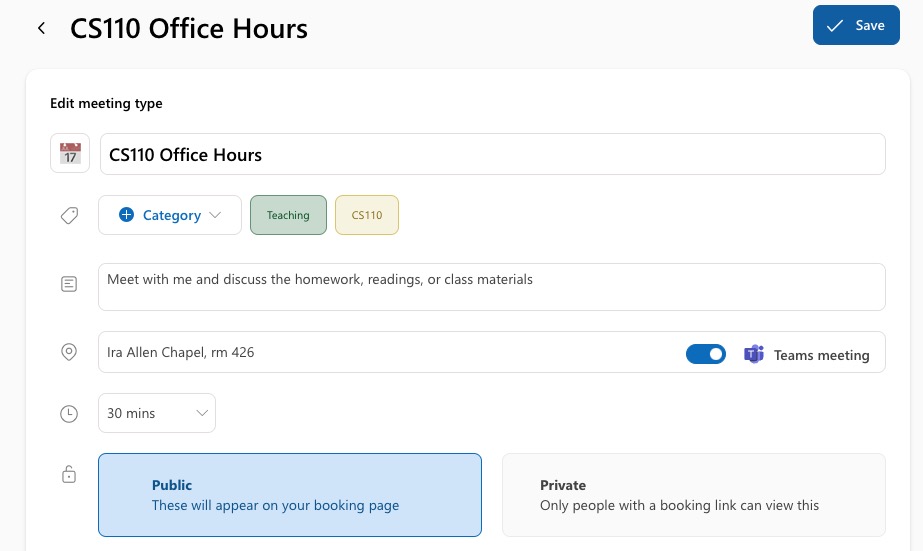
- Add a meeting title.
- Optionally, set a category of the meeting – these categories are carried over from your account settings.
- Add a meeting description – this will appear on your booking page.
- Set a location for the meeting. You may optionally toggle on the Teams meeting option for the meeting generated from this booking to include a Teams meeting.
- Set the duration of bookable time and double check your selection to make this bookable time Public or Private.
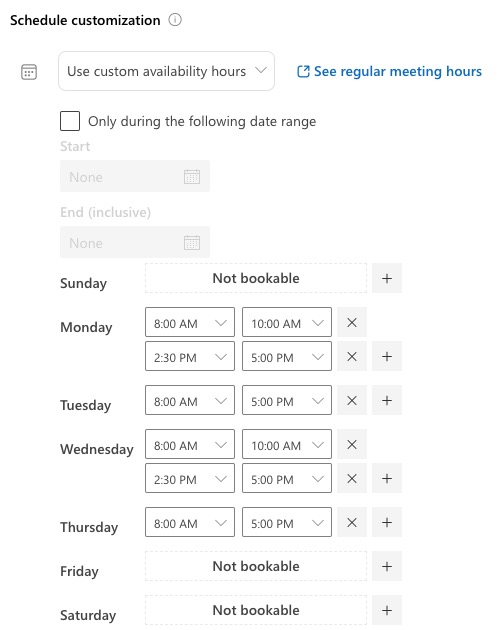
- Optionally, set custom availability hours instead of using your regular meeting hours.
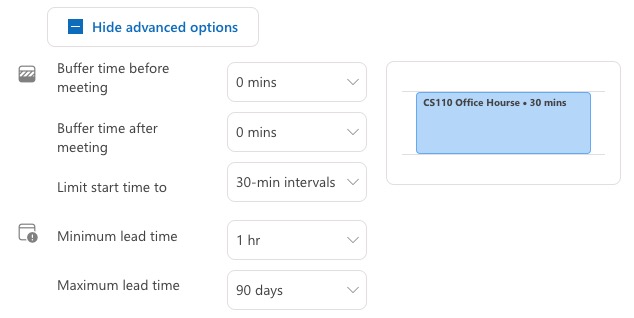
- Optionally, click the Advanced options button to add meeting buffer time, restrict start time intervals, and set bookings lead time.
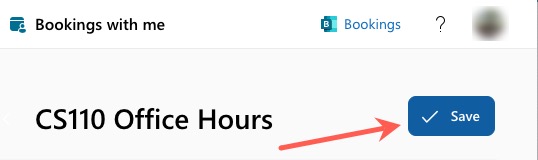
- Click Save in the top right corner.
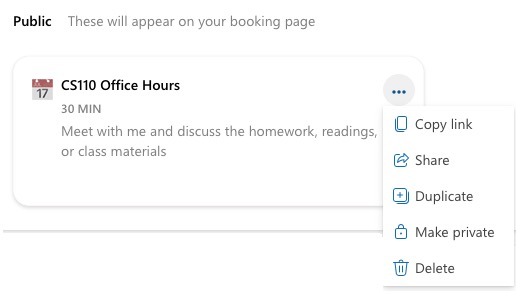
- Your new bookable time will now appear on the Bookings with me page. Click the three dot (…) menu in the upper right corner of the bookable time to copy a link or share it.
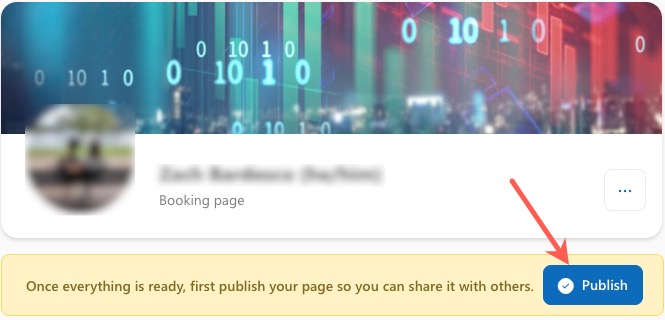
Turning off and Re-publishing your Individual Booking Page
You may wish to turn off you Bookings page to make changes to your bookable time(s) or to otherwise prevent people from booking your time.
To turn off your bookings page, visit the Bookings with me page, then click the three dot (…) menu, and select Turn off your bookings page.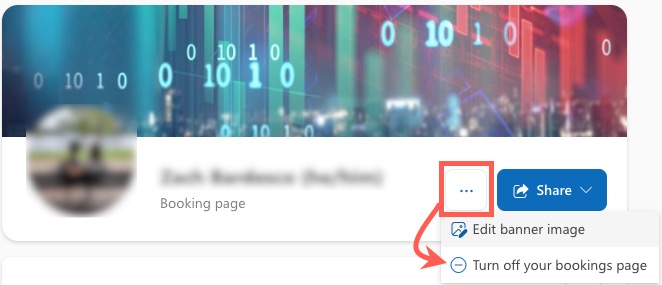
You can publish your bookings page by visiting the Bookings with me page and clicking Publish.