In a Teams class or meeting, you can share content on your screen with the other students or meeting participants. The best sharing option will vary based on the type of content you are sharing.
To share you screen or content, click the Share icon on the meeting toolbar.

Choose What to Share
When you click the Share icon, Teams offers several different options for what to share.
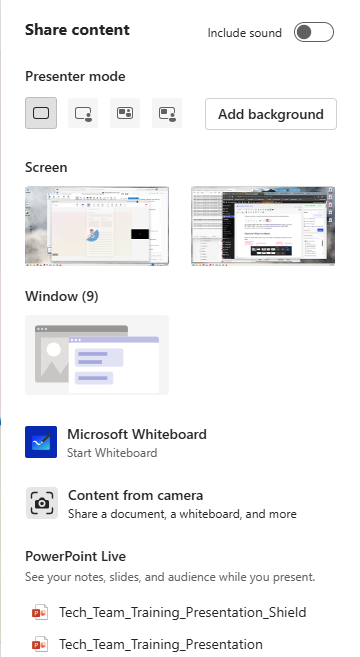 Include sound
Toggle this option to pipe your computer audio to the meeting.
Presenter mode
Decide how you would like your picture to be displayed during your presentation. More about Presenter modes below.
Add Background
Add a virtual background to your camera feed.
Screen
Choose one of these options to show the entire contents of one of your screens.
Window
Choose one of these options to share the contents of only one app.
Microsoft Whiteboard
Start a Microsoft Whiteboard session.
Content from camera
Choose this option to share content from a document camera or a camera pointed at a physical whiteboard.
PowerPoint Live
Choose a PowerPoint presentation from this list to present just that presentation.
Excel Live
Collaborate on an Excel worksheet with other meeting participants.
Browse OneDrive/my computer
Browse for files to share that have not recently been opened.
Sharing a Screen
When sharing your Desktop, a red box encloses the edges of the shared screen as shown below. Any application or window visible to you within this red box is being shared to meeting participants. 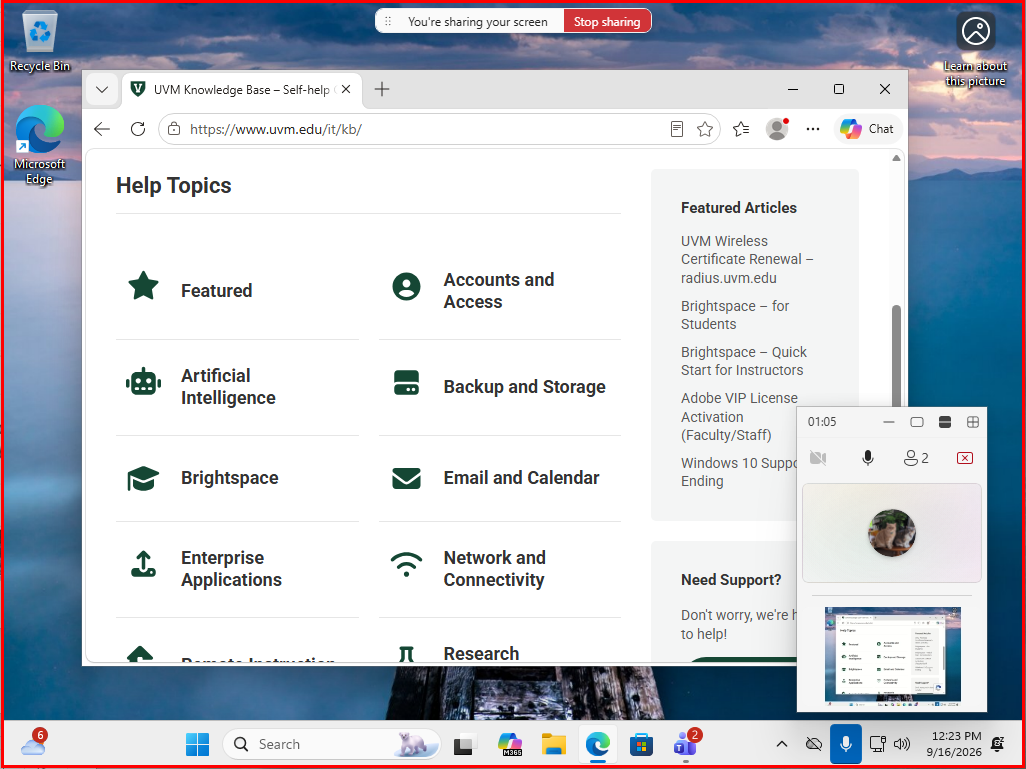
Sharing a Window
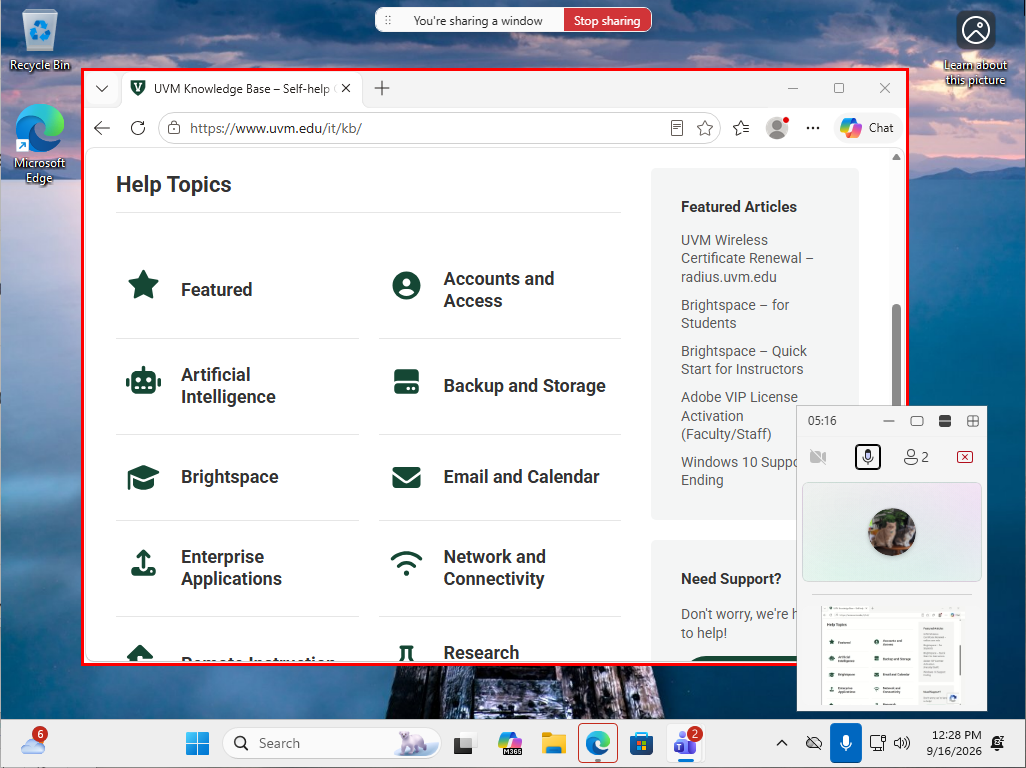
When sharing a Window, a red box encloses the edges of the shared application as shown below. The application or window within this red box is being shared to meeting participants. Even if you minimize the shared window or swap to a different one, participants will continue to see the shared window and only the shared window.
Sharing a PowerPoint
While you can present a PowerPoint by sharing your Desktop or the PowerPoint window, Microsoft also allows you to share a PowerPoint directly to your meeting.
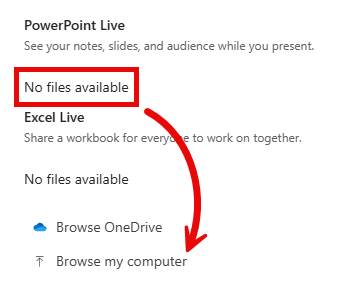
Below the PowerPoint Live heading, you will see some titles for recently opened PowerPoint files. If a file is missing from this list, you can click Browse my computer to upload a file from your computer or Microsoft OneDrive.
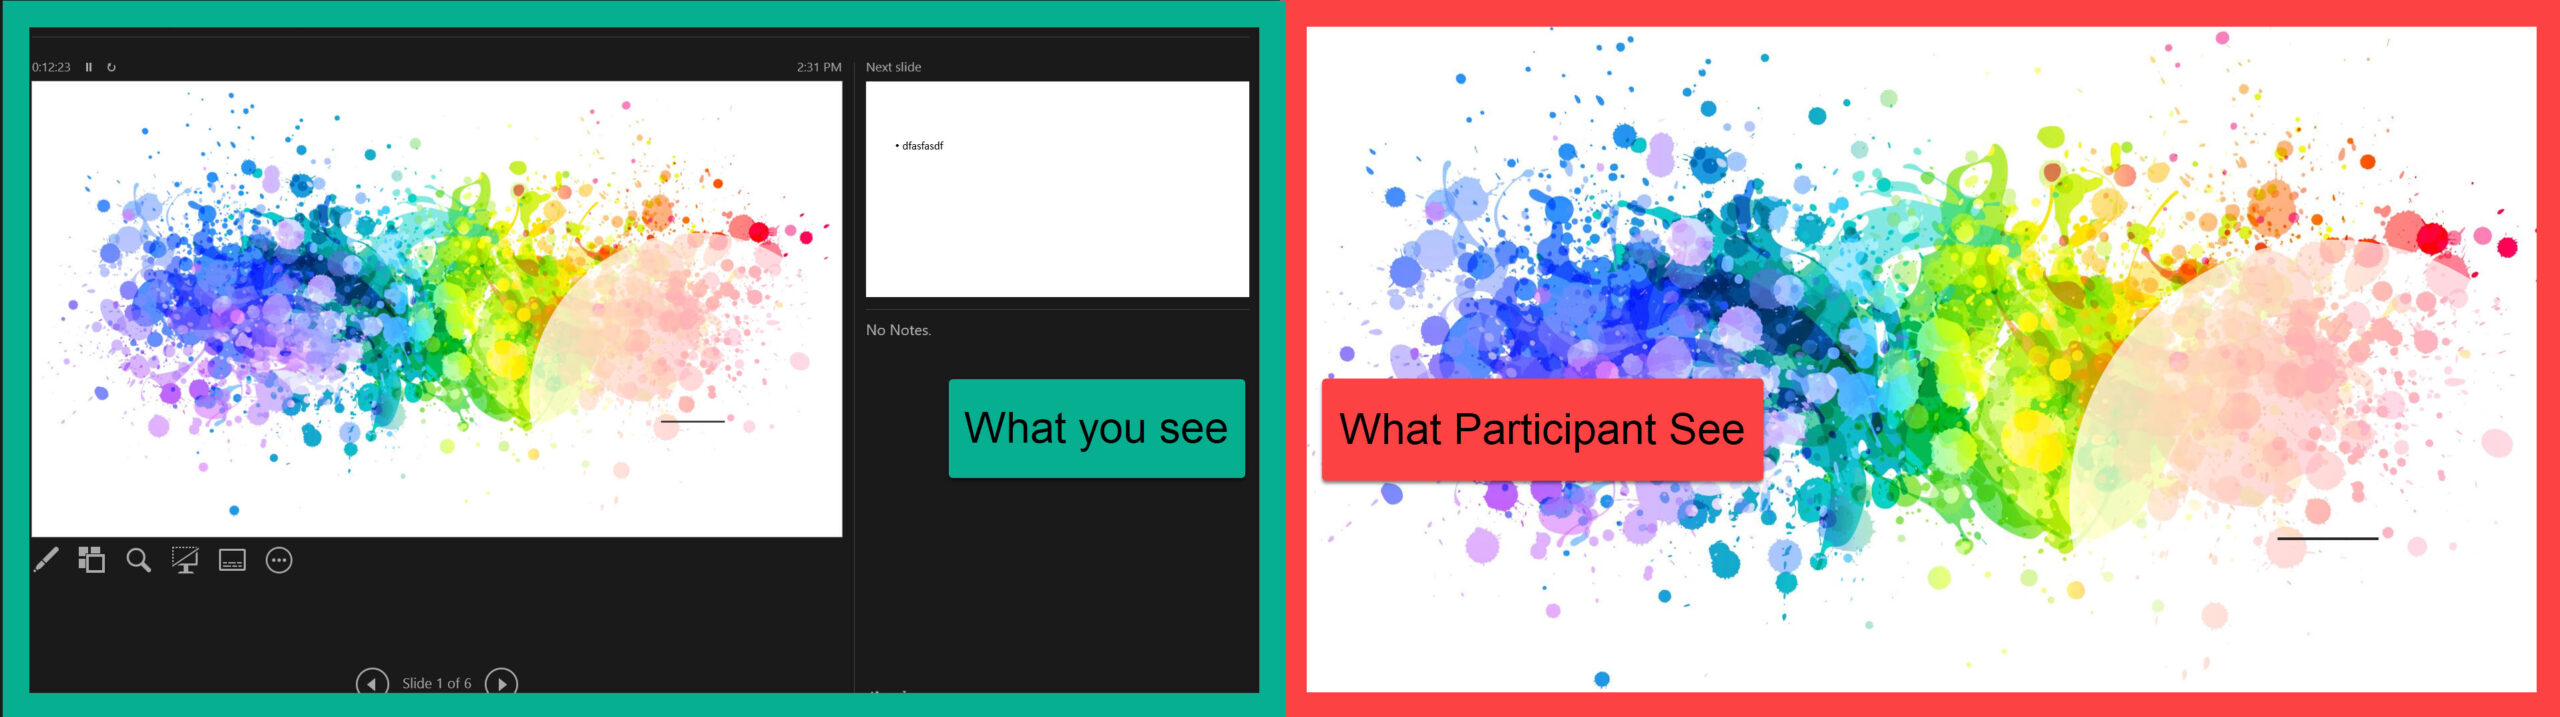
After sharing a PowerPoint this way, new options will appear in the meeting toolbar.
- Click the forward (>) or backward (<) buttons to navigate to the next or previous slide.
- Click the 4-square-grid icon to navigate to other slides.
- Click the refresh button () if you’ve updated the PowerPoint Presentation and would like to present the latest version.
- Click the settings slider icon () to expose additional options.
- Click the laser pointer or marker buttons to draw on the screen.

Sharing Microsoft Whiteboard
Microsoft Whiteboard allows you and meeting participants to draw, write, and more on a shared virtual whiteboard. Everyone in the meeting can write, edit, or delete content from the Whiteboard.
Presenter Modes
When presenting content while also showing your camera feed, Teams lets you choose between four presenter modes. Each mode offers a different layout of your camera feed and the presented content.
Choosing a Presenter Mode
- After your meeting starts, click on “Share Content” in the top right corner of Teams.
- This will show presenter modes and other content sharing options.
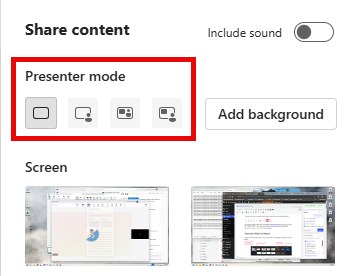
- Under Presenter mode, choose the mode that you want. For a list of the available modes and what they each do, see the next toggle.
- Optionally, select “Add background” and choose a background image.
- Finally, choose a screen, window, or other content to share.
Available Presenter Modes
In addition to the default, Content only mode, the following presenter modes are available:
| Standout presenter mode
Presenter portrait is superimposed transparently over the corner of the presentation. |
 |
| Side-by-side presenter mode
Presenter portrait is placed to the side of the presented content. |
 |
| Reporter presenter mode Presenter portrait is placed to the side and behind the presented content. |
 |
Sharing System Audio
Windows Users
When selecting which content to share, click the Include sound toggle switch to share system audio. Meeting participants will only hear songs or videos playing on your system if this option is enabled.
Set your volume appropriately so that meeting participants can hear your shared audio.
macOS Users
On a Mac, you’ll need to install the latest Teams audio driver in order to include computer audio in a Teams meeting and avoid sound issues like echoing. Once the driver is installed on your Mac, you’ll need to restart your computer. Download it here: https://aka.ms/macaudiodriver
Improving Sound Quality
Interference by other sounds reduces the sound quality (often causing it to fade out for a moment). You can preserve the quality in these two ways:
- Ensure Participants are Muted
- You can manually mute all participants by clicking the participants icon in your Teams Toolbar, and click Mute All. Be sure not to mute yourself.
- Alternatively, just ask participants to mute themselves. You can right click individual participants to mute them, as necessary.
- Reduce Background Noise
- Set up your microphone away from your keyboard and mouse.
- Avoid shuffling papers, clicking pens, or creating other noises near your mic.
- Enable or increase Noise Suppression in Teams
Stop Sharing
You can stop sharing a PowerPoint or Whiteboard by clicking Stop presenting.
For all other content, click the Stop sharing button.

Permit a Participant to Share Content
By default, only those with the Presenter or Organizer roles are permitted to share content. Organizers can adjust meeting options ahead of time to permit attendees to share content as well.
Allowing Participants to Share Content on the Fly
During a meeting, you can allow an Attendee to share content by promoting them to a Presenter.
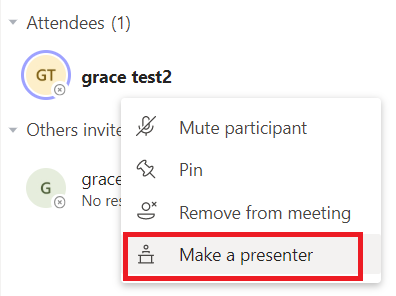
Find them in the Participants list, right-click their name, and select Make a presenter.
Disallow Participants from Sharing Content
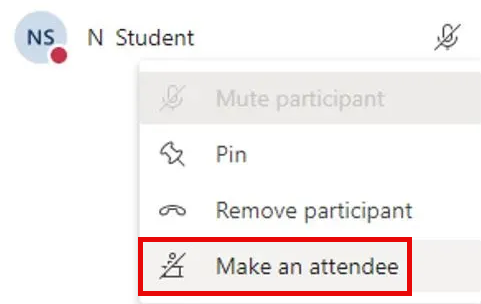
After someone is done presenting or sharing screen content, you may wish to change their role back to Attendee.
Find them in the Participants list, right-click their name, and select Make an attendee.