
 Enterprise Technology Services has created this KB guide at the request of UVM faculty and the Center for Teaching and Learning. This guide is meant to serve as an aid to students who need to capture presentations and share them remotely.
ScreenPal (Formerly Screencast-O-Matic) is an easy-to-use screen recorder that can be used to capture any area of your screen with the option to add narration from your microphone and video from your webcam.
Installation
Install ScreenPal
The steps below will walk you through the installation of Screencast-O-Matic FREE edition.
- Navigate to https://screenpal.com/uvermont. Sign in with your NetID and password if prompted
- Click the checkbox to the left of I agree to the Terms of Service, then click Launch the Recorder.

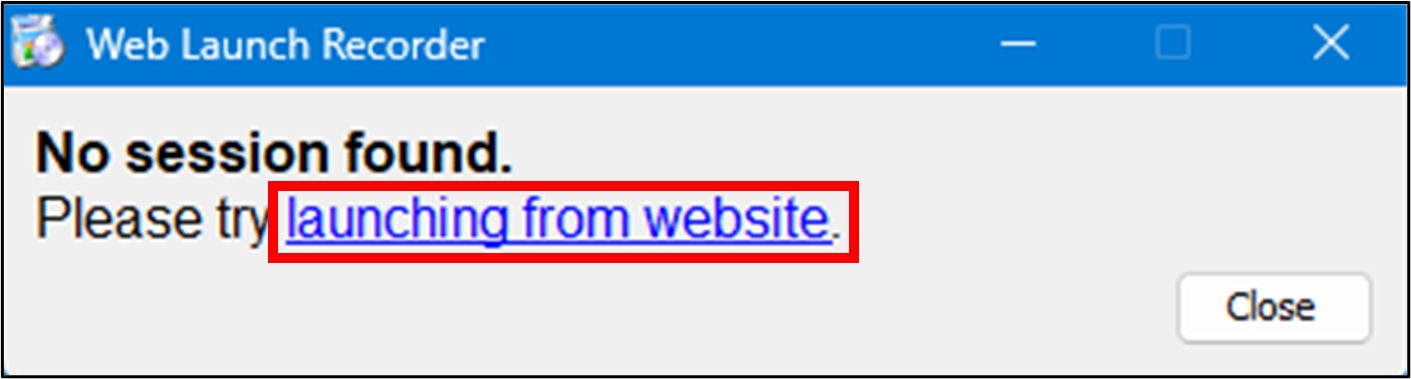
- When the download is complete, open the installer. When the installer is complete, it will show you the following window. Click launching from website.
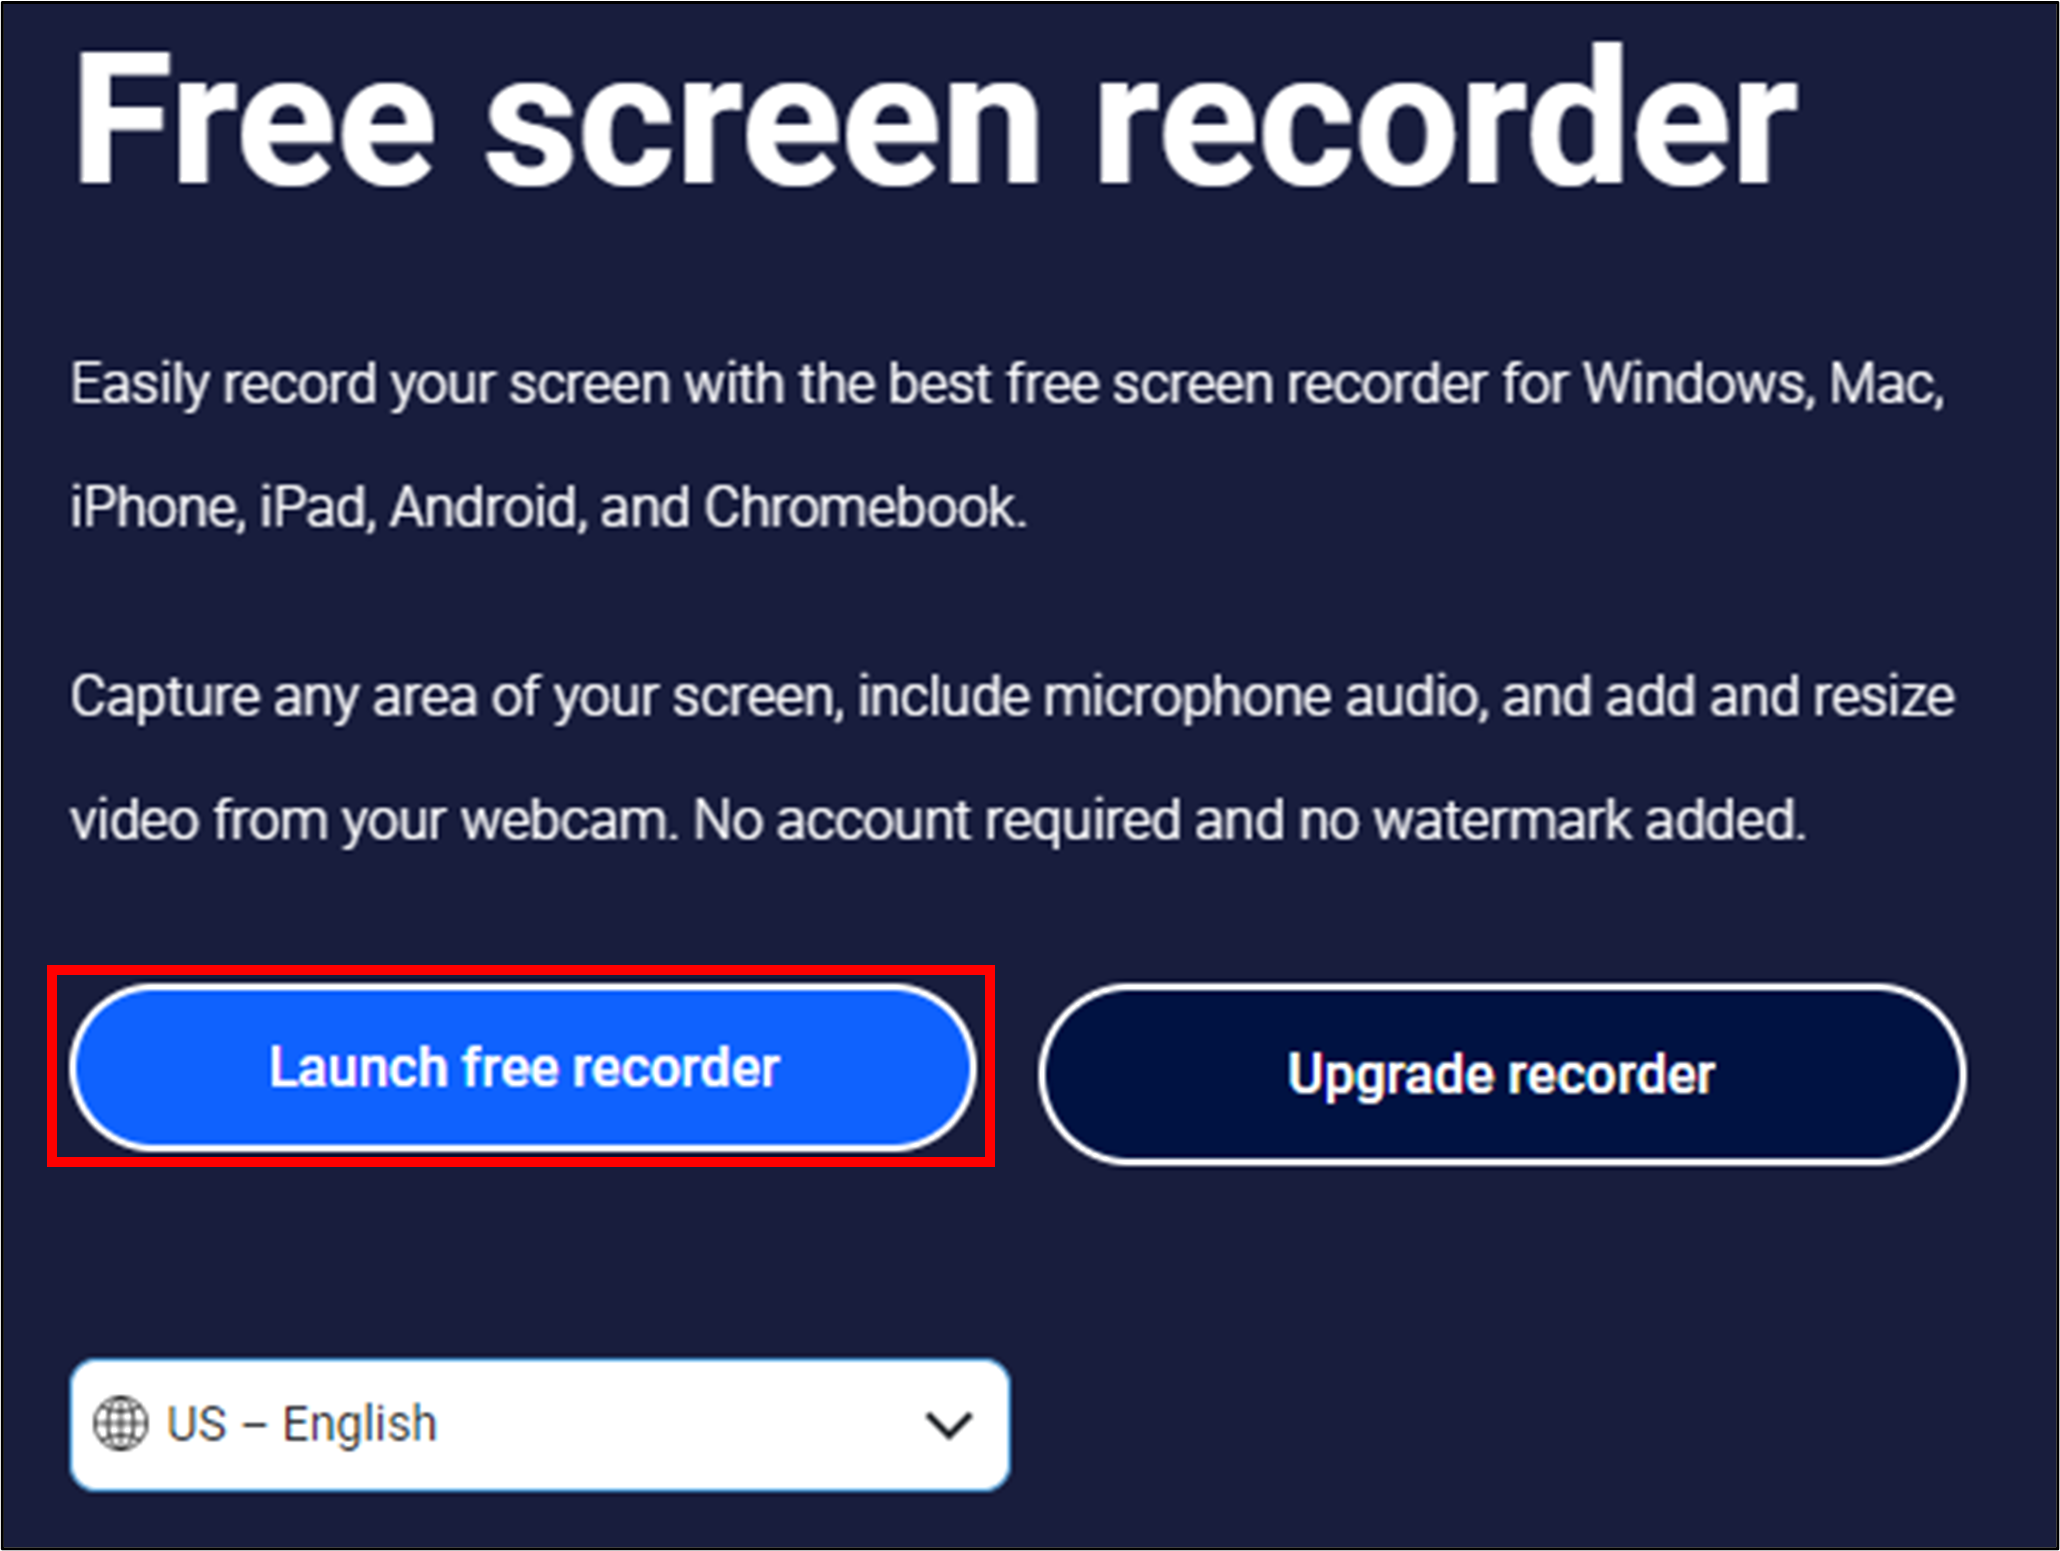
- Click Launch free recorder.
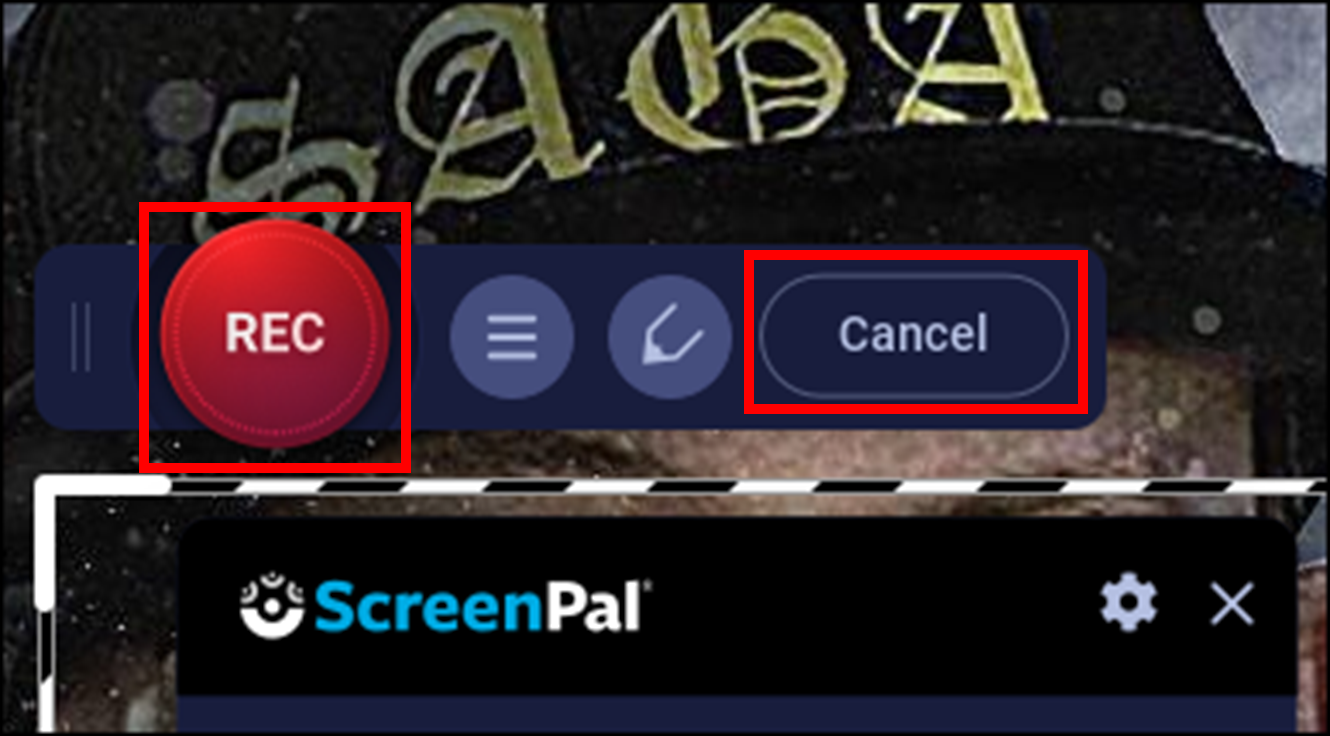
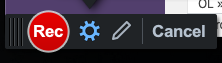
- Another installer will download. Open that up. When the installer is finished, the ScreenPal Recorder window will open. Click REC to begin recording your screen or Cancel to quit.
Create and Share a Recording
Create a Screen Recording
This portion of the guide assumes that you’ve already installed the Screen Recorder software using the Installation steps above.
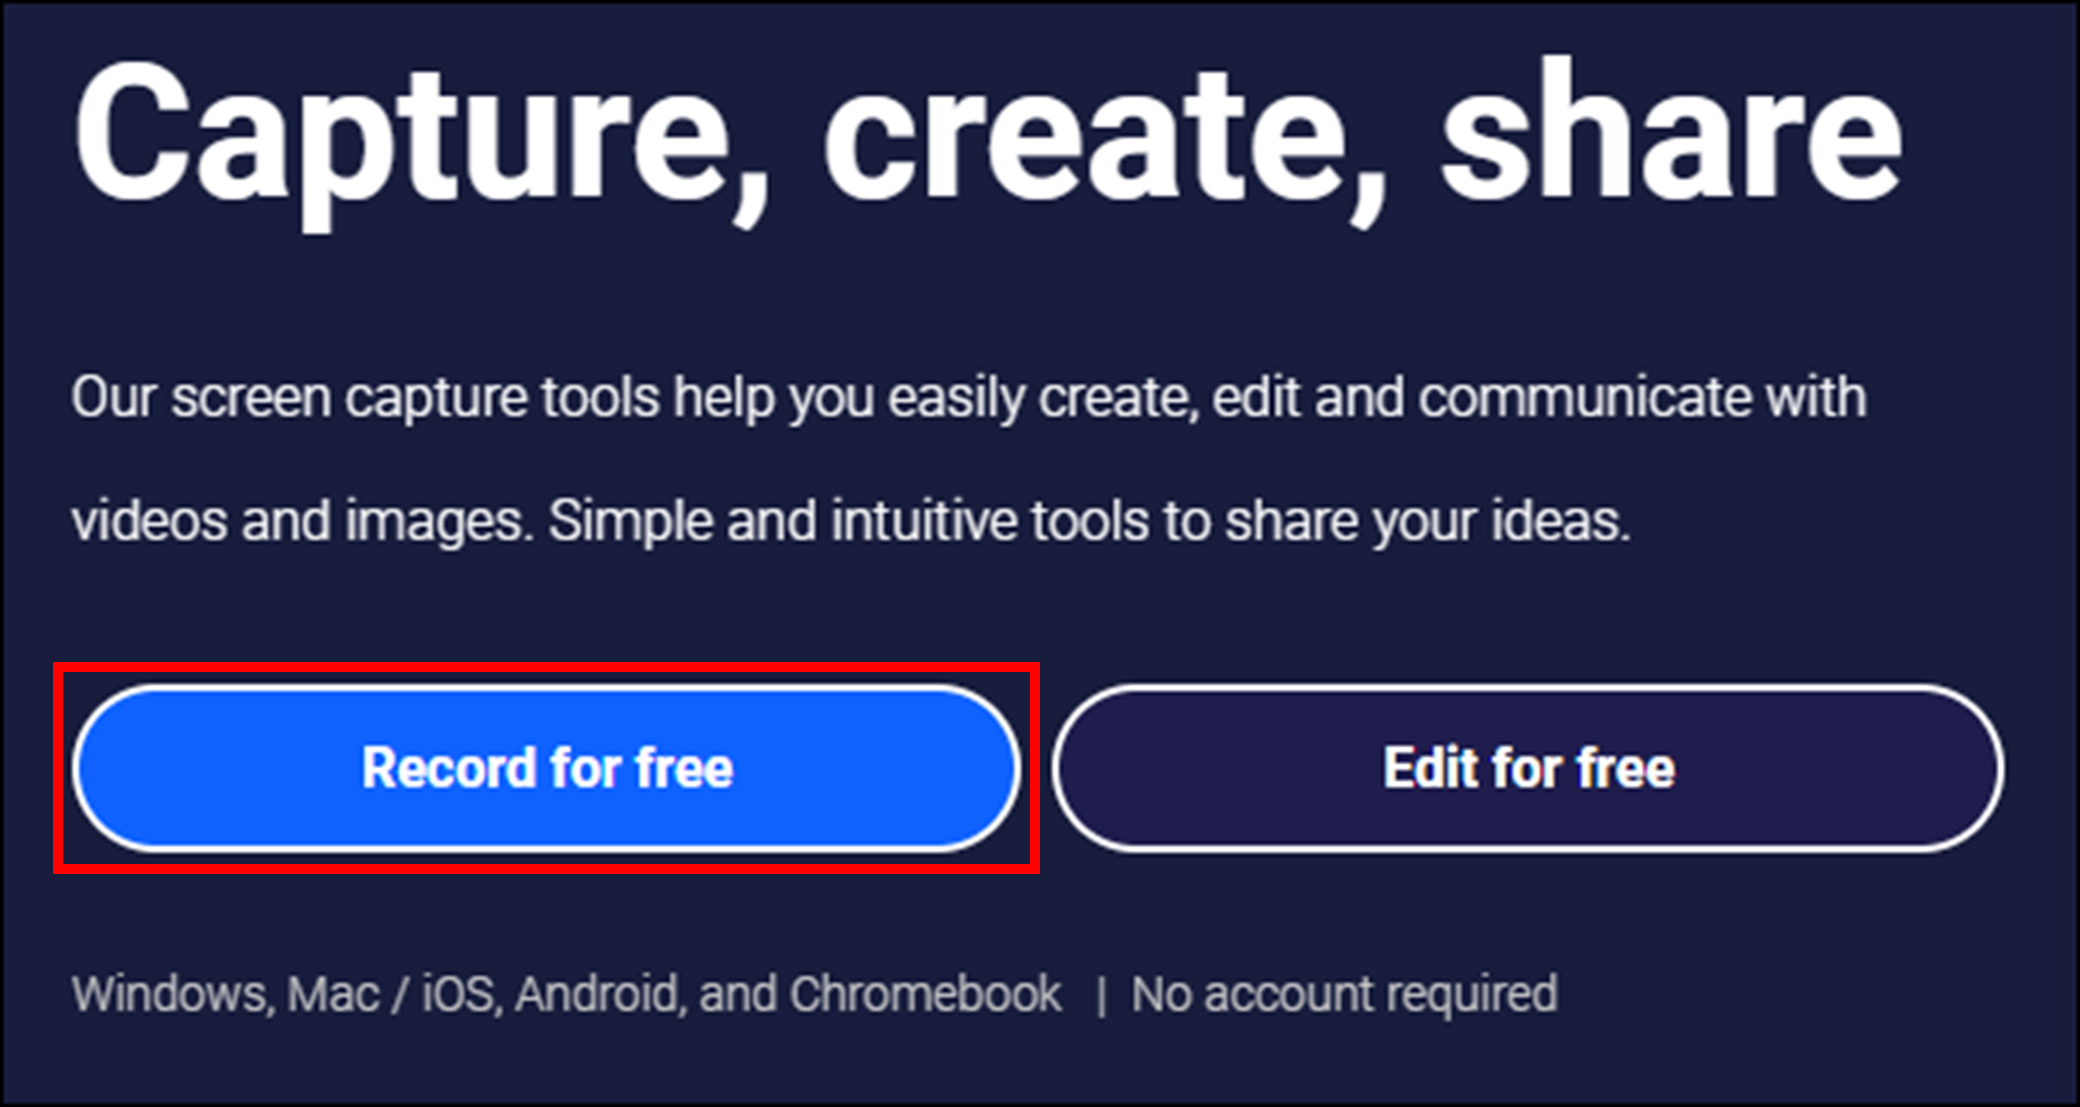
- Navigate to https://screenpal.com/, click the Record for free button.
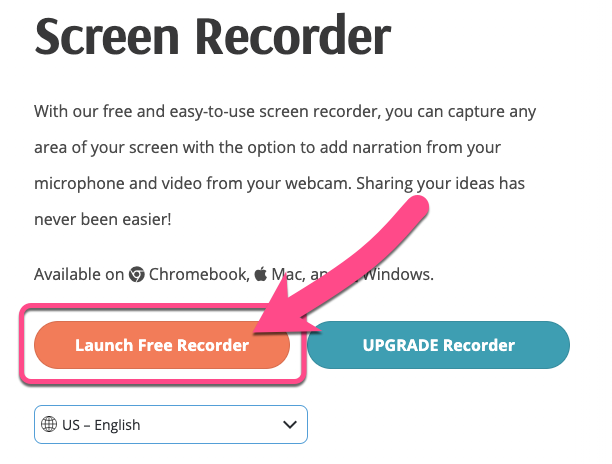
- On the next page that loads, click the Launch Free Recorder button.
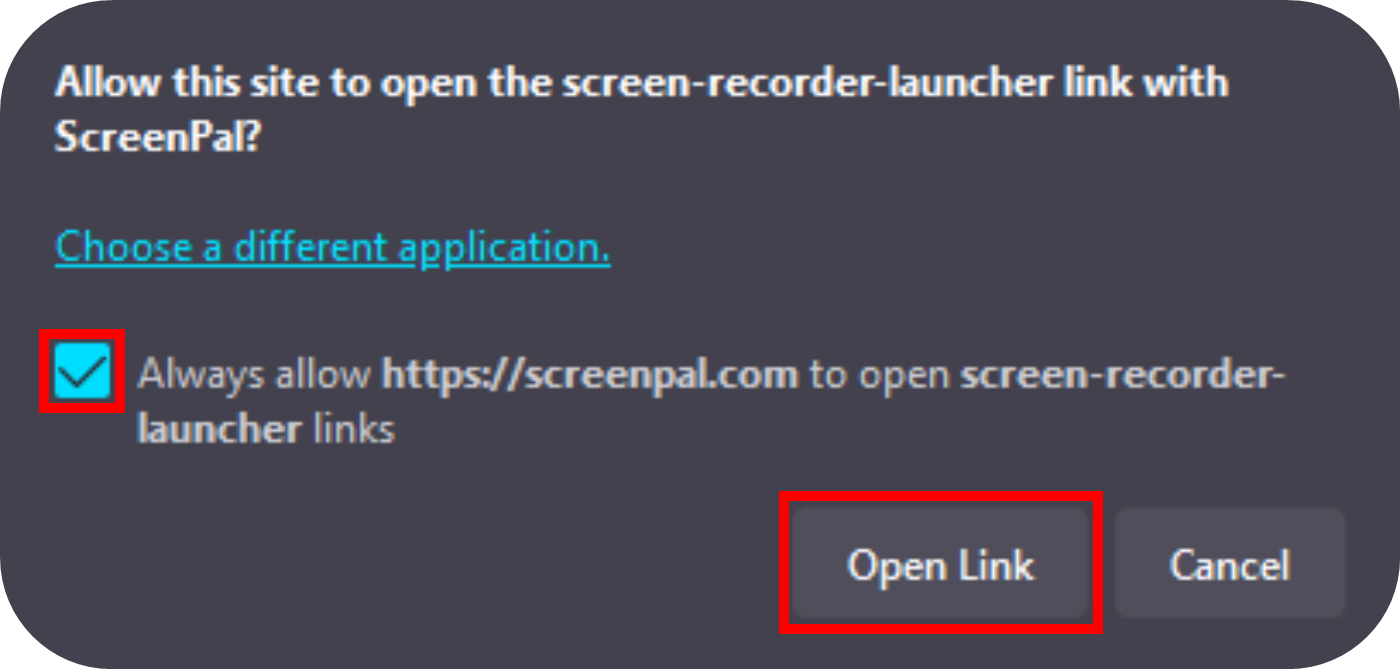
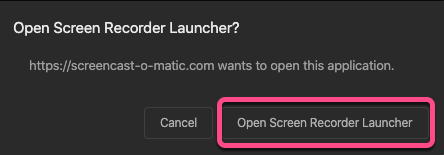
- If a file downloads, open the downloaded file. If you receive something like the following prompt, click the Open Screen Recorder Launcher or Open Link button. Check the Always allow box first to make next time easier.
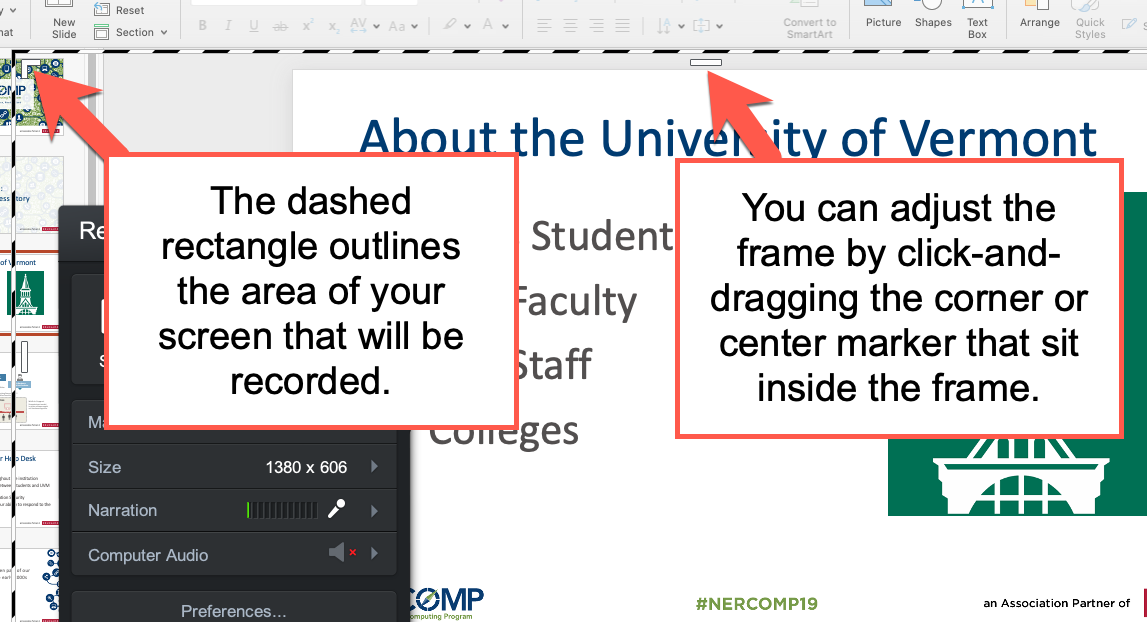
- The Screen Recorder will open. The dash rectangle outlines the area of your screen that will be recorded. You can adjust the frame by click-and-dragging the corner or center marker that sit inside the frame.
- An overview of the Screen Recorder controls – depending on the type of recording you need to make you may want to record a portion of your screen, video from your webcam, or use both:
- Screen – Record a screen capture (for things like PowerPoint presentations).
- Camera – Record using your built-in webcam.
- Both – Record an area of your screen and use the webcam.
- Narration – Select a microphone for voiceover narration. The sound meter indicates that your voice is being picked up by your selected microphone. green bars are good. Orange and red is a sign that the mic is too loud and is causing distortion. If there is no color change, try selecting a different microphone by clicking the red arrow.

- Computer Audio – This feature is not available in this version of ScreenPal.
- Preferences… – This button was replaced by a gear icon in the upper-right corner of the window.

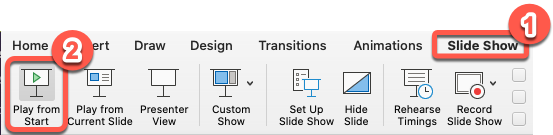
- Before you begin recording, close or minimize any unwanted applications. If recording a PowerPoint presentation, open your PowerPoint file and adjust the recording frame to capture the slides. To start your presentation, select “Slide Show” from the ribbon menu, then click “Play from Start”
- The PowerPoint will fill the entire screen. Stretch the frame recording area over the entire screen to match.
- Note: You will need to shrink the SOM recording screen out of the way to escape the PowerPoint presentation mode.

- Note: You will need to shrink the SOM recording screen out of the way to escape the PowerPoint presentation mode.
- When you’re ready, click the Rec button to start. A countdown will display 1, 2, 3 – GO. begin presenting.

- Use the Pause button to stop/restart the recording.

- Then, select Done and choose Save/Upload
- NOTE: The Edit Video option is not available in this version of ScreenPal.

- NOTE: The Edit Video option is not available in this version of ScreenPal.
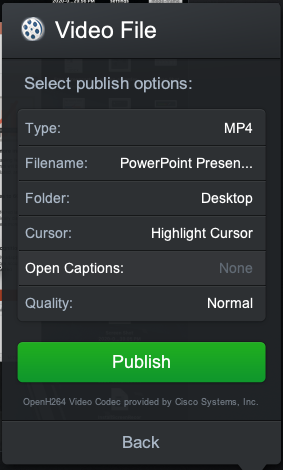
- Save as Video File.
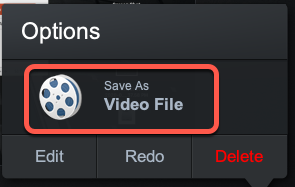
- Click the Publish button to save the recording to your computer.


Create a Webcam Recording
This portion of the guide assumes that you’ve already installed the Screen Recorder software using the “Install Screencast-O-Matic (FREE Screen Recorder version)” steps above.
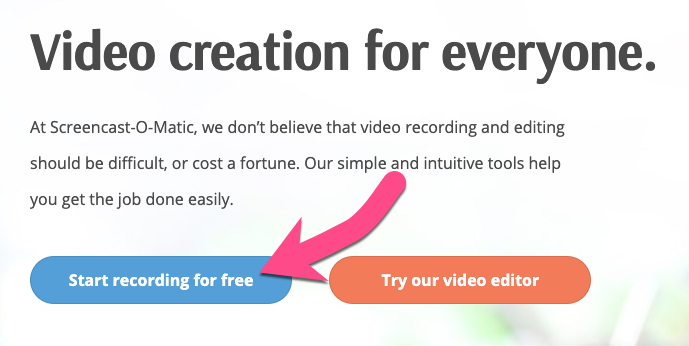
- Navigate to https://screencast-o-matic.com/, then click the “Start recording for free” button.
- On the next page that loads, click the “Launch Free Recorder” button.
- You’ll receive a prompt, click the “Open Screen Recorder Launcher” button.

- An overview of the Screen Recorder controls – depending on the type of recording you need to make you may want to record a portion of your screen, video from your webcam, or use both:
- Screen – Record a screen capture (for things like PowerPoint presentations).
- Webcam – Record using your built-in webcam.
- Both – Record an area of your screen and use the webcam.
- Narration – Select a microphone for voiceover narration. The sound meters
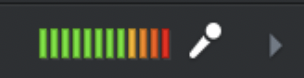 green bars indicate you have sound. Orange and red is a sign that the mic is too loud and is causing distortion. If there is no color change the microphone is not picking up sound, try selecting a different microphone.
- When you’re ready, click the “Record” button to start. A countdown will display 1, 2, 3 – GO, begin presenting.
- Use the “Pause” button to stop/restart the recording.
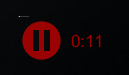
- When you’re finished your recording, press the “Pause” button, then select “Done” and choose “Save/Upload”
- NOTE: The Edit Video option is not available using the FREE version.

- NOTE: The Edit Video option is not available using the FREE version.
- Save as “Video File”

- Click the Publish button to save the recording to your computer.
Share a Recording via UVM Streaming
The Center for Teaching and Learning has created a quick tutorial for uploading video content to the UVM Streaming service.
Troubleshooting and FAQ
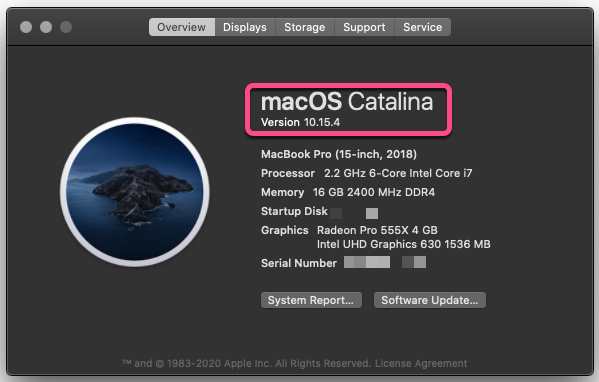
Permission Settings for macOS Catalina Users
macOS Catalina 10.15 introduced new security controls to better protect your computer. For example, apps are now required to ask your permission before accessing your webcam, microphone, or recording/sharing your screen.
To configure your security settings for Screen Recorder, please do the following:
- Check your macOS version – the following steps are only available in macOS 10.15 and higher. To check your macOS version click the menu in the top-left corner, then select “About This Mac“.
- If you’re running macOS 10.15.x or higher, continue on:
- If you’re running macOS 10.15.x or higher, continue on:
- Click the menu in the top-left corner, then select “System Preferences…“. From the window that appears, select “Security & Privacy”

- Click the padlock in the lower-left corner of the window. Enter your computer username and password – this will allow you to make the necessary changes.

- Select the “Privacy” tab. You’ll need to allow Screen Recorder to access your Camera, Microphone, Accessibility, Files and Folders, and Screen Recording. To do this, select the item from the left column, scroll through the list of applications, and make sure that Screen Recorder is checked.
- Repeat this process for:
- Camera
- Microphone
- Accessibility
- Files and Folders
- Screen Recording
- Quit and relaunch Microsoft Teams for these changes to take effect.


