
![]() Microsoft Bookings is a scheduling and appointment management tool, including a web-based booking calendar that’s integrated with staff and customer calendars. After creating services and adding staff member’s with custom availability, customers are given flexibility to book a time that works for them.
Microsoft Bookings is a scheduling and appointment management tool, including a web-based booking calendar that’s integrated with staff and customer calendars. After creating services and adding staff member’s with custom availability, customers are given flexibility to book a time that works for them.
Bookings integrates with your UVM Exchange Online calendar – when a customer creates a booking, it appears on the customer and assigned staff member’s calendars with the meeting location, an optional Teams meeting link, and other details.
Common use cases may include:
- One-on-one meetings with academic or financial advisors
- Remote meetings with IT support staff
- Collaborative sessions with groups of faculty and research assistants
Creating a New Shared Booking page
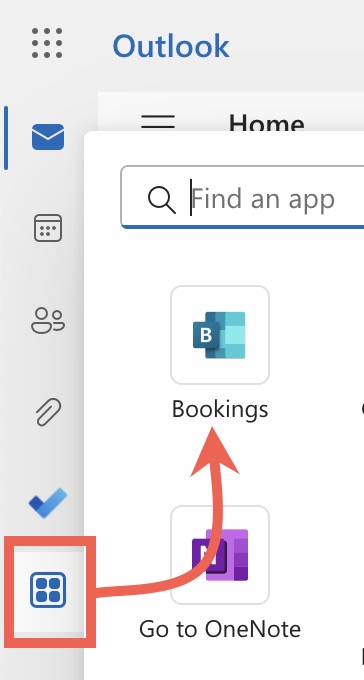
- Visit Outlook Online, sign in with your UVM account if prompted, and then click the square app chooser icon in the left-side menu and select Bookings.
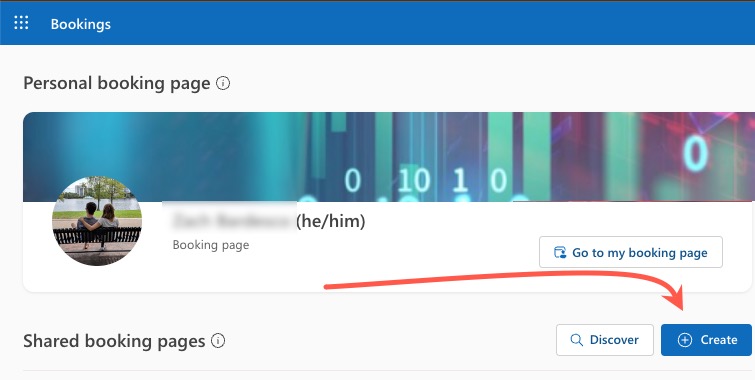
- In the Shared booking pages section, click Create.
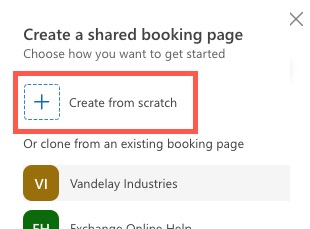
- Click Create from scratch.
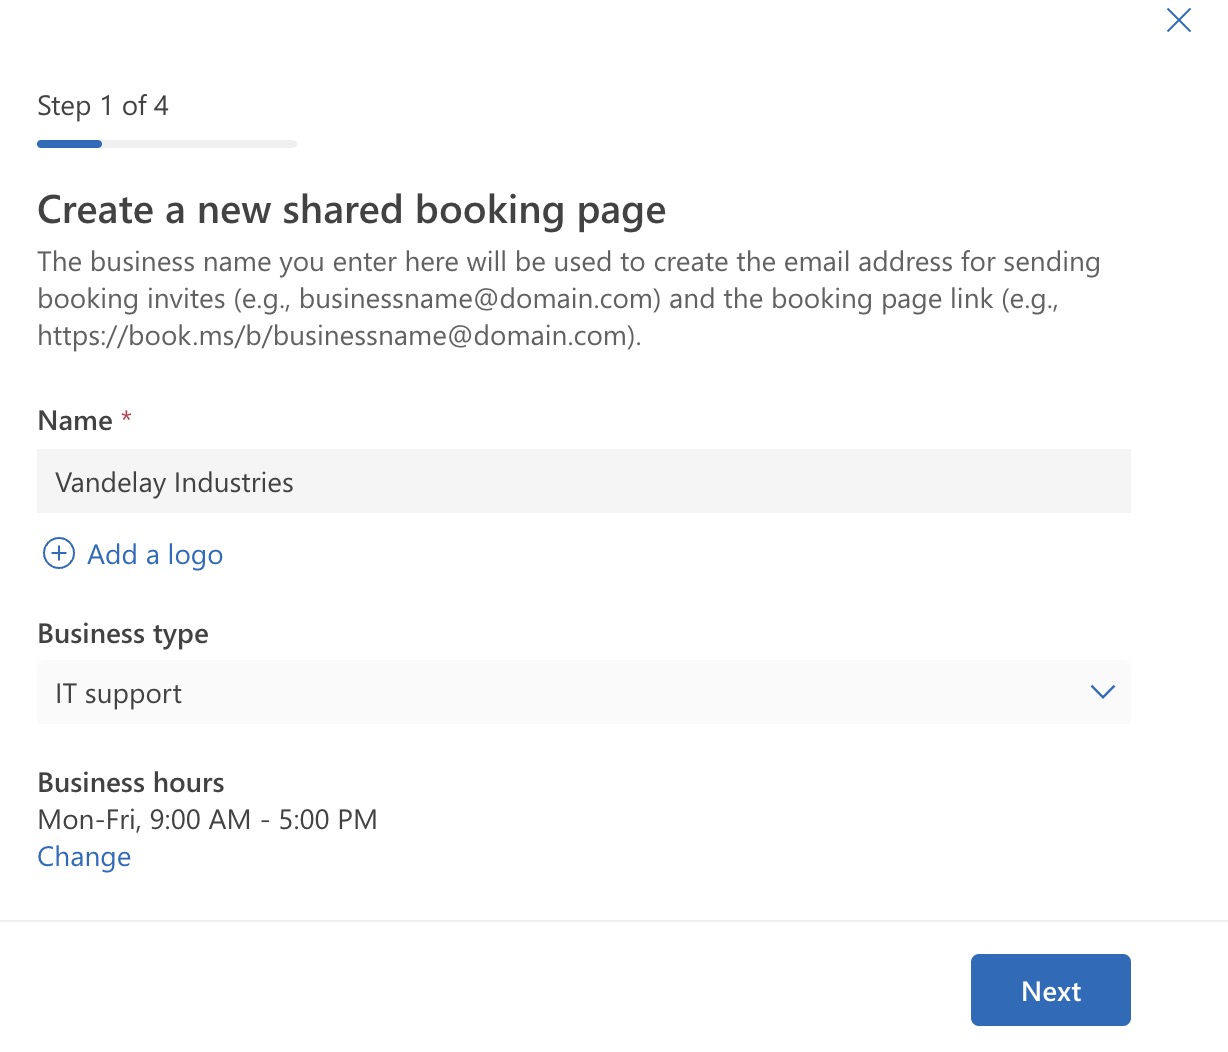
- Enter a Name, Business type, and optionally, set your Business hours. Then click Next.
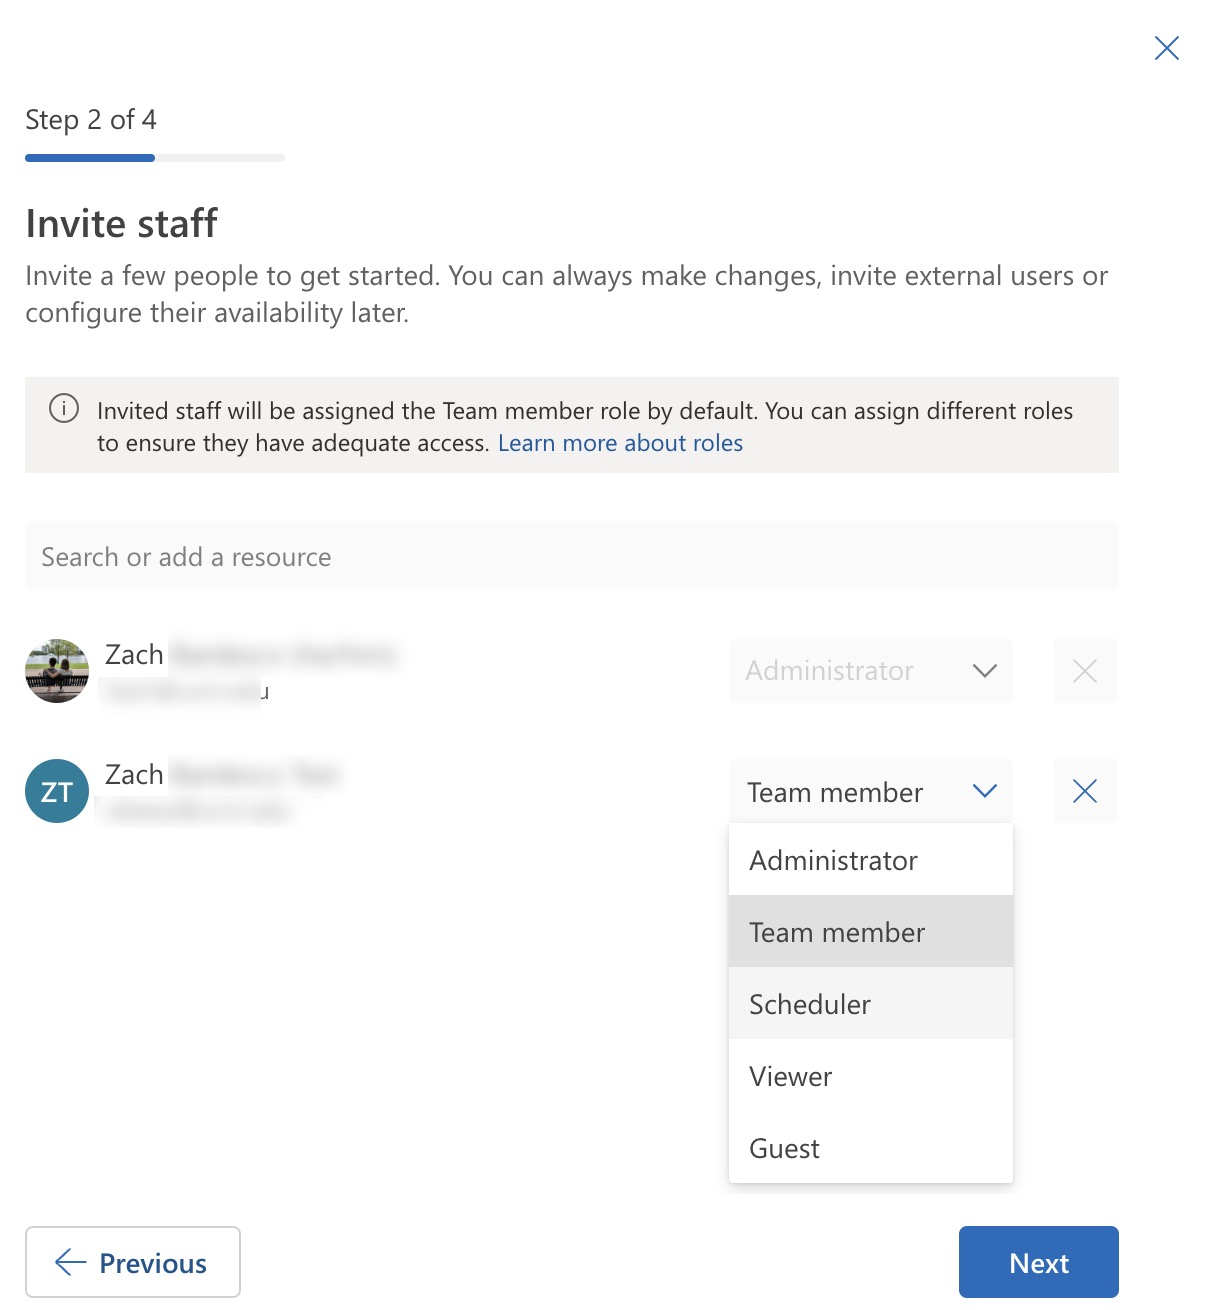
- Search for and invite staff members, assign a role, then click Next.
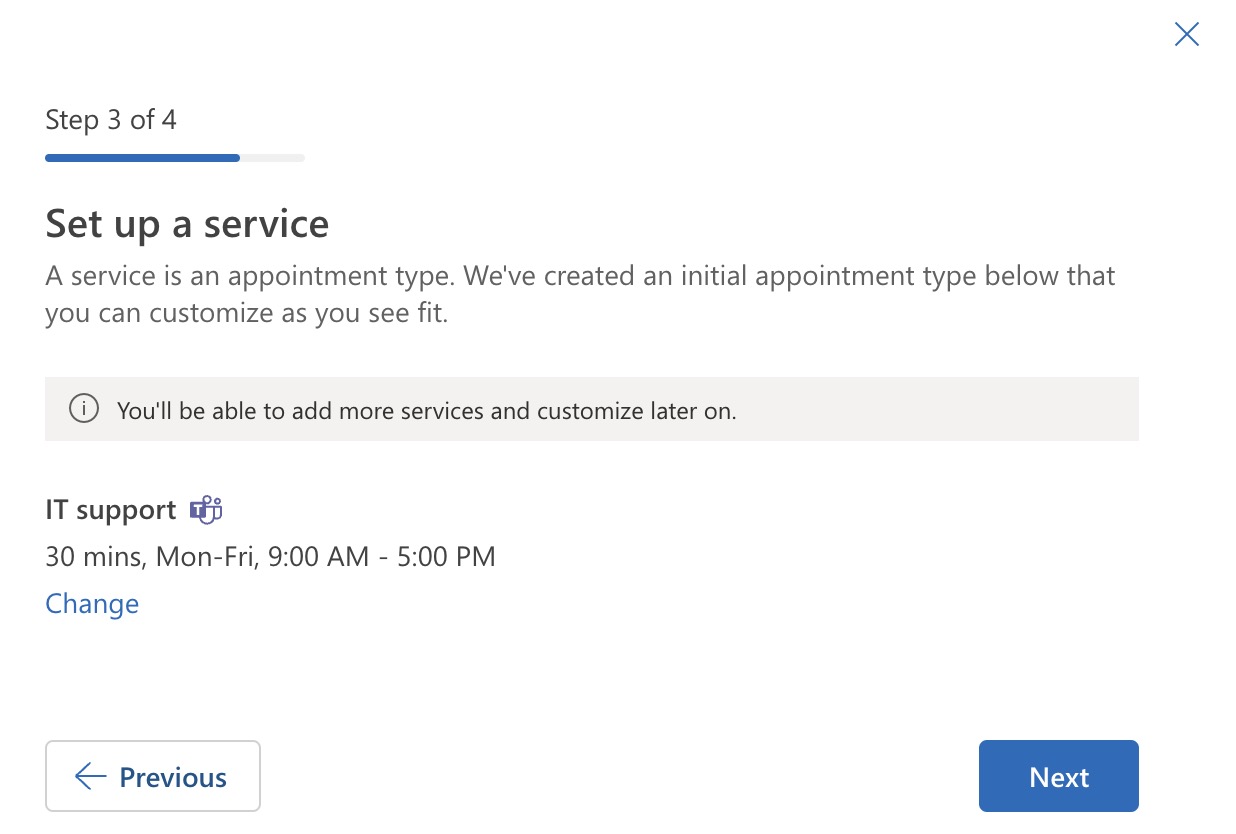
- Optionally, click Change to configure the default service, then click Next. See the Services section of this article for help.
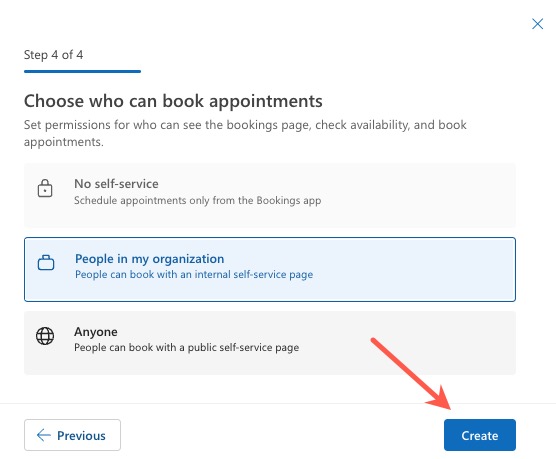
- Select who can book appointments, then click Create.
Bookings Page Administration
Shared Bookings page administrators can manually create bookings, adjust booking page settings, manage the customer and staff lists, create and manage services, and edit business details.
Create a New Booking as an Administrator
Administrators can manually create bookings for customers from the Calendar page, assigning specific staff members and selecting other booking details.
See Microsoft’s documentation for more information on creating manual bookings.
Editing your Bookings Page
Administrators can configure a variety of settings from the Booking page, including requiring a one-time password to create bookings, setting default service scheduling policy, and customizing a color theme for your page.
Explore Microsoft’s documentation for more information on editing a Bookings page.
Adding and Managing Customers
When someone signs up for a service, they are added as a customer. Administrators can review the list of customers to add or change contact information, notes, and other information.
To add a new customer:
- From the Bookings customers page, click Add new customer
- Enter the customer’s contact and other information, then click Save changes.
You can edit an existing customer by selecting them and clicking the pencil, or delete them with the trash can icon.
Adding and Managing Staff
Administrators can add staff to a bookings business from the Staff page, assigning various roles and customizing each staff member’s availability.
See Microsoft’s documentation for instructions on adding and managing staff.
Adding and Managing Services
Administrators can create various services from the Service page. Services can be created for specific business processes or consultations, with different staff assignments and customized form fields.
Please see Microsoft’s thorough documentation on creating a new service.
You can add custom fields as part of a service request to help prepare information for the booking. See Microsoft’s documentation on adding customer or required questions.
Editing Business Information
Administrators can configure a number of settings from the Business Information page, including the business name, type, contact information, business hours, and logo.
See Microsoft’s documentation for instructions on editing business information.
Troubleshooting and Frequently Asked Questions
Not finding the answer to your question below? Check out Microsoft’s FAQ.
How do I configure Scheduling Policy?
Scheduling policy includes the duration, lead and buffer time, and automatic notifications of booking cancellation. These settings can vary by each service.
See Microsoft’s documentation on managing scheduling policies.
How do I delete an existing Bookings Shared page?
Deletion of a bookings page can only be done by Systems Administrators.
Shared Bookings page administrators can contact the Tech Team to submit a request for page deletion. Be sure to include the name of the Bookings page.
What happens when a service is deleted?
When a service is deleted, existing appointments and their assigned staff, customers, and other details are retained.
What happens when a staff member is removed from a Shared Bookings page?
When a staff member is removed, all their appointments become unassigned and a different staff member will need to be manually assigned.
Can I use Calendly instead?
UVM has not approved the general use of Calendly with UVM accounts.
Using this service has required providing your UVM NetID credentials to a third party, in violation of UVM’s Information Security Policy. Now that UVM email and calendar services have transitions to Microsoft 365, stricter authentication prevents the use of Calendly with a UVM username and password.
You’ll find much of the same functionality in Bookings as you find in Calendly and other similar software, but Bookings is included in our Microsoft 365 license (free), institutionally approved, and tightly integrated with other Microsoft products we’re already using.