
![]() Microsoft Teams is a collaborative communications platform that incorporates a persistent chat, video calls/meetings, and file sharing (including collaborative editing of documents).
Microsoft Teams is a collaborative communications platform that incorporates a persistent chat, video calls/meetings, and file sharing (including collaborative editing of documents).
For Teams basics, see our Microsoft Teams – Getting Started article.
For other Teams guides, see the Index of Teams articles.
Installing Teams
Windows - Personally owned computers
- Download the installer from: teams.microsoft.com/download
- When the download completes, launch the installer and follow the installation prompts using the default settings.
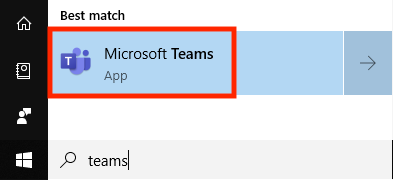
- When the installation of Teams has finished, click the button and search for Teams.
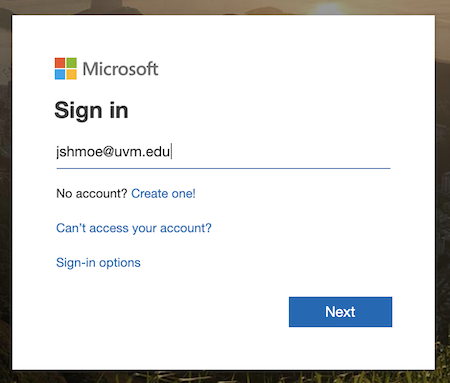
- Enter your UVM email address, then click Sign-In.

- Sign in with your UVM netID and password.
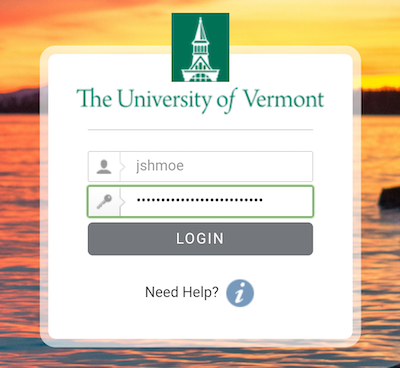 You should now be signed into Teams.
Windows - UVM owned computers
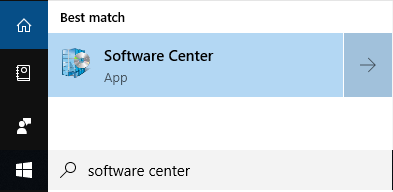
- Click the button and search for Software Center.
- In Software Center, click Microsoft Teams.
- If you do not see Microsoft Teams on the initial page, search Teams and select Microsoft Teams from the search results.
- Click Install.
- When the installation of Teams has finished, click the button and search for Teams.
- If Microsoft Teams does not appear in the results, please restart your computer, then try this step again.
- Enter your UVM email address, then click Sign-In.
- Sign in with your UVM netID and password.You should now be signed into Teams.
macOS - Personally owned computers
- Download the installer from: teams.microsoft.com/download
- When the download completes, launch the installer and follow the installation prompts using the default settings.
- When the installation of Teams has finished, open Microsoft Teams from your Applications folder, or by searching “Teams” in spotlight search.

- Enter your UVM email address, then click Sign-In.
- Sign in with your UVM netID and password.You should now be signed into Teams.
macOS - UVM owned computers
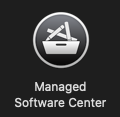
- Open Managed Software Center from your Applications folder, or by searching “Managed Software” in spotlight search.
- In Managed Software Center, click Install under Microsoft Teams.
- If you do not see Microsoft Teams on the initial page, search Teams and select Microsoft Teams from the search results and click Install on the resulting page.
- When the installation of Teams has finished, open Microsoft Teams from your Applications folder, or by searching “Teams” in spotlight search.
- Enter your UVM email address, then click Sign-In.
- Sign in with your UVM netID and password.You should now be signed into Teams.
Android
- Install Microsoft Teams from the Google Play Store.
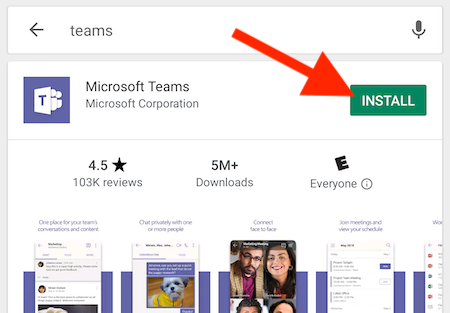
- Once installed, open the Teams app.
- Tap Sign in, enter your UVM email address, then tap Sign in again.
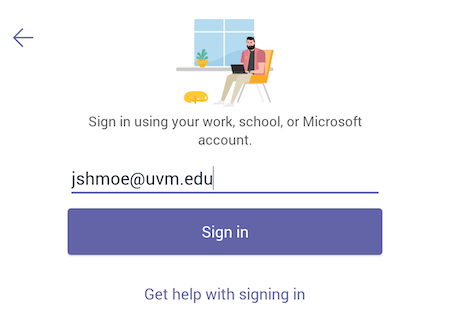
- Log in with your UVM netID and password.
You should now be signed into Teams.
iOS
- Install Microsoft Teams from the Apple App Store.
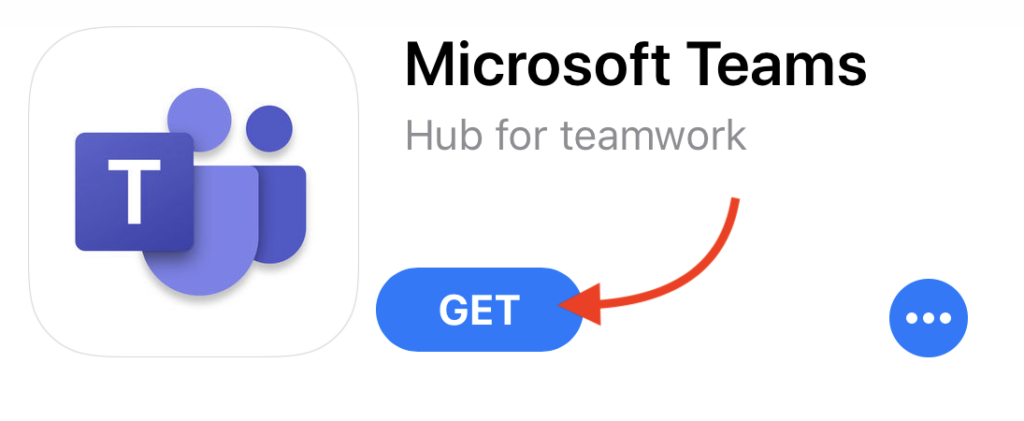
- Once installed, open the Teams app.
- Tap Sign in, enter your UVM email address, then tap Sign in again.
- Log in with your UVM netID and password.
You should now be signed into Teams.

Teams on the web
- Go to teams.microsoft.com
- Enter your UVM email address, then click Next.
- If prompted afterwards, sign in with your UVM netID and password.
 You should now be signed into Teams.
Troubleshooting
I can't sign in to Teams - Ask your admin to enable MS Teams

If you receive an error prompting you to contact your admin to enable Teams access, your UVM account does not yet have an MS Teams license provisioned to it.
To request a MS Teams license, please email techteam@uvm.edu or submit a help ticket.