If you do not already have the Cisco Secure Client app installed on your computer, you can install it using the guide here.
Address Options
There are two addresses available for connecting to UVM’s Virtual Private Network (VPN). Please use the table below to see which address best meets your desired use case.
| VPN addresses | sslvpn.uvm.edu | sslvpn.uvm.edu/full |
|---|---|---|
| Access to Network Folders? | Yes, both addresses will allow you to access your Zoofiles and department Shared drive. | |
| Print to home network printers? | Yes, you can print to home printers while connected. | No, you can only print to UVM networked printers. |
Logging In
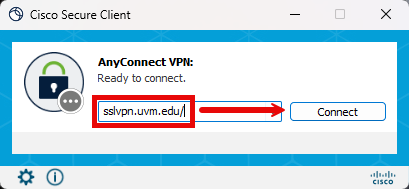
- Open the Cisco Secure Client app.

- Enter either sslvpn.uvm.edu or sslvpn.uvm.edu/full in the text field, and then click Connect.
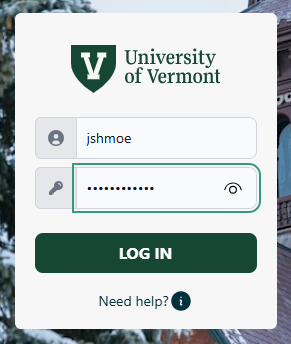
- Enter your NetID and your NetID Password into the Single Sign-On window that appears, and then click LOG IN.
- Proceed through the Duo prompt.
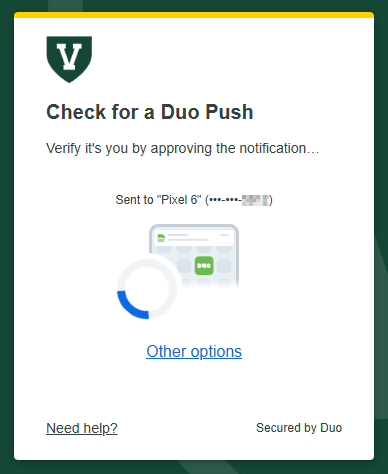
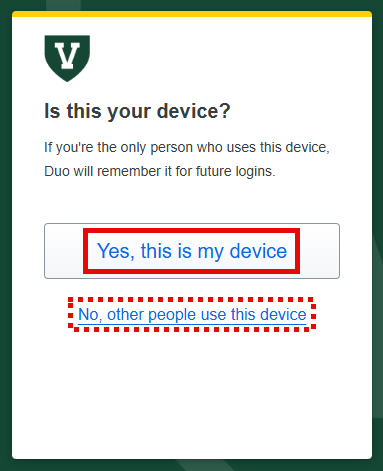
- If you’re on your own computer, and you’d like to skip the Duo prompt next time, click Yes, this is my device. Otherwise, select No.
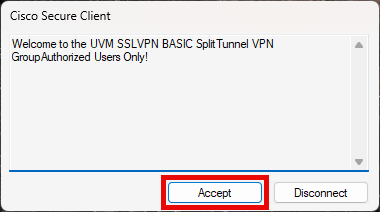
- Upon successful authentication, you will receive a welcome banner. Click Accept to close the banner and finish connecting.
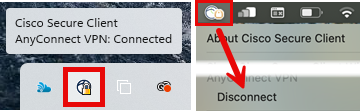
- You can tell you’re connected by looking in the notification tray, found in the bottom-right corner of Windows (you may have to click the up arrow to Show hidden icons) or the upper-right corner of macOS. The Cisco Secure Client icon appears with a lock over it when connected. When you’re ready to return to a standard internet connection, click that icon and then click Disconnect to disconnect from the VPN.