
The following guide provides printing instructions for CEMS Students.
Windows
Adding CEMS-Student-Printers to Your Computer
- Open Windows File Explorer (the folder icon on the Windows taskbar) and type \\printers-cems.campus.ad.uvm.edu into the address bar, and hit enter
\\printers-cems.campus.ad.uvm.edu
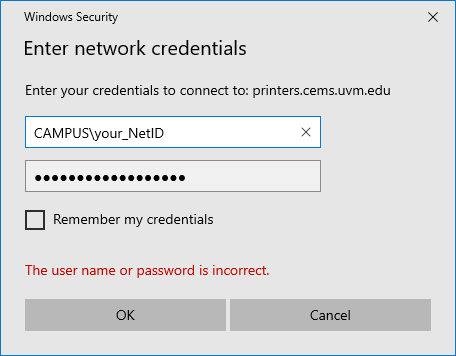
- You will be prompted for a username and password to connect to the printer server. Enter CAMPUS\your_NetID for the username and your NetID password in the password box
- Double-click CEMS-Student Printers from the list of available printers
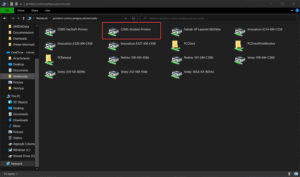
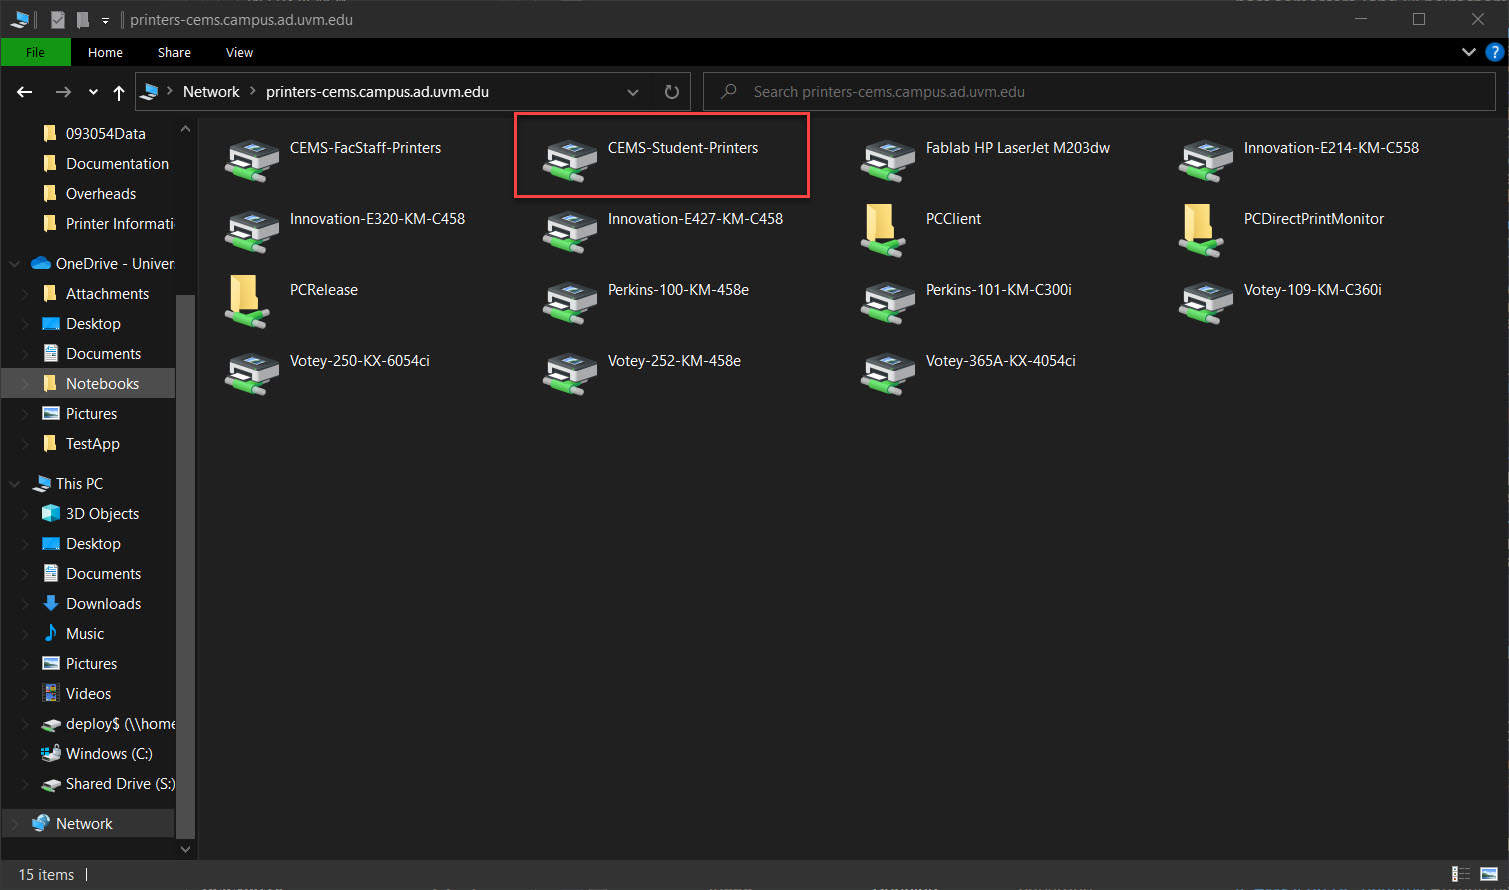
You should now be able to print to any student copier on campus
macOS
Adding CEMS-Student-Printers to Your Computer
- Open System Preferences > Printers & Scanners
- Click the (+) button within Printers & Scanners
- Click on the Advanced tab
- If you don’t see the Advanced tab, right-click anywhere on the blank space at the top and select Customize toolbar, then drag the Advanced icon up to the top bar.
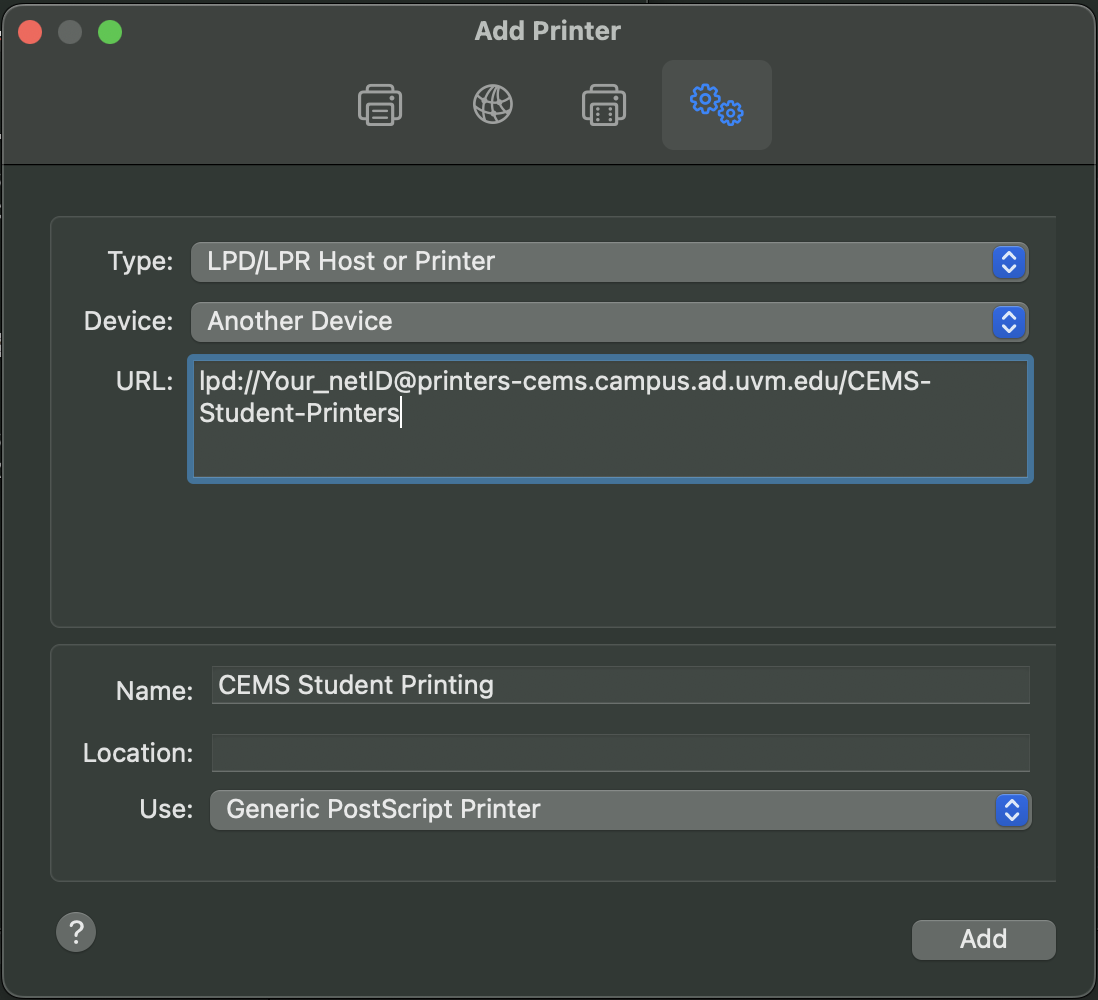
- Printer Settings:

- Type: Select LPD/LPR Host or Printer
- Device: Select Another Device
- URL: Enter lpd://Your_netID@printers-cems.campus.ad.uvm.edu/CEMS-Student-Printers
- Name: Can be anything (Ex. CEMS Student Printing)
- Use: Select Generic PostScript Printer
- Click Add
- Check the Box for Duplex Printing, then click OK

Release a Print Job
CatCard Release
- Swipe your card at the copier’s scanner
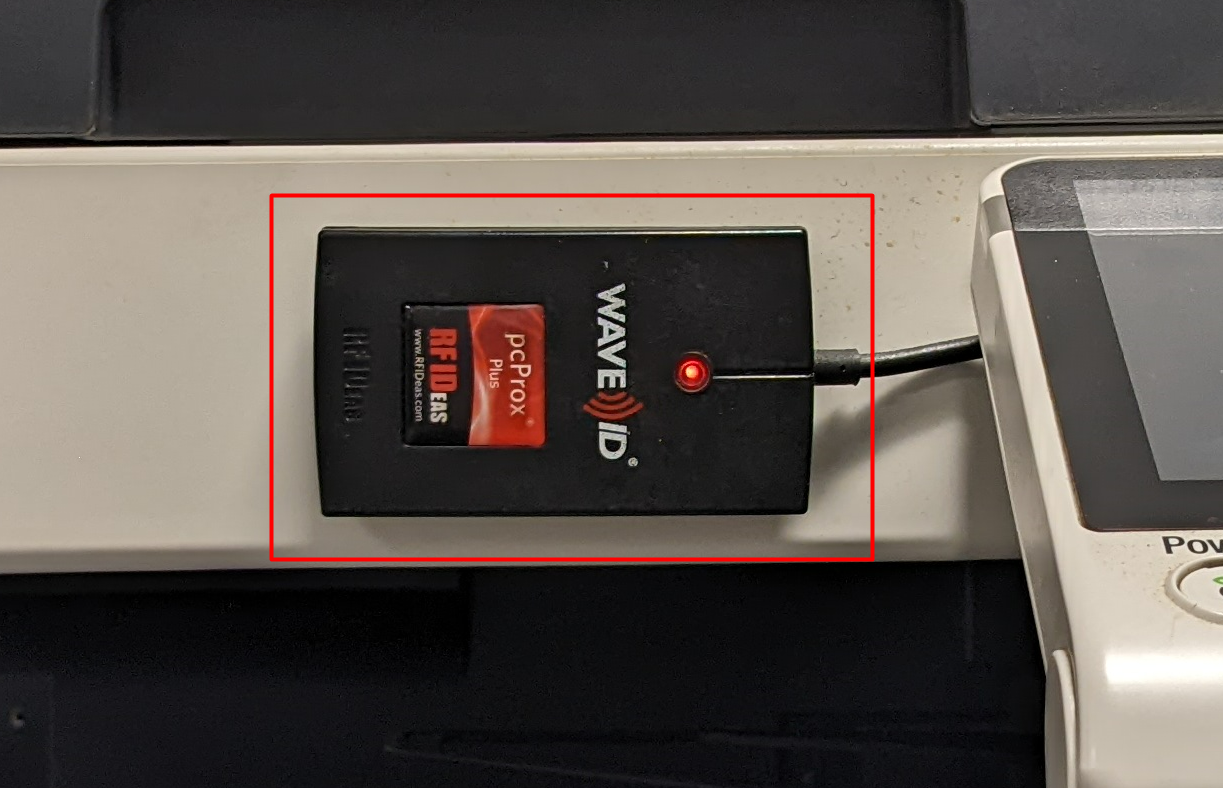
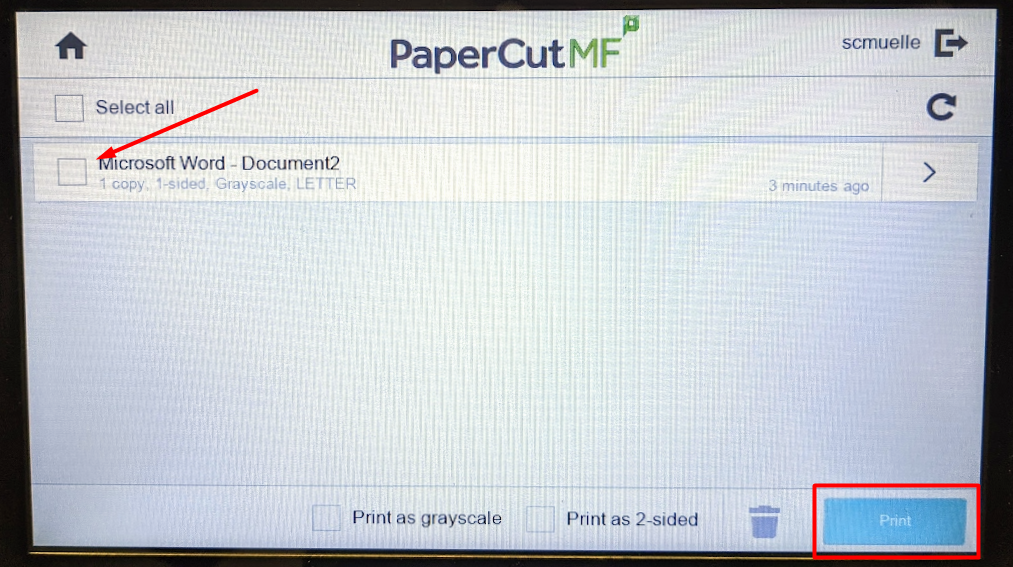
- At the printer’s display, select Print Release

- Select the jobs you’d like to release and press the Print button
Mobile Release
Each of the CEMS copiers has a QR code attached to it. Scan this QR code with your phone’s camera to begin Mobile Release.
- Scan the QR code located at your printer. You’ll be presented with the following login screen
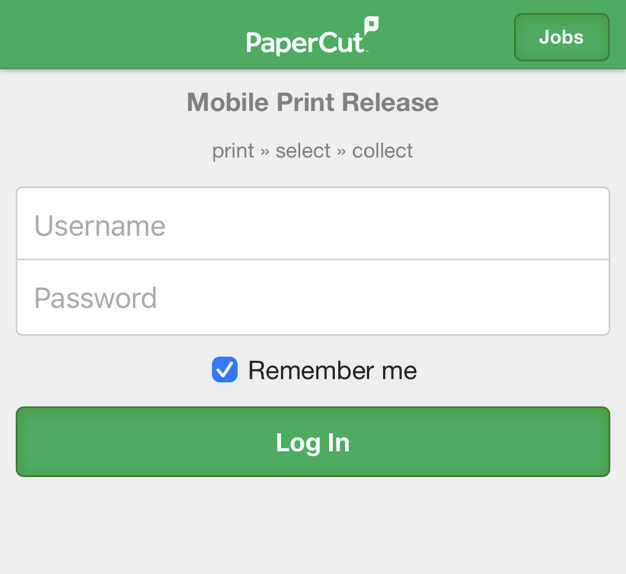
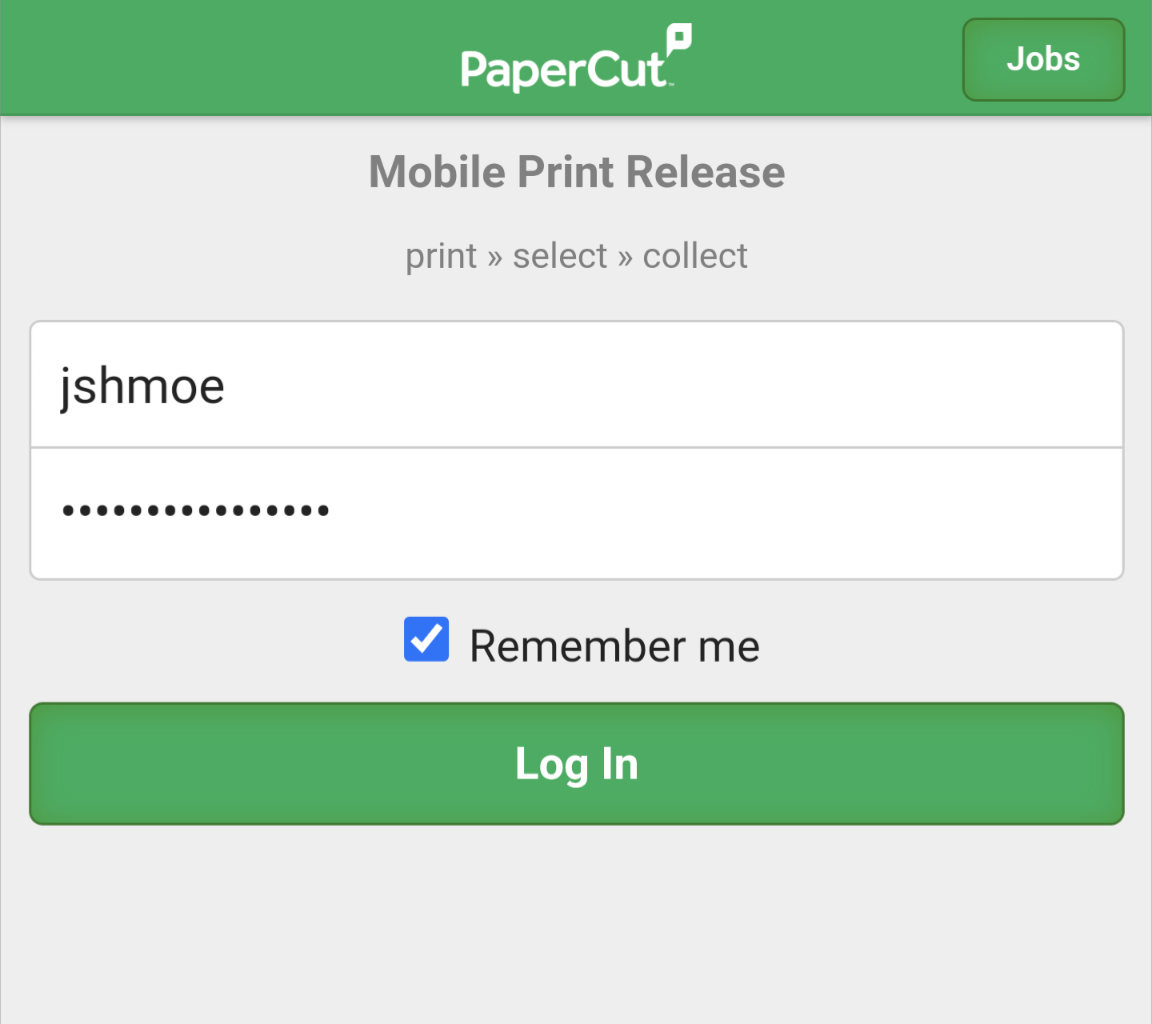
- Authenticate using your netID and netID Password
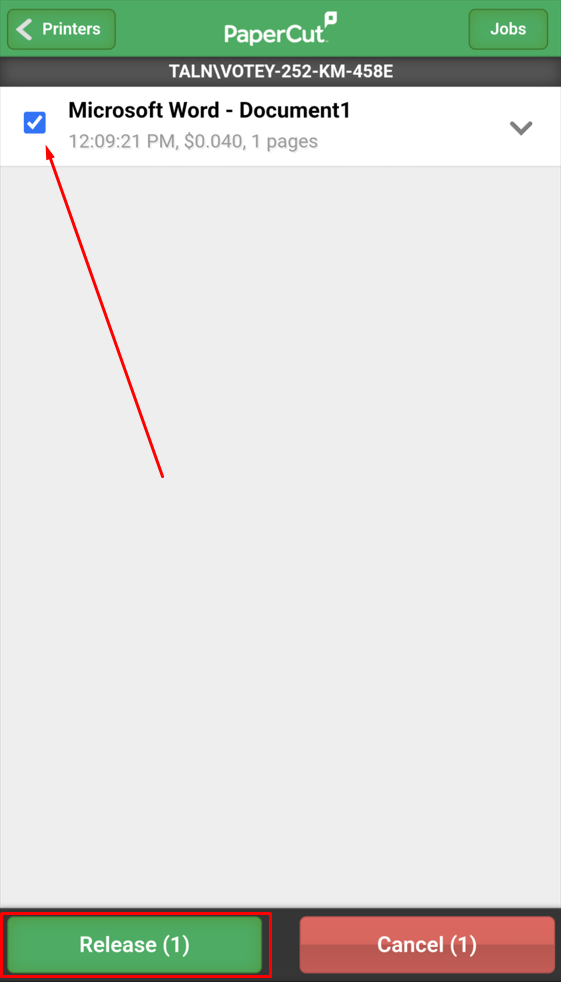
- Release your print job by selecting the document you’re trying to print and pressing the Release button
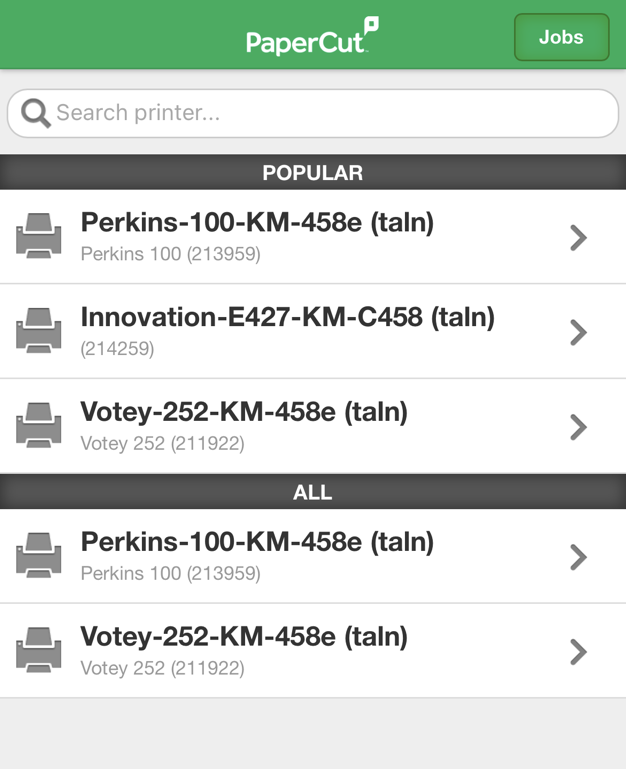
- Select your copier from the list below
- Release your print job by selecting the document you’re trying to print and pressing the Release button
Other Printer Features
Scanning
Students can scan using the printers as well. To scan, log in with your CatCard and hit the scan button. The scan will be sent to your UVM email address as a PDF.
PaperCut also allows for scanning directly to OneDrive. This allows scan jobs to exceed the standard 20 MB limit imposed by email attachment size limits. To scan to OneDrive, follow these instructions.
- Scan your CatCard to log in to the copier and select Scan.
- You will see two options, Scan to Email or OneDrive, tap OneDrive.
- Select your scan settings and tap start.
- Check your email for an email labeled “Authorize Scan for PaperCut MF to save to your OneDrive for Business” and click the “Login to OneDrive for Business” button.
- You will be asked to log in to your UVM Microsoft account, enter your email as “netid@uvm.edu”. If you are not already logged in through UVM’s WebAuth you will be presented the standard login screen. Log in and you will then see a confirmation page.
- You will then receive an email when your scan is successfully saved to your OneDrive, it will appear in the folder “Apps/Scans for PaperCut MF”.
Copying
Students can also copy on the printers. To copy, log in with your CatCard and hit the Device Functions button. This will bring you to a different screen with a copy button on it. Hit the Copy button and make copies. To log out from this screen, click the Access or Authenticate/Logout button on the right side of the control panel.