Your professors may have different policies for office hours. Some of them may put an open meeting on the calendar where students can click “Join” and either have to wait until they’re admitted or enter immediately into the meeting with other students.
However, other instructors may instead (or also) have blocked out times on their calendars where they are available to meet with students privately. If the policy in your class is that students should make the appointments for private office hour meetings on Microsoft Teams, follow these steps. If you are not sure what the policy is, check your syllabus first, then ask your instructor.
- Open Teams, sign in with your UVM account, and click “Calendar” on the left.
- Navigate to the date your instructor has indicated for office hours.
- Click on that day, approximately during the office hours time span. Don’t worry about the specific time yet, this will be set in a later step.

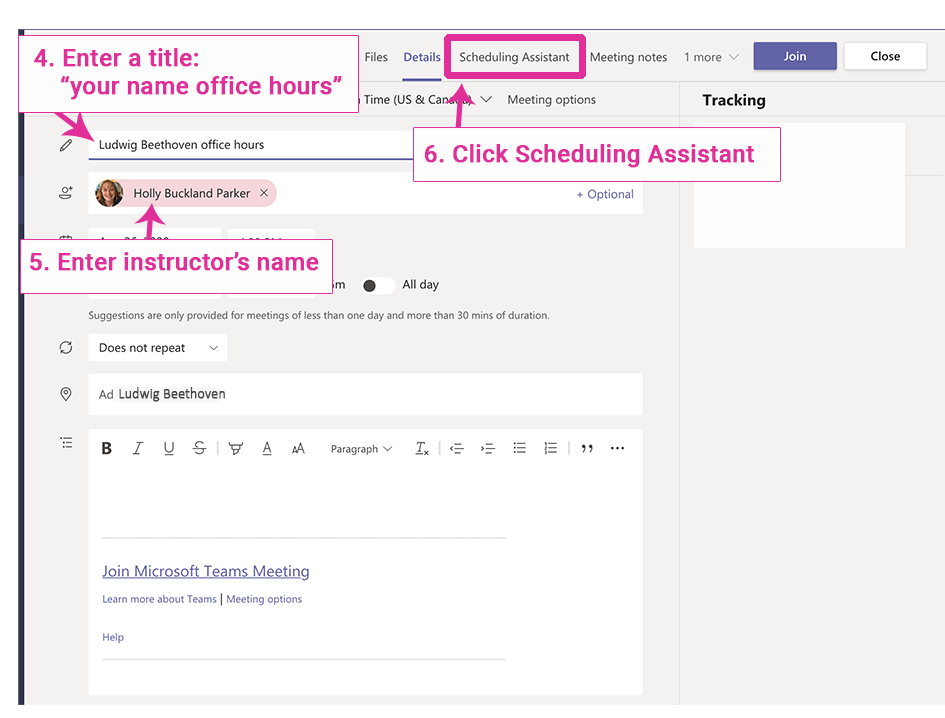
- You will now see the New Meeting window. For the meeting title, enter “[your-name] office hours” (your name in the meeting title lets your instructor see at-a-glance who they will be meeting with).
- Where it says “Add required attendees” type in or paste your instructor’s name. Be sure to spell it right so the correct person comes up as an option, then select it so their name appears as the attendee.
- Click “Scheduling Assistant” at the top.
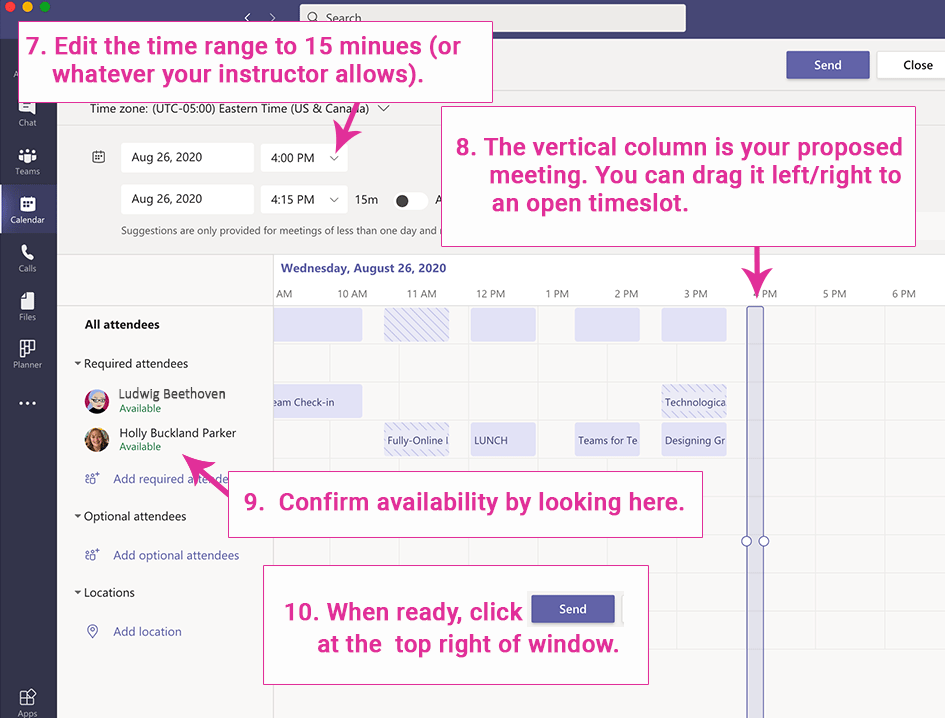
- On the Scheduling Assistant tab, define the the start and end times for the meeting. For most classes, office hours appointments are 15 minutes long (check your syllabus to confirm).
- The vertical bar represents your prospective meeting. Drag the bar left or right to change the time and length. If you see other students’ meetings on the calendar, you may need to move yours to an available time slot that does not overlap.
- You can double-check that it’s a good time by looking at your two names on the left and whether they both say “Available.”
- Click “Send” to save the meeting after first:
- Confirming that the meeting is within the designated office hours,
- Checking that AM or PM is right, and
- Confirming that it is 15-minutes long (unless otherwise instructed).
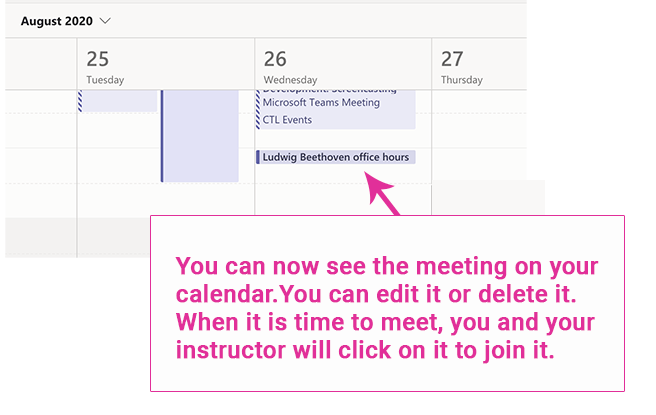
- You may receive a notification in Teams that your instructor has accepted. If it was declined, check to make sure you set it during the designated office hours and, if so, contact your instructor.
- At the time of your appointment, go to your Teams calendar, click on the meeting, and then click “Join.” You’ll now see the meeting entry page where you can set your video and sound to ON (the little icons of a camera and a mic). Click “Join Now.”