1. Home
  2. Network and Connectivity
  3. SSLVPN2 Cisco AnyConnect
  1. Home
  2. Servers and Data
  3. SSLVPN2 Cisco AnyConnect

SSLVPN2 Cisco AnyConnect

If you do not already have the Cisco AnyConnect client installed on your computer, you can install it using the guide here.

This guide will assist with the Duo login process for sslvpn2.uvm.edu  using the Cisco AnyConnect VPN. If you do not already have a device enrolled in Duo MFA, please see this guide.

There are two addresses available when connecting to sslvpn2. Please use the table below to see which address best meets your desired use case.

VPN addresses sslvpn2.uvm.edu sslvpn2.uvm.edu/full
Access to Network Folders? Yes, both addresses will allow you to access your Shared, Netfiles, and Zoofiles folders
Print to home network printers? Yes, you can print to home printers while connected No, you can only print to UVM networked printers
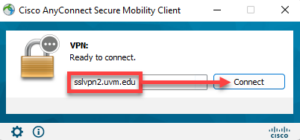
  1. Open the Cisco AnyConnect VPN Client. Under “Ready to Connect”, enter either sslvpn2.uvm.edu or sslvpn2.uvm.edu/full then click “Connect”
    • Use the table above to see which address best meets your use case.
  2. Enter your NetID and NetID Password into the corresponding fields.
  3. The Password field is where you will specify a Multi-Factor Authentication method. Click your preferred MFA method below for specific instructions.

Duo Mobile App - Push

  • Ensure your NetID and NetID Password are entered in the corresponding fields.
  • Type “push” in the Password field.
  • Click “OK“.
  • Respond to the Duo Mobile notification on your device when prompted.

If you have more than one push enabled device added to your account, you can use push1, push2, push3, etc. to send an MFA request to a specific device.


Duo Mobile App - Generated Codes

  • Ensure your NetID and NetID Password are entered in the corresponding fields.
  • Open the Duo mobile app on your device. Tap the Key icon to the right of the University of Vermont entry. This will generate a six-digit passcode.
  • Enter the generated passcode into the Password field.
  • Click “OK“.

SMS Text Message

  • Ensure your NetID and NetID Password are entered in the corresponding fields.
  • Type “sms” in the Password field.
  • Click “OK“.
  • You will receive a “Login failed” error, but you should will receive SMS passcodes on your phone. If you do not receive codes, try entering “sms” again, or use a different MFA method.

  • Enter one of the SMS passcodes into the Password field.
  • Ensure your NetID and NetID Password are properly entered, then click OK.

If you have more than one sms capable device added to your account, you can use sms1, sms2, sms3, etc. to send MFA codes to a specific device.


Phone Call

  • Ensure your NetID and NetID Password are entered in the corresponding fields.
  • Type “phone” in the Password field.
  • Click “OK“.
  • You’ll receive a call to your phone, answer the call and press any key to approve the authentication.

If you have more than one phone added to your account, you can use phone1, phone2, phone3, etc. to call a specific device.


Offline Codes

  • Ensure your NetID and NetID Password are entered in the corresponding fields.
  • Enter your next, unused offline code in the Password field.
  • Click “OK“.

Hardware Token (YubiKey)

  • Ensure your NetID and NetID Password are entered in the corresponding fields.
  • Insert your YubiKey hardware token into a USB port on your device.
  • Click into the “Password” field, then press the brass contact on your YubiKey.
  • Enter your NetID and NetID Password before pressing the brass contact or you will receive a “Login failed” error.


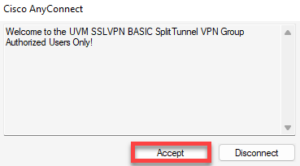
Upon successful authentication, you will receive the “Welcome to SSLVPN2” banner. Click “Accept” to close the banner.

Updated on March 10, 2022

Related Articles

Not the solution you were looking for?
Don’t worry we’re here to help!
Submit a Help Ticket