
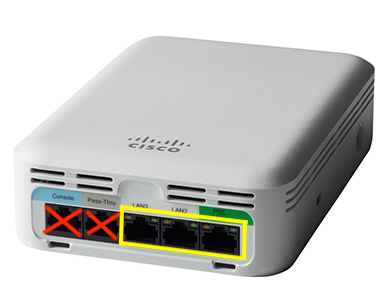
Cisco Access Point
If you have a Cisco access point similar to the one below, use the LAN1 port for your first device. Additional Ethernet connections can use the LAN2, and LAN3 ports. The PassThru port will also work to establish an Ethernet connection in all dorms except for the Christie-Wright-Patterson (CWP) dorm.
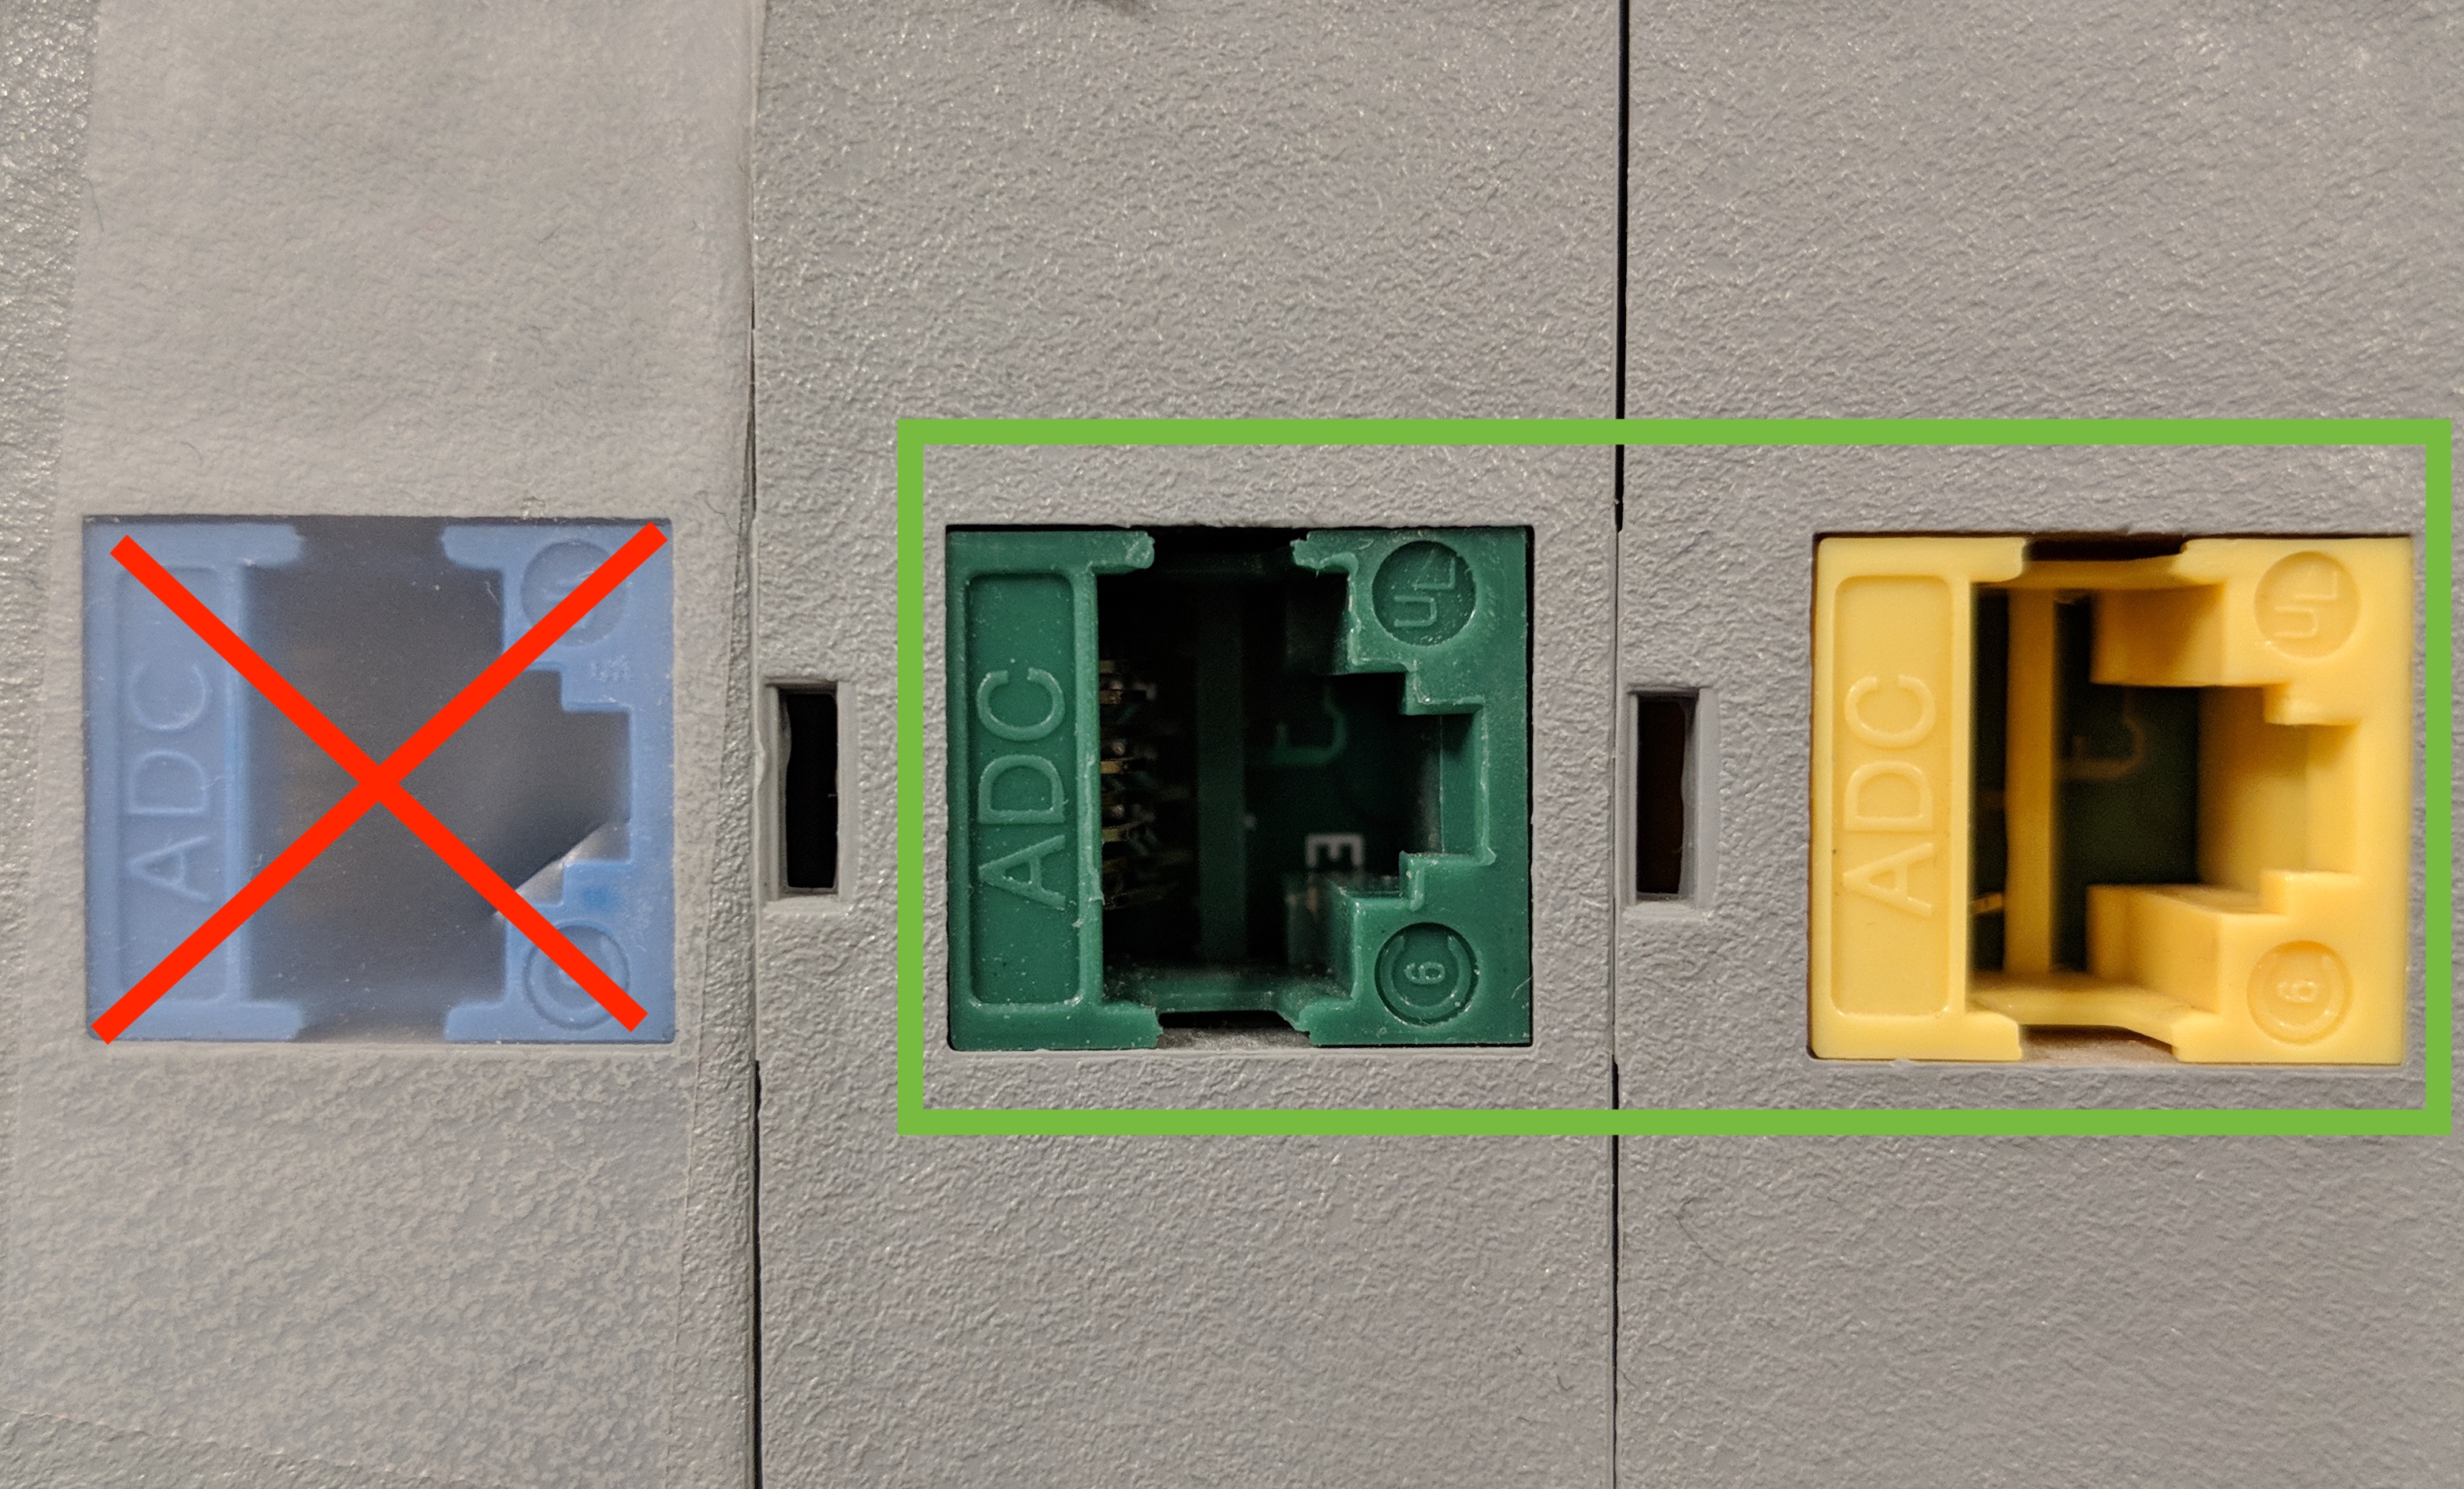
Wall Port Access
If you have a wall port similar to the one below, use the yellow or green ports to establish an Ethernet connection.
Troubleshooting Ethernet Connectivity Issues
Re-seat connections
If you have ensured you’re plugged into one of the correct ports, but you are still unable to get online, please attempt the following steps:
- Completely power down your computer, gaming, or media device.
- Unplug your Ethernet cable both from the access point/wall port and from your device.
- Reconnect your Ethernet cable with the access point/wall port, selecting the proper port as specified in the previous sections of this article.
- Make sure you hear or feel the Ethernet cable click, ensuring the cable is properly seated into the Ethernet port.
- Plug the other end of the Ethernet cable into your computer, gaming, or media device.
- Make sure you hear or feel the Ethernet cable click, ensuring the cable is properly seated into the Ethernet port.
- Power on your computer, gaming, or media device.
Eliminate variables
If re-seating the connections doesn’t help, try to test the connection with a different wall port, a second device, and/or a second cable, if possible. If there is a hardware problem preventing the connection, trying these will help locate where the problem lies.
Submit a help request
If you’d like help with troubleshooting the problem, or if you’ve tried the above steps and it still isn’t working, contact the UVM Tech Team.
If a wall port is visibly broken, please submit a service request to have it inspected. You can submit a ticket including the building name and room number, as well as which wall port it is (if there are multiple).