
This guide was created to be used in circumstances where the usual process of connecting to wireless on campus from a Windows PC does not work.
If you’ve confirmed that your password is working, you can use the steps below to create a wireless profile that should tell your computer which settings are needed to connect to the wireless network on campus.
- Start by removing any existing UVM, eduroam, HSID, and UVM Guest wireless profiles from your computer by Forgetting the Network(s).
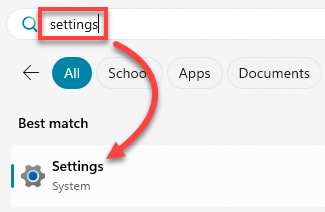
- Search for and select the Settings app using the Start Menu or search icon on the Windows taskbar at the bottom of your screen.
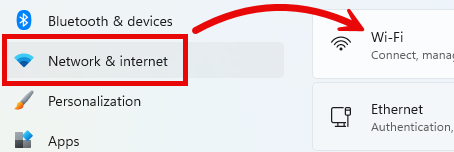
- Select Network & internet from the left column menu, then click Wi-Fi.
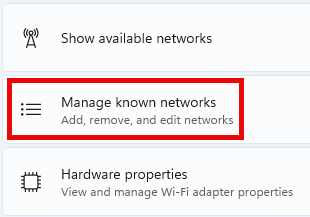
- Select Manage known networks.
- Click the Add network button.

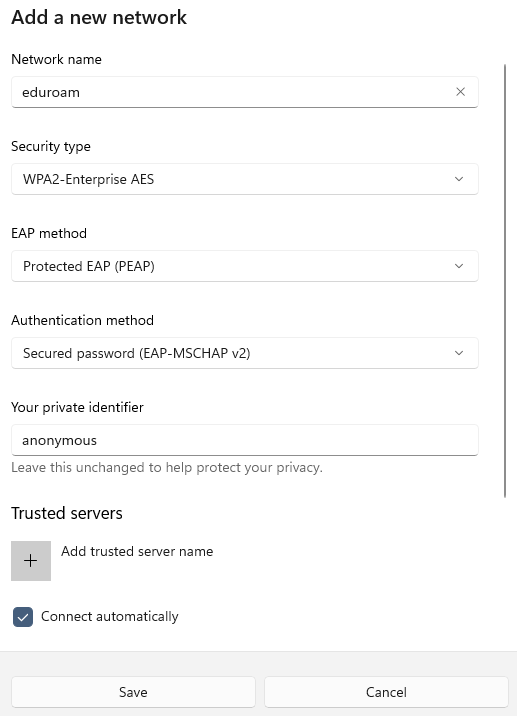
- Enter the settings as described below:
- Network Name = eduroam
- Security type = WPA2-Enterprise AES
- EAP method = Protected EAP (PEAP)
- Authentication method = Secured password (EAP-MSCHAP v2)
- Scroll down and make sure that Connect automatically is checked (the window is not large enough to show all the options at once).
- Click the Save button.
- Try reconnecting to the eduroam wireless network, enter your NetID@uvm.edu and password, click OK, and then Connect.