This guide contains information on Outlook profiles, their purpose, and the process of removing and creating profiles. Creating a new profile is a common fix for sign-in and send/receive issues in the Windows version of Outlook.
What is a Profile?
Outlook uses e-mail profiles to store a user’s e-mail accounts and to keep track of where each account’s data is stored.
What kind of data is stored in a profile?
Each profile provides Outlook with the following information:
- Account Information – User name, display name, e-mail server name, etc.
- E-mail Data – Locations of: Inbox/Sweep rules, message data, contacts, calendars, notes, tasks, journals.
Profiles are stored in the Windows registry, a database of settings and information kept by the operating system, and are loaded by Outlook when the application is opened.
Troubleshooting
You may need to reset your Outlook Profile if:
- You see the disconnected flag in bottom right corner
- Messages remain in your Outbox instead of sending
- You have multiple inboxes added to your Outlook and only some of them are updating with new messages
Try these steps prior to resetting your Outlook Profile:
- Ensure your machine is connected to the network
- Swap Outlook into Offline Mode and back
- Restart the Outlook application and, if that doesn’t resolve it, restart your machine
If none of these steps work, you may need to reset your Outlook Profile using the instructions below.
Resetting an Outlook Profile in Outlook
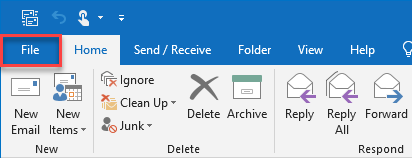
- Open Outlook and click File in the top left corner.
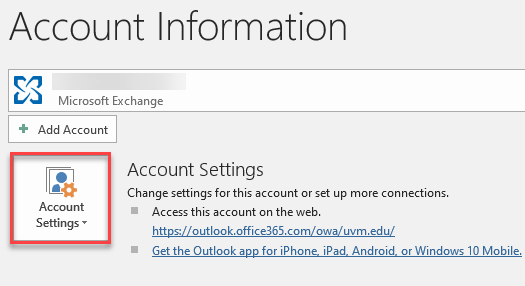
- Click Account Settings
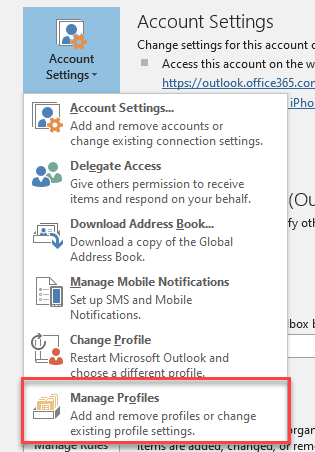
- Click Manage Profiles
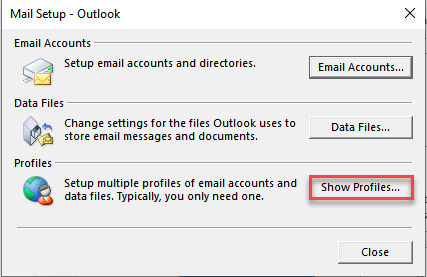
- Click Show Profiles
- Click Add
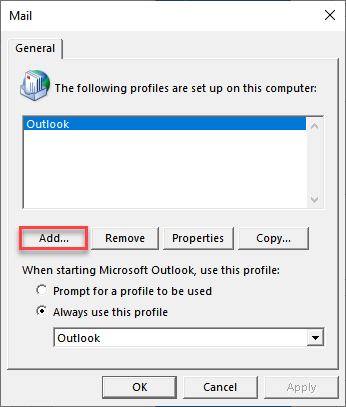
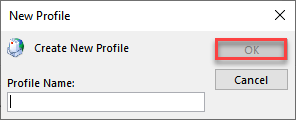
- Enter a name for the new profile and then click OK
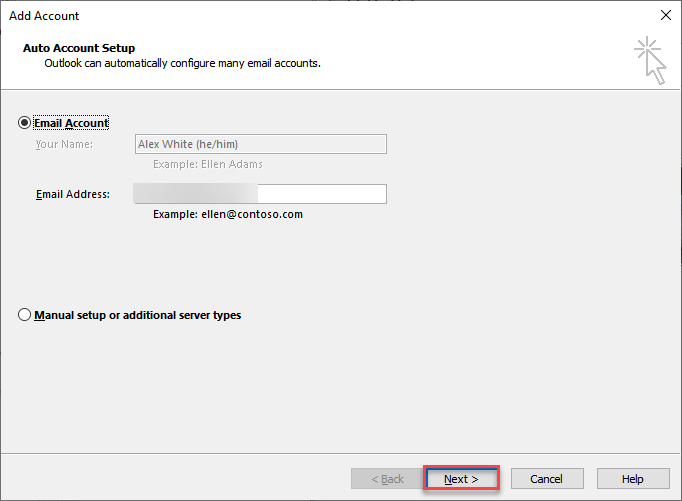
- Click Next and if prompted enter your NetID password.
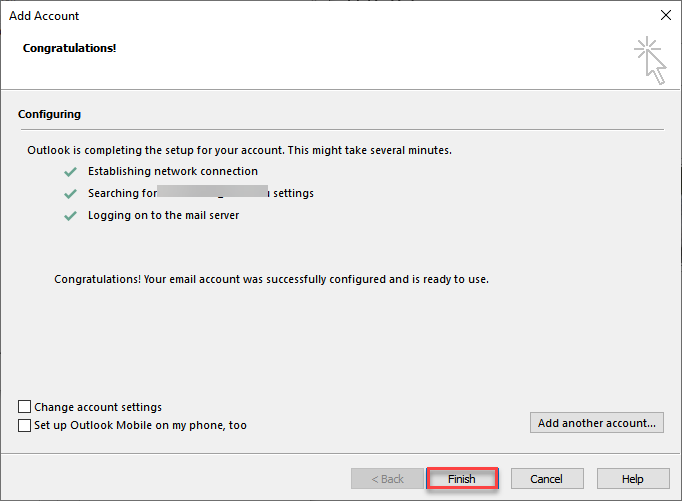
- It will load for a moment and then you can click Finish in the bottom right corner of the window
- Click the drop-down arrow and select the name of the new profile you just created and then click Apply
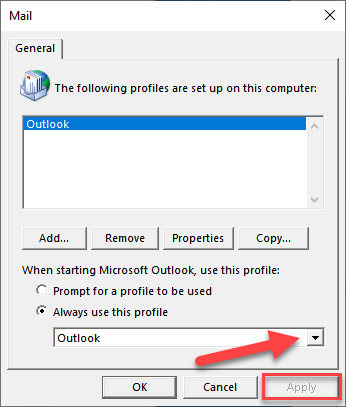
- After applying the changes you can click OK which will close the window
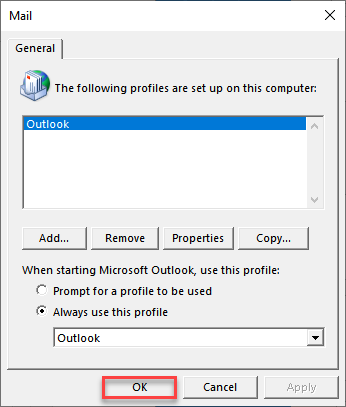
- Close out of the Outlook application. When you reopen Outlook it should automatically select the new profile you just created and add your accounts back. If your account is not automatically re-added you can follow this guide to add it manually.
Sometimes you’ll need to force the inboxes and other folders to sync for the first time. This can be done by selecting the folder you want to sync and clicking the Send/Receive tab and then clicking Update Folder. Repeat this for all frequently used folders.
Resetting an Outlook Profile in Control Panel
- Quit Outlook
- Hit the Windows key on your keyboard or click the magnifying glass in the bottom left of your screen to bring up the Windows discovery tool
- Search for Control Panel and open the application
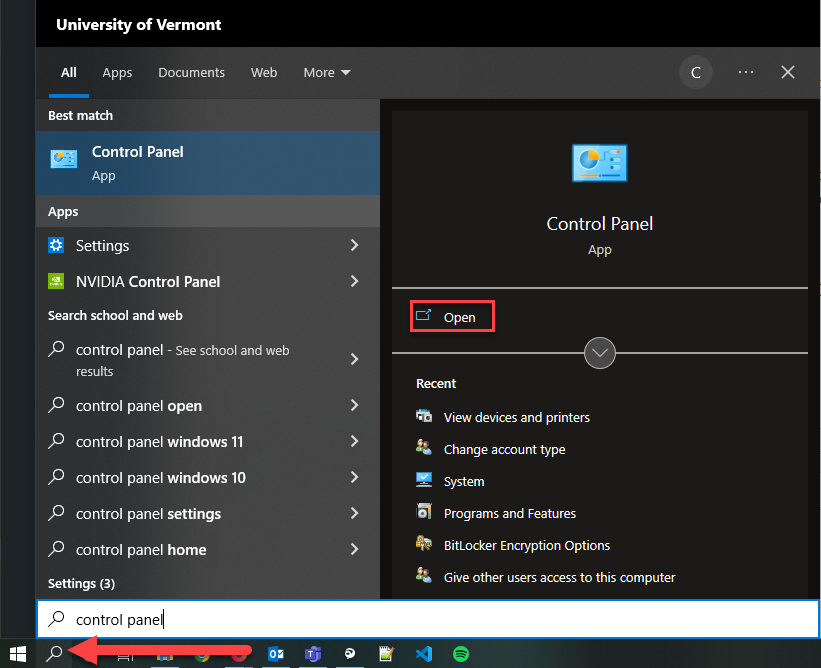
- In the top right corner of the window click the drop-down arrow next to View by: Category

- Select Large icons from the list of options
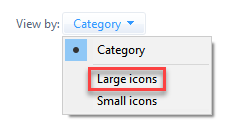
- Select Mail from the list of settings
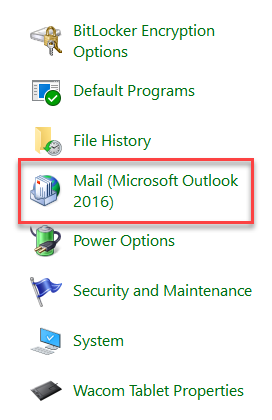
- Click Show Profiles in the new Mail Setup window that opens

- Click Add

- Enter a name for the new profile and then click OK

- Click Next, and then enter your NetID password if prompted

- It will load for a moment, and then you can click Finish in the bottom right corner of the window

- Click the drop-down arrow and select the name of the new profile you just created, and then click Apply

- After applying the changes, you can click OK to close the window

- Close out of the Outlook application. When you reopen Outlook it should automatically select the new profile you just created and add your accounts back. If your account is not automatically re-added you can follow this guide to add it manually.
Sometimes you’ll need to force the inboxes and other folders to sync for the first time. This can be done by selecting the folder you want to sync and clicking the Send/Receive tab and then clicking Update Folder. Repeat this for all frequently used folders.