
 Planon is UVM’s new integrated work management solution (IWMS) which is used for all facilities-related services including campus maintenance, facilities services, and space management.
Log in to Planon
Planon is cloud-based and any web browser will work. Planon uses UVM Single Sign-On credentials (i.e. your NetID and password).
There are two different Planon Portals set up for UVM; one is for staff and faculty, and the other is for residential students living on-campus. Be sure to use the correct link to access the portal.
Planon (for Staff & Faculty)
https://uvm-prod.planoncloud.com/
Planon (for Students Living On-Campus)
https://uvm-prod.planoncloud.com/startpage/BP/UVM_Students
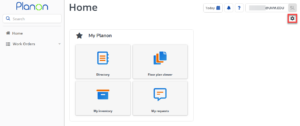
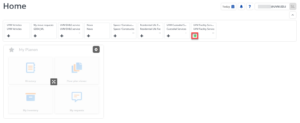
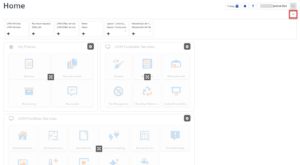
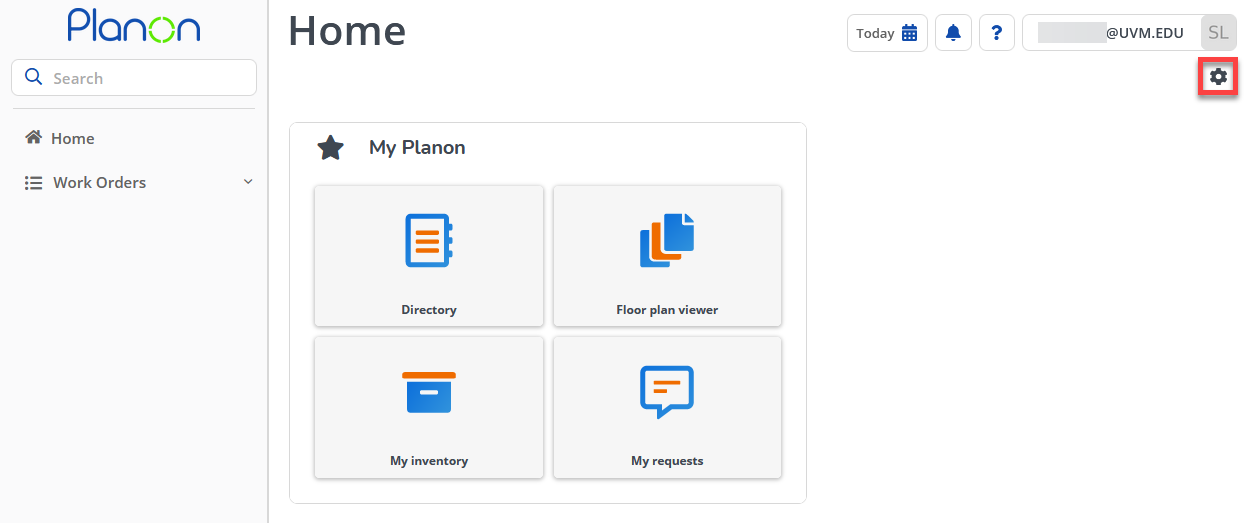
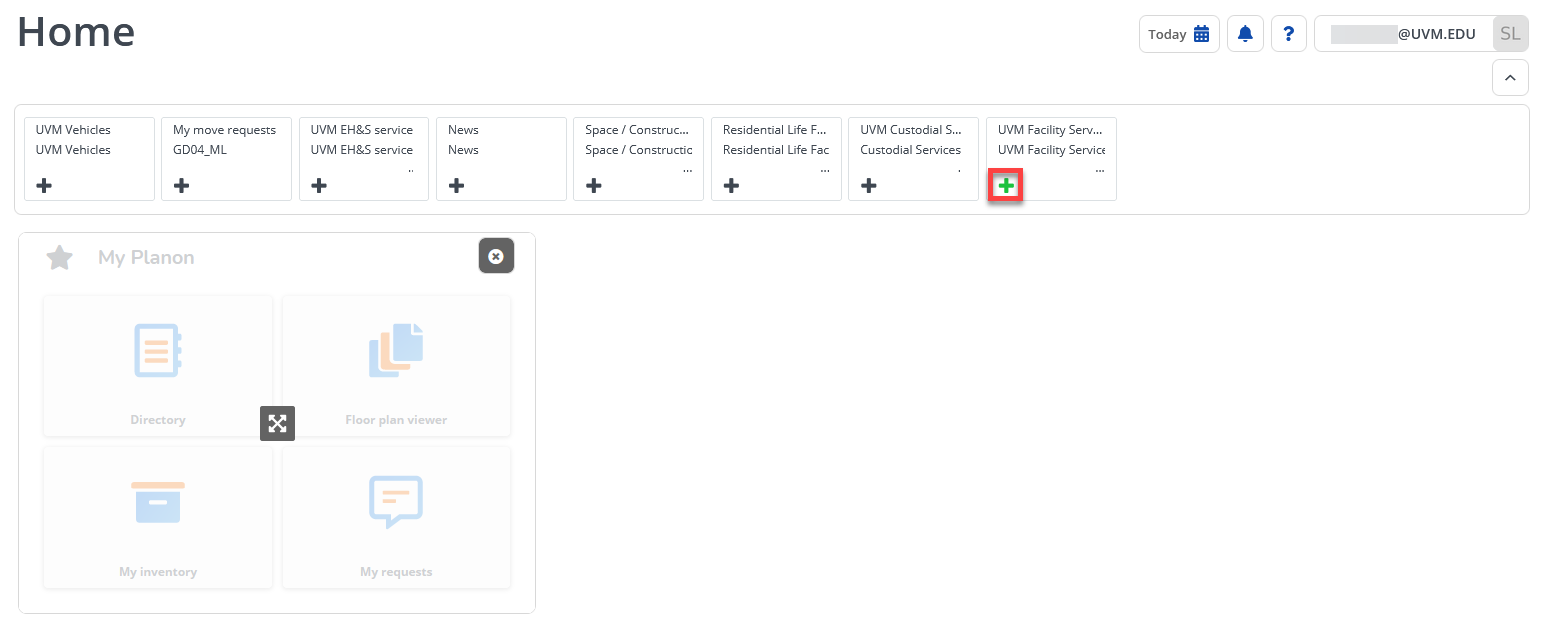
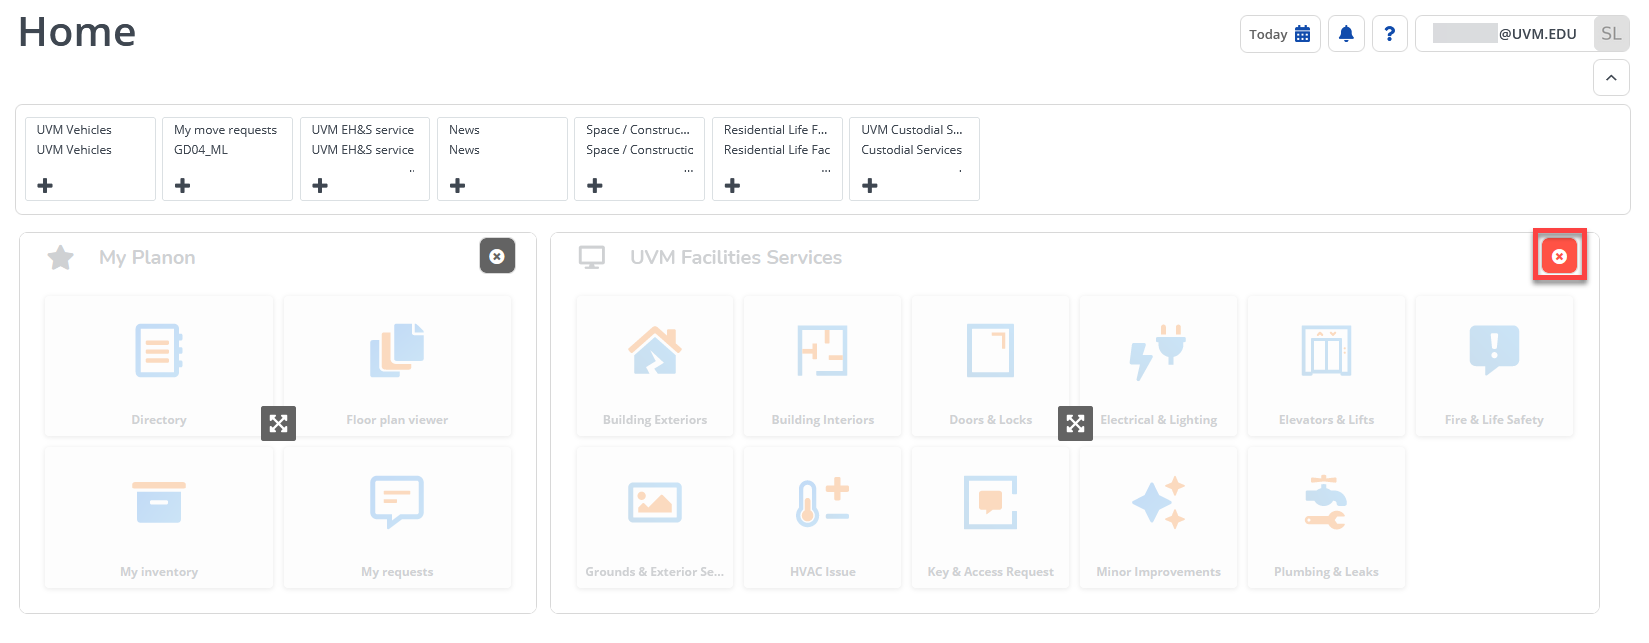
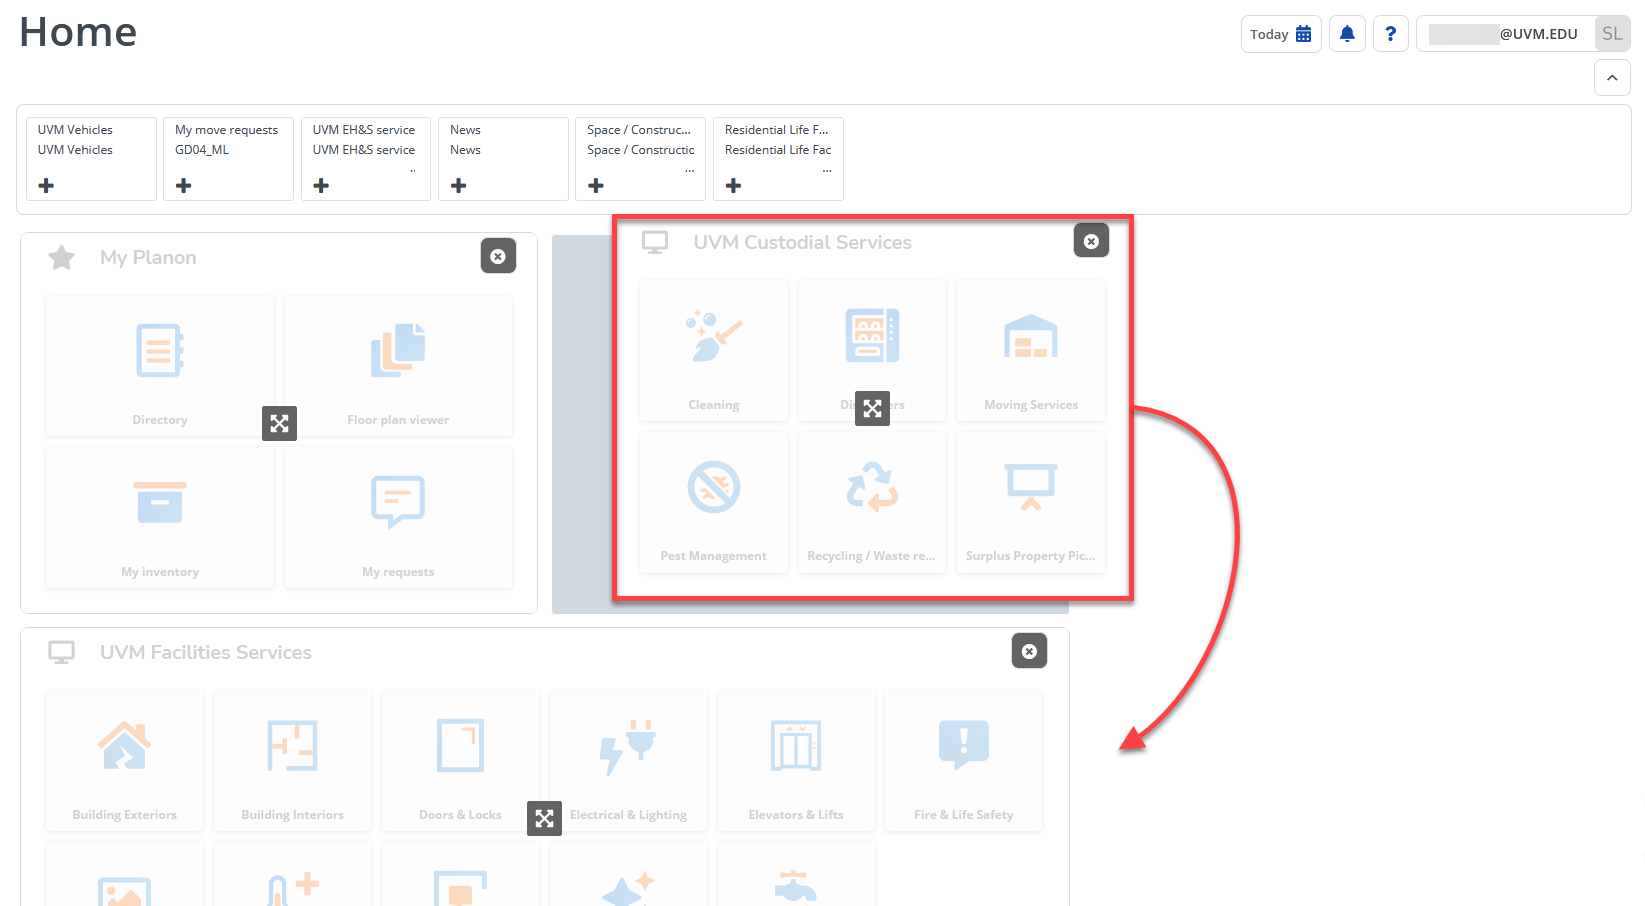
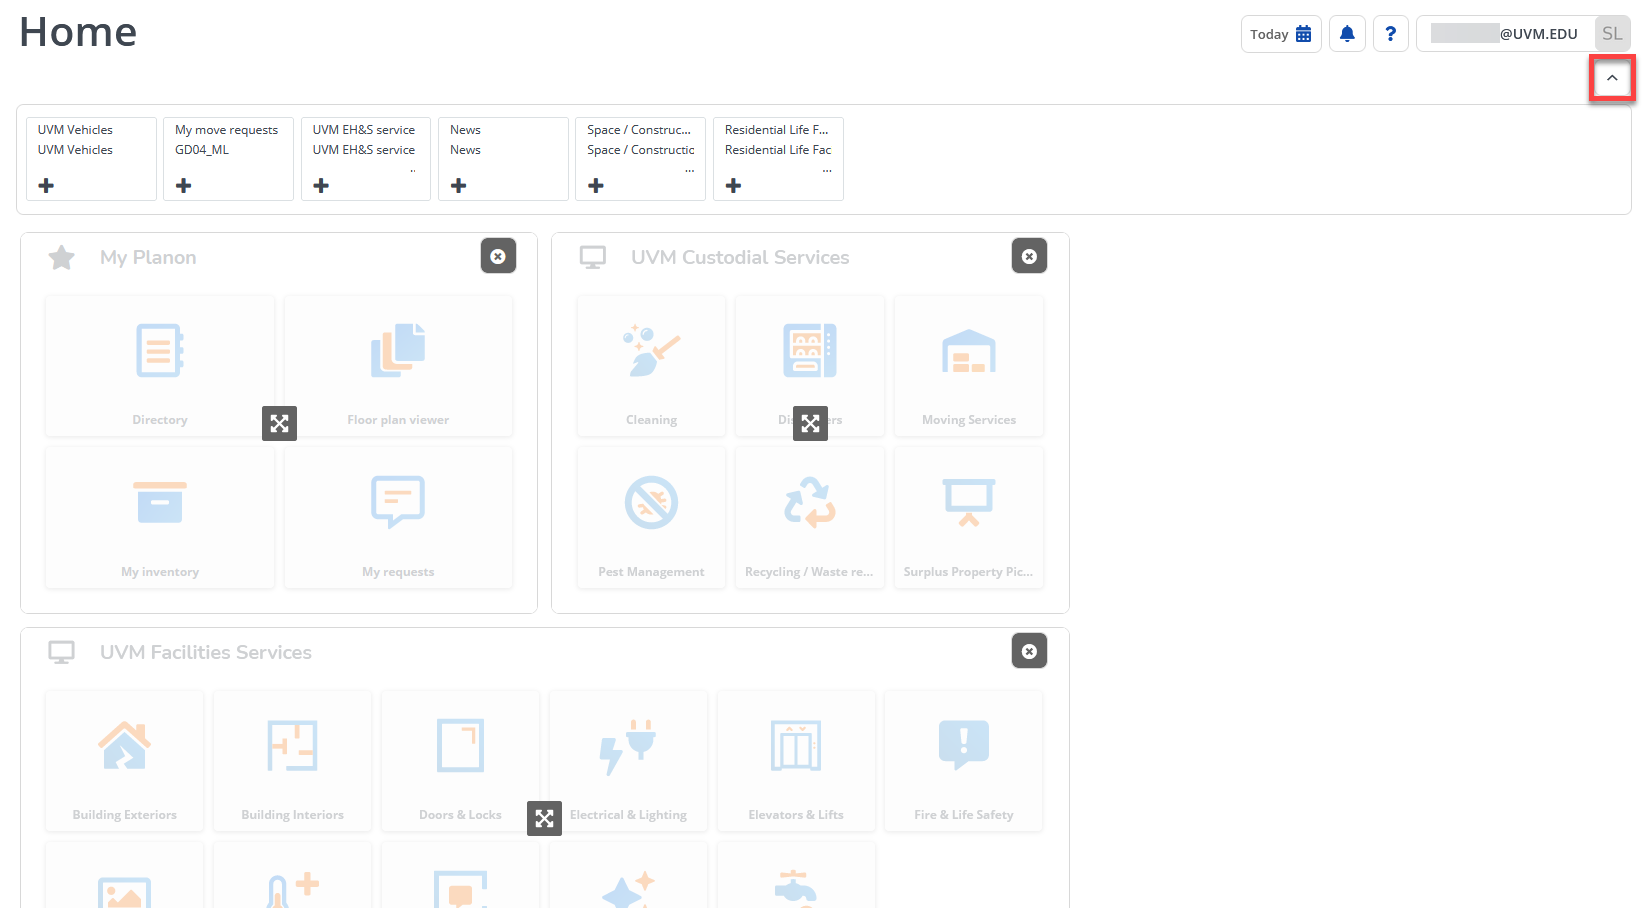
Set up your Home screen
- To edit your groupings, click the Gear icon near the top right corner.
- To add a grouping to your Home page, click the plus sign (+) by the grouping you’d like to add.
- To remove a grouping from your Home page, click the X in that grouping’s top right corner.

- To rearrange your groupings, click anywhere other than the X on a grouping and drag it to where you’d like it to be.

- To close edit mode, click the up-arrow (^) near the top right corner.
Enter a new service request
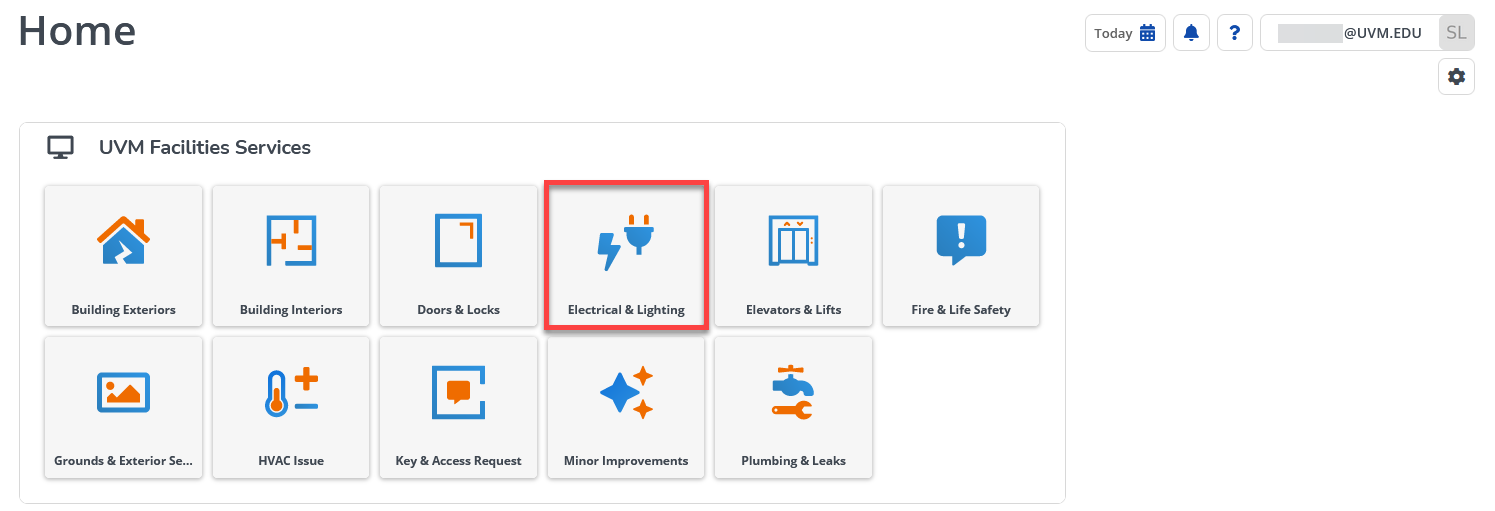
Several tiles (or “widgets”) should appear on your Home screen. These list the various services that users may request of Facilities Management departmental units.
- Click on the tile which best describes the type of service or facilities-related issue you need taken care of. The appropriate Planon Self-Service (PSS) form will open on your screen.

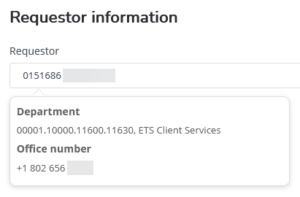
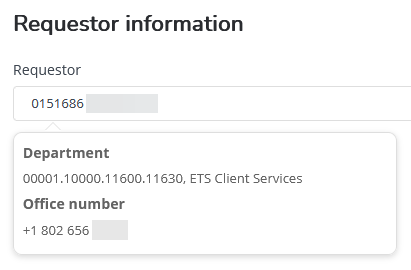
- Your name and location information should automatically appear in the Requestor Information field.
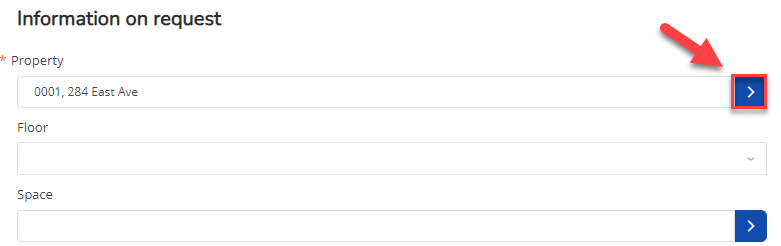
- If desired, change the location by clicking on the blue arrow to open a Search dialogue box. Select a different Property (i.e. building name) and continue to fill in the remaining location details including Floor (i.e. level) and Space (i.e., room number).
- After you have entered the location information (Property, Floor and Space), use the drop-down menu(s) and select the text which best describes the maintenance concern you have, including the item affected and the specific issue you’re having with the item. You can enter free-form text to further describe your request, and you can attach a file (e.g., an image or document) along with your request.

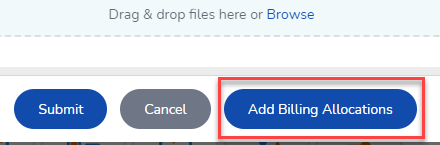
- If there’s a button to Add Billing Allocation at the bottom of the request form, see “Add Billing Allocation if Needed” below. If not, you can click Submit now.

Add billing allocation (if needed)
Certain services are considered elective and will require a departmental charge. If this is the case, then a blue Add Billing Allocations button will appear at the bottom of the request form.
- Click Add Billing Allocations to open the “Add/Change Billing Allocations” dialogue box.
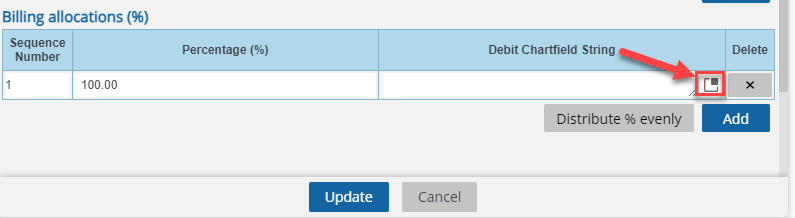
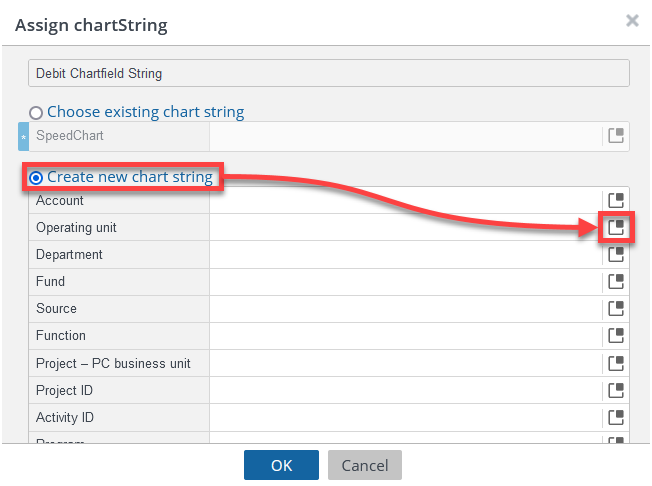
- Under Billing allocations (%), add your Debit Chartfield String information by clicking on the Select a value Pop-Out box.
- Select Create new chart string. Using the Select a value popup boxes, enter the appropriate data into the Chart of Accounts segment fields.
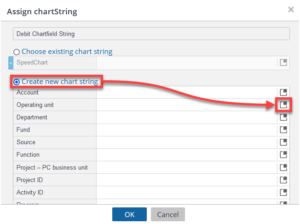
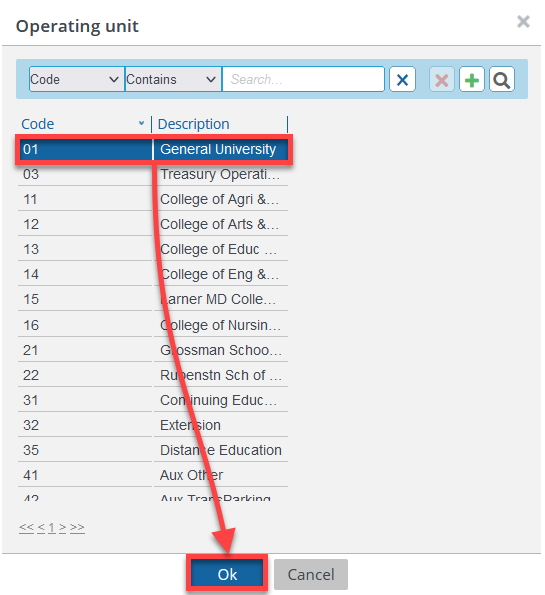
- For each field, choose the appropriate code and click Ok.

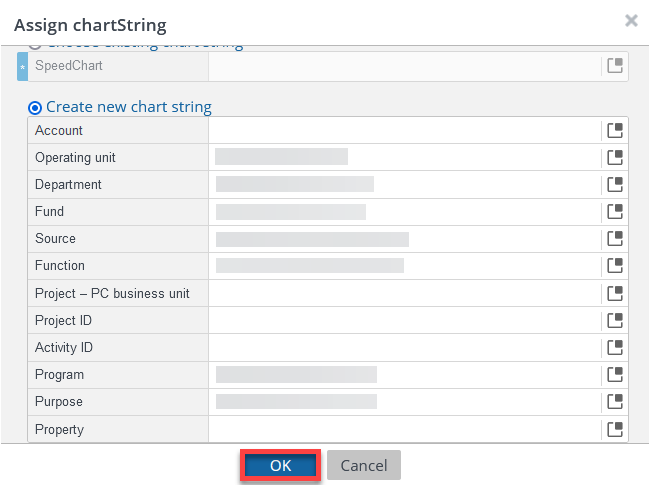
- After filling in any appropriate fields, click Ok to generate a chart string for your order.

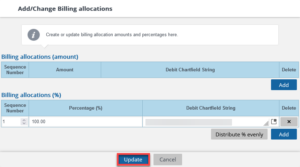
- Click Update and then submit your request.

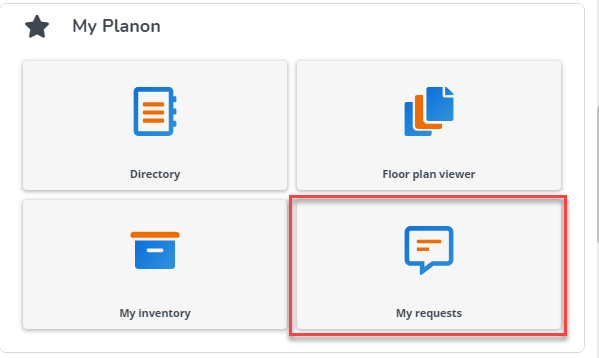
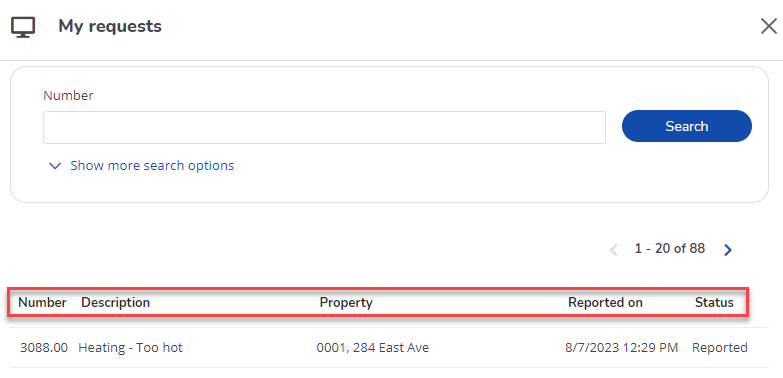
Check the status of an existing service request
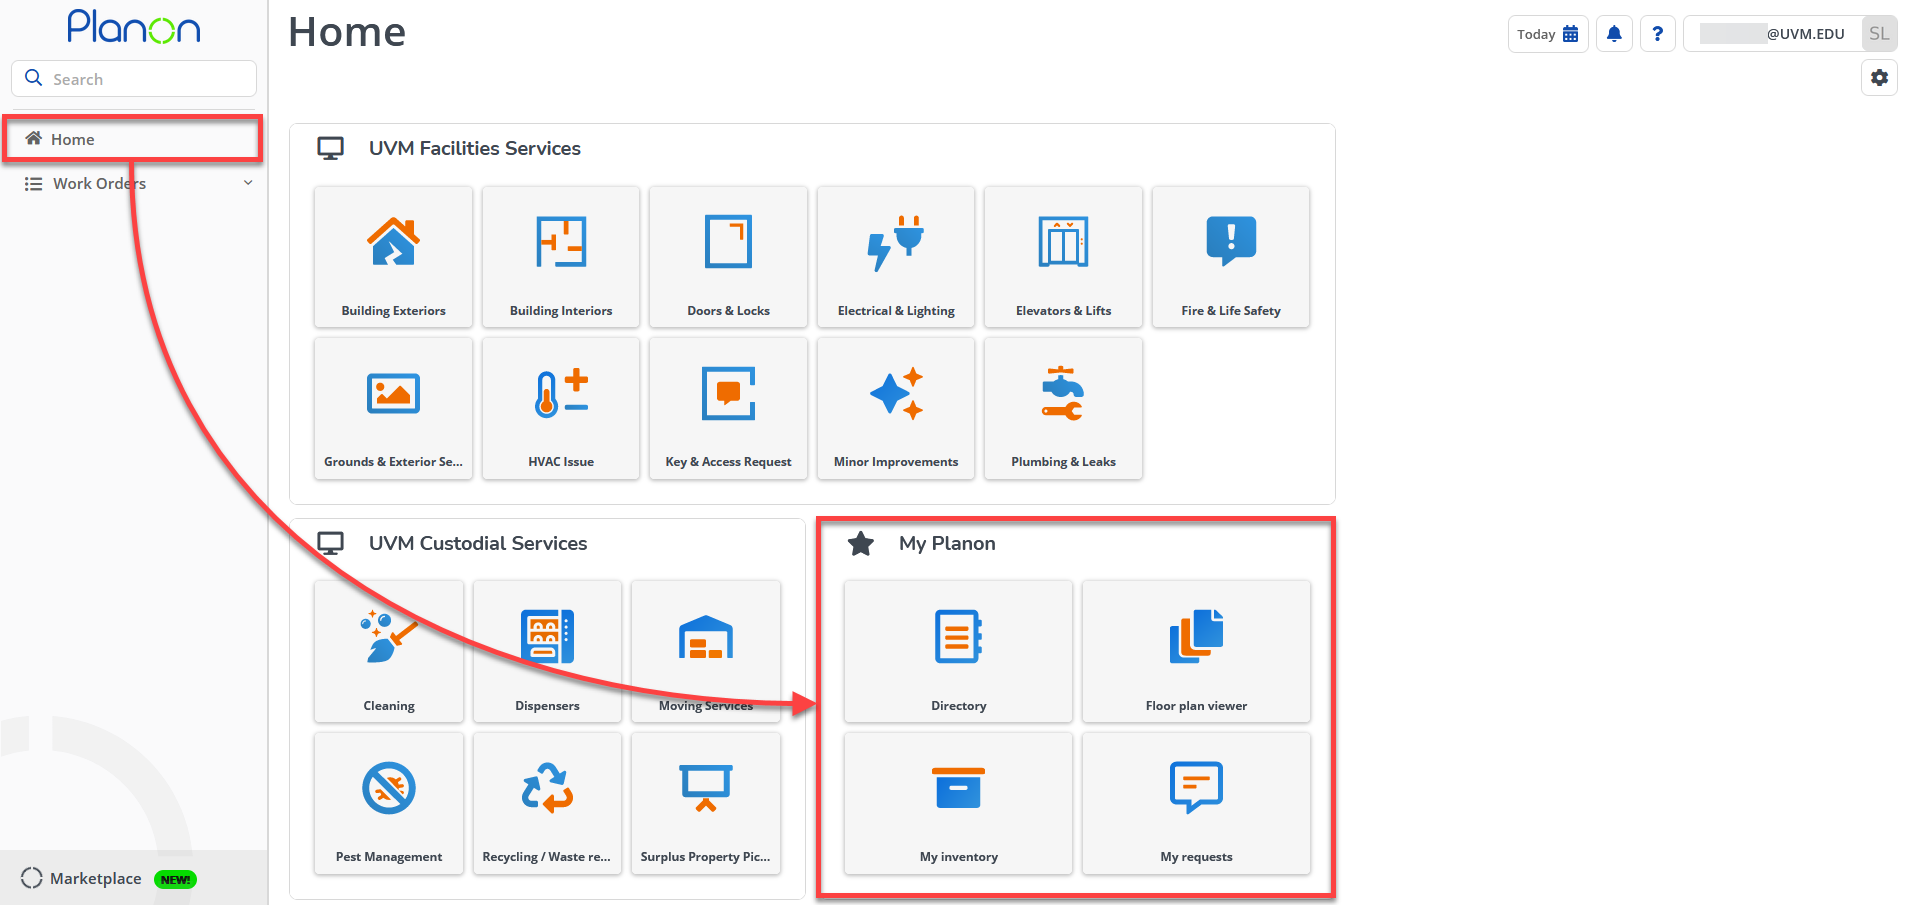
- Navigate to the Planon Home Screen and locate the My Planon grouping (or gadget).
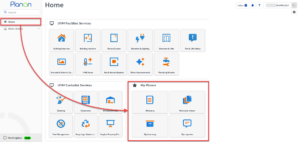
- Click on the My requests tile (or widget.)
- The My requests dashboard should appear along with the current status of any requests you’ve submitted.
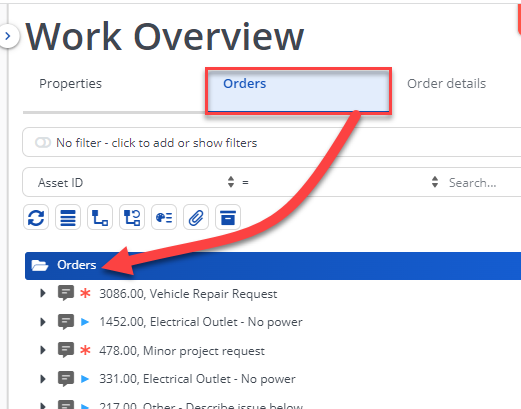
View “Work Overview” details about your request
- Users with the Requestor role should see a Work Orders option in their Navigation Panel (i.e., the left-side menu). Click the ∨ symbol to expand the menu and then select Work Overview.
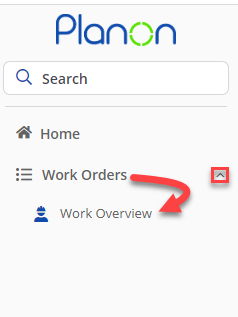
- The Work Overview task interface will launch and a series of tabs will appear at the top of the Element Panel (which is the center portion of the screen). Click on the Orders tab to view a list of all Requests that you’ve previously submitted.
Looking for advanced Planon help?
If you’re looking for deeper help than this guide can offer, please reach out to UVM’s Integrated Work Management Solution team at iwmshelp@uvm.edu.