![]() Access AppsAnywhere at software.uvm.edu using your UVM NetID and password. You do not need to be on-campus or connected to the UVM VPN to access AppsAnywhere.
Access AppsAnywhere at software.uvm.edu using your UVM NetID and password. You do not need to be on-campus or connected to the UVM VPN to access AppsAnywhere.
AppsAnywhere Basics
What is AppsAnywhere?
Installing AppsAnywhere and the Cloudpaging Player
- Visit software.uvm.edu and sign in with your UVM NetID and password
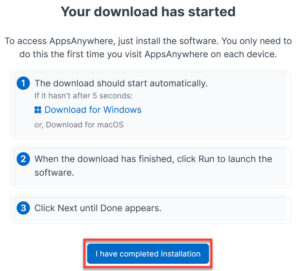
- Click the Install now button in the window that appears to download the AppsAnywhere installer
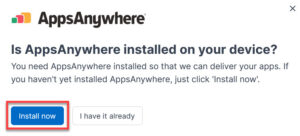
- Click the download to open the installer, which will check if AppsAnywhere is already installed and then proceed through the installation process automatically
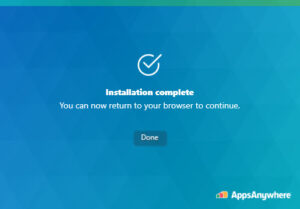
- Once the installation is complete, return to the browser and click I have completed installation
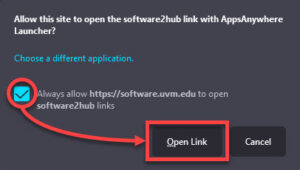
- If prompted, check the box that says “Always allow https://software.uvm.edu to open software2hub links”, and then click Open Link
- A purple circle icon should appear in the bottom right indicating that validation is in progress

- When validation is complete, the icon will change into a green check mark

Downloading, Installing, or Launching Applications
Applications in AppsAnywhere have different installation or launch options. Each app’s default launch option will be displayed below its name. Most applications will have a Launch option as well as either a Download or Open Website option.
The primary option displayed when you hover your mouse over an app may vary by application, license, or by the operating system you are running. Some apps will also have a dropdown icon () that, when clicked, shows you the other available delivery methods for the app.
Launch (Locally Installed)
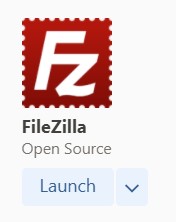 When AppsAnywhere detects that you have already installed an application on your computer, you’ll see this option. Clicking Launch will open the application, just like if you searched for the application in the Applications folder or from the start menu and double clicked it.
Launch (Cloudpaging) – Windows Only
For Windows AppsAnywhere users, if the selected application doesn’t appear to be installed on your computer already, and the application is available for virtualization, you will see this option.
The Cloudpaging Player is described further below in this guide, but works in tandem with software.uvm.edu to rapidly get the app running. Launching an app this way is effective for conserving your computer’s storage space, and can be much faster than installing the application locally. However, you will be unable to access the application if you are not connected to the internet or the Cloudpaging Player is not installed.
Download
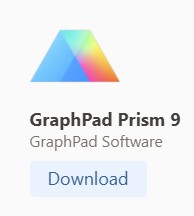 Clicking this option will cause the selected application to immediately start downloading through your browser. Software installation may vary by application. Double click the downloaded installer and proceed through the normal installation steps.
Applications with the Download option typically have some UVM-specific licensing or configuration.
Open Website
Clicking this option will open a browser window and navigate to the website where you can download the app and potentially view installation instructions.
Applications with this option typically do not require that UVM customize the installation files, but these applications may still benefit from AppsAnywhere categorization, the ability to be added to AppsAnywhere App Lists, and from being linked through a trusted UVM resource.
AppsAnywhere Advanced
What is the Cloudpaging Player?
The Cloudpaging Player comes bundled with the Windows AppsAnywhere installer, and is required for the Launch via Cloudpaging option to function correctly. This option is not available for macOS computers.
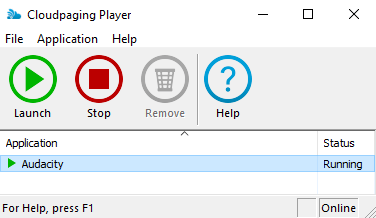
The Cloudpaging Player is used to run AppsAnywhere apps as though they are locally installed on your computer without requiring that you fully download and install them.
If you have previously Launched an app via Cloudpaging, these apps will appear when you open the Cloudpaging Player app, and can be launched from within the app – no need to launch them from software.uvm.edu.
Read more about the Cloudpaging Player here.
Viewing Licensing Keys, Codes, and Info
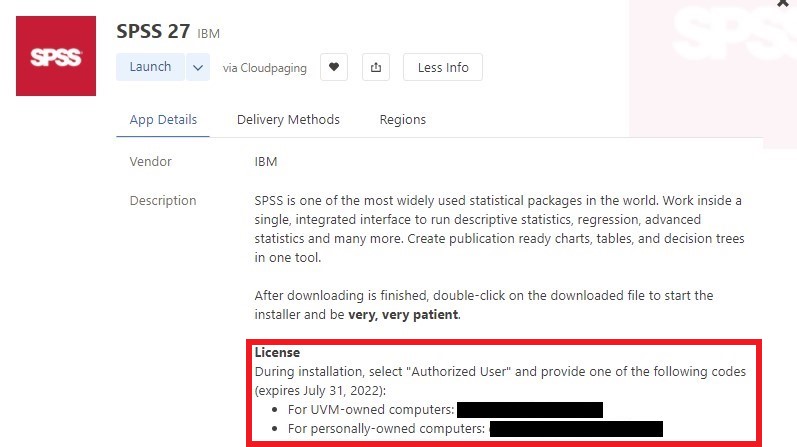
- Visit software.uvm.edu, then search for the app and click on its name or icon.
- You should see the code, key, or other licensing information toward the bottom of the App Details section.
Favoriting Apps
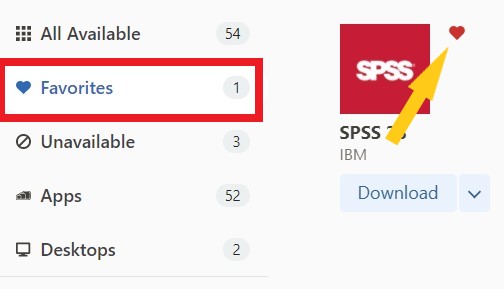
Applications in AppsAnywhere can be favorited by hovering your mouse over an app and clicking the heart icon (). You can view your Favorites from any device from the Home page or by clicking the Favorites section on software.uvm.edu.
Creating and Editing an App List
App Lists can be an effective way for people to designate and share specific sets of apps for a course or group. This may be useful for faculty looking to share a comprehensive list of all software relevant to their coursework in a single link.
Click here for a video demonstration of this process.
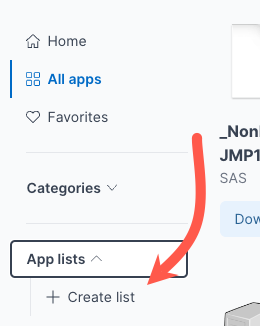
- From the All apps menu, click the App lists dropdown and select Create list
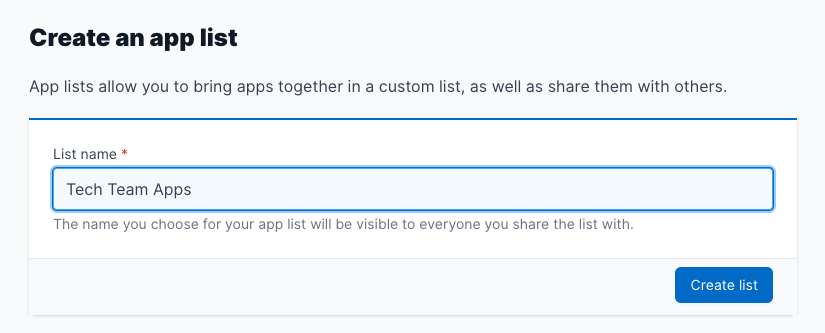
- Enter a name for your list
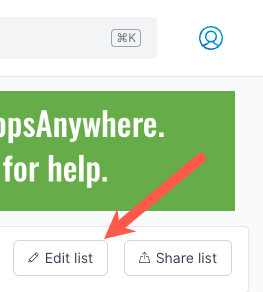
- Click Edit List in the upper right corner
- Search for the app(s) you want to add to the list, then click Add
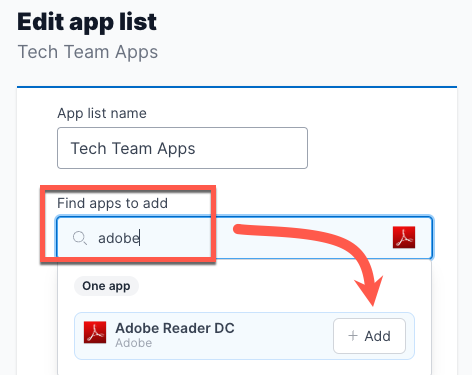
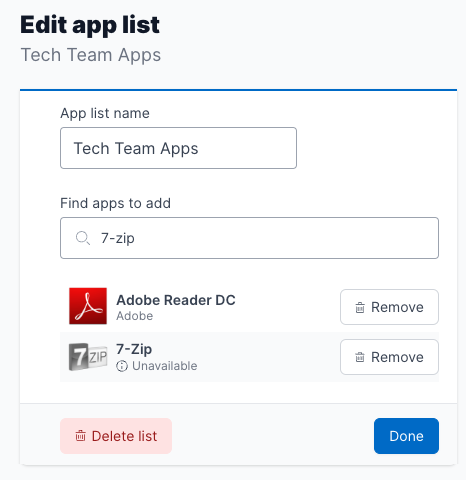
- Click Done to finish adding apps to your list.
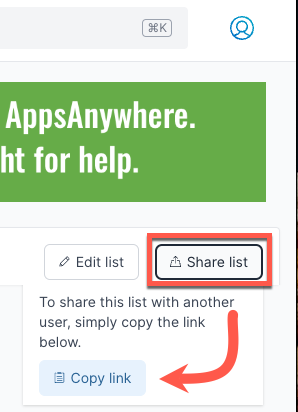
- Click Share list then Copy link to copy a link to your list to your clipboard. Then, you can share this link through email, Microsoft Teams, or some other means.
Troubleshooting
Needs Validation Error
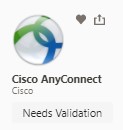 If you are seeing Needs Validation under each app, the AppsAnywhere client and related services may not be installed or not running, or you may not have accepted the prompts required for validation.
If you have not yet installed AppsAnywhere, please follow the instructions at the start of this guide.
If you have installed the client, please ensure you are accepting the prompts required to validate. If you are getting the Validation failed error, see the help section below.
Validation failed error
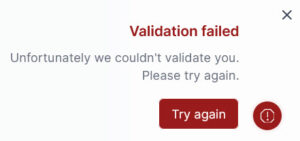
If you received the Validation failed error, please click Try again and ensure you have accepted the External Protocol request as recommended.
If you are still receiving this error, please double check that your browser is fully updated, you have a functioning internet connection, and that you have installed AppsAnywhere using the installation instructions above.
If you are still receiving the Validation failed error, please clear your cache and cookies, reboot your computer, and try again.
If you continue to experience issues with validation – disable any Anti-Virus software on your computer. If you’re not sure how to disable your AV software, perform a google search for “temporarily disable <name of AV software>”
In some situations it may be easier to reset your browser back to its defaults. Note that this will remove all saved passwords, cache, extensions, and settings for the browser.
- Reset Google Chrome – https://support.google.com/chrome/answer/3296214?hl=en
- Reset FireFox – https://malwaretips.com/blogs/reset-firefox-settings/
Validation Failed error - M1 Macs
There is a known issue for users on Apple computers with M1 processors (any model released since late 2020) that will cause them to receive the Validation Failed error.
Due to changes in Apple architecture, Rosetta must be installed for the AppsAnywhere client to run. This can be resolved by manually launching AppsAnywhere from /Applications/Software2/AppsAnywhere.app which will prompt to install Rosetta, as shown in the screenshot below.
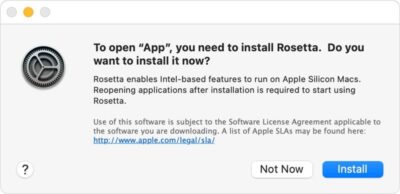
You may need to reboot after the installation. If you are still receiving the Validation Failed error after installing Rosetta, please follow the troubleshooting steps in the Validation Failed error toggle above.
Some apps are appearing as unavailable
An application will appear as unavailable if your device doesn’t meet the requirements to run it. Some applications can only be installed on UVM-owned computers or may only be available on-campus. An application will also appear as unavailable if it is incompatible with your device’s operating system.
To review these requirements:
- Visit software.uvm.edu and click on the name or icon of the desired app.
- Select the Delivery Methods tab, optionally clicking your preferred delivery method, then click Restrictions to view requirements and explanations.
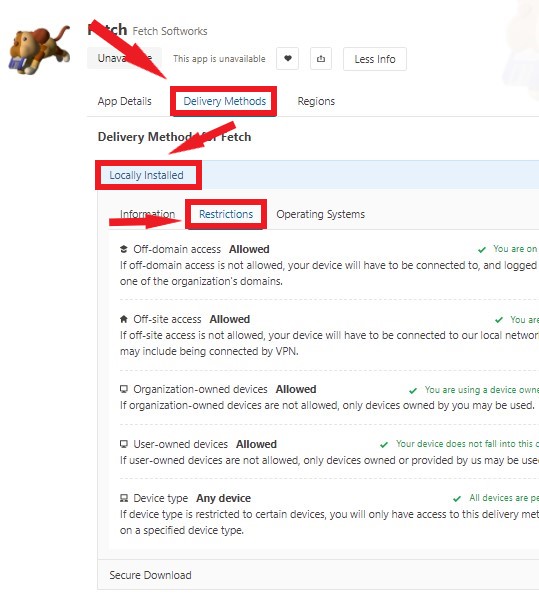
If you believe an application is incorrectly appearing as unavailable, please contact the UVM Tech Team.
Some apps are missing for me
If an application doesn’t appear in the available or unavailable sections of AppsAnywhere, and you know that others are able to see the application, it’s possible that your UVM affiliation does not permit access to the application.
If you believe you should be able to view the application, please contact the UVM Tech Team.
Security & Privacy FAQ
What does AppsAnywhere install on my computer?
On macOS, the AppsAnywhere client and related background services are installed.
On Windows, the AppsAnywhere client, Cloudpaging Player and related background services are installed.
What can AppsAnywhere do with my computer once installed?
The AppsAnywhere client and related background services can install and launch applications that you initiate from the UVM Software Portal at software.uvm.edu without requiring administrator access or rights.
On Windows, the Cloudpaging Player continually streams application installation blocks to your device as you use a Cloudpaging application, until all relevant information is cached locally.
All activity is performed with user initiation, alerts or approval.
What information does AppsAnywhere gather about my computer?
After logging in to the UVM Software Portal, the AppsAnywhere client performs the initial Validation step to determine which software in the catalog your device is able to run. In doing so, it communicates information to the UVM servers about your device hardware (OS version, laptop vs. desktop) and your current IP address to determine on-campus or off-campus presence and country-level location (such as US or UK). It also checks what applications in its database you may already have installed locally, to provide the Launch via Locally Installed option.
For applications launched via the portal, analytic usage information about the application may also be logged (such as number of times the application was run, and for how long). Applications not launched from the portal, or otherwise not part of the AppsAnywhere service, are not tracked.
For more information on analytics, see www.software2.com/appsanywhere/analytics.
Who has access to the information gathered about my computer?
Validation information is exchanged directly between your computer and the UVM servers. Analytics information may be viewed by UVM system administrators to ensure optimized service performance, software licensing, and software delivery methods.
Can AppsAnywhere manage other aspects of my computer?
No, the AppsAnywhere client is not an overall management agent.
The AppsAnywhere client is intended to gather basic information for software compatibility, and install or launch the software you choose to initiate. It performs no other management functions.
