
UVM has several calendars that you can add to your individual UVM calendar. This guide details the different methods alongside links to the commonly requested calendars. Once added, these calendars can be toggled on or off.
Adding these calendars will not block scheduling of your own calendar, but they provide a convenient way to view important UVM calendar information within your calendaring app.
| Source of information | Outlook Calendar | WebCal link |
|---|---|---|
| Administrative Closures | UVM Administrative Closures | UVM Admin Closures |
| Academic Calendar | UVM Academic Calendar | |
| Interfaith Calendar | UVM Interfaith Calendar | UVM Interfaith Calendar |
Outlook Calendar: A custom UVM Outlook calendar. These links are alternative ways to view the calendars found by Adding a Calendar from the Directory in the steps below.
WebCal Subscription: A web-based way to access the Outlook calendar that you can add to Outlook (the native calendar method is better) and also available to external users and other calendar apps.
Adding a Calendar from the Directory
Outlook Online and Outlook for Windows
- Select the Calendar tab.
- Make sure the sidebar is shown to the left of the event view; if it’s hidden, toggle it with the menu button ().
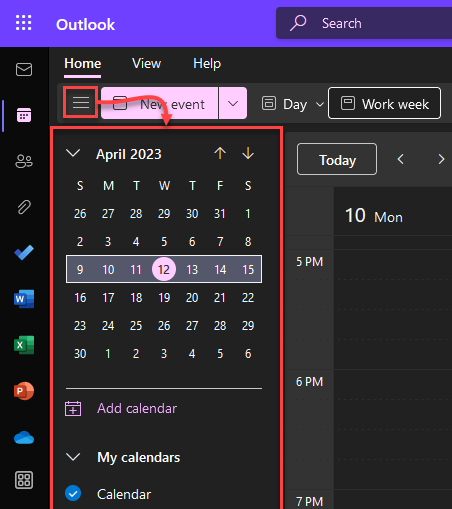
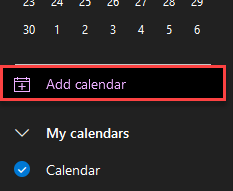
- Click Add calendar.
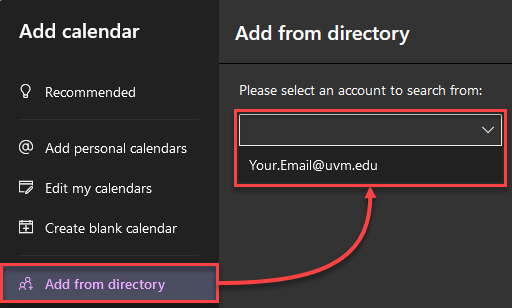
- Click Add from directory, then select your own account from the drop-down menu.
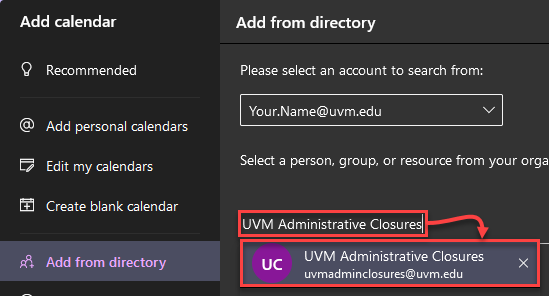
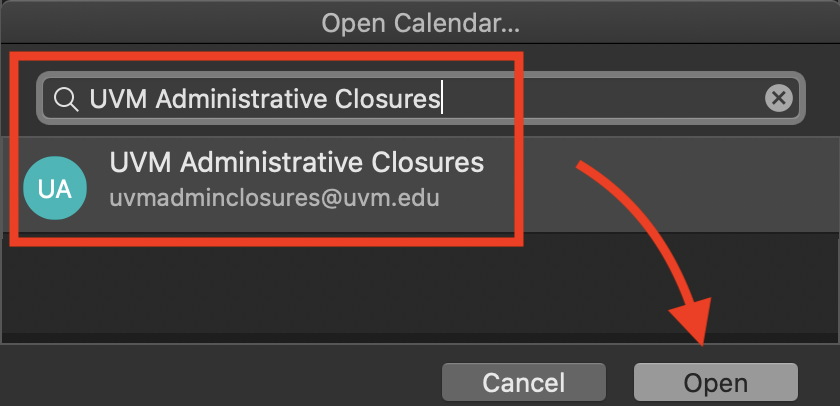
- Enter the name of the calendar (e.g. UVM Administrative Closures, UVM Academic Calendar, or UVM Interfaith Calendar), click the listed result, and then click Add.
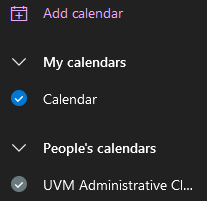
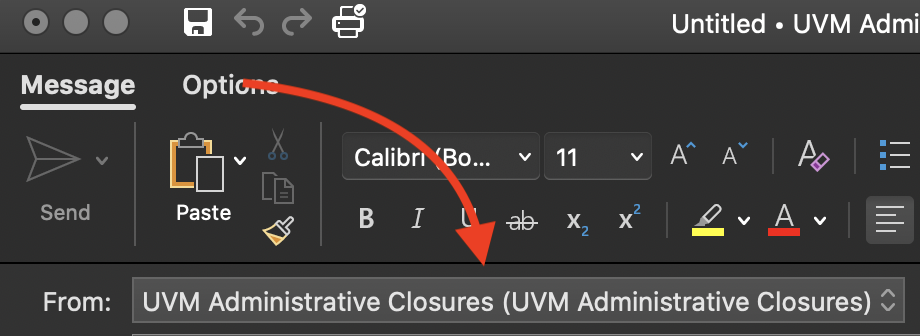
- A success message should show at the bottom of the Add calendar pane, which can now be closed. The shared calendar should now be available to select from the People’s calendars group.
Outlook (classic) for Windows
- Select the Calendar tab.
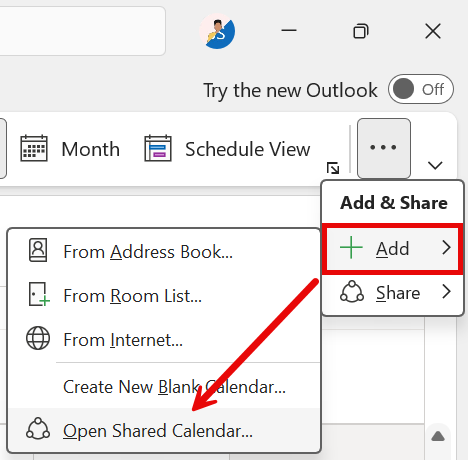
- From the Home tab of the ribbon, click Add and then Open Shared Calendar…. You likely have to click the ellipsis menu () first to show More commands.
- Click Name… to bring up the full search window.

- Search for the calendar (e.g. UVM Administrative Closures, UVM Academic Calendar, or UVM Interfaith Calendar), select it from the results, and then click OK.

- Click OK.

- Click the checkbox next to the newly added calendar in the left sidebar to view it.

(new) Outlook for Mac
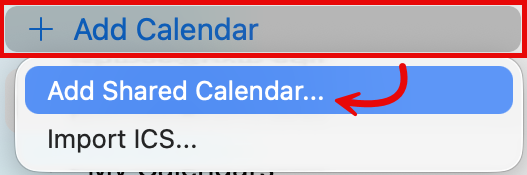
- Select the Calendar tab.
- Make sure the sidebar is shown to the left of the event view; if it’s hidden, toggle it with the menu button ().
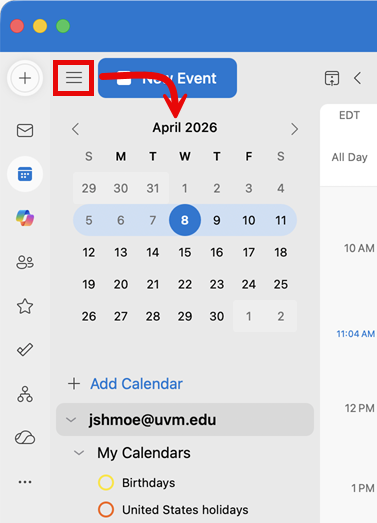
- Click Add Calendar and then Add Shared Calendar….
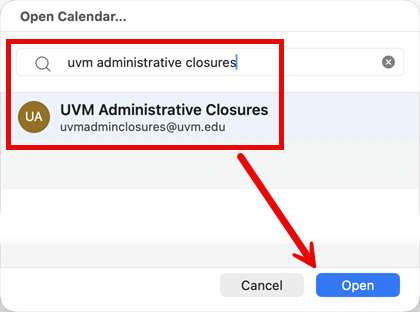
- Enter the name of the calendar (e.g. UVM Administrative Closures, UVM Academic Calendar, or UVM Interfaith Calendar), click the listed result, and then click Open.
- The shared calendar should now be available to select from the sidebar.
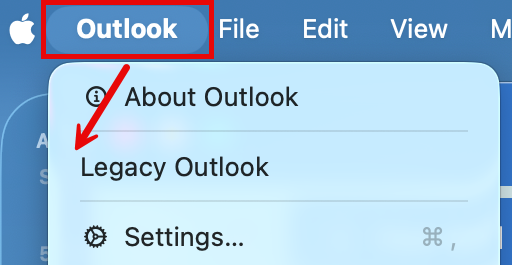
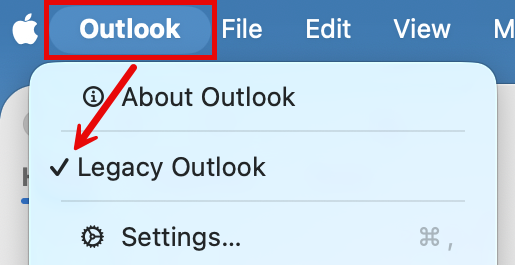
Legacy Outlook for Mac
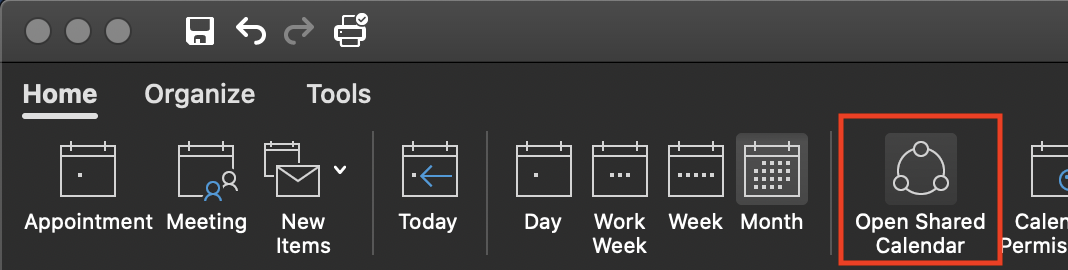
- Select the Calendar tab.
- From the Home tab of the ribbon, click Open Shared Calendar.
- Enter the name of the calendar (e.g. UVM Administrative Closures, UVM Academic Calendar, or UVM Interfaith Calendar), click the listed result, and then click Open.
- The shared calendar should now be available to select from the sidebar.

Adding an Internet Calendar as a Subscription
Outlook Online and Outlook for Windows
- Select the Calendar tab.
- Make sure the sidebar is shown on the left side of the window; if it’s hidden, toggle it with the menu button ().
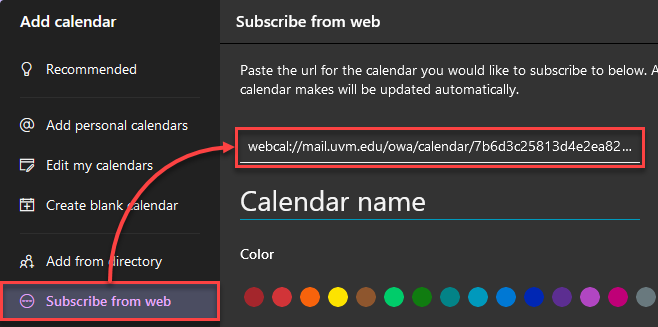
- Click Add calendar.
- Click the Subscribe from web button. Paste in the calendar URL, like one of the WebCal Links ending in .ics from the table above.
- Choose the name for the calendar according to preference, and optionally style and group, then click the Import button.
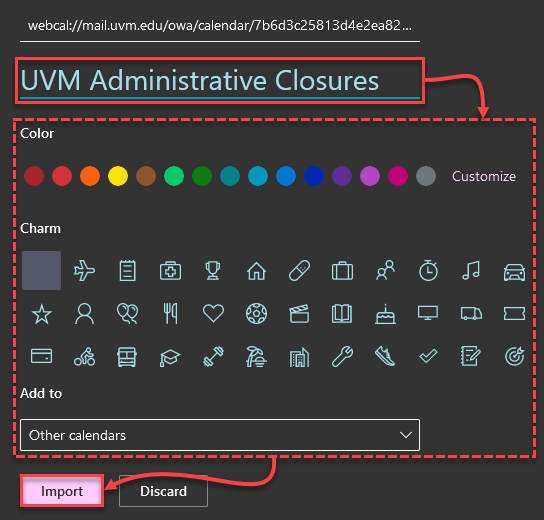
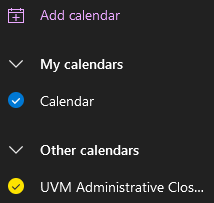
- A success message should show at the bottom of the Add calendar pane, which you can now Dismiss (). Now that it is added, the shared calendar should now be visible in the chosen calendar group, Other Calendars in this example.
Outlook (classic) for Windows
There are two options for adding a subscription-based internet calendar to Outlook (classic).
Add from a file
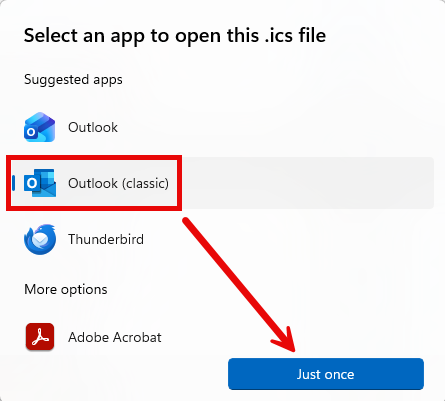
- Download and open a .ics file, like one of the three found in the WebCal Links column of the table at the top of this article.
- If you are prompted to choose a program to open the link, select Outlook (classic) and click Just once.
Add from within the application
- Right-click and Copy link address of the internet calendar you wish to subscribe to, like one of the WebCal Links ending in .ics from the table above.
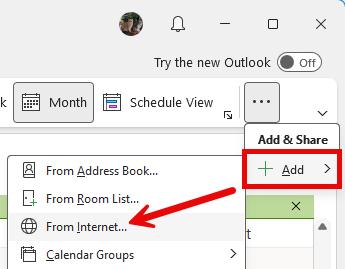
- In Outlook (classic), select the Calendar tab.
- Click Add and select From Internet…. You may have to first click the ellipsis button () to expand the More commands menu.
- Paste (Ctrl-v) the address of the internet calendar and click OK.

Outlook for Mac
You cannot subscribe to internet calendars using Outlook for Mac, due to limitations of the software. Follow the instructions above using Outlook Online to add your internet calendar subscription. The subscribed calendar will then appear in Outlook for Mac.