
 This guide is intended to help macOS users who do not have the Teams meeting button in Outlook.
The guide outlines the necessary configuration and requirements that need to be met for the Teams meeting button to populate in your Outlook client.
If the Teams meeting button is missing from your Outlook client, please use the toggles below to complete each of the above requirements.
1. Switch to Office 365 licensing
You must be using the Office 365 Subscription activated with your NetID account for the Teams Meetings button to appear in Outlook. Follow these instructions to locate your Office version.
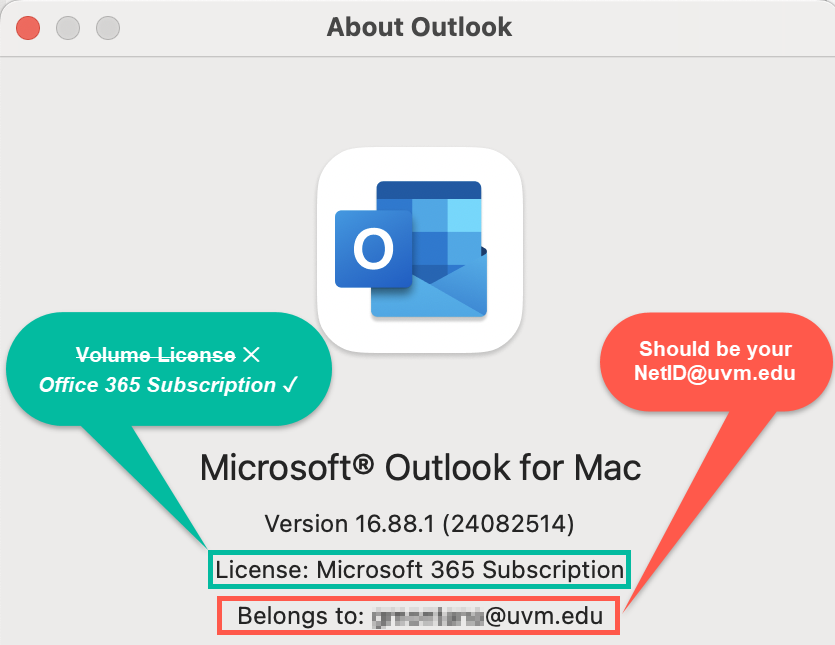
If you are currently utilizing the Volume License you will need to switch your Office version to Office 365.
If you are already using the Office 365 Subscription, but it belongs to a different NetID, you will need to follow the instructions detailed in this guide from Microsoft to remove your License files. Then, sign back into Office 365 using your NetID credentials.
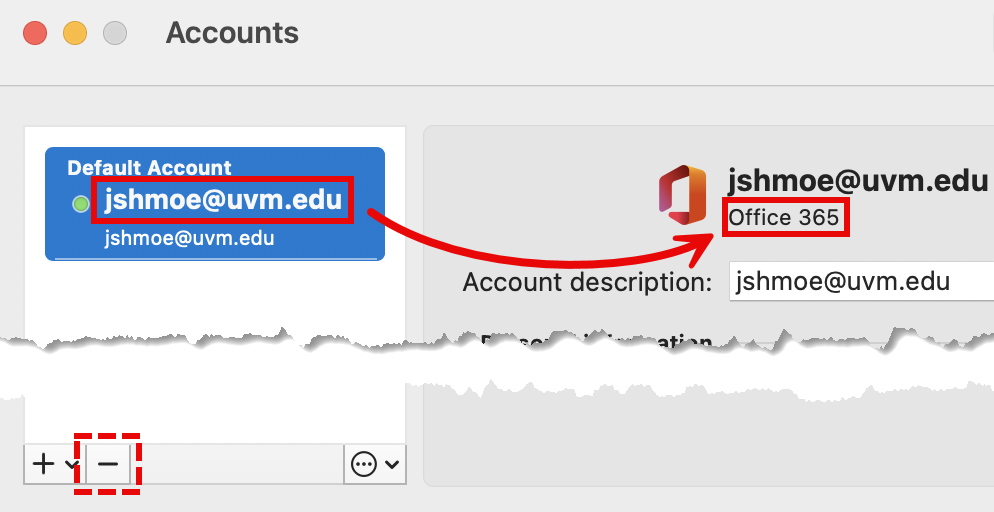
2. Configure your UVM email account in Outlook
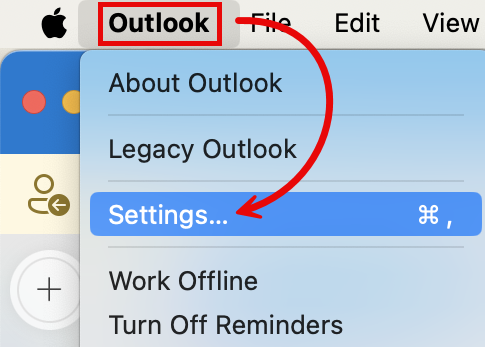
- Open the Outlook app, then click Outlook in the top left corner menu, and select Settings.
- Select Accounts.
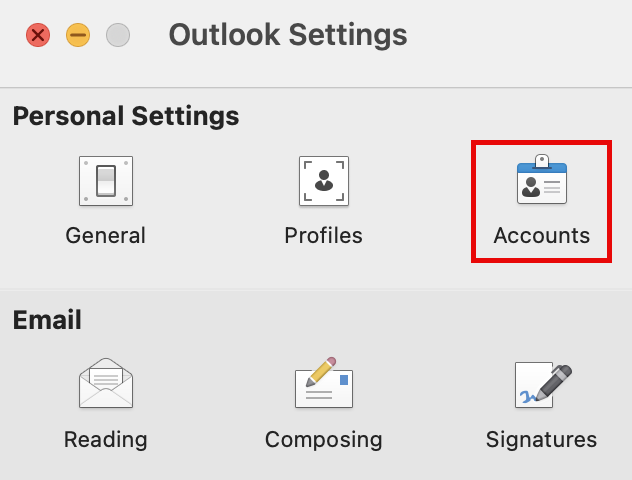
- Your NetID@uvm.edu account should be added as an Office 365 account. If you see “first.last@uvm.edu” or “IMAP” (for example), remove the account using the minus symbol () button, and re-add it using these instructions.
3. Sign into the Teams Desktop client
If Microsoft Teams is not installed on your computer, please see our Microsoft Teams guide to install and sign-in.
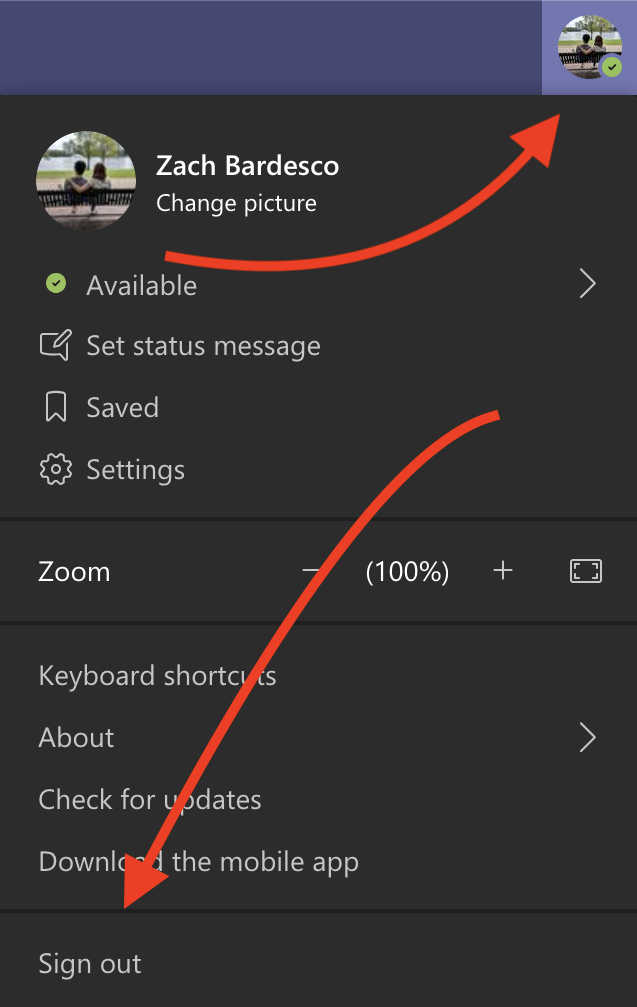
If you have Teams installed, but you are signed into the wrong account, sign out by clicking the portrait in the top right corner of Teams and selecting Sign out. Then, reopen Teams and sign-in using the instructions in our Microsoft Teams guide.
After successfully completing the steps above, you should be able to create a Teams meeting directly from your Outlook calendar.
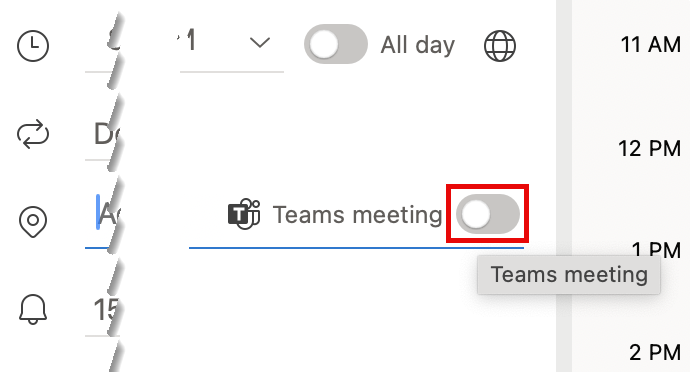
- Click the “New Event” button, enter the names of the individuals you’d like to invite, provide a subject, and then make sure the “Teams Meeting” radio button is enabled ().

Troubleshooting
Still unable to see the Teams Meeting Button?
If you still do not see the Teams Meeting button after confirming that you are using Office 365, your Outlook account has been configured correctly, and that you are signed into Teams as detailed in the sections above, please fully reboot your computer.
Why do I have a Skype for Business button instead of the Teams button?
If you’ve followed the steps above and you see a Skype for Business button in your macOS Outlook client, please do the following:
- Open your Applications folder
- Locate the Skype for Business application, right-click it, then select “Move to Trash”
- Quit and re-open Outlook