
A shared mailbox is a mailbox that multiple users can use to read and send email messages. Shared mailboxes can also be used to provide a common calendar, allowing multiple users to schedule and view vacation time or work shifts.
Why set up a shared mailbox?
- Allows multiple users to access a departmental email account without the need of sharing passwords.
-
Allows multiple users to monitor and reply to email sent to an email address (for example, an address used specifically by your department).
What is a Shared Mailbox?
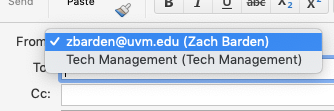
As below, those who add a Shared Mailbox to their Outlook profile can select to send a message using the Shared Mailbox (Tech Management, in this case), and can view the email folders for this Shared Mailbox.

To access a shared mailbox from their own account, users must first be granted Send As or Full Access permissions to the mailbox. Once that’s done, users sign into their own mailboxes and then access the shared mailbox by adding it to their Outlook profile.
Request a Shared Mailbox
To request a Department Account be converted to a Shared Mailbox, an owner of the Departmental Account can send an email to techteam@uvm.edu with the following information:
- The NetID for the Departmental Account you wish to be converted to a Shared Mailbox
- If you do not already have a Departmental Account, you can apply for one here: go.uvm.edu/deptaccount
- The NetID and permission levels for all the users who should have access to this Shared Mailbox.
Shared Mailbox Permission Levels
You can use the following permissions with a shared mailbox.
- Full Access: The Full Access permission lets a user log into the shared mailbox and act as the owner of that mailbox. While logged in, the user can create calendar items; read, view, delete, and change email messages; create tasks and calendar contacts. However, a user with Full Access permission can’t send email from the shared mailbox unless they also have Send As or Send on Behalf permission.
- Send As: The Send As permission lets a user impersonate the shared mailbox when sending mail. For example, if Joe Shmoe logs into the shared mailbox “UVM Admissions” and sends an email, it will look like the UVM Admissions account sent the email.
-
Send on Behalf: The Send on Behalf permission lets a user send email on behalf of the shared mailbox. For example, if Joe Shmoe logs into the shared mailbox “UVM Help Line” and sends an email, it looks like the mail was sent by “Joe Shmoe on behalf of UVM Help Line”.
Adjust Access Levels
If you wish to grant or revoke access to a Shared Mailbox, an owner of the Shared Mailbox can send an email to techteam@uvm.edu with the NetID and permission level for any such users.
Open a Shared Mailbox
Once you have been granted access to a shared mailbox and Outlook has been restarted, you may find the mailbox has automatically been added to the folder navigation pane on the left side of the Outlook window. If it is not automatically added, you may need to follow the steps below.
New Outlook (Windows)
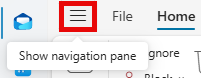
- From the Mail tab of the Outlook app, click the hamburger icon () to Show the navigation pane.
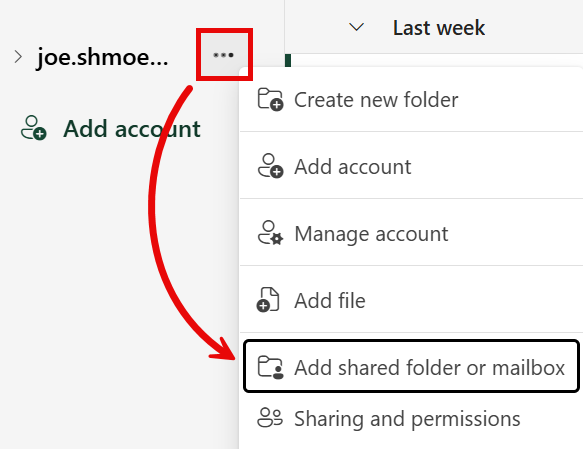
- Hover your mouse over your @uvm.edu mailbox, click the ellipsis menu icon (), and select Add shared folder or mailbox.
- Type in the email address for the shared mailbox, select it from the results, and then click Continue.

- Click Close, and then close the Settings window.
- The new mailbox will appear in the navigation pane on the left side of the Outlook window. You may have to scroll down.
Classic Outlook (Windows)
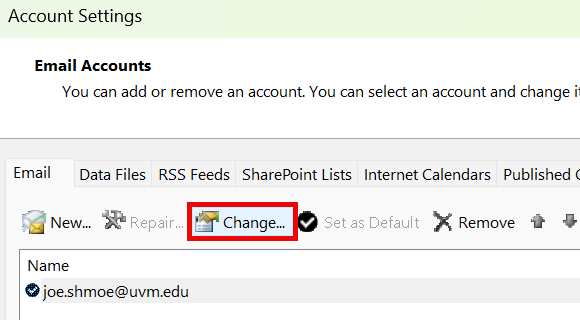
- Open the Outlook application, then click File.
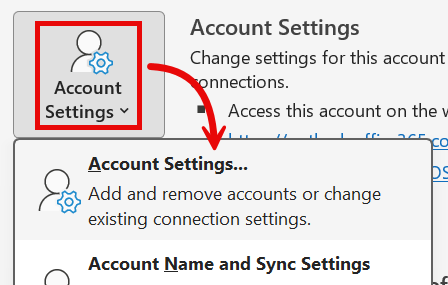
- Select Account Settings > Account Settings….
- Click Change….
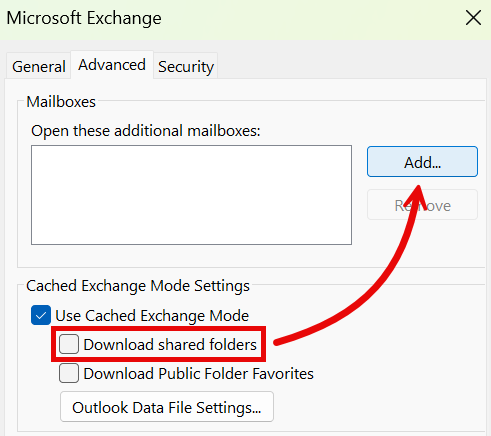
- Click More Settings.

- Select the Advanced tab, make sure the Download shared folders checkbox is NOT checked, then click Add….
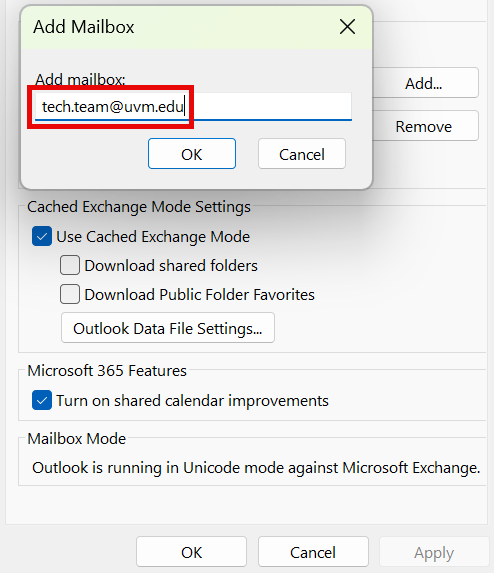
- Type in the email address for the shared mailbox, click OK three times, then Next, Close, and Done.
- The new mailbox will appear in the navigation pane on the left side of the Outlook window. You may have to scroll down.
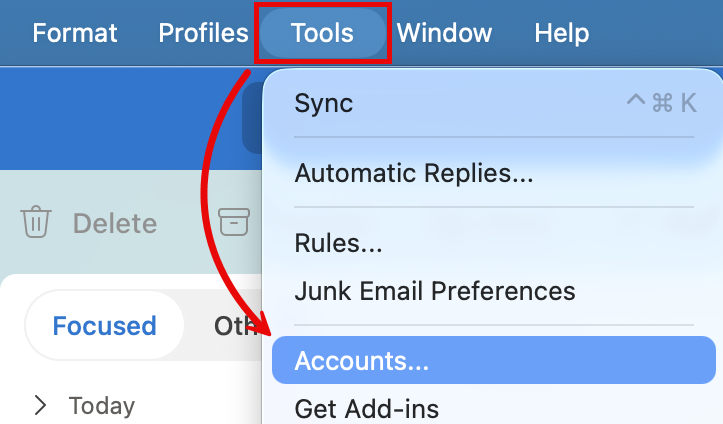
Outlook (macOS)
- Open Outlook and select Tools > Accounts….
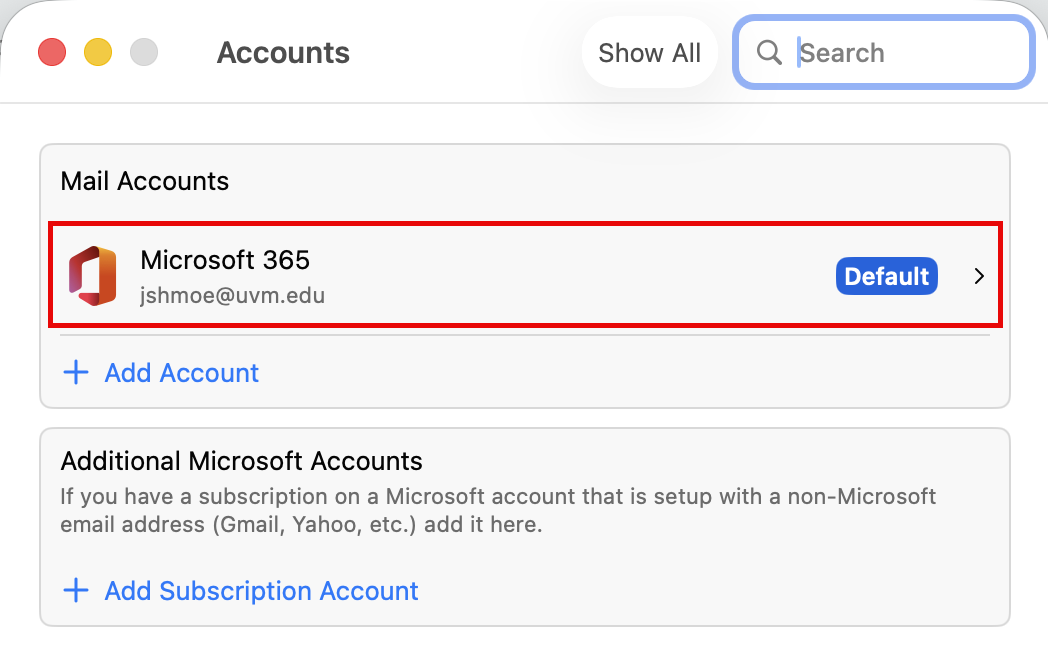
- Select your account and from the list of Mail Accounts.
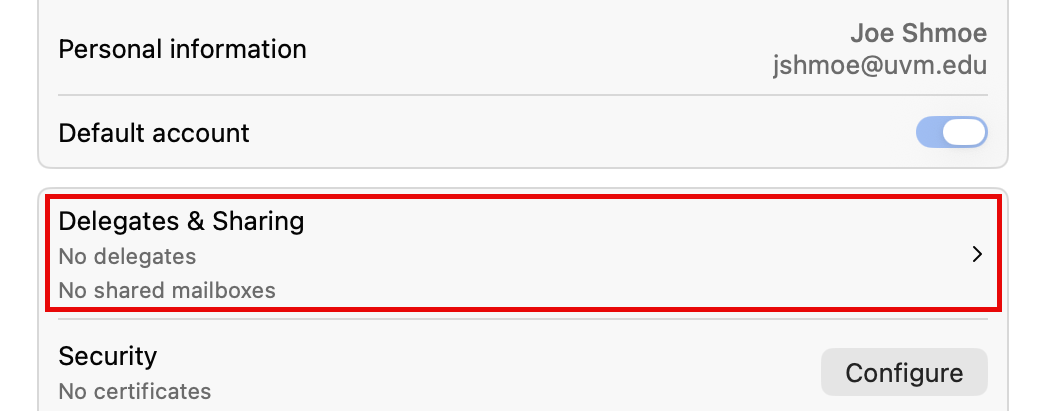
- Click Delegates & Sharing.
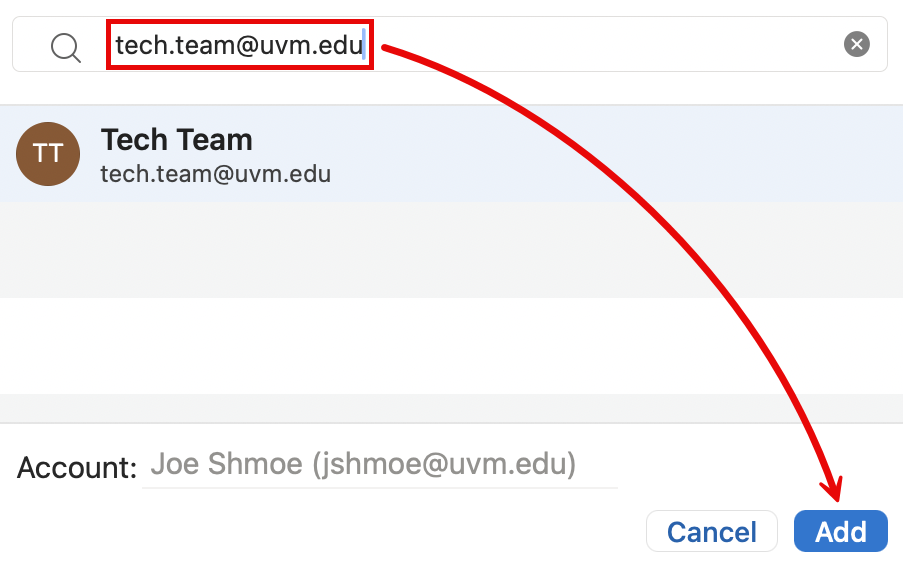
- Select the Shared With Me tab, and click the plus (+) sign in the bottom-left corner.
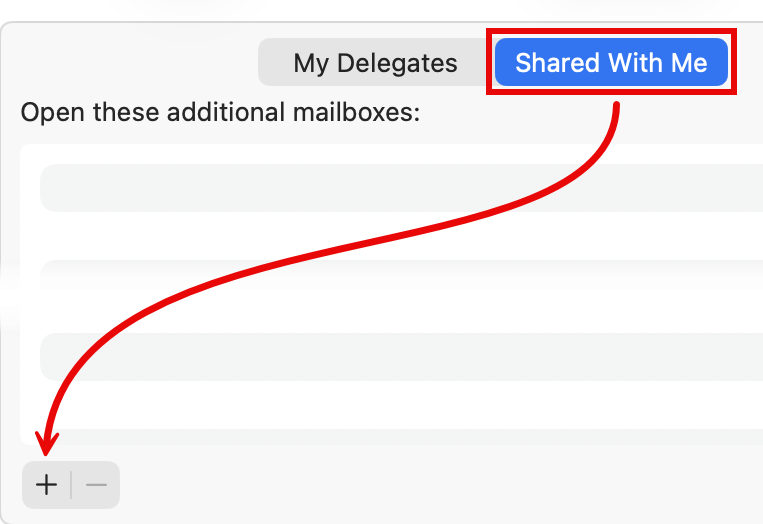
- Enter the address for the shared mailbox, then click Add.
- Close the Accounts Window.
- The new mailbox will appear in the sidebar on the left side of the Outlook window. You may have to scroll down.
Outlook Online
- Log in to Outlook Online.
- Hover your mouse over your @uvm.edu mailbox, click the ellipsis menu icon (), and select Add shared folder or mailbox.

- Type in the email address for the shared mailbox, select it from the results, and then click Continue.
- Click Close, and then close the Settings window.
- The new mailbox will appear in the navigation pane on the left side of the page. You may have to scroll down.