
How-to guides for connecting to research virtual machines (VMs) hosted by Enterprise Technology Services.
ETS hosts VMs for researchers to use as an alternative to the Vermont Advanced Computing Center (VACC). These VMs run on a server cluster that the Systems Architecture & Administration (SAA) team supports and are available to any researcher on campus.
The guide below will walk you through the steps to connect to your VM with either command-line access or full GUI access. You must be connected to the UVM network to connect to research VMs. It is recommended to be connected to the Cisco Anyconnect VPN, however there are other methods of connecting if you do not have access to the VPN.
Linux VMs
Linux VMs can run in either “multi-user” mode or “graphical” mode. Multi-user mode means the VM is only usable via the command-line, and requires SSH to access. Graphical mode means the VM has a desktop similar to personal PCs. If you are not sure what mode your VM is configured in, reach out to the owner of the VM or vacchelp@uvm.edu.
Command Line Access (multi-user mode)
Command line access provides a terminal/shell to your research VM for the execution of text-only commands. This is ideal for starting long-running processes or simple document/script editing.
Windows using PowerShell on UVM VPN
- If connected to the UVM VPN, you can connect directly to your research VM using PowerShell on Windows. Open PowerShell from the Start Menu by searching for “PowerShell”
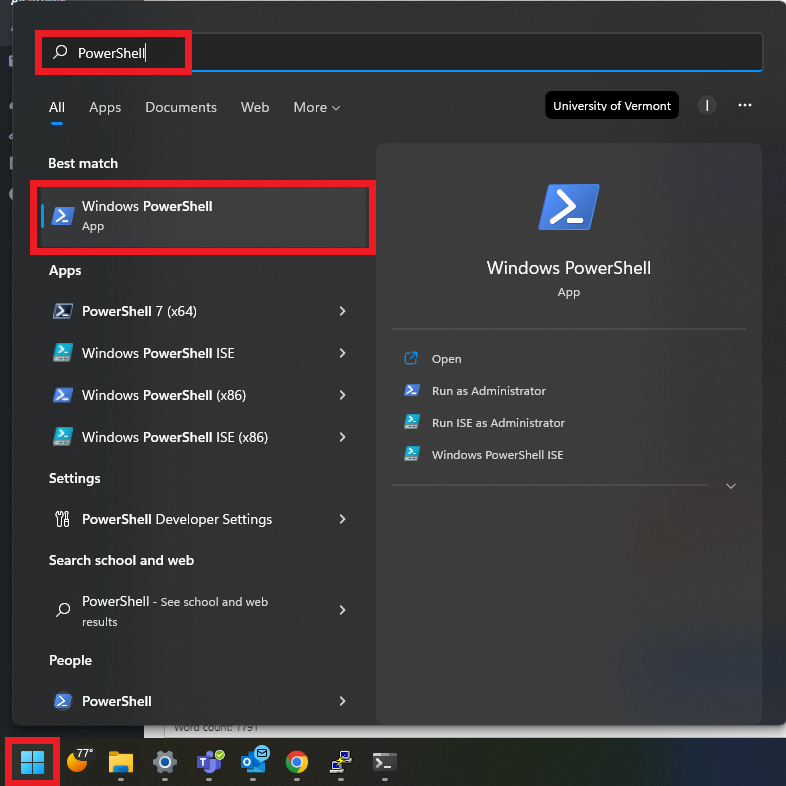
- In PowerShell, type the command:
ssh netid@my-host-here.uvm.edu(replacing ‘netid’ with your NetID and ‘my-host-here’ with your research VM name), you will be prompted for your NetID password.

- You now have command line access to your research VM, to verify this type
hostnameand you will see your VM name. To disconnect, typeexitor just close the PowerShell window.
Mac using Terminal on UVM VPN
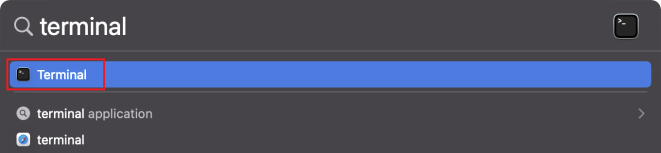
- Open Terminal on your Mac by searching “Terminal” in Spotlight (cmd+space).
- Type “ssh netid@hostname.uvm.edu”. Replace NetID with your NetID, and “hostname” with the name of the research VM. Hit enter and you will be prompted for your password.
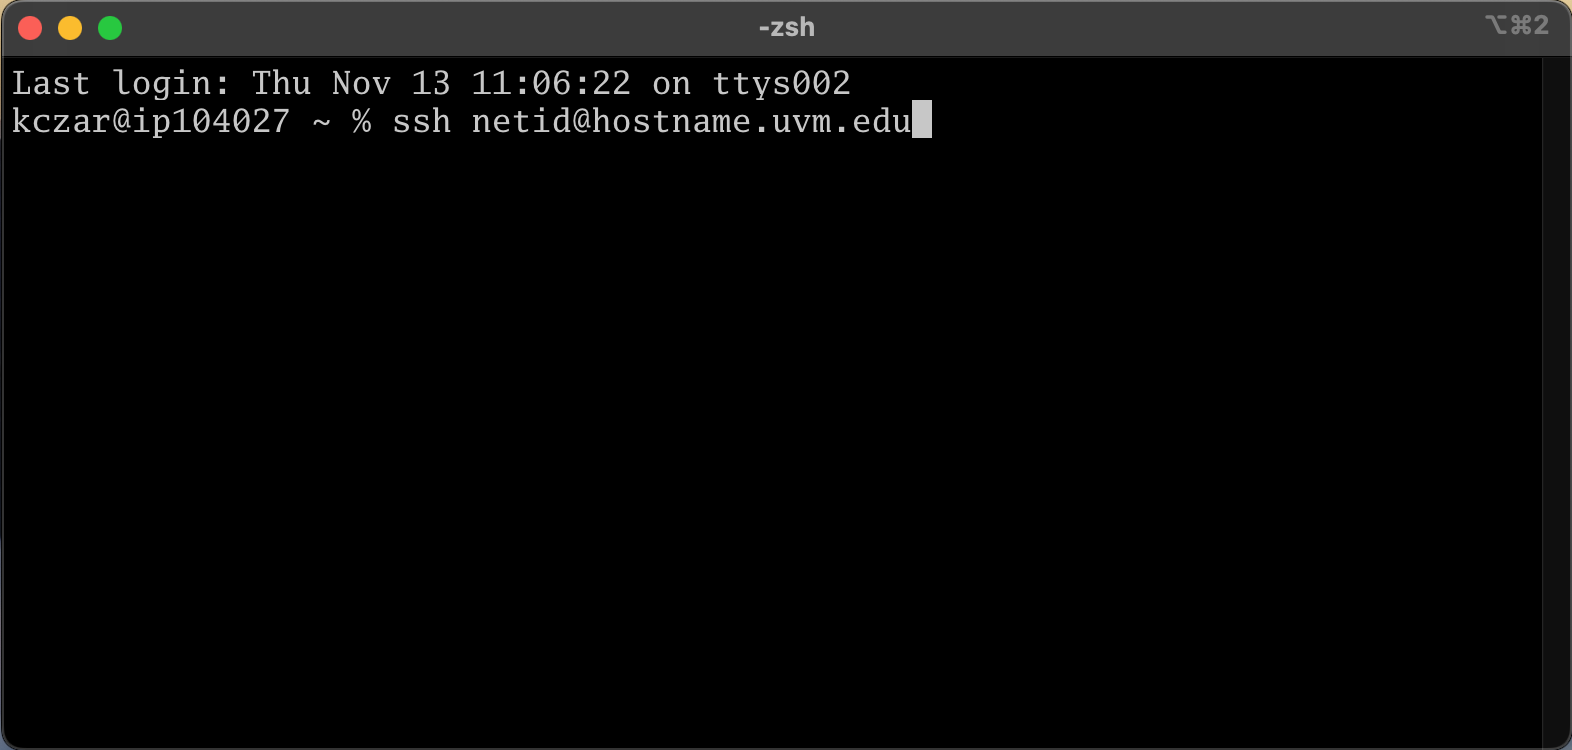
- You should now be connected to your VM. To verify this type
hostnameand you will see your VM name. To disconnect, typeexitor just close the Terminal window.
Access Linux VM without UVM VPN
If you do not have access to the UVM VPN, you can use the following instructions to connect to a research VM. This is most likely applicable to undergraduate students, faculty by default have access to the VPN.
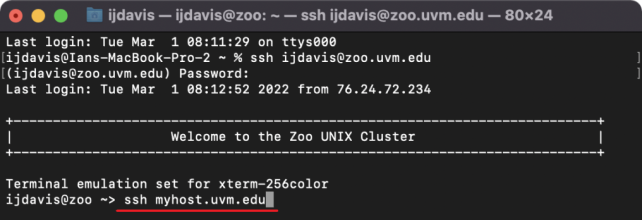
Mac or PC through Zoo
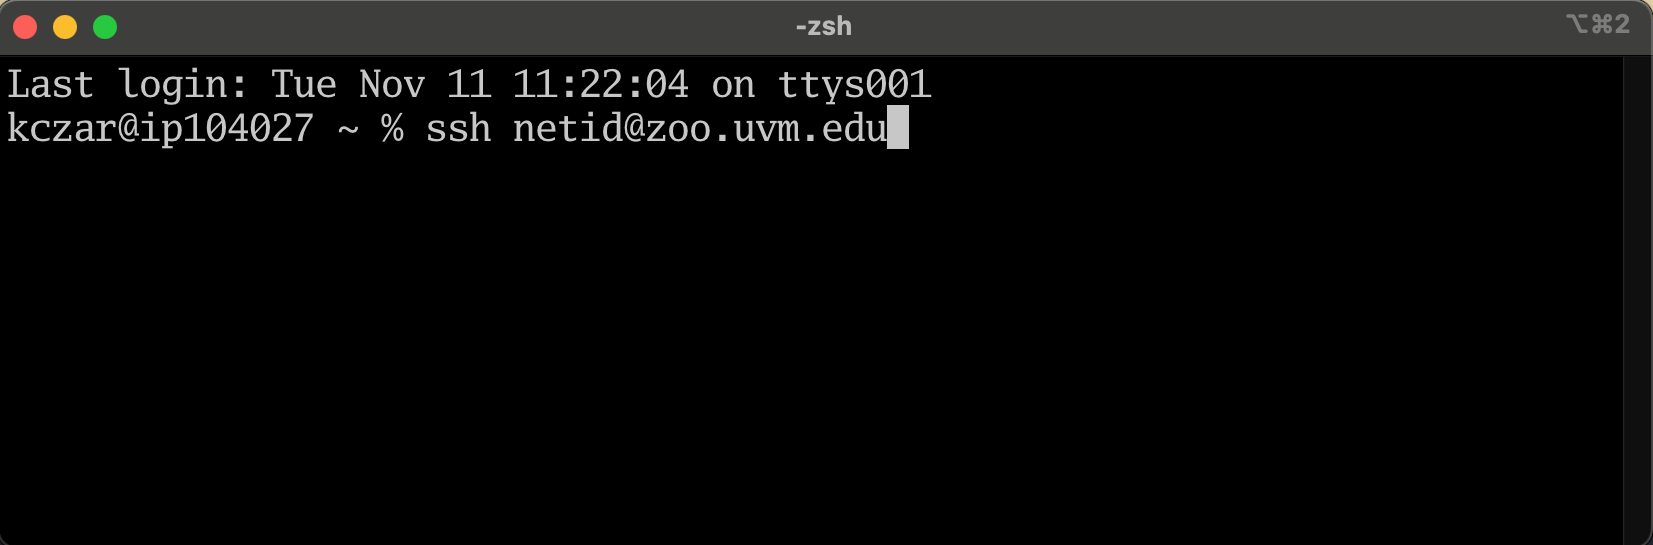
- You can connect to Zoo from Terminal on a Mac, or with Powershell on a PC. To open Terminal, open the Spotlight search and type ‘Terminal’. On a PC, type “Powershell” in the search bar.
- In Terminal or Powershell, type the command:
ssh netid@zoo.uvm.edu(replacing ‘netid’ with your NetID), you will be prompted for your NetID password.
- Once logged in to Zoo you can now SSH into your research VM. This is done by entering the command
ssh hostname(replacing hostname with your research VM name). After entering this command you will be prompted for your NetID password once more, enter it.
- You now have command line access to your research VM, to verify this type
hostnameand you will see your VM name. To disconnect, typeexitor just close the Terminal window.
Full GUI Access (Full Remote Desktop)
This option grants access to a full remote desktop environment for running multiple graphical applications. It is highly recommended that you connect to the VPN to gain access to VMs running in graphical mode.
Windows using Remote Desktop Connection on UVM VPN
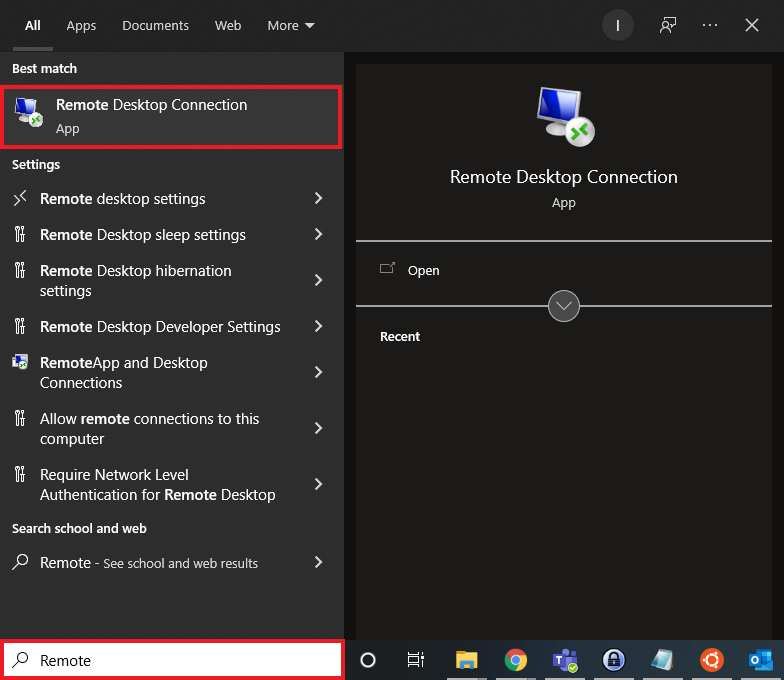
- Open the Remote Desktop Connection application from the Start Menu by searching for ‘Remote Desktop Connection’.
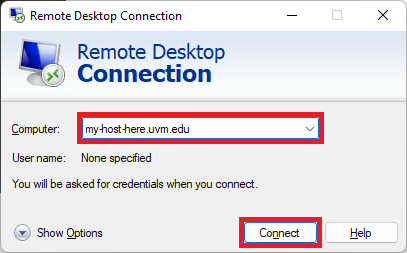
- Enter your hostname in the computer field (replace my-host-here.uvm.edu with your research VM hostname) and click Connect.
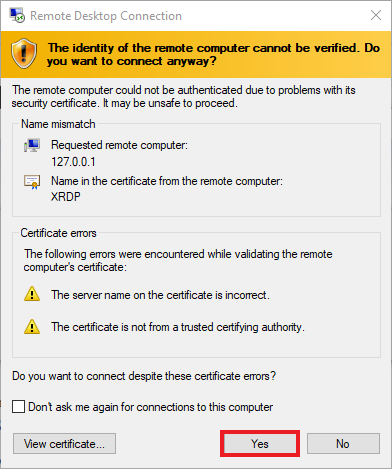
- If you see a certificate warning, click Yes.
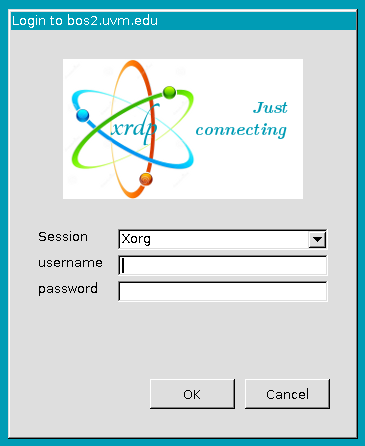
- You will then be connected to a remote session on your VM and will be prompted with an XRDP login screen. Enter your NetID and password to login.
- You are now connected to your research VM with a full desktop.
Mac using VPN and Windows App
To connect to your research VM, you will need an RDP application. The recommended application for MacOS is “Windows App” which can be downloaded from the App Store.
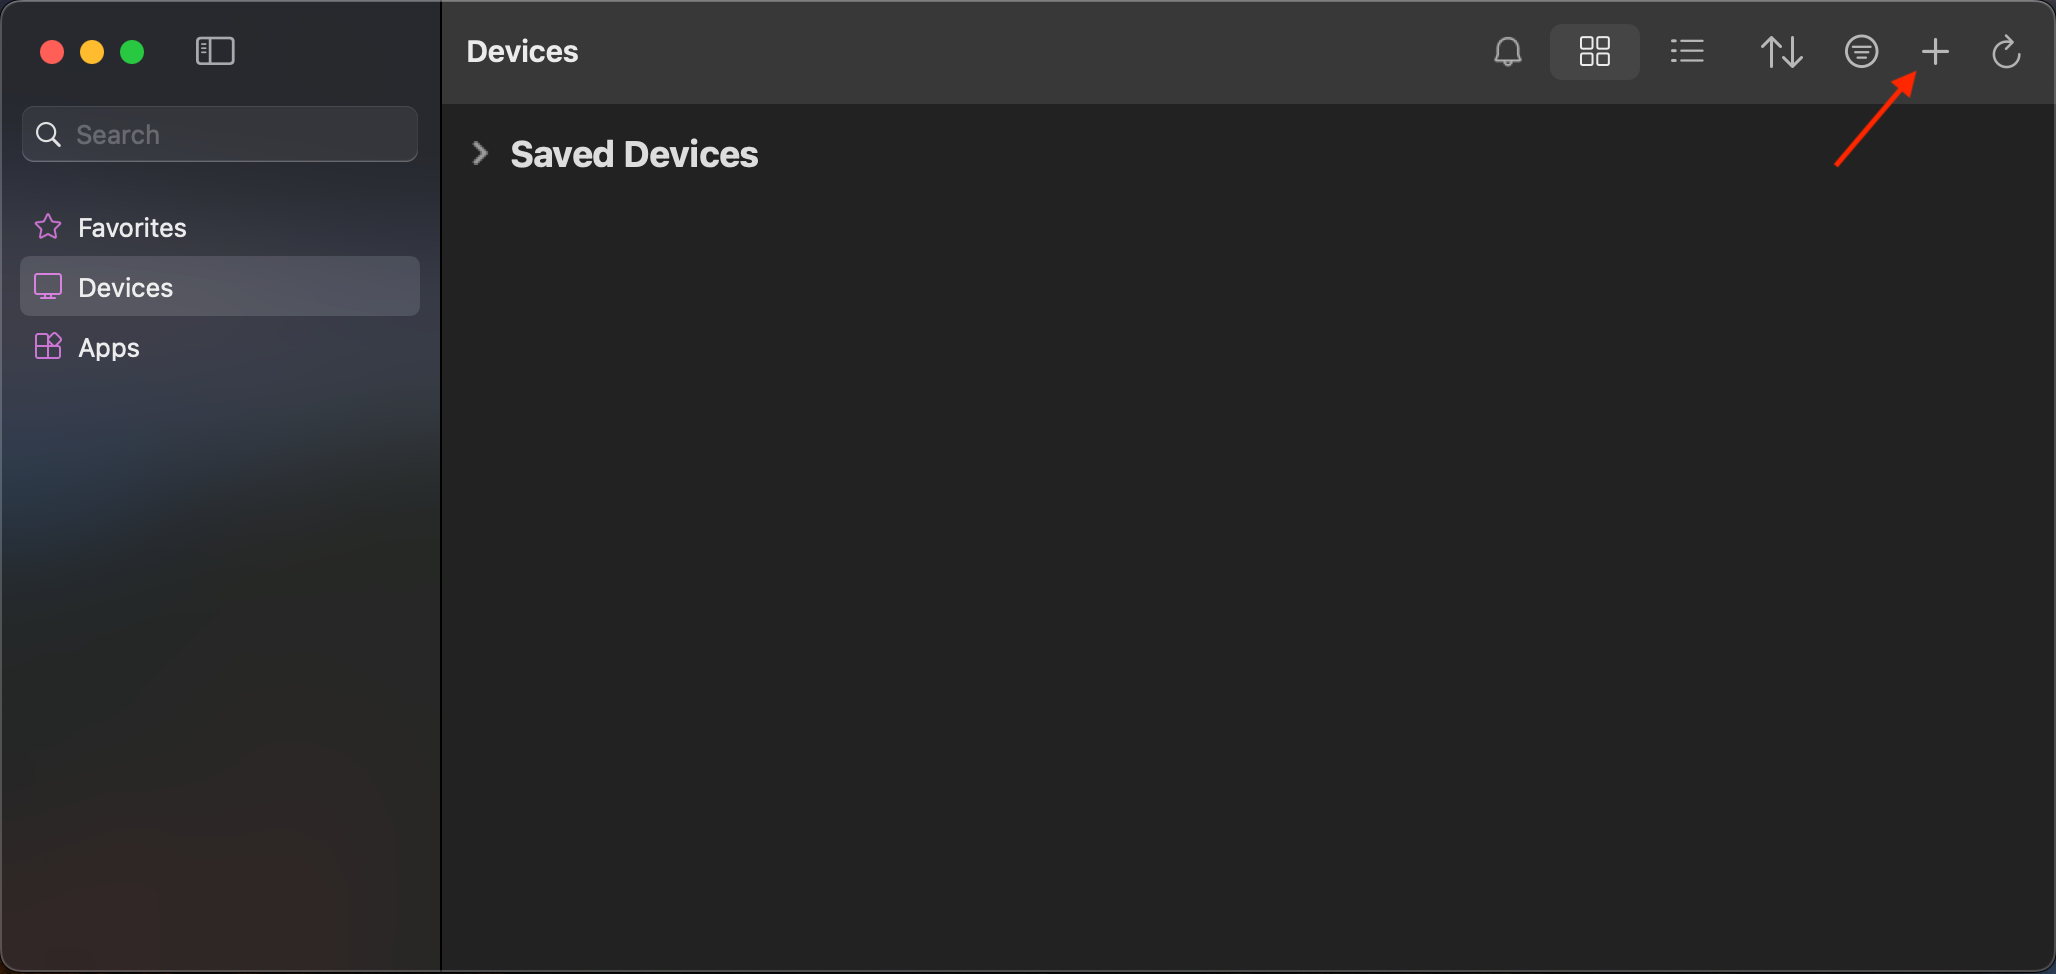
- Open Windows App and click the + symbol in the upper right corner.
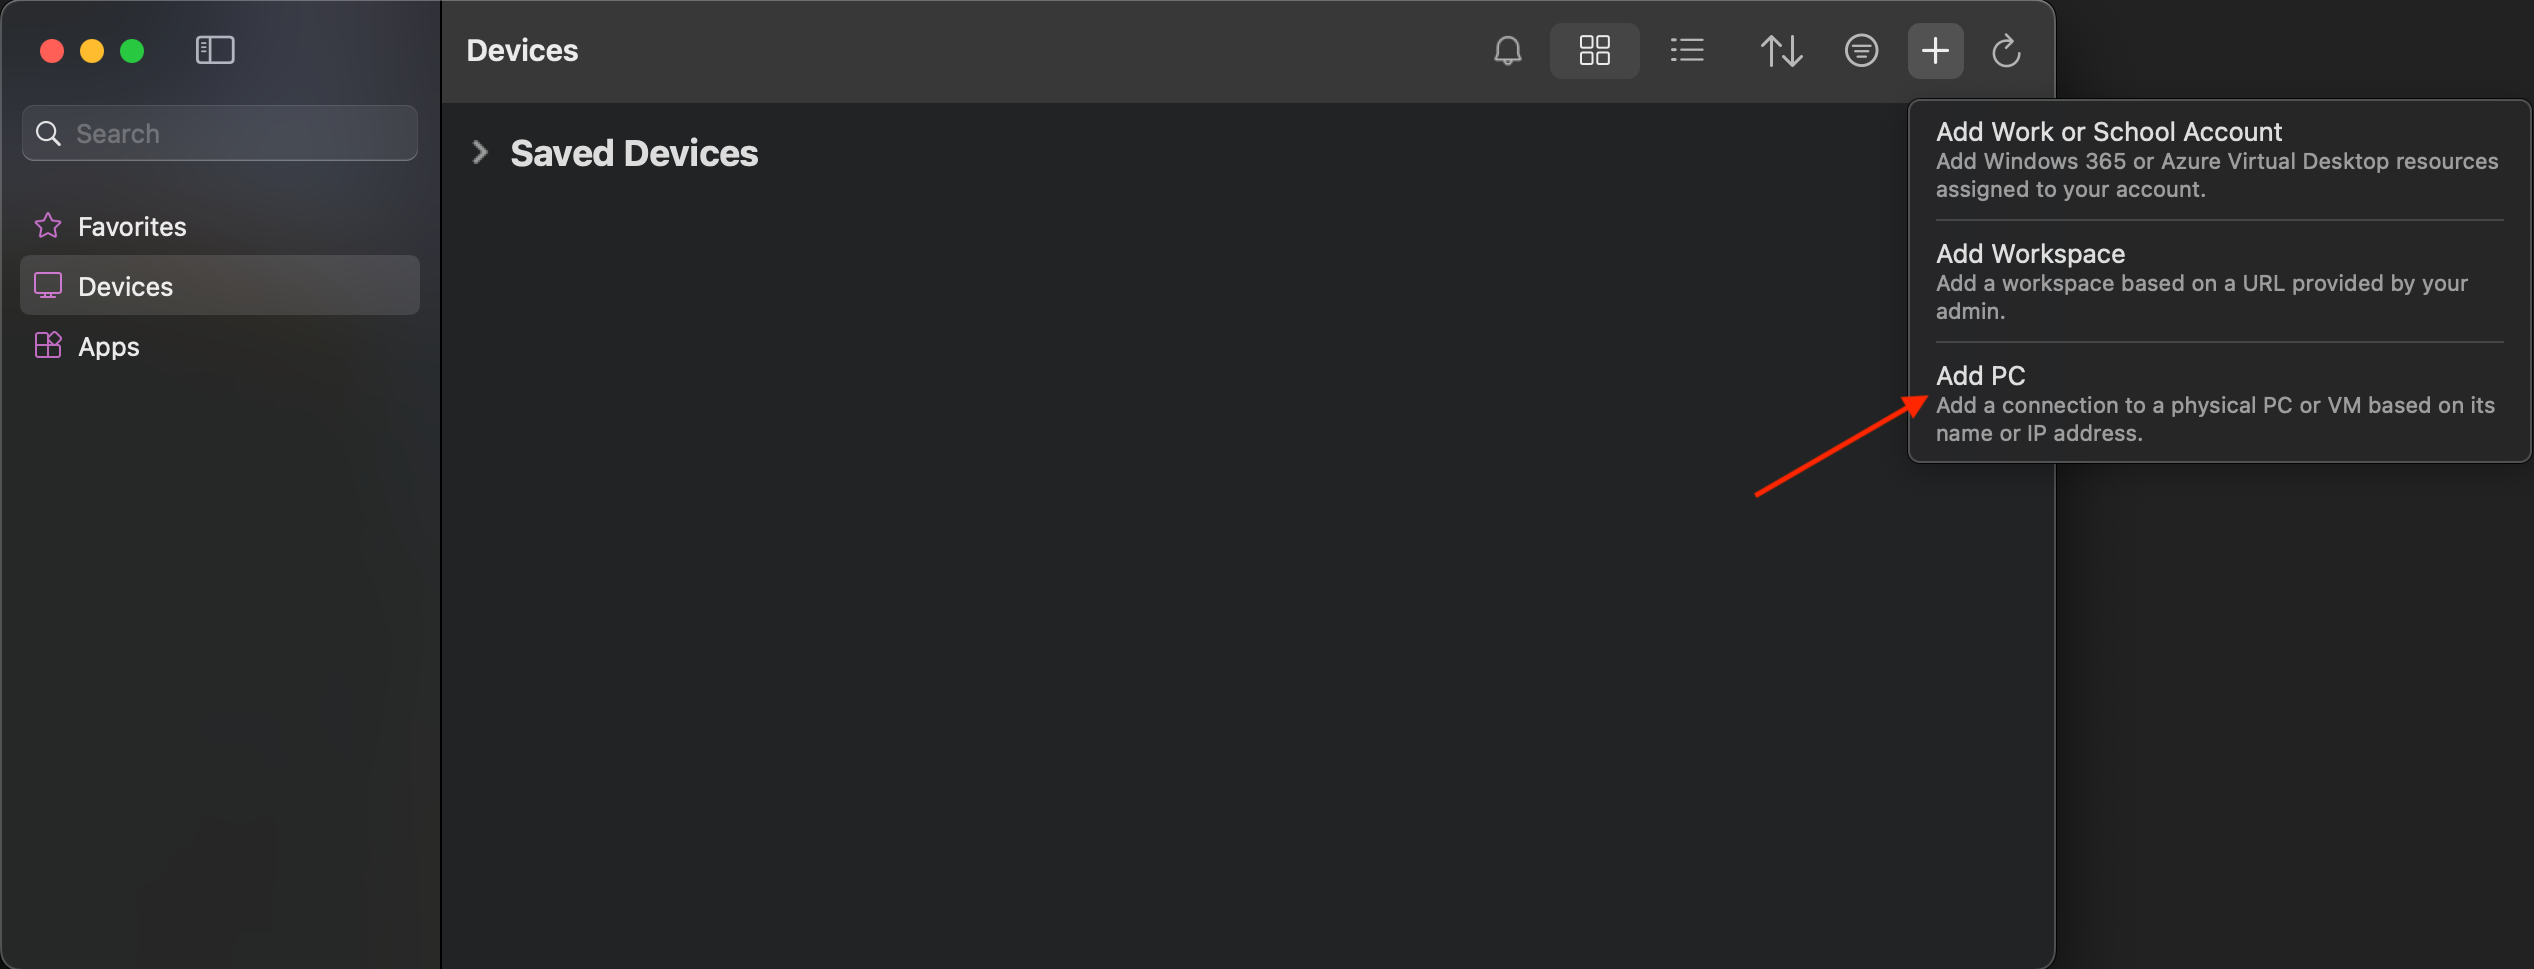
- Click the Add PC Button
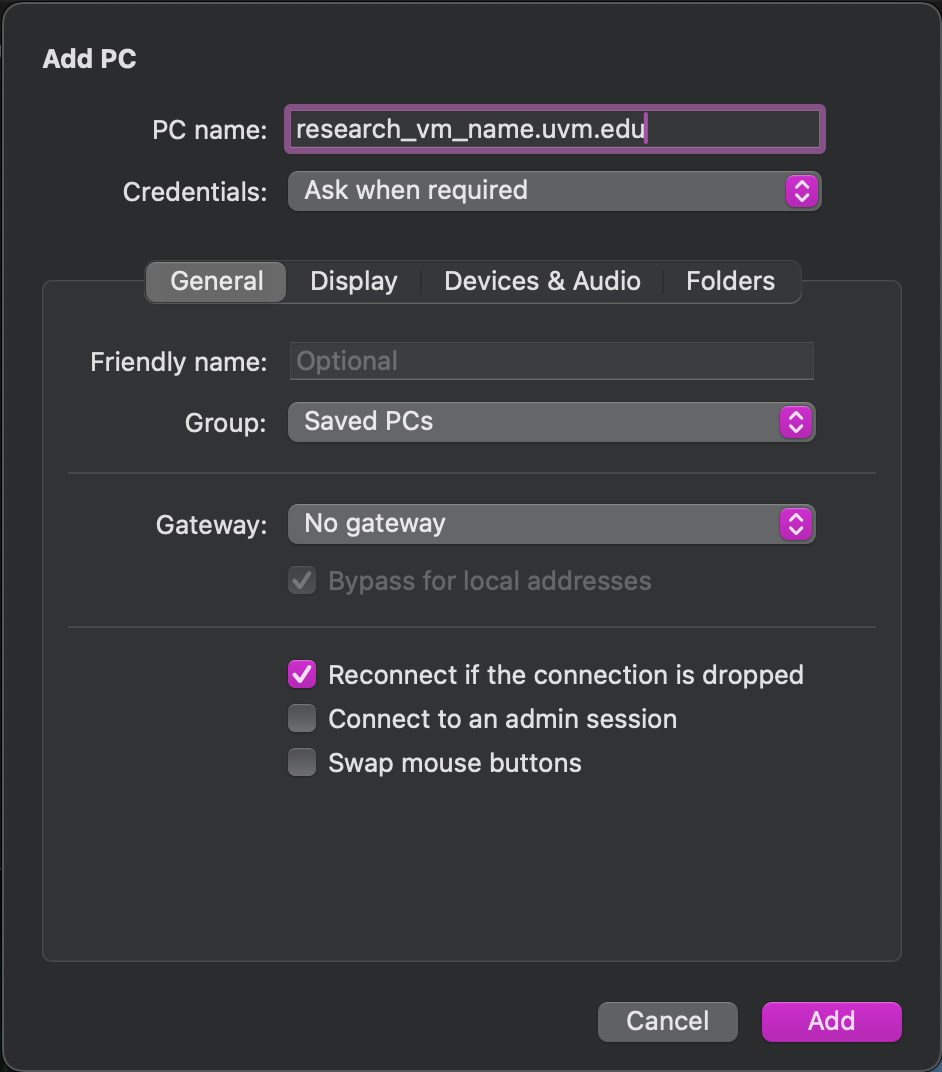
- In the Add PC window, enter the hostname of the VM you are connecting to. The Credentials dropdown should say “Ask when required”. Click Add.
- You should now see your VM in your “Saved Devices” Tab. Double click the pane with your VM name.
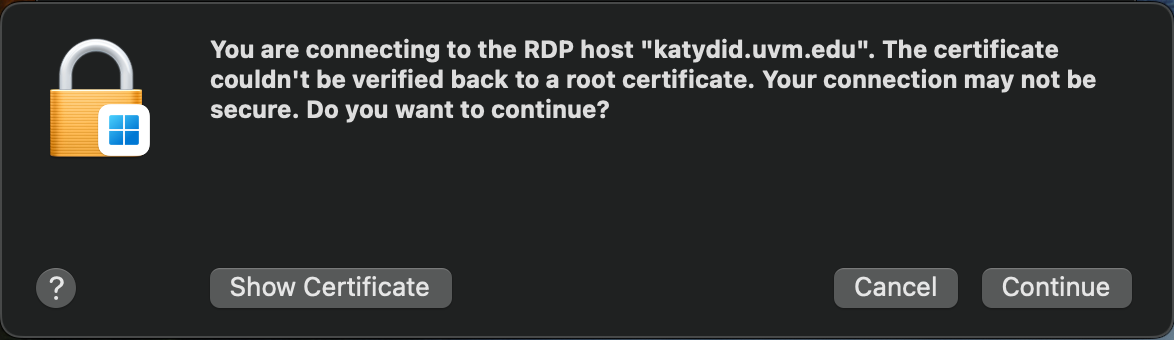
- You will see a popup saying the connection may not be secure. Click continue.
- If the connection is successful, you will see the following login window. Enter your NetID in the username field and your NetID password.

- Done!
Connect to GUI without VPN (Mac & PC)
To connect to a GUI desktop without connecting to the VPN, you must first set up an ssh tunnel through Zoo. Once the tunnel is set up, you will follow the directions above for connecting from a VPN connection, but instead of hostname.uvm.edu as the computer or PC Name, you will need to put in “127.0.0.1:33389”.
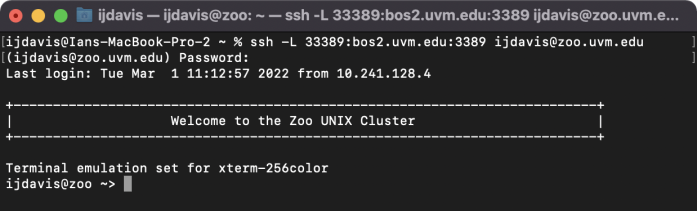
- To create an SSH Tunnel, you will need to connect to Zoo with a certain command. To do this open Terminal (Mac: Spotlight search -> Terminal) or Powershell (Windows PC).
- In the Terminal or Powershell window, type the following command
ssh -L 33389:hostname.uvm.edu:3389 netid@zoo.uvm.edu(replacing hostname with your VM hostname), you will be prompted for your NetID password.

- Once logged in to Zoo the SSH tunnel is created and will remain open as long as the Terminal window is open.
- Follow the instructions above for connecting to a VM from UVM VPN depending on your operating system. For the PC Name or Computer name put in “127.0.0.1:33389” as the computer name. Everything else stays the same.
- You are now connected to your research VM with a full desktop. To close the SSH tunnel, log out of your remote desktop session and go to your Terminal window and type
exit.
Windows VMs
Windows using Remote Desktop Connection
Connections to Windows research VMs when using Windows as your client device will be made through the Remote Desktop Connection application. Connection security is managed through the use of RD Gateway which allows remote access from both on and off campus.
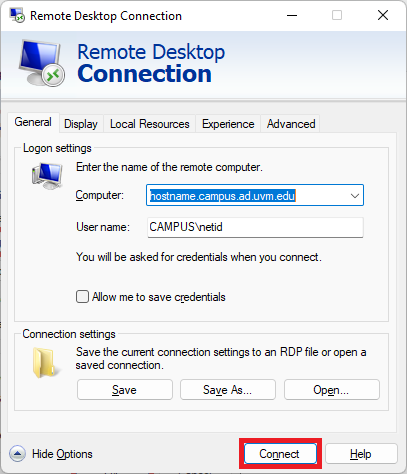
- Open the Remote Desktop Connection application from the Start Menu by searching for ‘Remote Desktop Connection’.
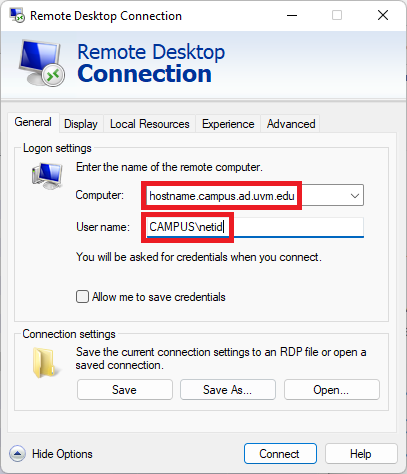
- Expand the configuration screen by clicking ‘Show options’ and enter your hostname and username information.Computer: hostname.campus.ad.uvm.edu
User Name: CAMPUS\netid
Replace ‘hostname’ with your VM hostname and ‘netid’ with your UVM NetID.
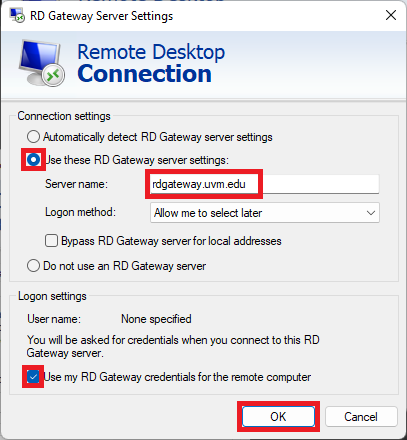
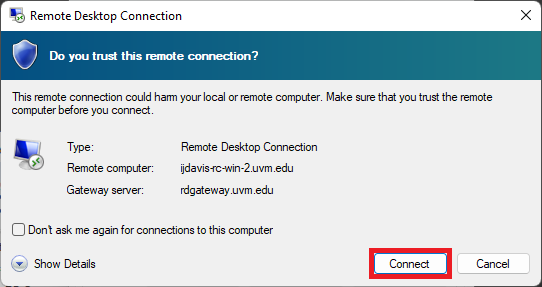
- Click the ‘Advanced’ tab to show more configuration options and then click the ‘Settings’ button under the ‘Connect from anywhere’ heading.

- Click the radio button next to ‘Use these RD Gateway server settings’ and enter the RD Gateway address: ‘rdgateway.uvm.edu’ Then click the checkbox next to ‘Use my RD Gateway credentials for the remote computer’ and click ‘OK’.
- Go back to the ‘General’ tab and click Connect.
- You will see a warning asking if you trust the connection, click Connect.
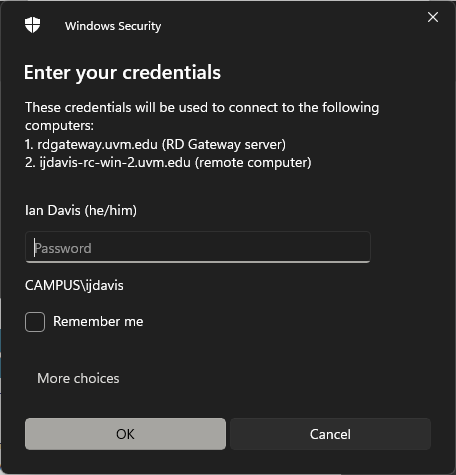
- You will be prompted for your credentials, your username will be filled in, enter your NetID password and click OK.
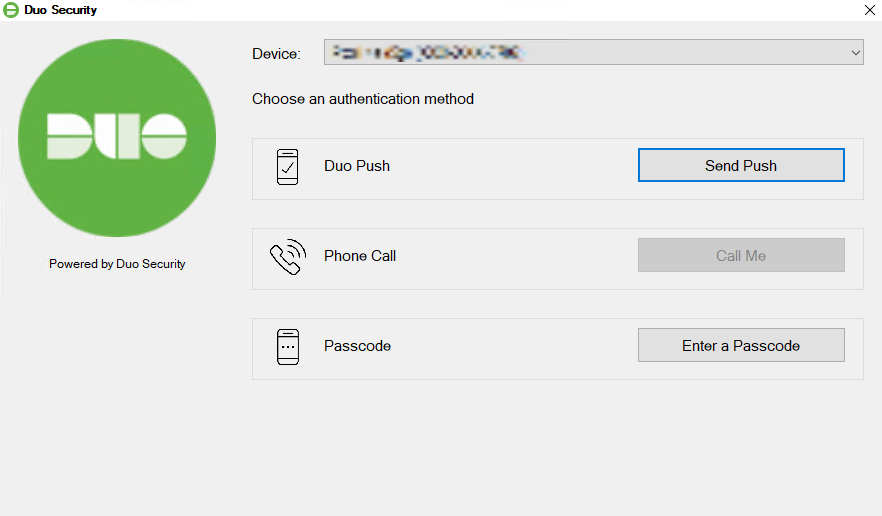
- Finally, you will be prompted for your multi-factor authentication method. Click your method of choice to complete the log in.
Mac using Microsoft Remote Desktop
To connect to your research VM, you will need an RDP application. The recommended application for MacOS is “Windows App” which can be downloaded from the App Store.
If you are not connected to the UVM VPN, you will need to configure RD Gateway. If you are connected to the VPN, you can skip steps 4 and 5.
-
- Open Windows App and click the + symbol in the upper right corner.
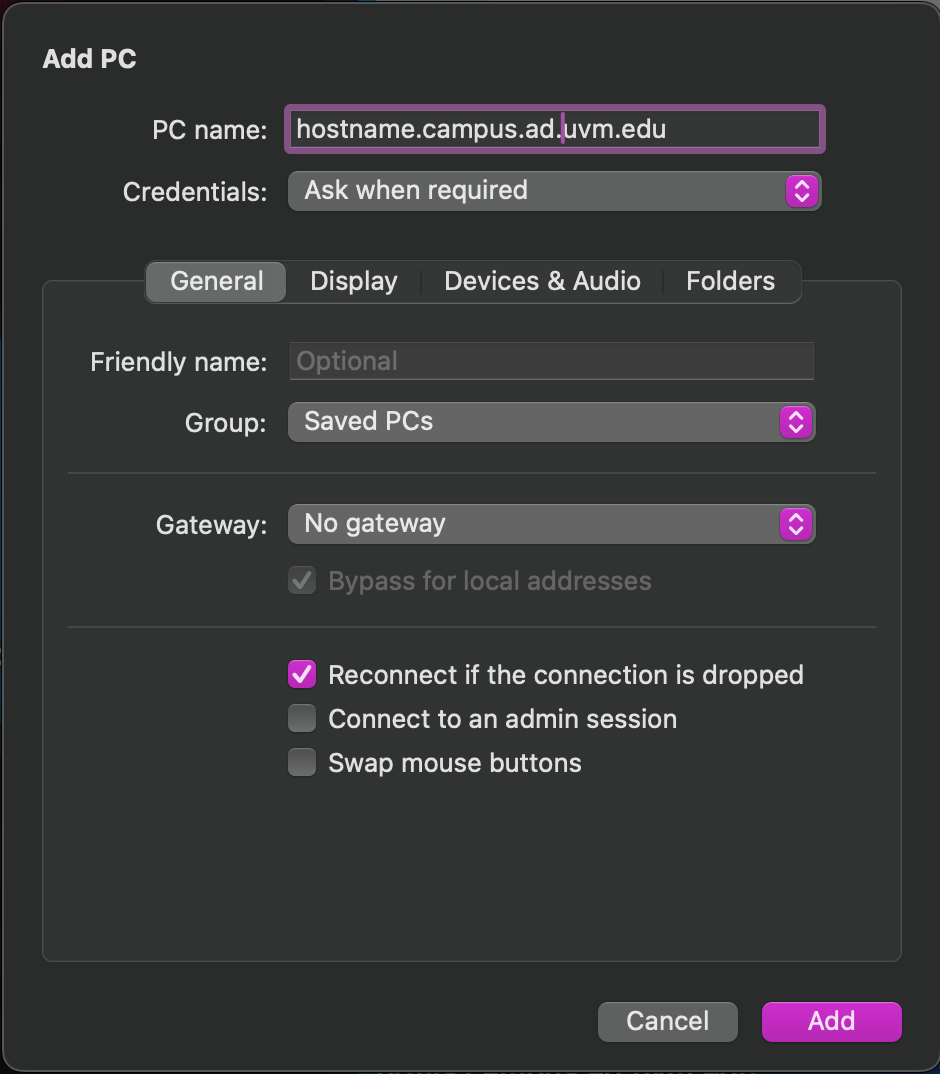
- Click the Add PC Button
- In the Add PC window, enter the hostname of the VM you are connecting to. The Credentials dropdown should say “Ask when required”.
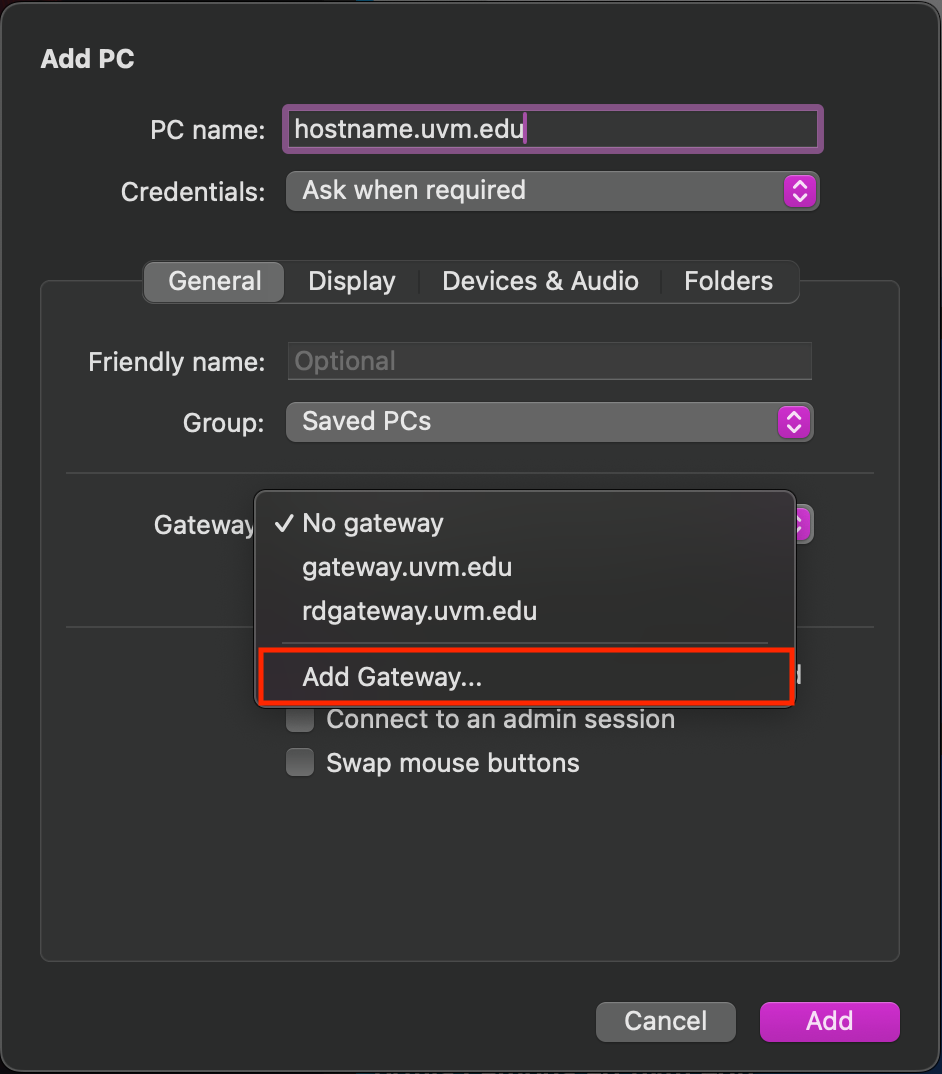
- (If you are connected to the VPN, skip this step). Click on the Gateway drop-down, and select Add Gateway.
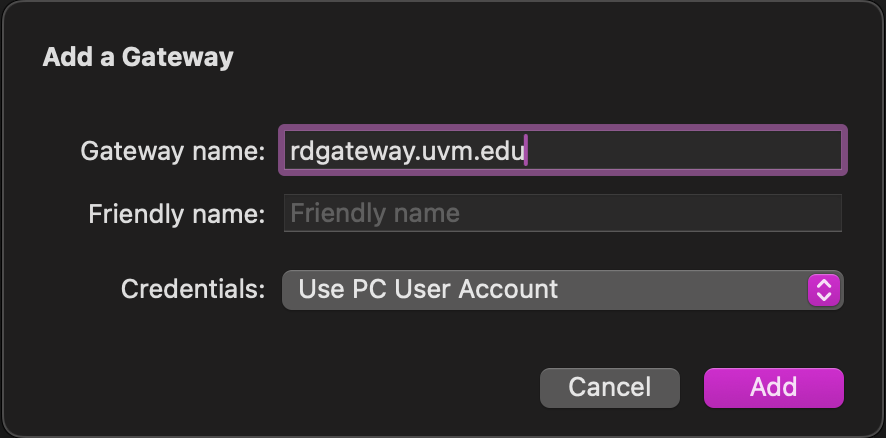
- (If you are connected to the VPN, skip this step). Enter rdgateway.uvm.edu in the gateway name, and make sure the Credentials drop-down says “Use PC User Account”. Click Add.
- Click “Add” in the Add PC window.
- You should now see your VM in your “Saved Devices” Tab. Double click the pane with your VM name.
- A window should pop up asking for your credentials. Enter “CAMPUS\netid” for the Username and your NetID password.
- Finally, you will be prompted for your multi-factor authentication method. Click your method of choice to complete the log in.
- Done!
- Open Windows App and click the + symbol in the upper right corner.