LISTSERV is an email list management software that provides everything you need to manage all of your opt-in email lists, including email newsletters, announcements, discussion groups, and email communities.
For more advanced instructions not detailed in this guide, please see the LISTSERV Documentation and Manuals page.
Subscriber Commands
Subscribing by email
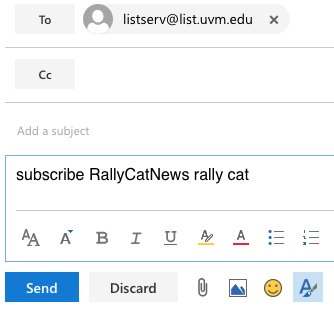
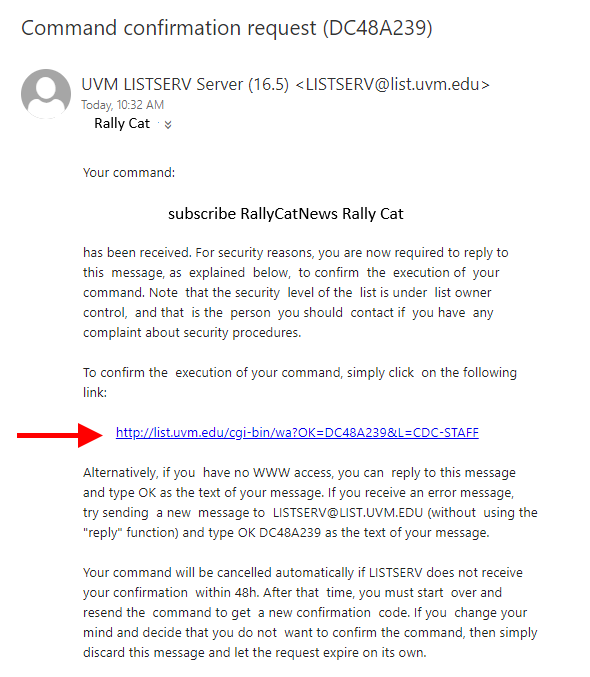
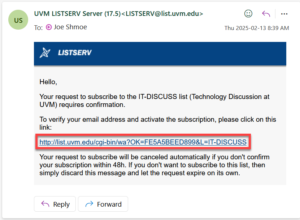
- Email listserv@list.uvm.edu with the following format: subscribe [listname] [first_name] [last_name]
- After sending the email, you should receive a confirmation email with a link to activate your subscription.
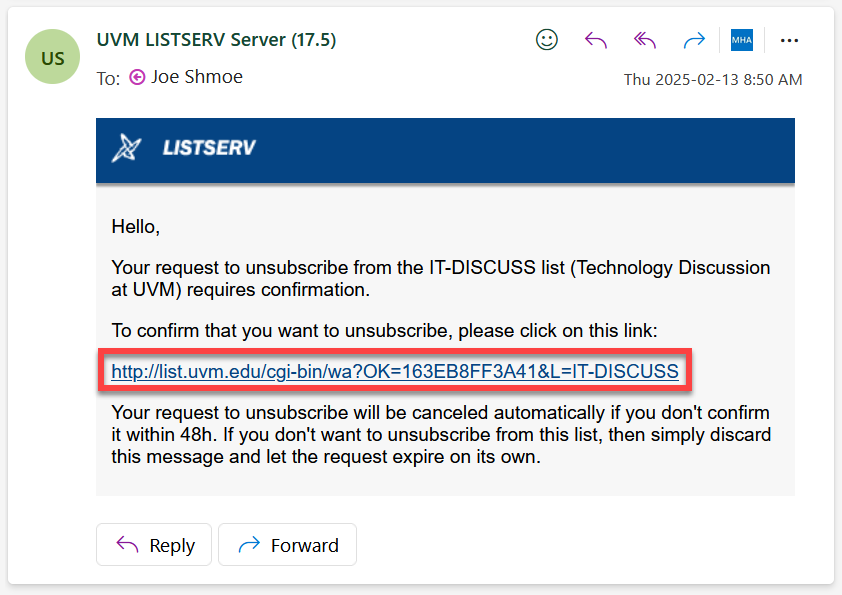
Unsubscribing from a single list by email
- Email listserv@list.uvm.edu. The body of the email should read “unsubscribe [listname]” where “listname” is a portion of the email address preceding the @list.uvm.edu.
- Remove any signature or other text from the message body.
- Leave the Subject of your email empty.
- You should receive an email with confirmation that your request was processed.
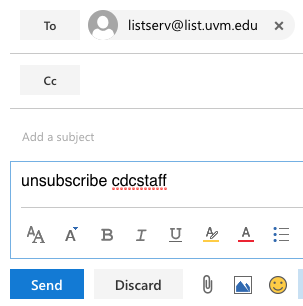
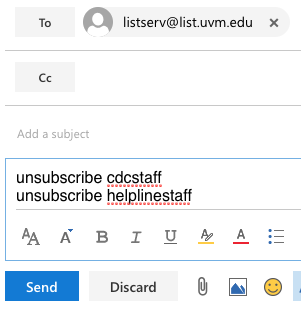
Unsubscribing from several lists by email
- You can enter multiple unsubscribe commands on separate lines.

- Remove any signature or other text from the message and send the email. You should receive an email with confirmation that your request was processed.
Subscribing using a web browser
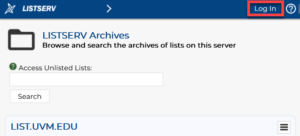
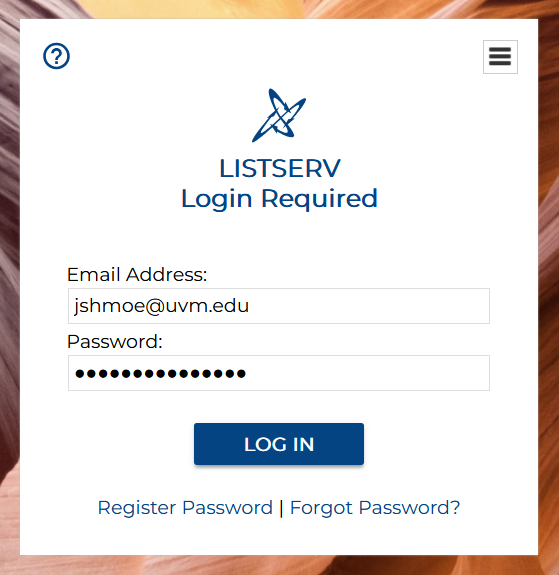
- Go to https://list.uvm.edu and click the Log In link in the top right corner of the page.
- Log in using your primary email address (usually either firstname.lastname@uvm.edu OR NetID@uvm.edu, whichever you have set as your primary) and your NetID password.

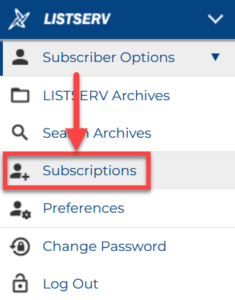
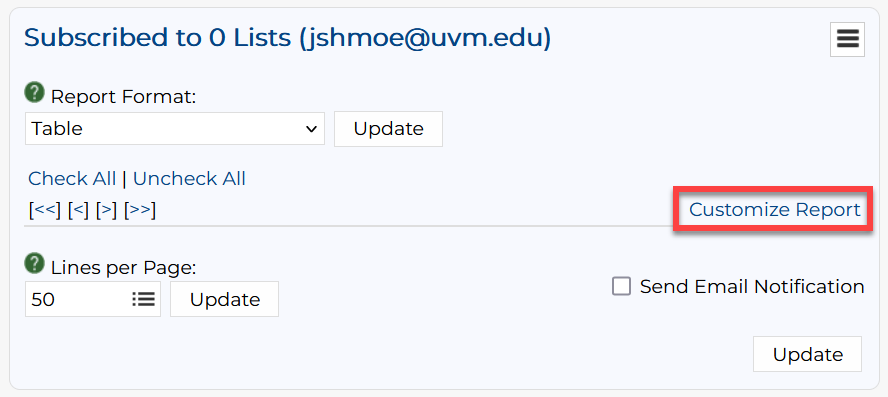
- Click Subscriber Options on the left side of the screen to expand it, and then click Subscriptions.
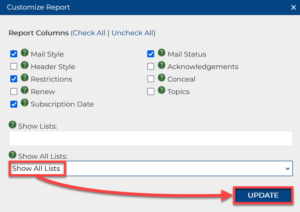
- If you’re only seeing lists you’re already subscribed to, click Customize Report. Otherwise, you can skip ahead to step 6.

- Select Show All Lists in the Show All Lists drop-down menu, and then click Update in the bottom right corner.
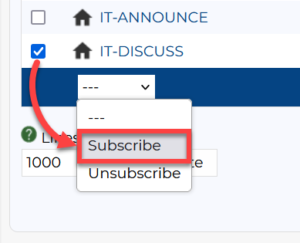
- Check the boxes next to the names of any lists you want to subscribe to, and then select Subscribe from the drop-down menu in the bottom-left.
- Click the Update button on the bottom-right corner.
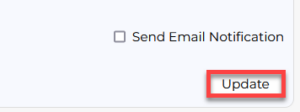
- You should get an email asking to confirm your subscription. Click the link in the email to confirm.


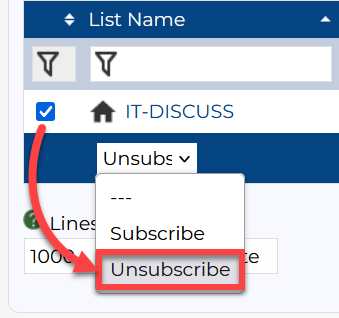
Unsubscribing using a web browser
- Go to https://list.uvm.edu and click the Log in link in the top right corner of the page.
- Log in using the email address that’s subscribed to the list (usually either firstname.lastname@uvm.edu OR NetID@uvm.edu) and your NetID password.
- Click Subscriber Options on the left side of the screen to expand it, and then click Subscriptions.
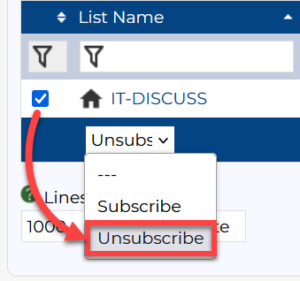
- Check the boxes next to the names of any lists you want to unsubscribe from, and then select Unsubscribe from the drop-down menu in the bottom left.
- Click the Update button on the bottom-right corner.
- You should get an email asking to confirm your unsubscription. Click the link in the email to confirm.

LISTSERV Administration
Creating a new list
Students, staff, and faculty looking to request the creation of a new list can fill out this form: https://go.uvm.edu/listservrequest
Logging in to LISTSERV with a list owner's account
- Go to https://list.uvm.edu and click the Log In link in the top-right corner of the page.
- Log in using the email address associated with the list (usually either firstname.lastname@uvm.edu OR NetID@uvm.edu) and your NetID password.
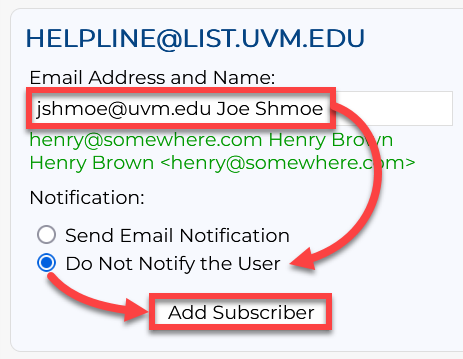
Adding a single subscriber to a list
There are several ways to add subscribers to your list. Depending on the design of your list, you can allow users to add themselves by mailing the list directly, or you can add the subscribers manually as shown here.
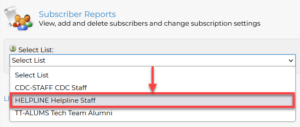
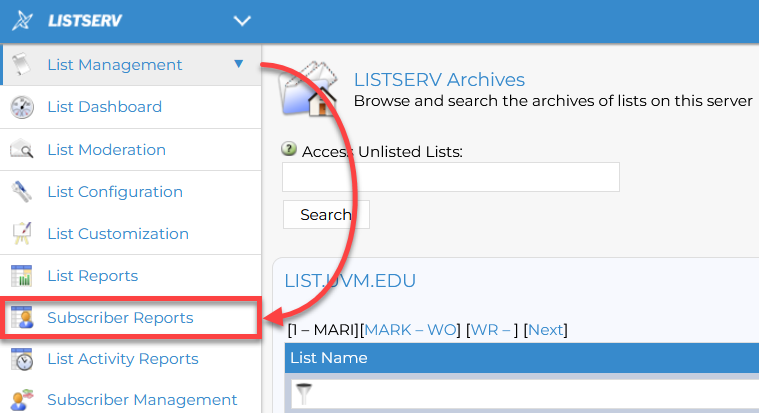
- Click Subscriber Reports under List Management on the left side of the page.

- Use the Select List drop-down menu to choose which list you’d like to edit.
- Enter the subscriber’s email address, first name, and last name in the Email Address and Name field.
- Choose whether or not you’d like to send an email notification to notify the user that they’ve been subscribed, and then click Add Subscriber.


Adding subscribers in bulk
To add a large number of subscribers to a list, create a spreadsheet with a list of email addresses, first names and last names. Once your list of emails is complete, export the spreadsheet in MS-DOS or Windows text format (.txt). Then upload that file to LISTSERV using the Bulk Operations option. Uploading a Subscriber Text File is the best way to add or remove a large number of subscribers.
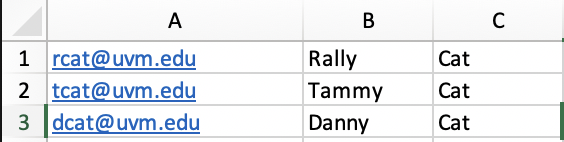
Creating a Subscriber Text File
The Subscriber Text File you will upload to LISTSERV must be ordered “subscriber’s e-mail address, <space>, subscriber’s first name, <space>, subscriber’s last name”.
For example:
rcat@uvm.edu Rally Cat
tcat@uvm.edu Tammy Cat
dcat@uvm.edu Danny Cat
The easiest way to create a subscriber list is in a spreadsheet. Use the first column for the e-mail address, the second for the first name, and the third for the last name.
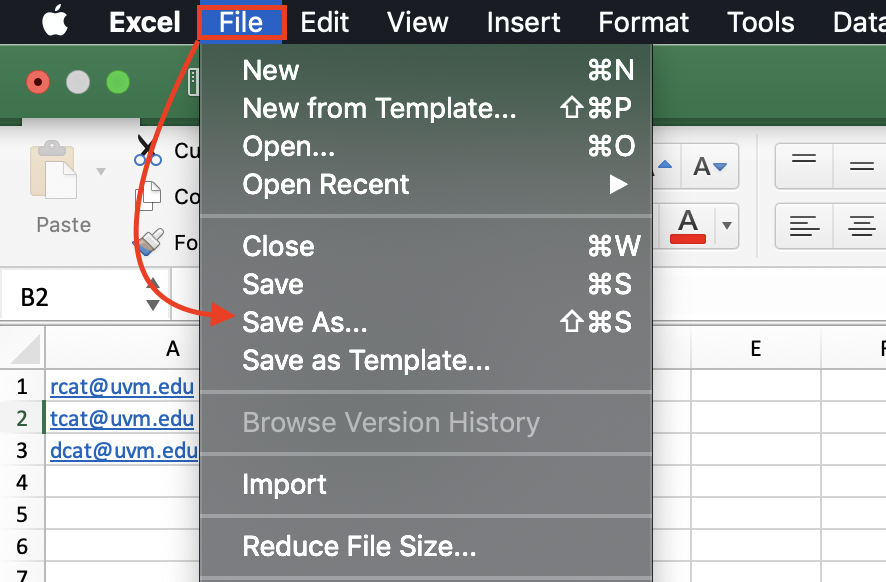
- Once you have created the subscriber list, you will need to export the file in MS-DOS or Windows Text Format (.txt).
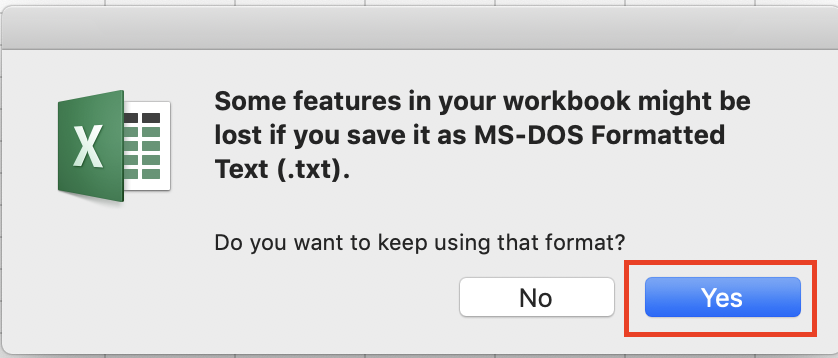
- Scroll through File Format and select MS-DOS Formatted Text (.txt) or Text (*.txt).
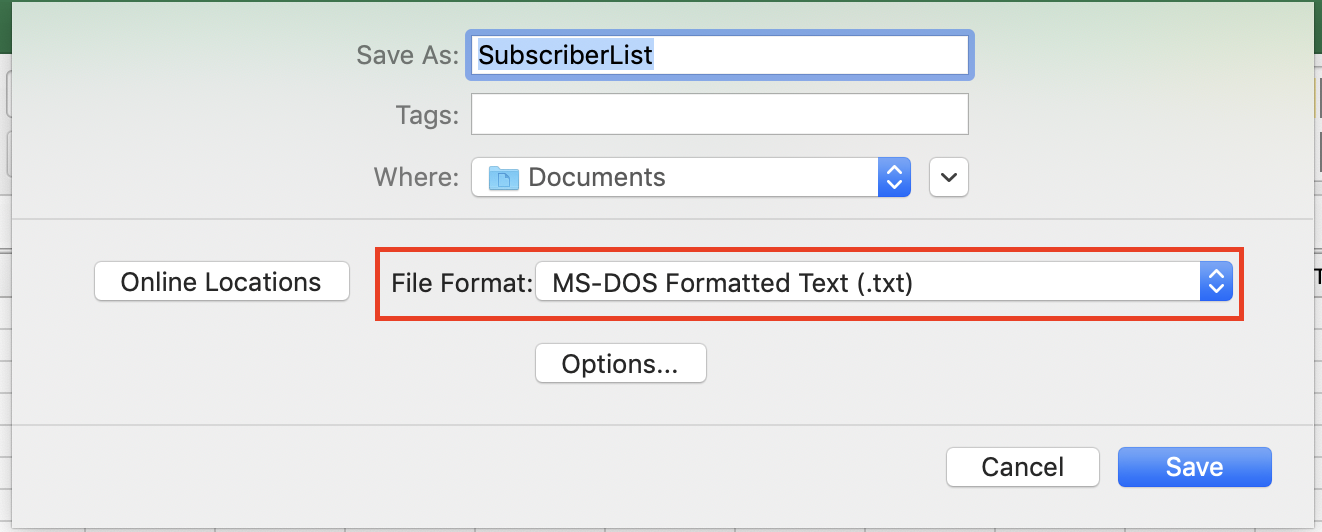
- Select “Yes” to continue using the .txt format.
Uploading a Subscriber Text File
- Go to https://list.uvm.edu and click the Log In link in the top right corner of the page.
- Log in using the email address associated with the list (usually either firstname.lastname@uvm.edu OR NetID@uvm.edu) and your NetID password.
- Click Subscriber Reports under List Management on the left side of the page.
- Use the Select List drop-down menu to choose which list you’d like to edit.
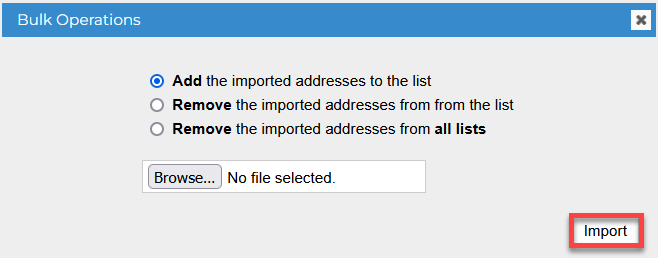
- Click Bulk Operations to the right of Add Subscriber.

- Click Browse… to find and select your subscriber text file.
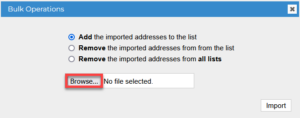
- Make sure Add the imported addresses to the list is selected, and then click Import.


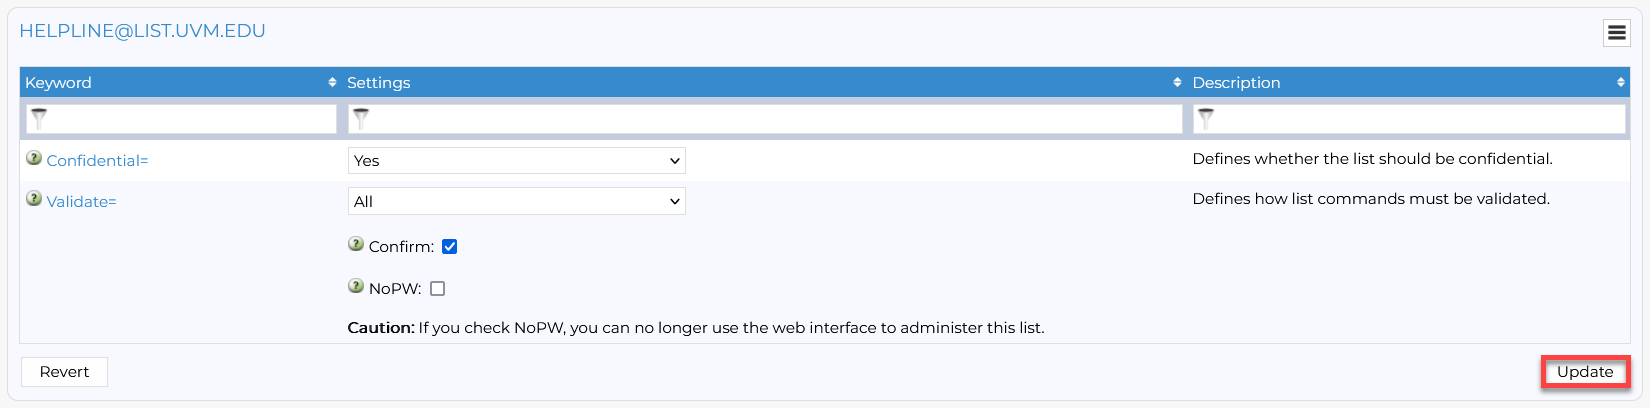
Making a list confidential
The Confidential option makes your list unlisted for all users excluding known subscribers, but will still allow subscriptions if the user subscribing knows the list name. Additionally, this function also prevents the list from being probed externally with the “list” command.
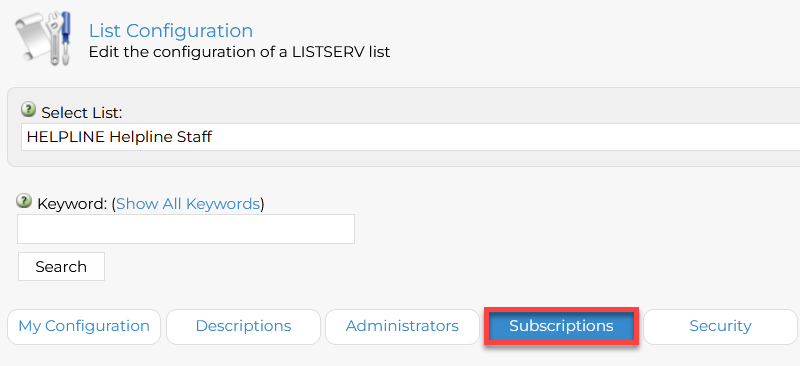
- Click List Configuration under List Management on the left side of the page.
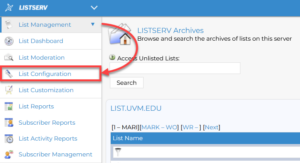
- Use the Select List drop-down menu to choose which list you’d like to edit.
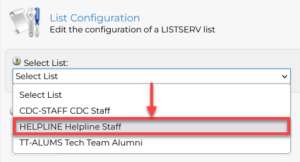
- Click the Security tab, and then use the Confidential drop-down menu to choose whether or not you’d like the list to be public to unknown subscribers.
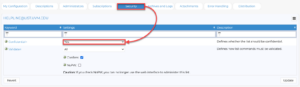
- Click Update in the bottom right corner to confirm your changes.
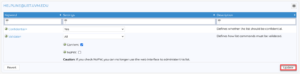
- Click Update in the bottom right corner to confirm your changes.


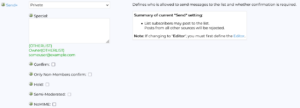
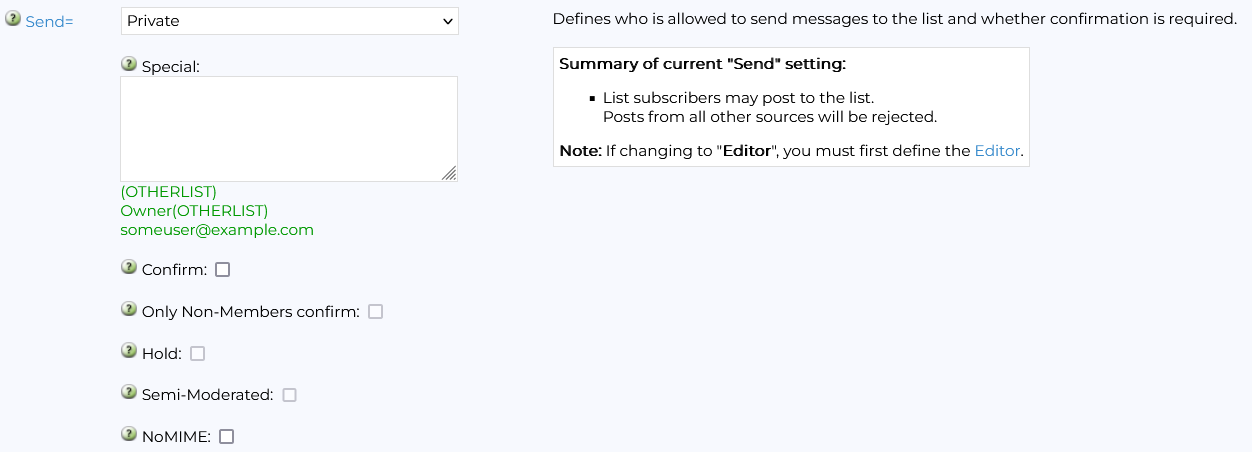
Setting sending options
- Click List Configuration under List Management on the left side of the page.
- Use the Select List drop-down menu to choose which list you’d like to edit.
- Click the Subscriptions Tab.
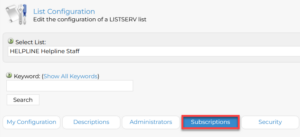
- Set your desired Send options.
- Click Update in the bottom right corner to confirm your changes.
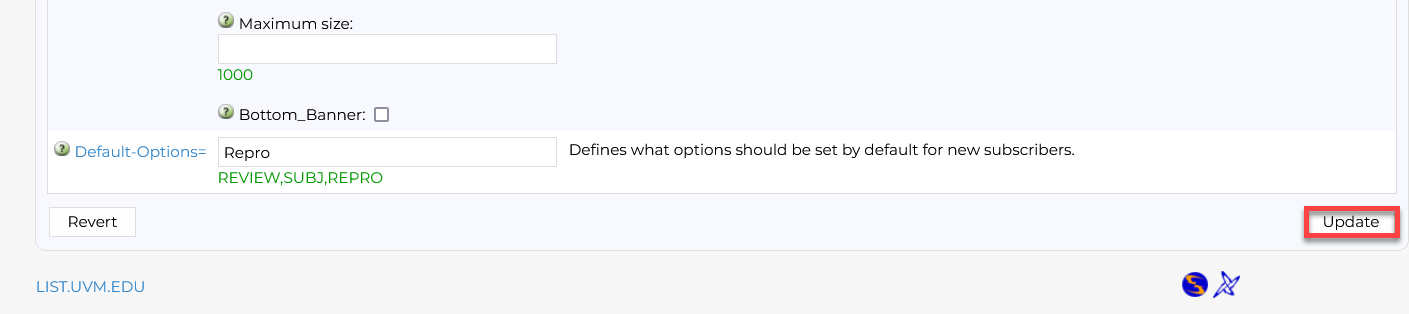
Setting a daily threshold
The Daily Threshold option limits how many times per day each user can send messages to the list.
- Click List Configuration under List Management on the left side of the page.
- Use the Select List drop-down menu to choose which list you’d like to edit.
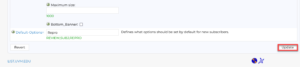
- Click the Subscriptions tab, and then enter a number into the Per sender field under Daily-Threshold (leave it blank for no limit).
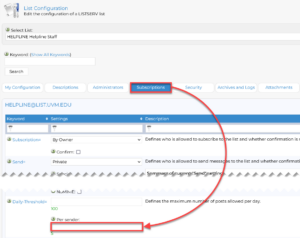
- Click Update in the bottom right corner to confirm your changes.

Setting administrator roles
Lists have four roles and two list protocols that can be modified to grant levels of access to your list. While each role can be modified, they each have unique properties that make some roles superior in access/control to others.
Postmaster Role
The Postmaster role is a role assigned to Administrators for the LISTSERV site as a whole. If you create a List, you will not have access to this role. Instead, you will be granted the role of “Owner.”
Owner Role
The Owner role has access to all parts of their list even when not specified; this allows them to properly manage the list without locking themselves out of a certain function such as sending to the list. The Owner can grant roles to other users and moderate the various role abilities.
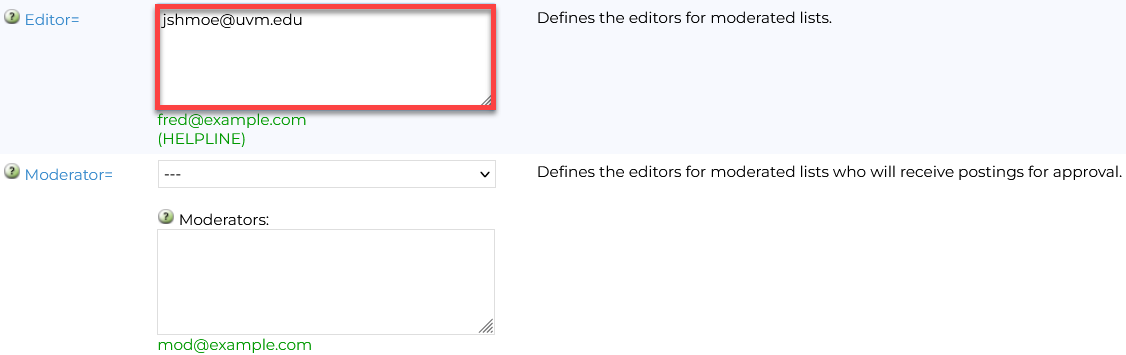
Editor/Service Role
The Editor/Service role is very malleable and can be set by the Owner to handle specified permissions. For this reason, they have the highest access in the sending and receiving area, only surpassed by that of the list owner.
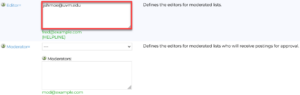
Moderator Role
The Moderator role can approve posts that are held for review. You can select either All to give all moderators the ability to review each post, or Round-robin to cycle through each moderator in turn.
Public and Private are classified as roles, but instead function as protocols and adjust how the list behaves on a broader scale than the above roles.
Public Role
The Public protocol allows all users, if subscribed or not, to make emails and send them to a list. By adding it to the review area, it will force all users to review their email before they send it.
Private Role
The Private protocol acts as a placeholder for a role rather than an actual role. The Private protocol can be used to allow all subscribed users who to send mail to the list as well as review it.
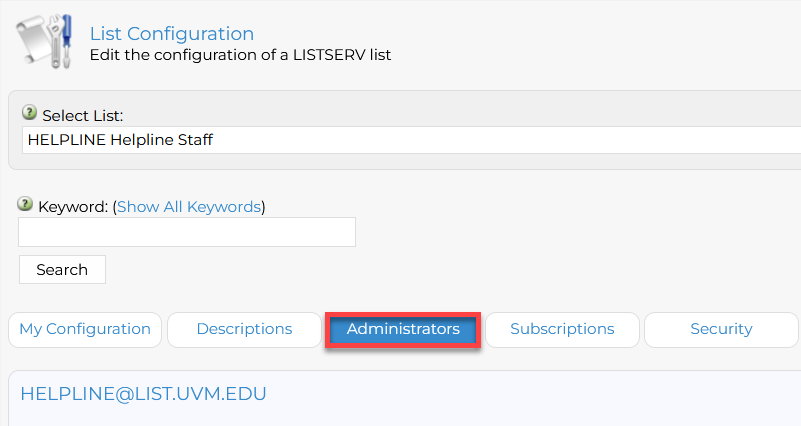
- Click List Configuration under List Management on the left side of the page.
- Use the Select List drop-down menu to choose which list you’d like to edit.
- Click the Administrators tab to open it.
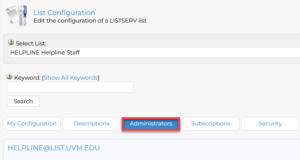
- Enter the email addresses of users into the boxes by roles to give the users those roles.
- Click Update in the bottom right corner to confirm your changes.


Adding or Removing List Owners
In order to change the owners of a list, a current owner of the list will need to follow the below instructions. If you believe that a list’s ownership should be changed, and are unable to reach the list’s current owner, please contact the Tech Team for assistance.
- Click List Dashboard under List Management in the top-left corner of the page.

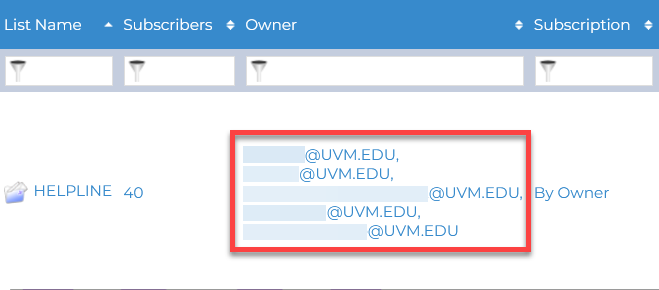
- Scroll down to find the list you’d like to edit, and then click on the list of owners.

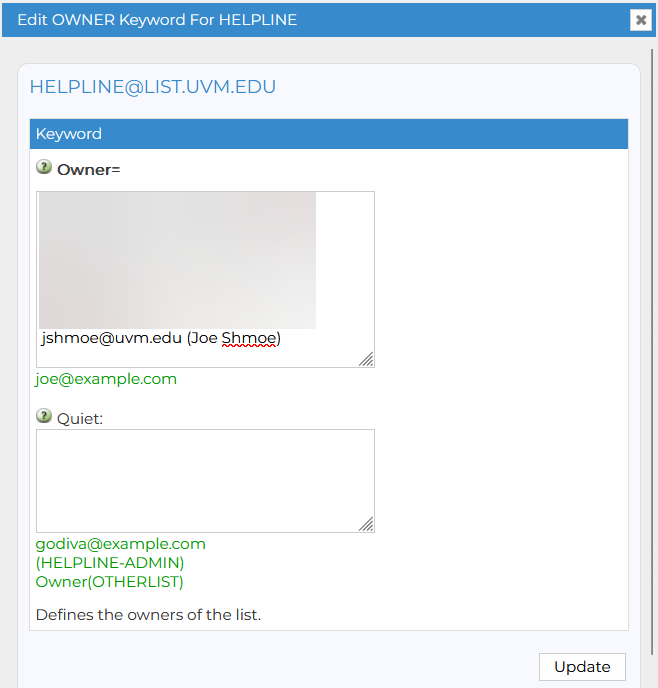
- Here, you can make changes to the list’s owners by typing or deleting text in the Owner box.
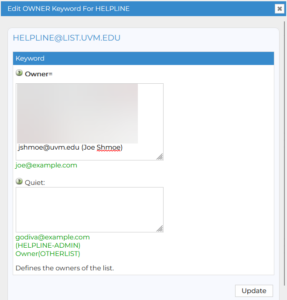
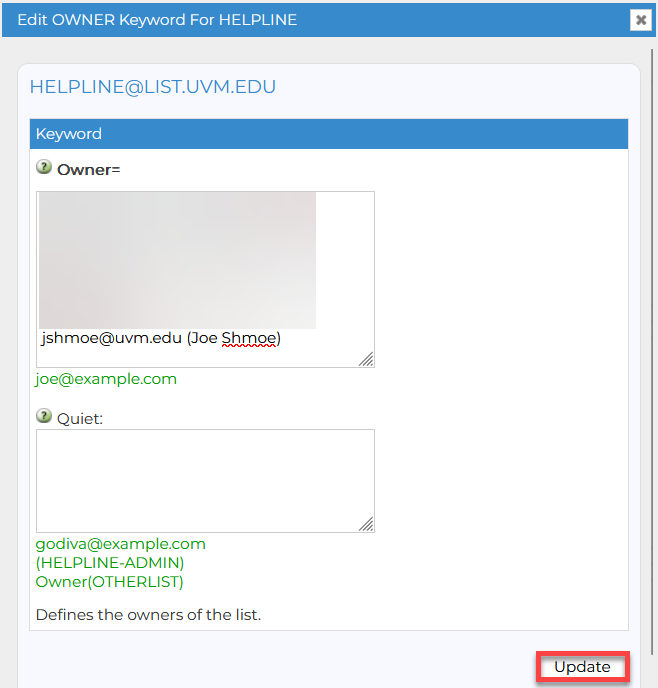
- Click Update in the bottom right corner to confirm your changes.