
In most situations, people are interested in seeing only the first few headers on a message (From, To, Cc, Subject, and Date), so most email clients display only those headers when the recipient reads the message or forwards it. The rest of the headers are masked.
Unfortunately, the above headers are easy to forge, and this commonly occurs in cases of phishing and spam email. Fortunately, the Received: headers are extremely difficult to forge and can be used to identify the source of the offensive email.
If you need to report a Proofpoint email filter error, abuse, phishing or other potentially harmful communication, you will need to send a copy of the email as an attachment.
- abuse@uvm.edu – for targeted phishing, or email scams.
- not-spam@uvm.edu – for False Positives (email that was sent to Junk that should have been delivered to your INBOX).
- is-spam@uvm.edu – for False Negatives (email that was delivered to your INBOX but should have gone to Junk)
Full headers allow our Help Desk and Information Security team to track a message back to the IP address from which it was sent; a message without full headers cannot be tracked.
Use the appropriate guide below to forward the message in question as an attachment, which will keep all email header info intact.
Outlook Online
- Log in to Outlook Online.
- Select the message you wish to forward as an attachment.
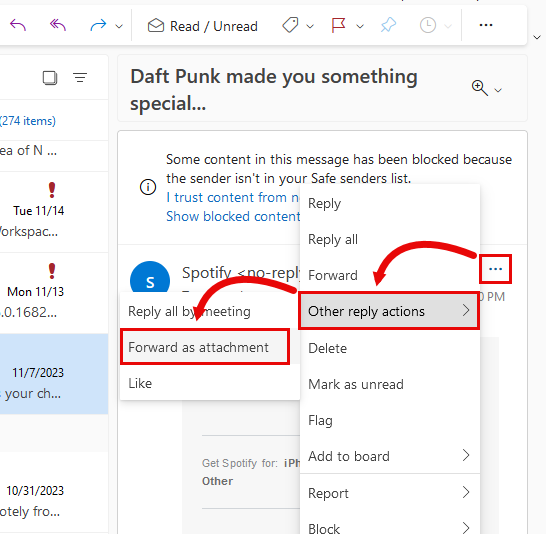
- Open the drop-down menu in the upper-right corner to the right of the sender, hover over Other reply actions, and select Forward as attachment.
- Enter the email address you wish to forward the message to, enter a message body, and then click the Send icon.
Outlook for Windows
![]()
- Select the message you wish to forward as an attachment.
- Select the Home tab.
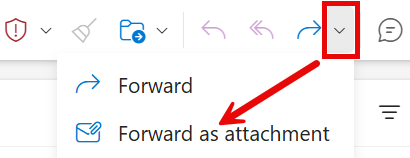
- Click the down arrow () to the right of the forward arrow (), and then select Forward as attachment.
- Enter the email address you wish to forward the message to, enter a message body, and then click Send.
Outlook (classic) for Windows
![]()
- Select the message you wish to forward as an attachment.
- Select the Home tab.
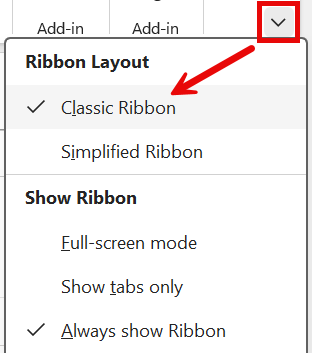
- Ensure the Classic Ribbon is selected by clicking the down arrow () in the upper-right corner and selecting Classic Ribbon.
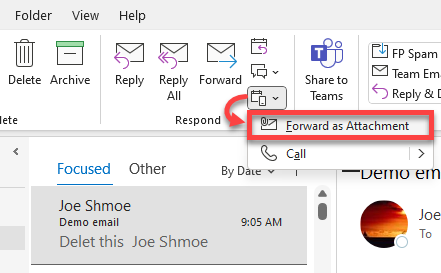
- Open the More Respond Actions drop-down to the right of Forward, and then select Forward as Attachment.

- Enter the email address you wish to forward the message to, enter a message body, and then click Send.
Outlook for macOS
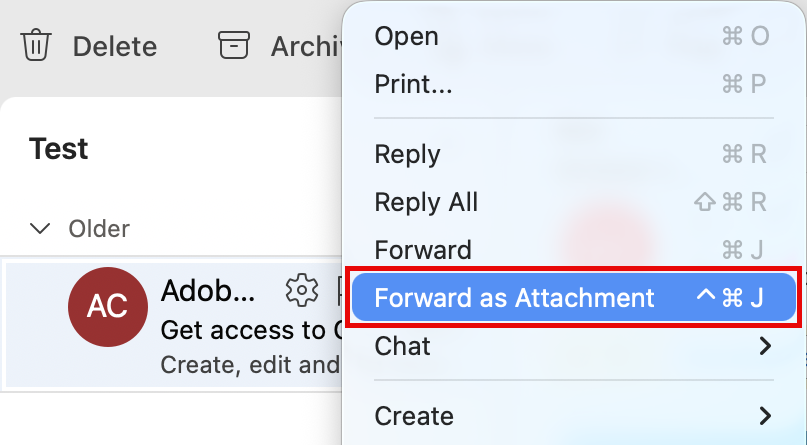
- Right-click (or control-click) on the message you wish to forward as an attachment.
- Click Forward as Attachment as shown in the screenshot below.
- Enter the To address you wish to forward the message to, enter a message body, and click Send.
(legacy) Outlook for macOS
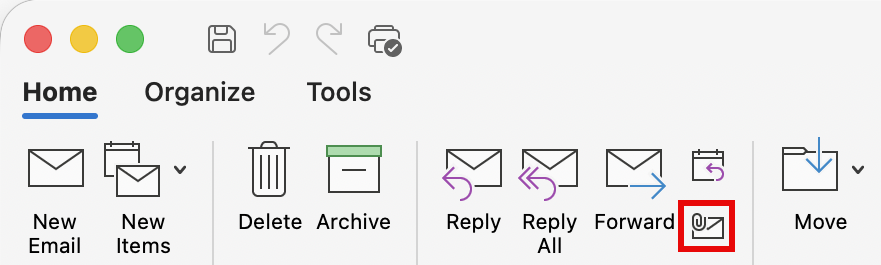
- Select the message you wish to forward as an attachment.
- Click the icon of an envelope with a paperclip to the right of Forward to Forward this message as attachment.
- Enter the email address you wish to forward the message to, enter a message body, and then click Send.
Mozilla Thunderbird
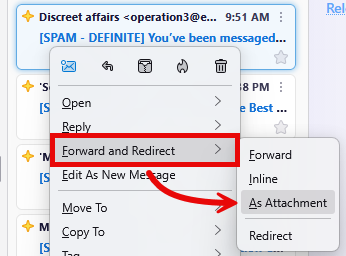
- In Thunderbird, right-click on the message you wish to forward as an attachment.
- Click Forward and Redirect > As Attachment as shown in the screenshot below.
- Enter the To address you wish to forward the message to, enter a message body, and click Send.
Apple Mail

- Right-click (or control-click) on the message you wish to forward as an attachment.
- Click Forward as Attachment as shown in the screenshot below.
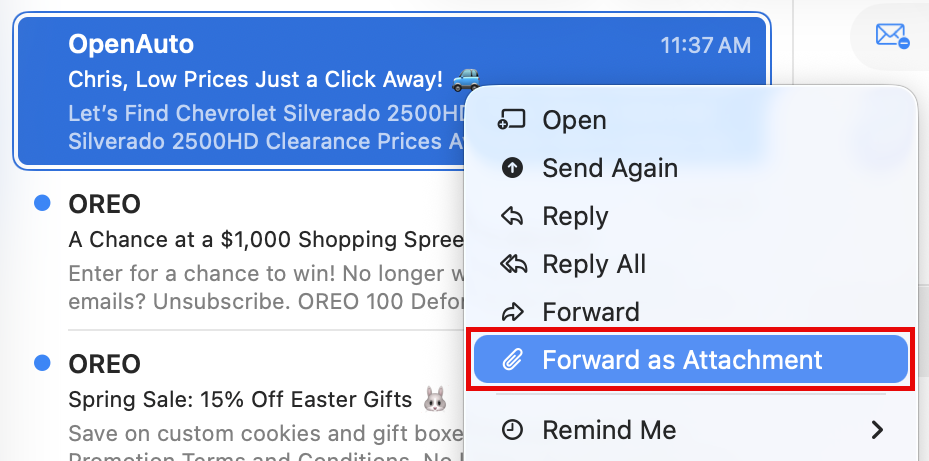
- Enter the email address you wish to forward the message to, enter a message body, and then click the Send Message button.