
UVM’s email spam filter, Proofpoint Protection Server, identifies several different classes of mail. In addition to tagging mail as Spam or Junk E-Mail, which few people choose to read, there is another class of email it tags, called Low Priority mail.
What is Low Priority mail?
Low Priority mail is of the type vendors and other bulk senders will send to lots of people to drum up business. It’s not necessarily spam, it might not be unsolicited, but it’s not something you want to end up in your Inbox, either.
Low Priority mail examples:
- Newsletters from legitimate vendors you may have done business with, or vendors you haven’t done business with, but who think they are in your sector
- Pleas for membership/support from professional organizations
- Almost anything sent via bulk marketing email providers (Constant Contact, SendGrid, Salesforce Marketing Cloud)
Generally speaking, personal messages from vendors do not end up in Low Priority mail. If you write to a vendor asking for a quote, they generally respond using their company’s mail server rather than the bulk sending vendor’s services.
Creating an Inbox Rule for Low Priority Mail
Proofpoint is already tagging some messages as Low Priority, but Exchange is not configured to automatically filter based upon the tag, like it does for spam. To take advantage of it, you’ll need to set up Inbox Rules to filter these messages to a “lowpriority” folder.
Setting an inbox rule in Outlook Online
- Log in to Outlook Online and switch to the Mail view. Make sure the folders pane is open to the left of the message list; if it’s not, toggle it with the ≡ button.
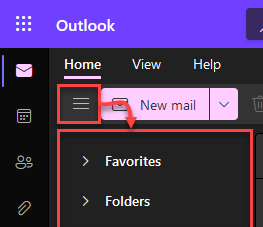
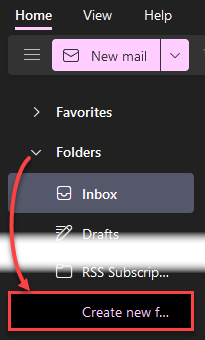
- Expand the Folders group in the folders pane, and at the bottom of the group click the Create new folder button.
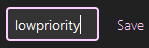
- You’ll get a textbox at the bottom of your list of folders. Give the folder a name, “lowpriority“, and hit enter or the Save button to create the folder.
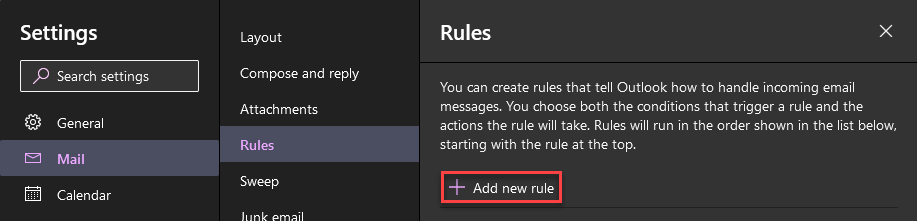
- Go to https://outlook.cloud.microsoft/mail/options/mail/rules to open the Rules options for Exchange Online’s mail.
- Click the Add new rule button to add a new rule.
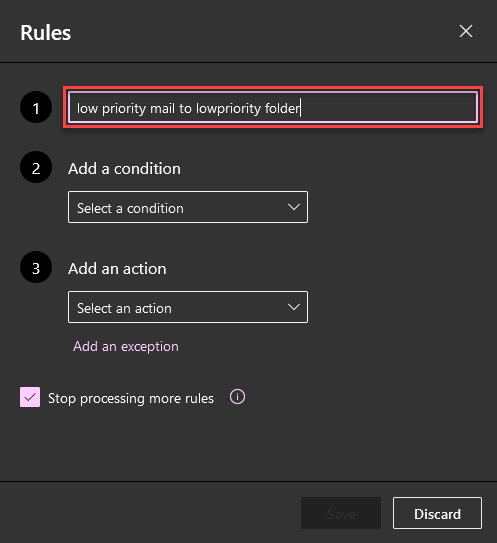
- Name the inbox rule appropriately. For example, low priority mail to lowpriority folder.
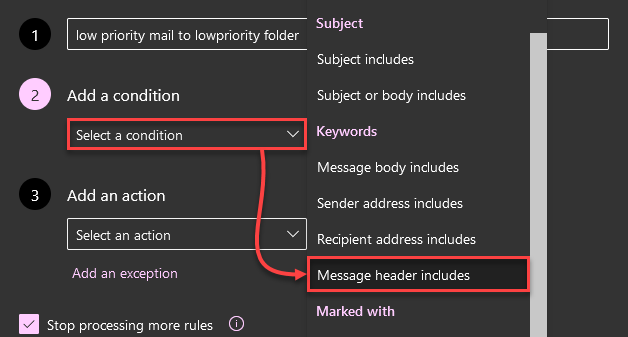
- Under Add a condition, click the Select a condition drop-down box and select Message header includes.
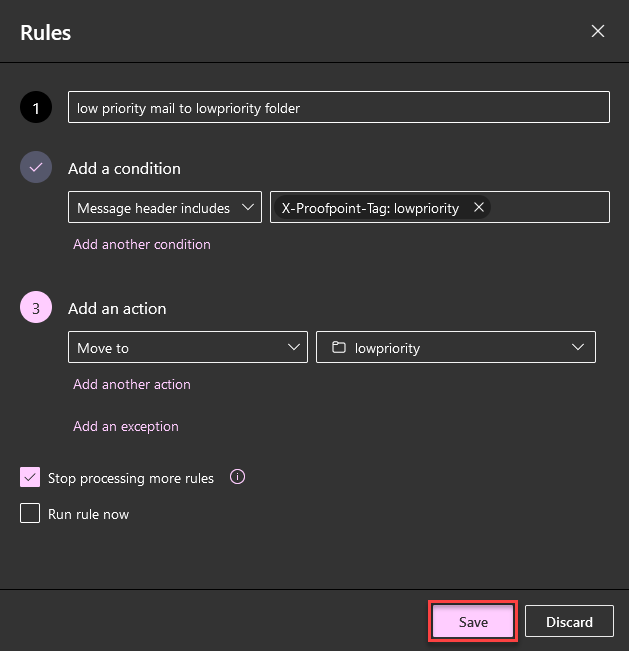
- In the new Enter words to look for box, enter the following:
X-Proofpoint-Tag: lowpriority

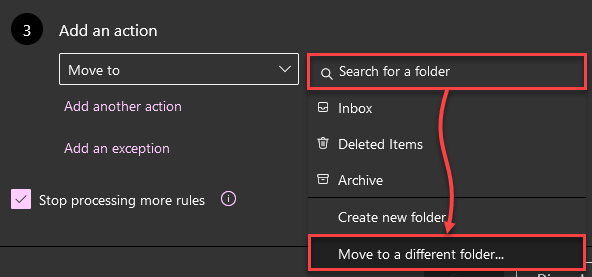
- Under Add an action, click the Select an action drop-down box and select Move to.

- Click the resulting Search for a folder box and choose Move to a different folder, then scroll in the expanded drop-down list and choose the lowpriority folder.
- Click the Save button to save the rule.
- The list of mail rules at https://outlook.cloud.microsoft/mail/options/mail/rules should be displayed again, this time including the newly-created rule at the top. If there were any mistakes in creating the rule, it can be modified or removed from here as well.
Please remember to check back later to see if any messages have been routed to your lowpriority mail folder.
Setting an inbox rule in Other Mail Clients
While mail clients are capable of handling inbox rules, Outlook Online is the only method that is officially supported by UVM. Outlook Online inbox rules will apply to all emails that match the rule, even when your device is off or disconnected from the Internet.
This is a benefit as all devices and mail clients used to connect to your UVM email will have the same filtering applied – without the need to configure rules manually on each device.
Please see the instructions above to set an inbox rule in Outlook Online.
Making exceptions to the rule in Outlook Online
Perhaps you still want certain vendors’ bulk emails to end up in your Inbox after all. It’s easy to add exceptions to the “low priority” rule.
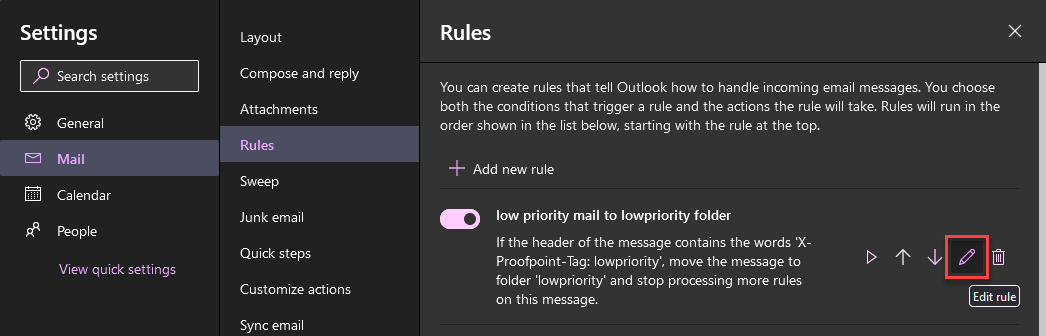
- Go to https://outlook.cloud.microsoft/mail/options/mail/rules and click the pencil button next to your previously-created lowpriority rule.
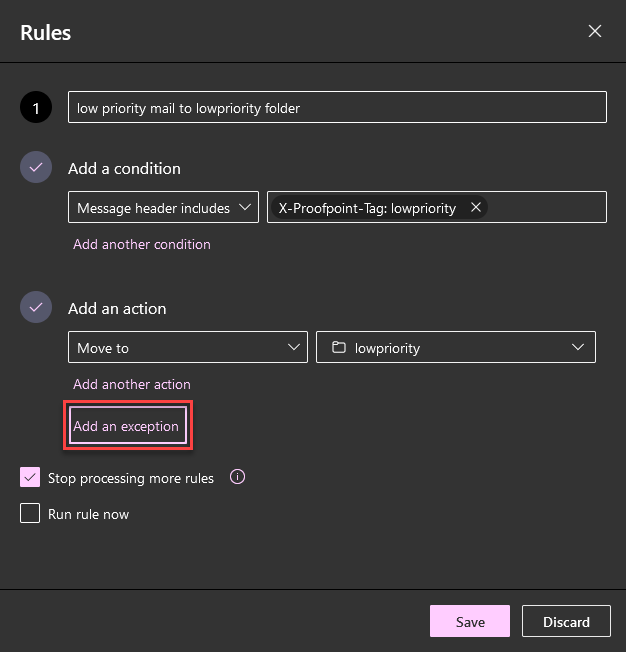
- Click the Add an exception button underneath the Add an action section.
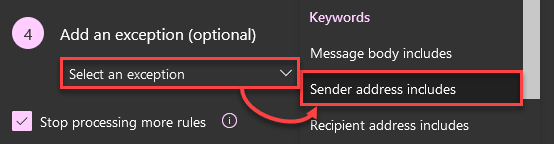
- Click the Select an exception drop-down button to choose how Outlook will decide what emails to not move to the lowpriority folder. For example, if you would like all your messages from “example.com” to still end up in your inbox:
- Click Sender address includes.
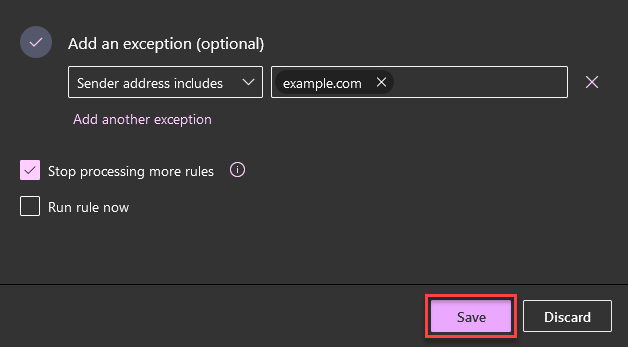
- Enter the partial address to exclude (“example.com”) in the Enter all or part of an address text box, then hit the Enter key. You can repeat this step as many times as you like, to exclude multiple addresses.

- Click Sender address includes.
- Repeat step 3 for however many exceptions you’d like to add, and when done click the Save button to add the exception(s) to the lowpriority rule.
- Watch incoming mail for several days to make sure that example.com email is ending up in your Inbox and not your lowpriority folder. If this is not the case, the rule can be edited again, the and incorrect exceptions modified or removed.