This article provides information on data stored by Microsoft Outlook, along with instructions on exporting this data.
At UVM, the most common reason to export Outlook data is leaving the university. Because users lose access to their UVM email account after leaving the university, many will wish to save these emails in a secondary location that can be accessed without an active UVM account.
What is Exported?
Data that can be exported from a UVM email account includes the following:
- Emails
- Contacts
- Calendar items
Windows
(new) Outlook
- Open Outlook, click File near the top-left corner, and select Open and export.
- Click Export and then Get started.

- Select your @uvm.edu email address from the Account drop-down menu.
- If you’d like to export everything, select the root folder, which should also be your @uvm.edu email address. You could instead choose to only backup your Inbox or only your Calendar events (for example) if you’d like. Click Next.
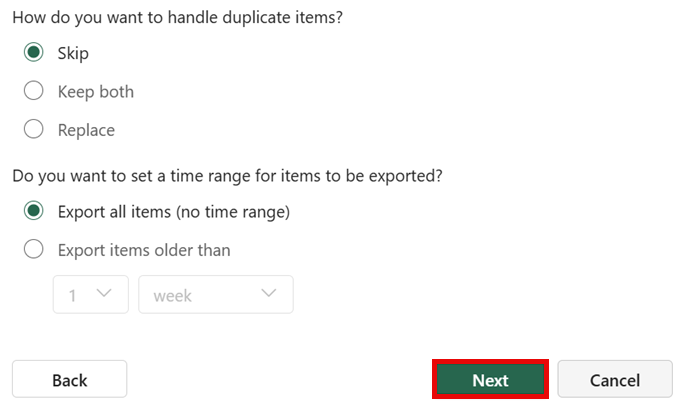
- Choose how to handle duplicate items and the time range you’d like to export. It’s easiest to leave the default choices and click Next.
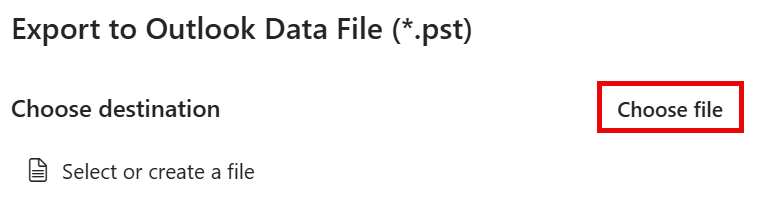
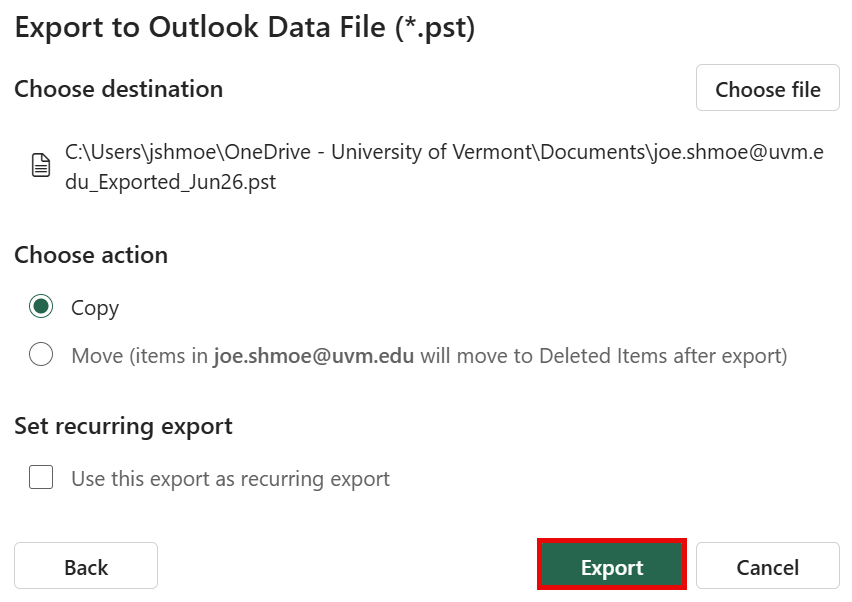
- Click Choose file.
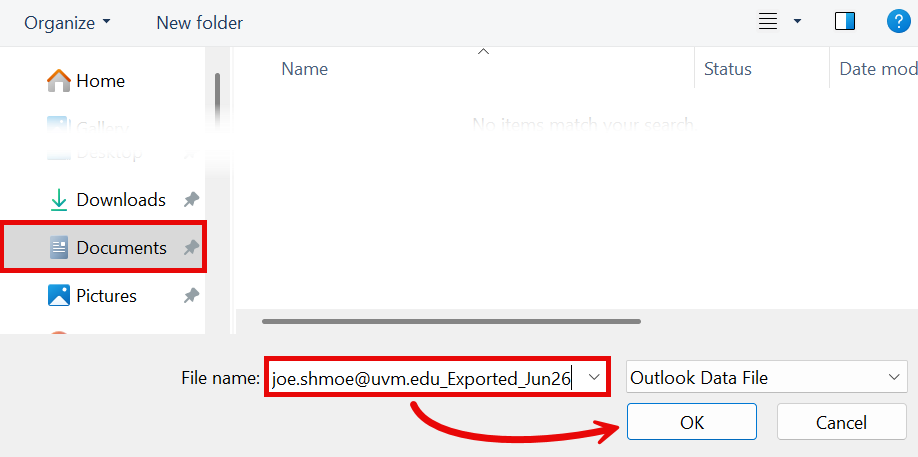
- Use the window to select a location on your PC to save the exported file, choose a File name, and click OK.
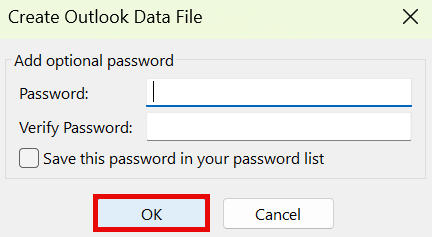
- Optionally, choose a Password to protect the exported file, or just click OK.
- Click Export.
The export will take some time. Once complete, the exported file can be transferred to another computer where it can be imported into Outlook as a local Outlook Data File.
Outlook (classic)
Select Export Range
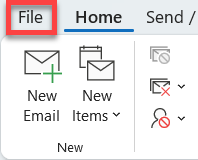
- Open Outlook (classic) and click File near the top-left corner.
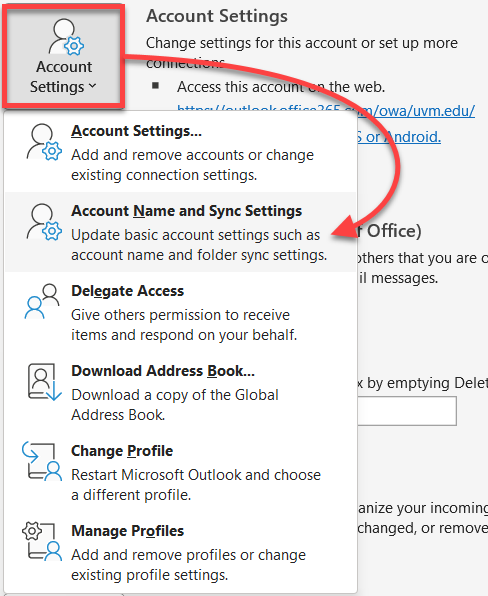
- Open the Account Settings drop-down menu and select Account Name and Sync Settings.

- Select the range of data you would like to export and click Next.
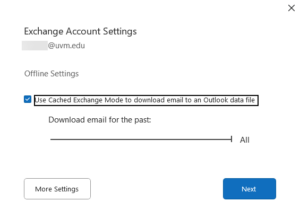
- Restart Outlook and wait for the selected range of emails to download from the mail server.
Export to a File
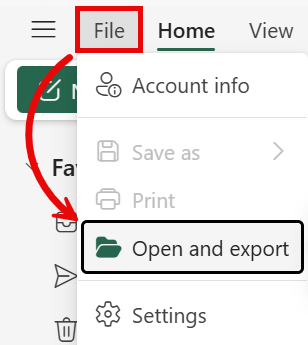
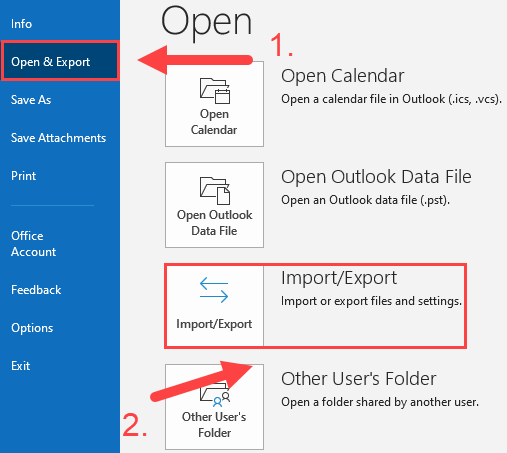
- Open Outlook and click File near the top left corner.

- From the menu on the left, click Open & Export, and then click Import/Export.
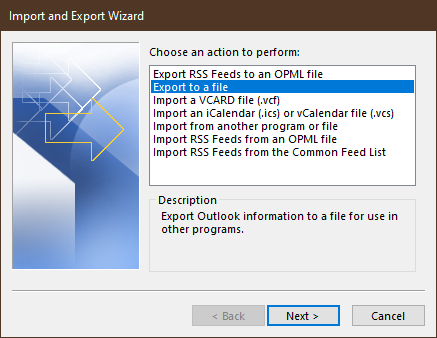
- Click Export to a file, and then click Next.
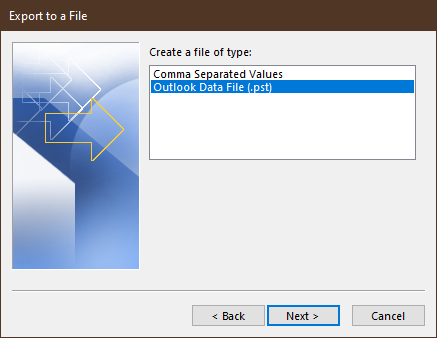
- Click Outlook Data File (.pst), and then click Next.
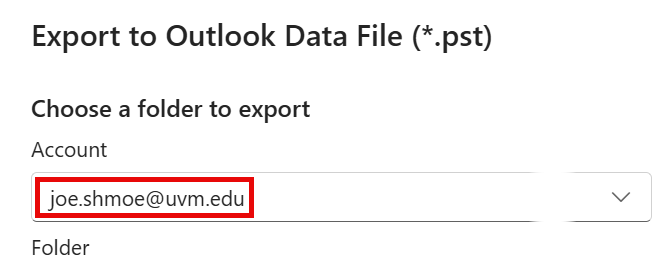
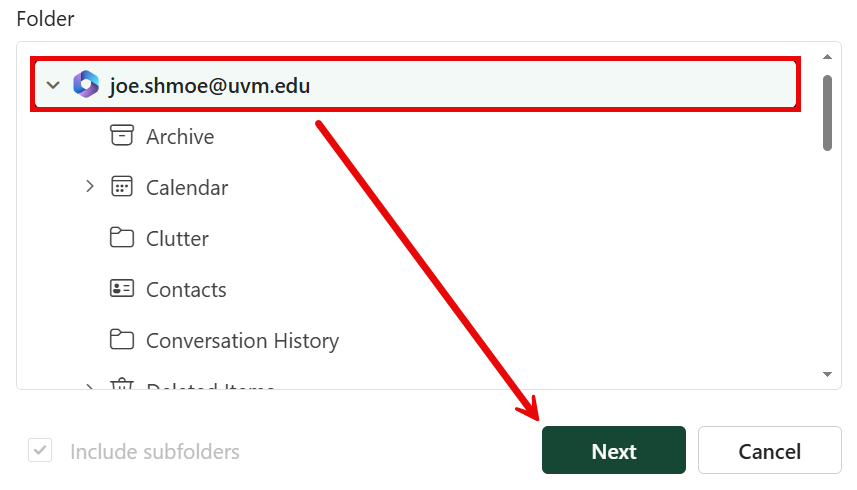
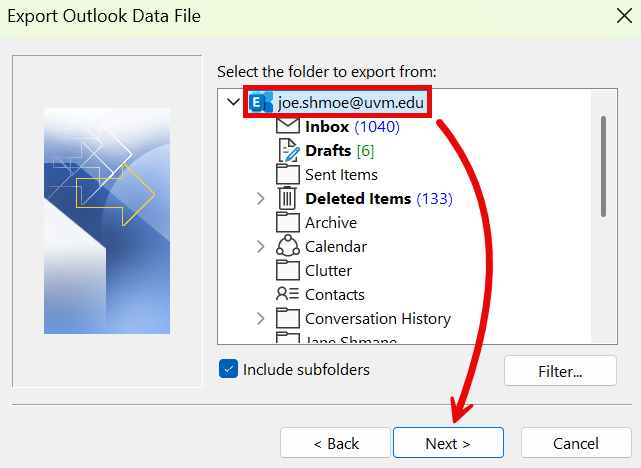
- Select the name of the account that you would like to export, ensure Include subfolders is checked, and then click Next.
- Click Browse….
- Choose a file name and save location for the Outlook Data File, and then click OK.
- Click Finish to start the export.
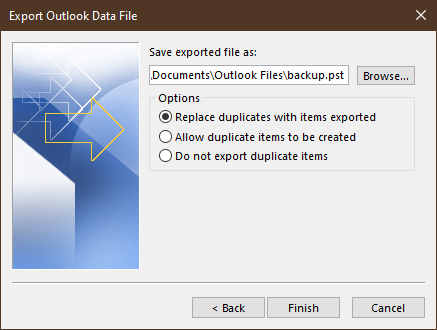
- Optionally, choose a Password to protect the exported file, or just click OK.
The export will take some time. Once complete, the exported file can be transferred to another computer where it can be imported into Outlook as a local Outlook Data File.
macOS
Outlook
- In Outlook on your Mac, expand the Outlook menu in the upper-left corner and ensure Legacy Outlook is checked. If not, click Legacy Outlook. Follow any prompts to restart the app and sign in.
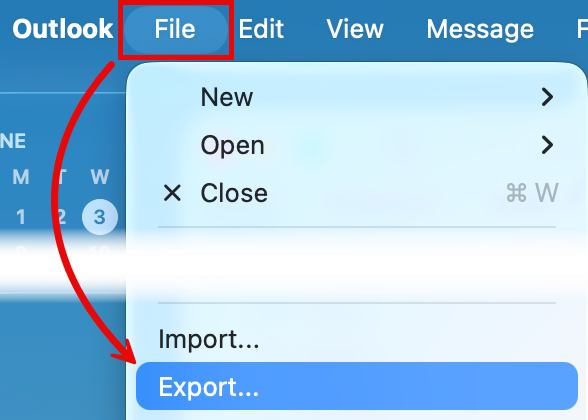
- Choose File > Export….
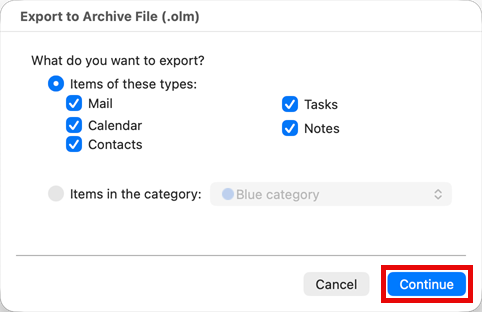
- Select the items you would like to export and click Continue.
- Choose a name and a location for the exported file and click Save.
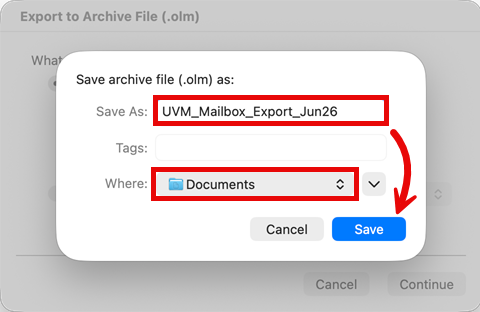
- When the data has been exported, click Finish.
The export will take some time. Once complete, the exported file can be transferred to another Mac where it can be imported into Outlook as a local Outlook Data File.
Apple Mail
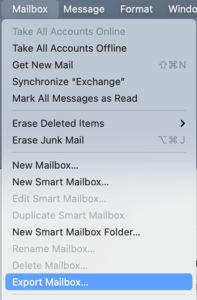
Mailbox
- In the Mail app on your Mac, hold the Command key on your keyboard and select any number of folders or individual emails.

- Choose Mailbox > Export Mailbox.
- Choose a folder or create a new folder, and then click Choose. Mail exports the mailboxes as .mbox packages. If you previously exported a mailbox, Mail doesn’t overwrite the existing .mbox file; it creates a new .mbox file, such as “My Mailbox 3.mbox”.


The export will take some time. Once complete, the exported file can be transferred to another computer where it can be imported into Apple Mail or Thunderbird.
Calendar
- In the Calendar app on your Mac, choose File > Export > Export….
- Choose a name and destination for the exported file and click Save.
The exported file can be transferred to another computer and imported into another calendar app.
Contacts
- In the Contacts app on your Mac, select all contacts with command-A.
- Choose File > Export > Export vCard….
- Choose a name and destination for the exported file and click Save.
The exported file can be transferred to another computer and imported into another contacts app.
Drag-and-drop without export (email only)
- Add a second email account to your email client like Outlook, Apple Mail, or Thunderbird. For this to work consistently, the second account must not have an “@uvm.edu” address.
- Find your second account in the left sidebar of the app. Click the arrow to expand the account’s mail folders.
- Optionally, create a new folder for the transferred emails.
- Drag-and-drop any number of folders or individual messages from your UVM account to the Inbox of the second account or the new folder you created.

- It may take a while for the transferred emails to sync to the second account. To verify the emails have been transferred and synced properly, log in to your second email account on the web (gmail.com for example) to find them.