 The University of Vermont utilizes Microsoft Exchange as our primary email, calendaring, contacts, scheduling, and collaboration platform. All current UVM affiliates with an active NetID account are provisioned with Exchange access.
The guides below will walk you through the process of adding your UVM Exchange account to various devices and mail clients. You can also access your UVM email from any web browser by visiting outlook.cloud.microsoft.
If you don’t yet have Outlook on your device, see the Microsoft Office 365 – Installation and Activation article for help.
Windows
(new) Outlook
- Open the Outlook application.
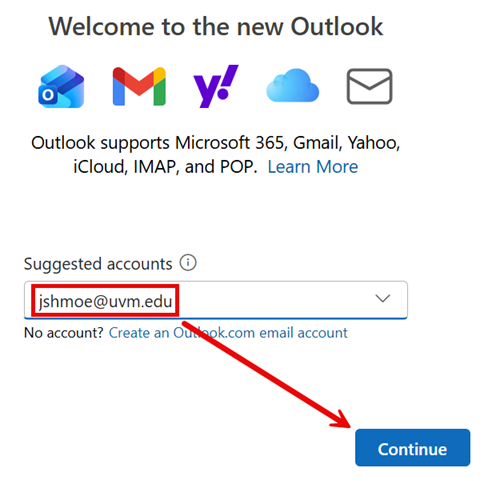
- If this is your first time launching Outlook, you should be automatically prompted to enter your email address. Enter your email address in the format of NetID@uvm.edu and click Continue.
- If prompted to Select your email provider, choose Microsoft 365.

- If this is your UVM computer, after a few “setting up” screens, your inbox will load and you’re all set. If this is a personal computer, you’ll be prompted to sign in with your NetID and Password. Enter your credentials and click LOG IN.
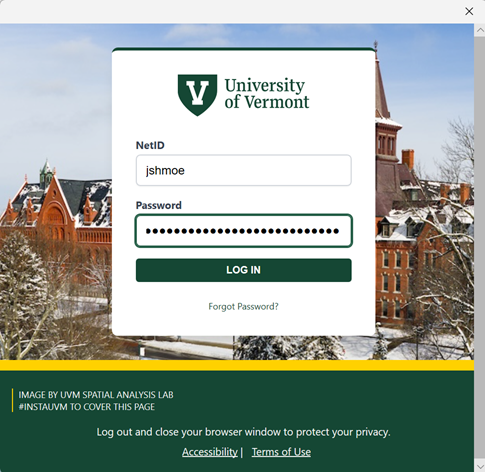
- If prompted, respond to Duo.
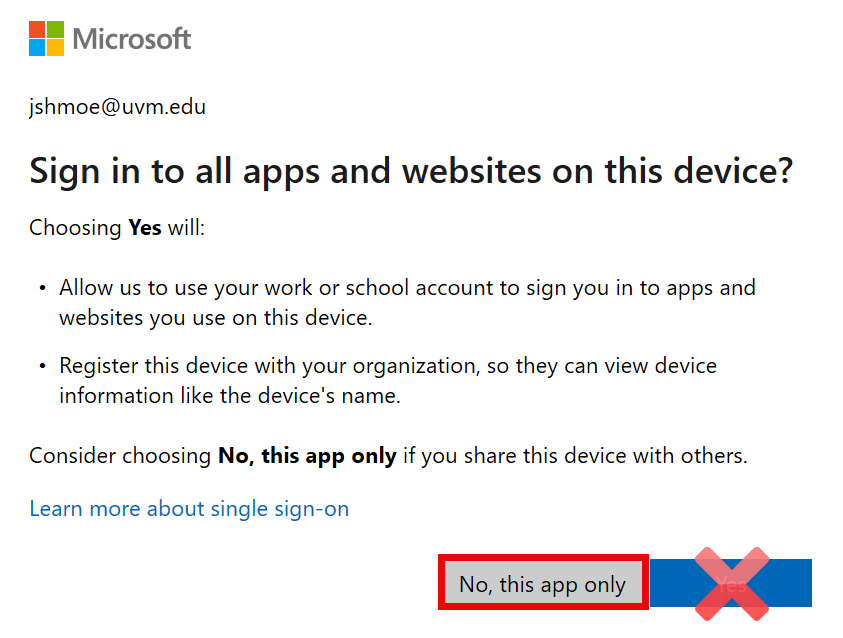
- If asked to “Sign in to all apps and websites on this device”, click No, this app only.
Outlook (classic)
- Open Outlook (classic).

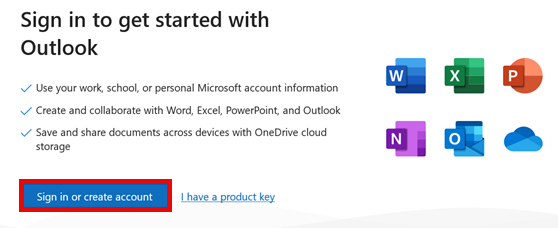
- If this is your UVM computer, skip to step 6. If this is a personal computer, and you’ve never used the Office apps before, you’ll first have to “Sign in to get started with Outlook” by clicking Sign in or create account.
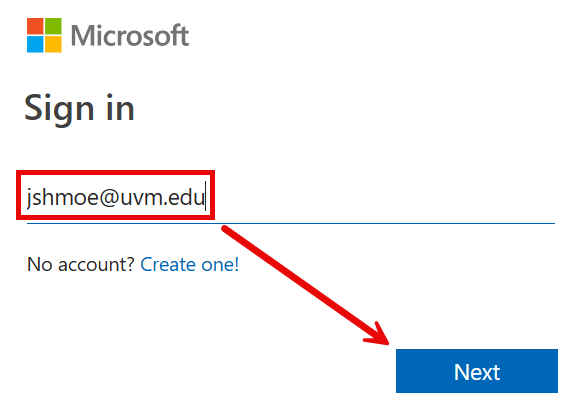
- Enter your Email in the format of NetID@uvm.edu and click Next.
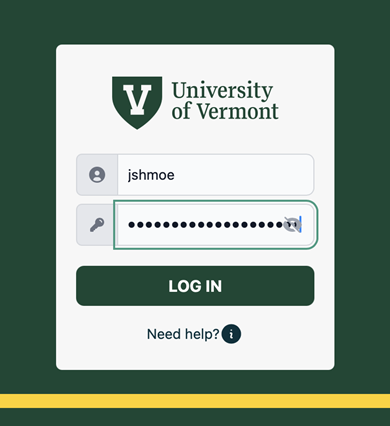
- Log In with your NetID and Password, and respond to the Duo prompts.
- If asked to “Sign in to all apps and websites on this device”, click No, this app only.
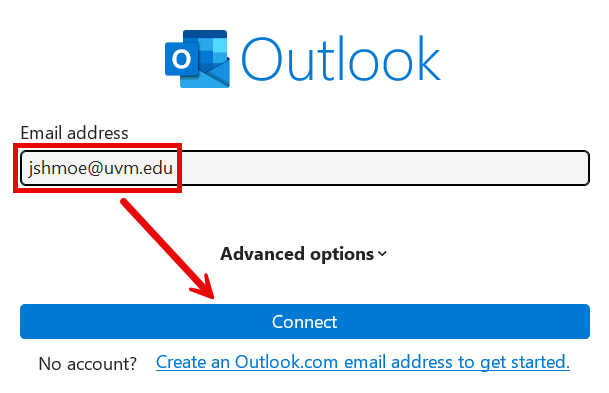
- Enter your email address in the format of NetID@uvm.edu and click Connect.
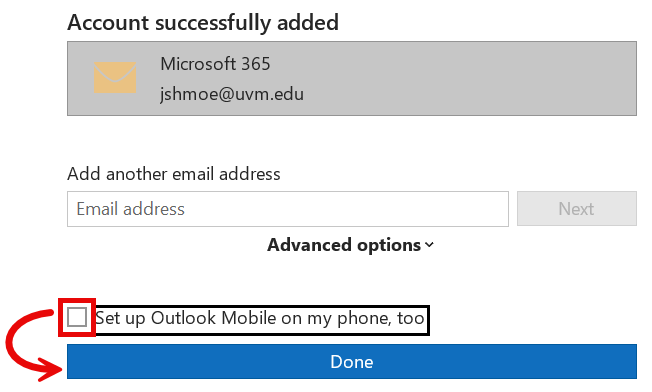
- Uncheck the box next to Set up Outlook Mobile on my phone, too, and click Done.
- If prompted, click Accept to accept the license agreement.
macOS
Outlook
- Open the Microsoft Outlook application.
- If you haven’t used the Office apps on this computer, you’ll be presented with a prompt to activate your license. Click Get Started and then Sign In.
- Enter your email address in the format of NetID@uvm.edu and click Next.
- Proceed through UVM’s Single Sign-On and Duo.
- Click Done and then Start Using Outlook.
- Click on the button containing your email address or enter your email address in the format of NetID@uvm.edu and click Continue.
- If prompted, Proceed through UVM’s Single Sign-On and Duo.
- Click Done.
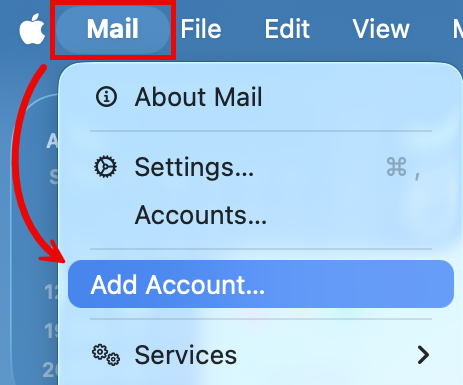
- Open the Mail application.
- Expand the Mail menu in the upper-left corner of the screen and select Add Account….
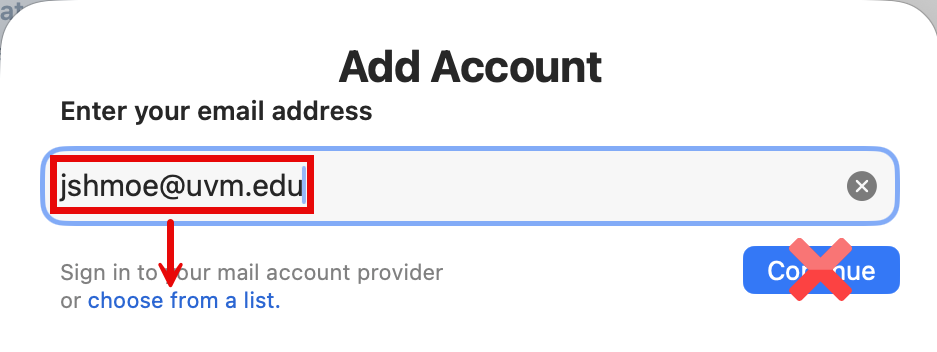
- Enter your email address in the format of NetID@uvm.edu and click Choose from a list.
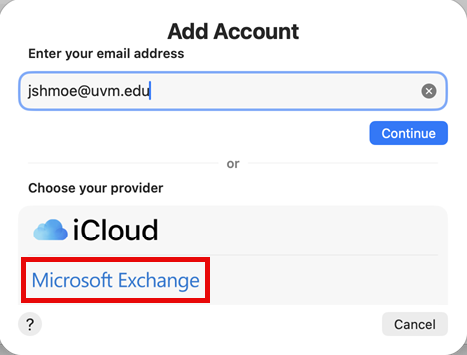
- Choose Microsoft Exchange as your provider.
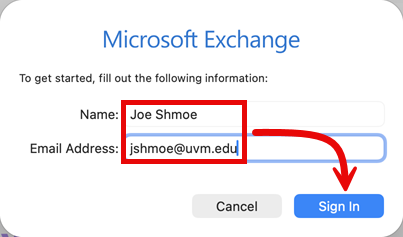
- Enter your full name and your UVM email address in the NetID@uvm.edu format, and then click Sign In.
- Click Sign In.
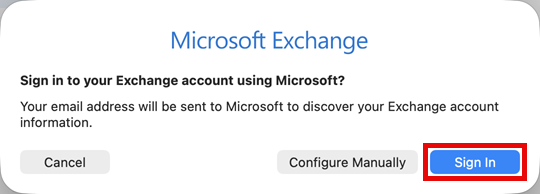
- Enter your NetID and Password and click LOG IN.
- If required, proceed through the normal Duo MFA prompts.
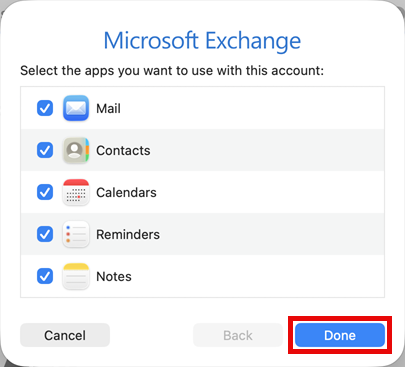
- Select the content you’d like to sync with your Mail client, and then click Done.
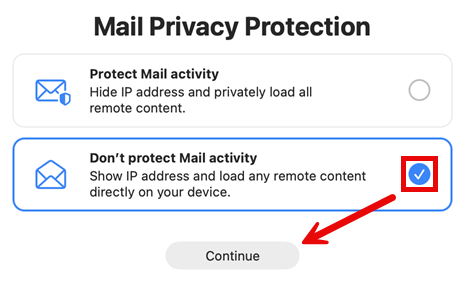
- Choose your Privacy Protection setting and click Continue.
iOS
Outlook
- Search for and install Outlook from the App Store. Then open the app.

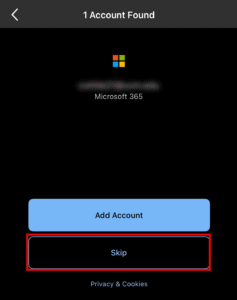
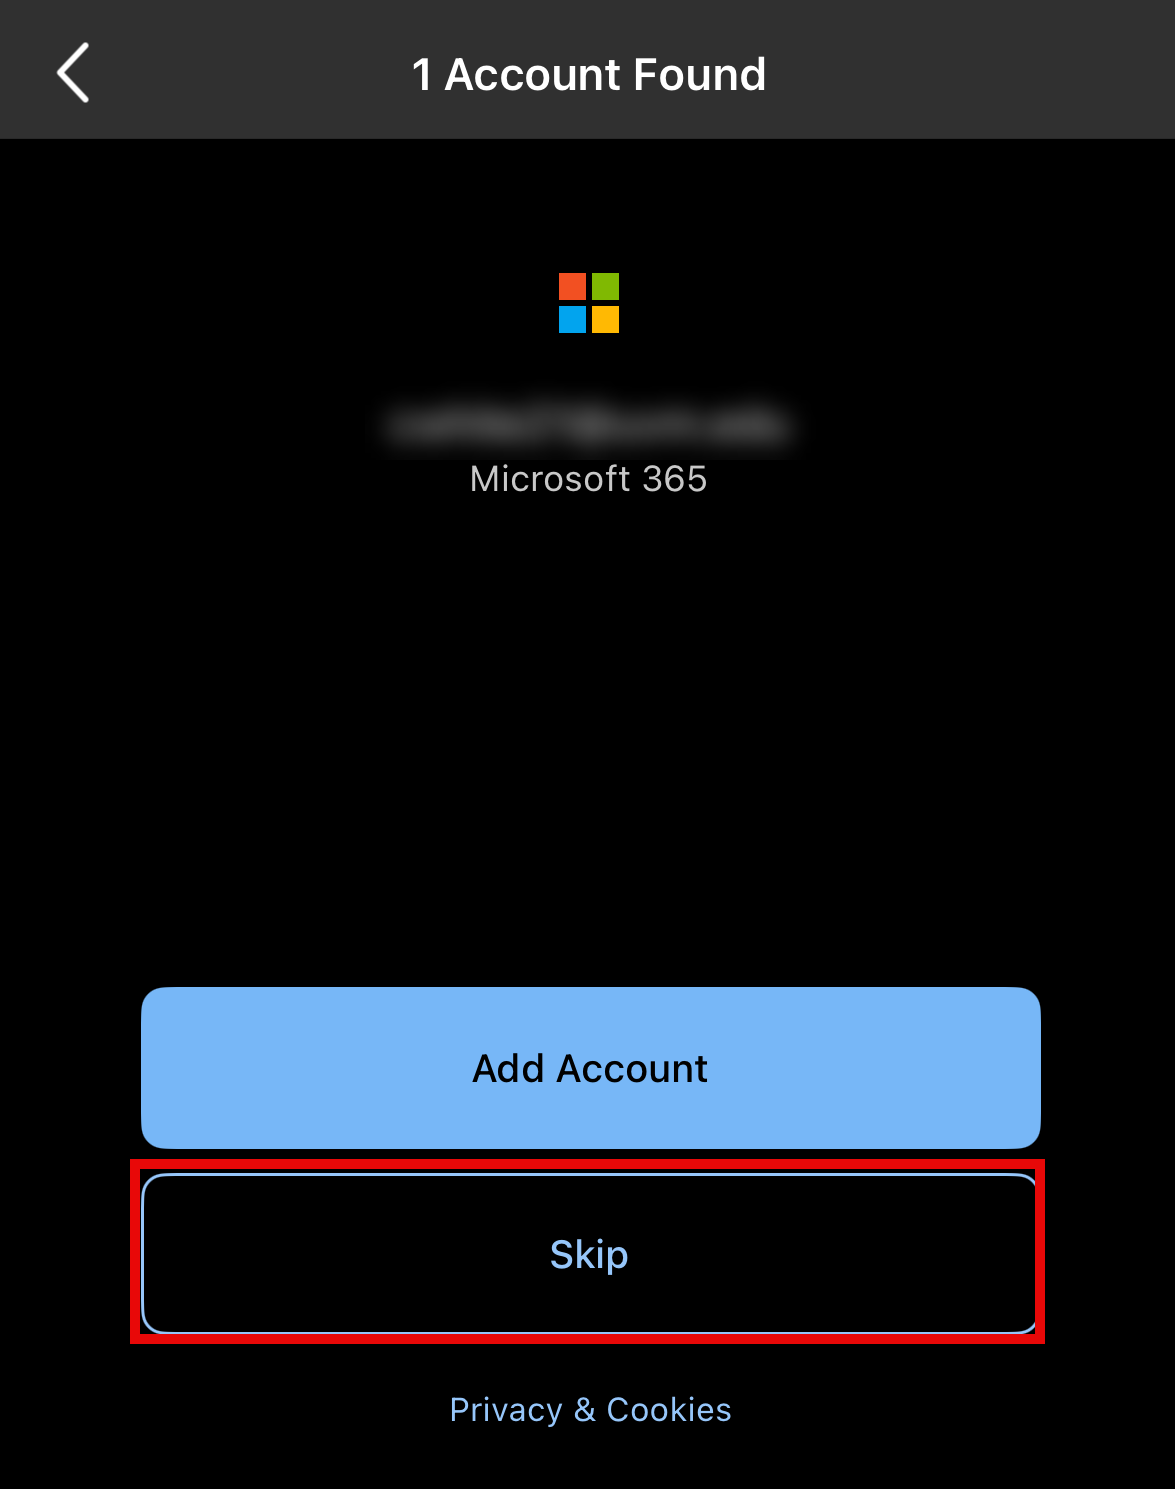
- If asked to add an already existing account, press Skip to bypass this screen and continue with the standard Add Account process.
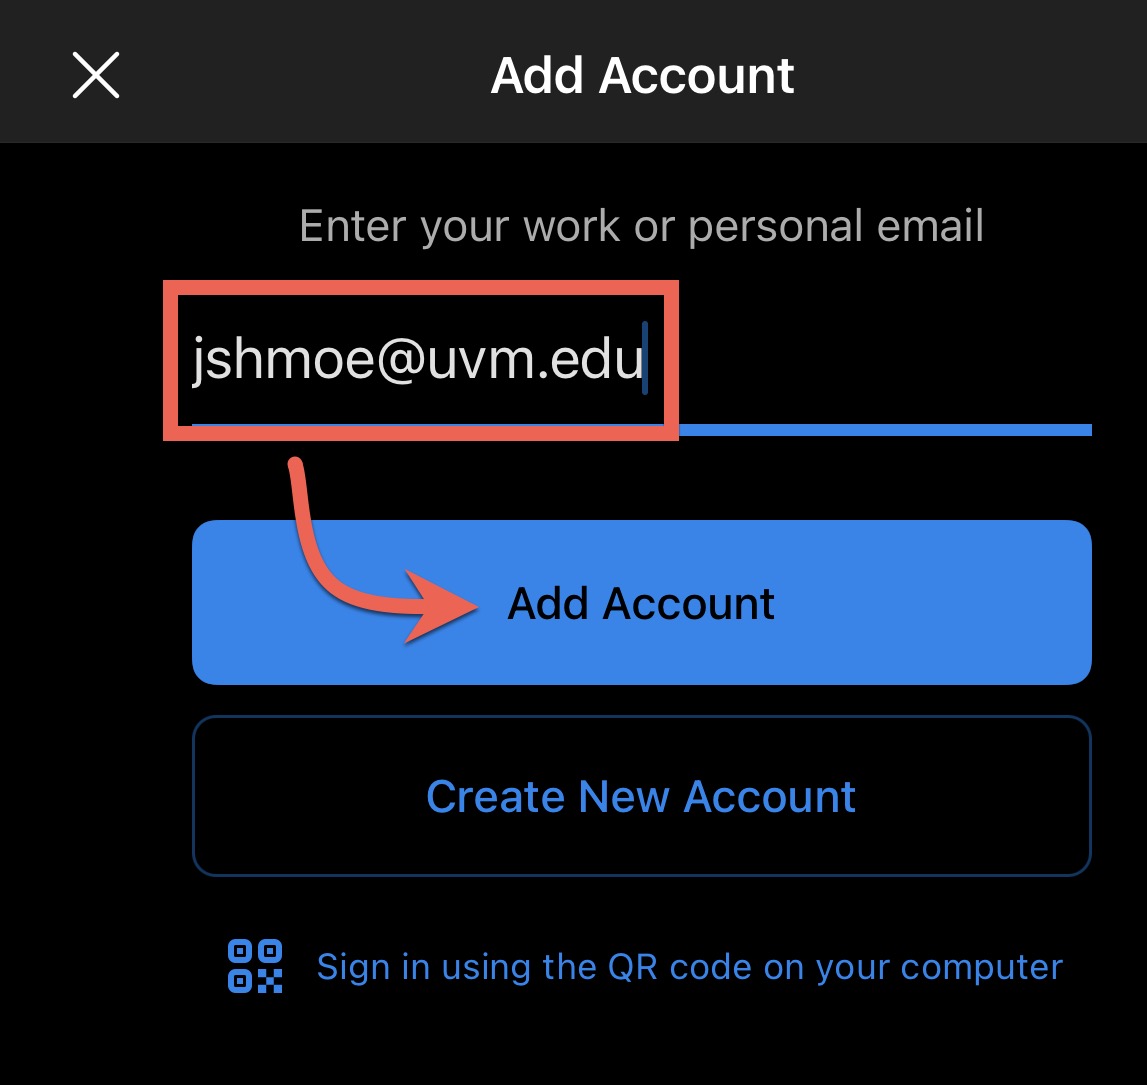
- Enter your UVM email address, then click Add Account to be redirected to the UVM sign-in screen.
- Enter your UVM NetID and password.
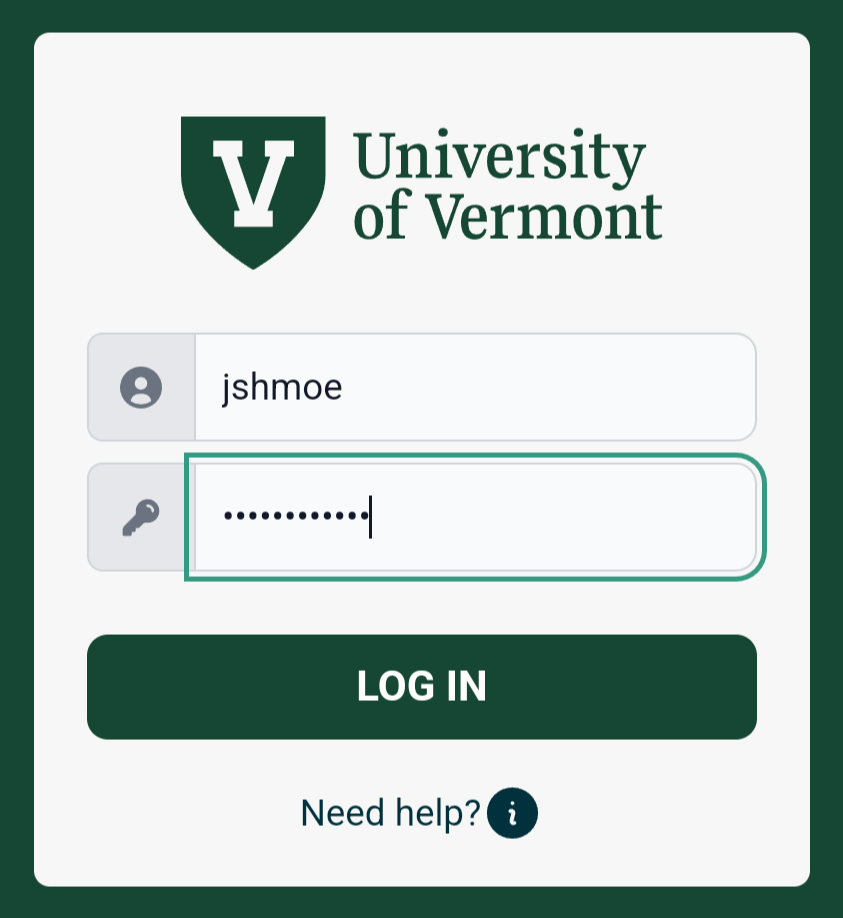
- If required, proceed through the normal Duo MFA prompts.
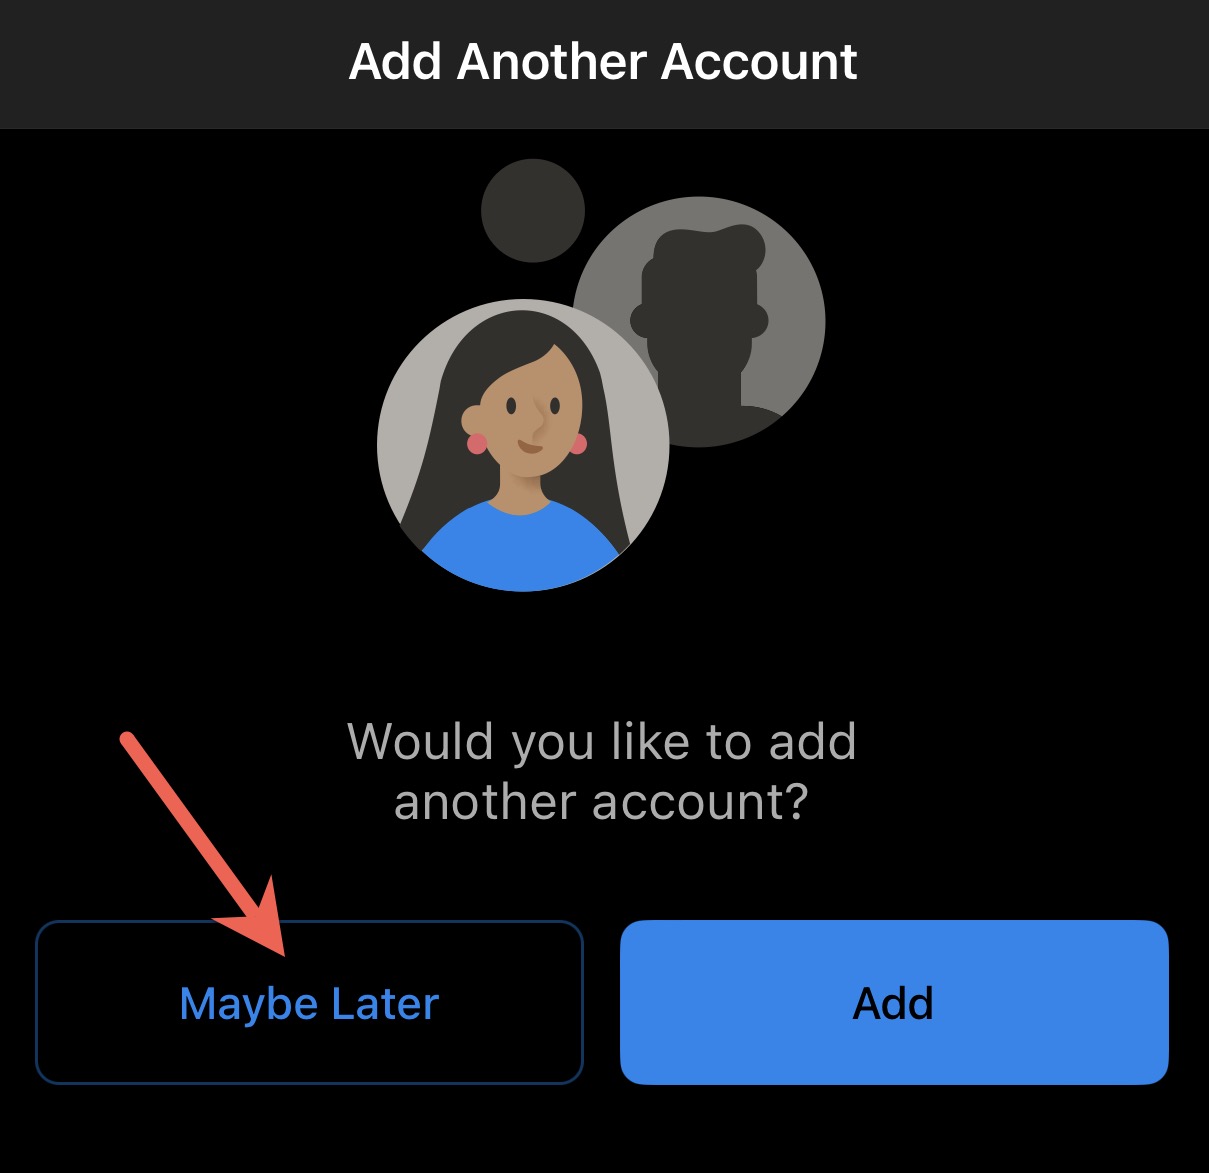
- Tap Maybe Later to proceed to your inbox.
- You should now begin to see your inbox populate. It may take some time for all of your emails and folders to appear.
Mail - Default iOS App
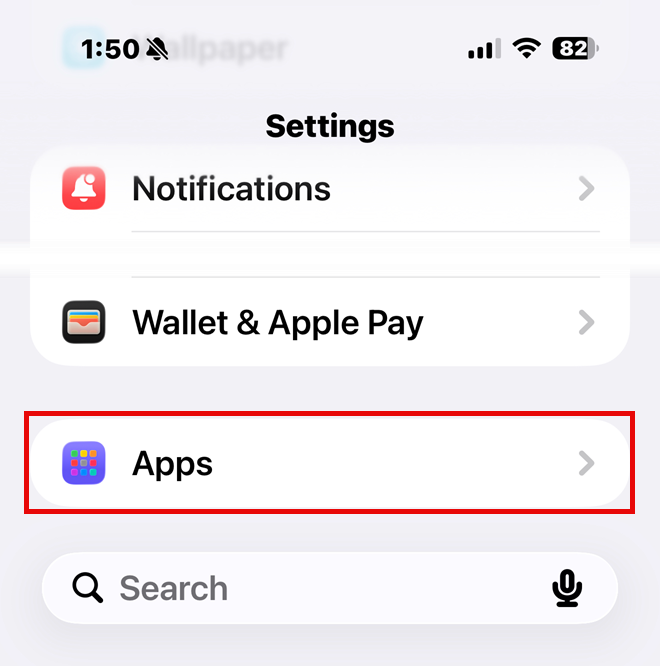
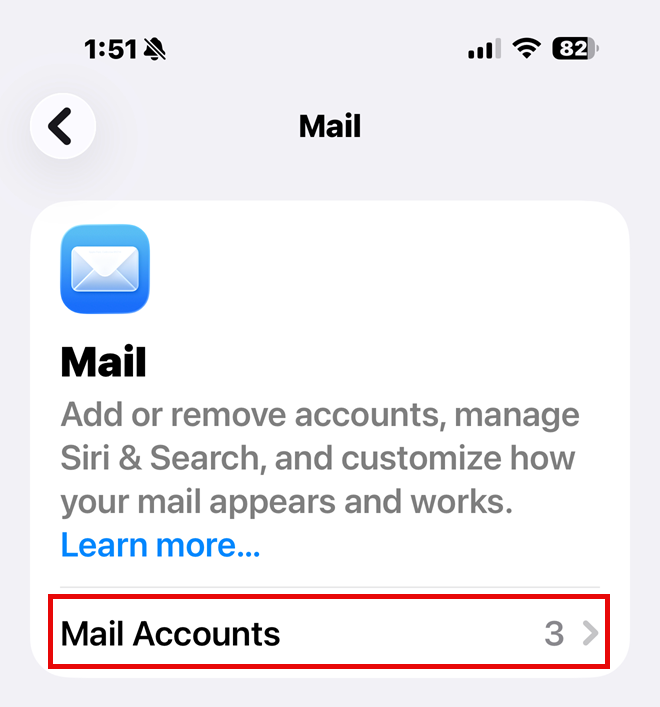
- Open the Settings app and tap Apps.
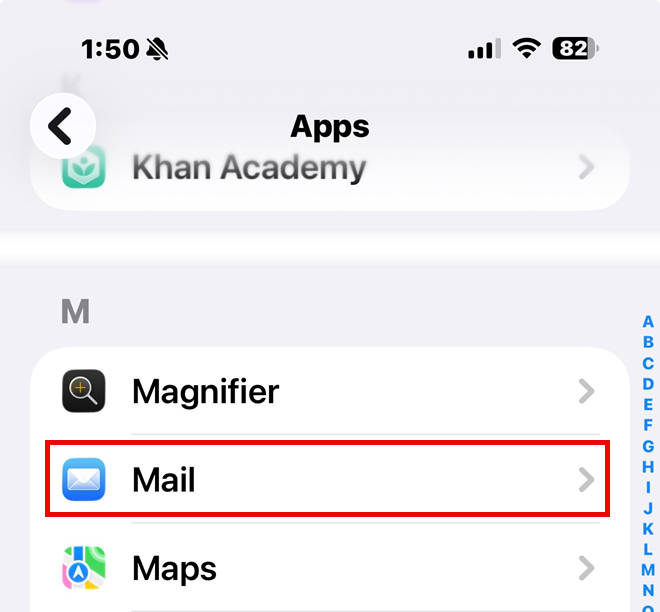
- Tap Mail.
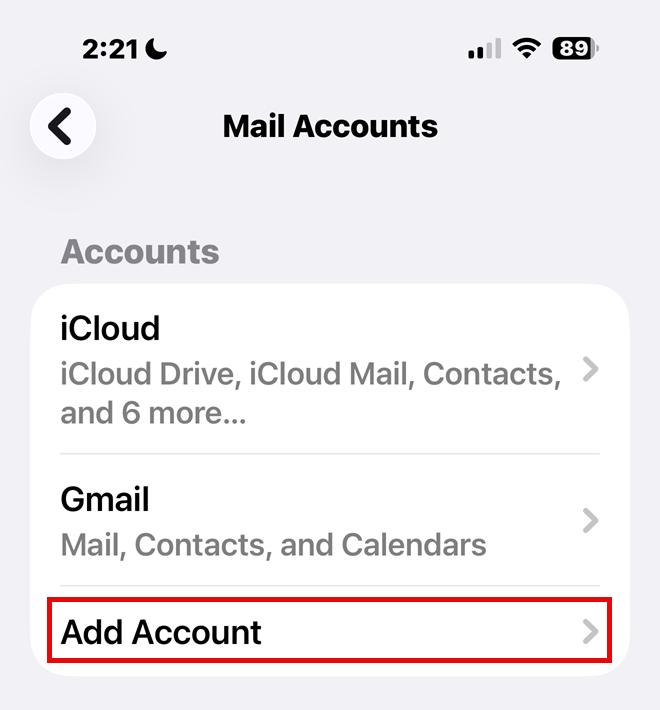
- From the Mail menu, select Mail Accounts.
- Tap on Add Account.
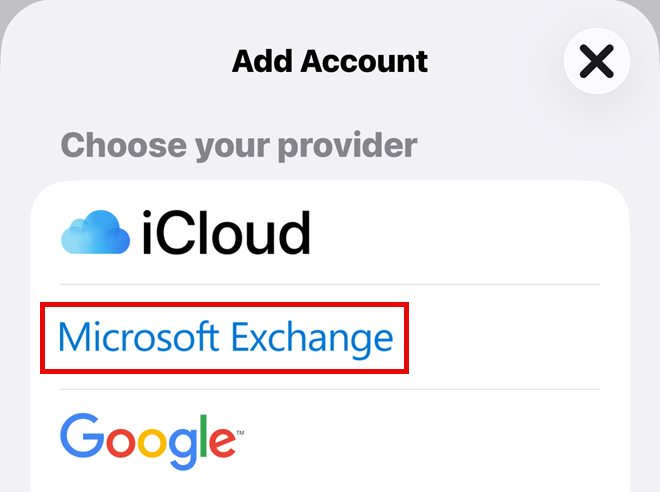
- Tap on the Microsoft Exchange option.
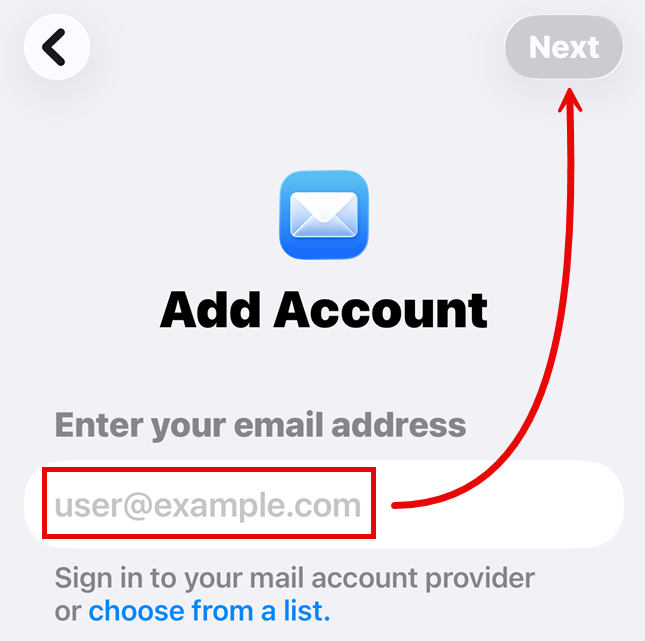
- Enter your UVM email address in NetID@uvm.edu format and tap Next.
- You’ll receive a prompt asking if you’d like to sign in to your Exchange account using Microsoft. Tap the “Sign In” option.
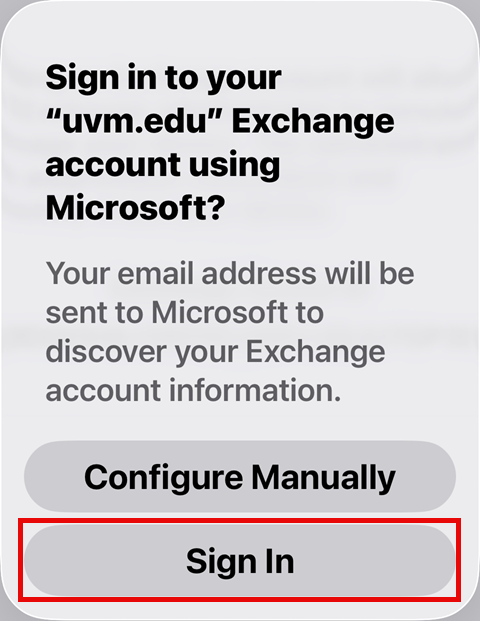
- Sign in with your UVM NetID and password.
- If prompted, proceed through the normal Duo MFA prompts.
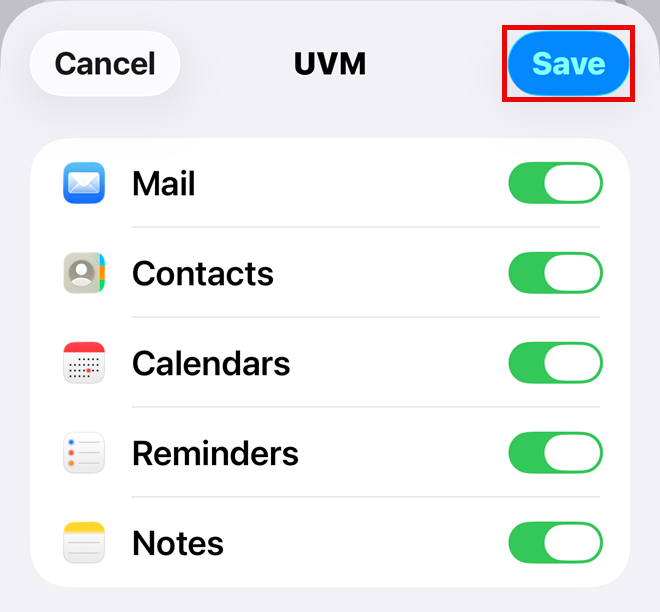
- You’ll be asked to choose which items you’d like to sync with your device. ETS recommends leaving all toggles switched “On”. When you’ve finished adjusting your sync settings, tap Save.
Android
Outlook
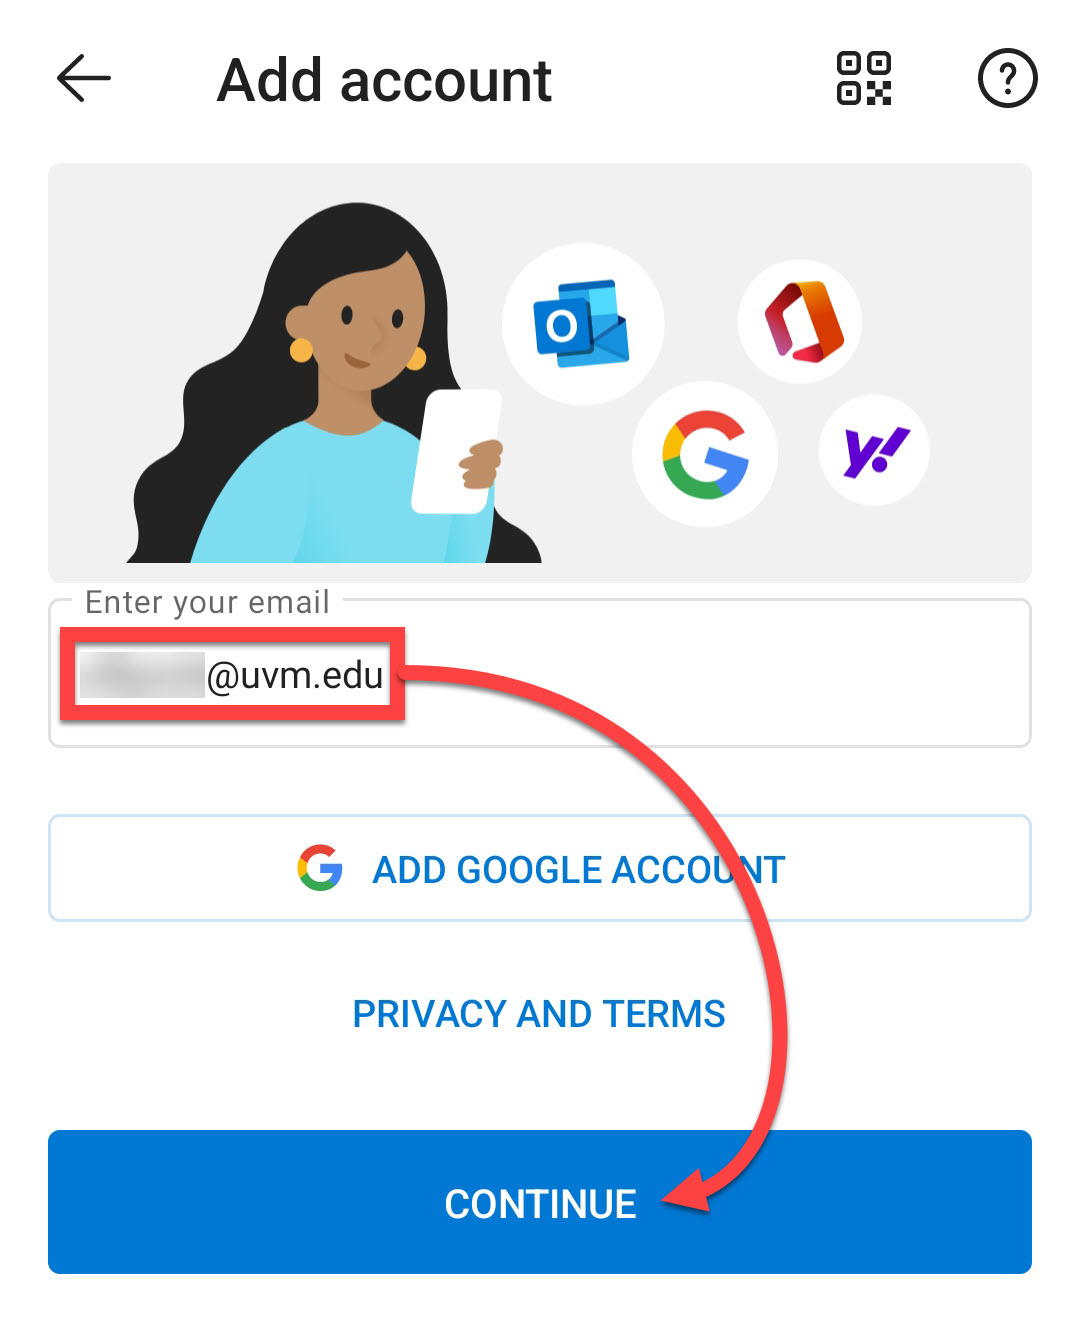
- Search for and install Outlook from the Play Store, and then open the app.
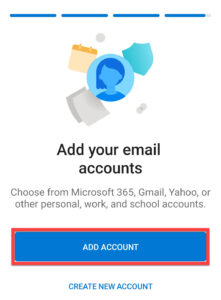
- Tap Add Account.
- Enter your UVM email address in the format NetID@uvm.edu and tap Continue.

- Proceed through UVM Single Sign-On and Duo.
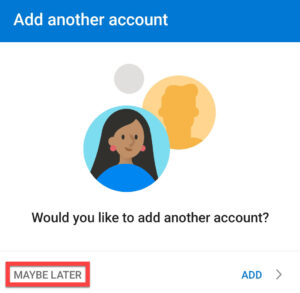
- Tap Maybe Later.


Gmail
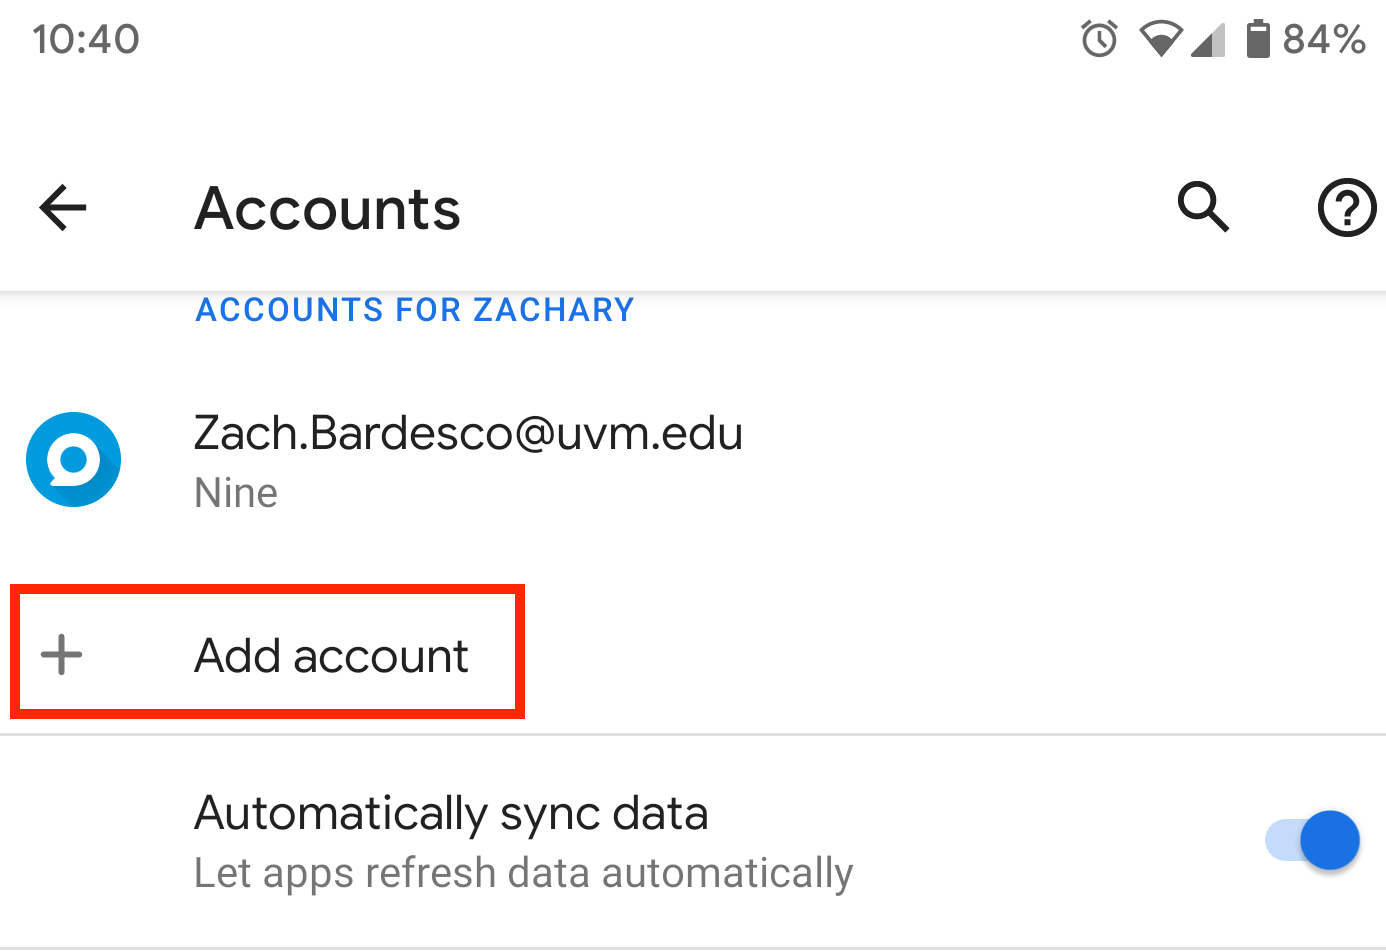
- Open the Settings app on your Android device.
- Scroll down and tap Accounts.
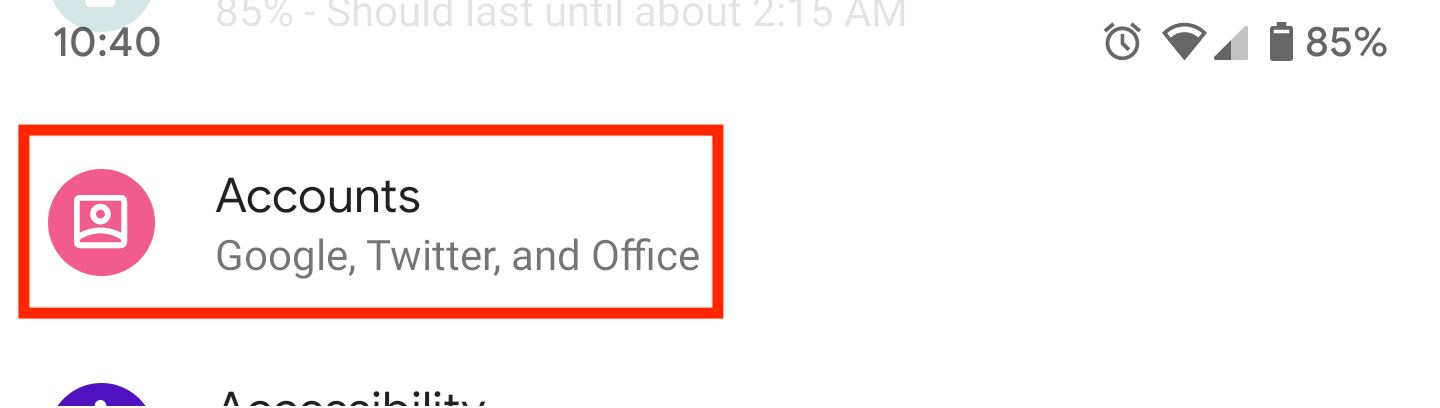
- Scroll down to the Add account option.

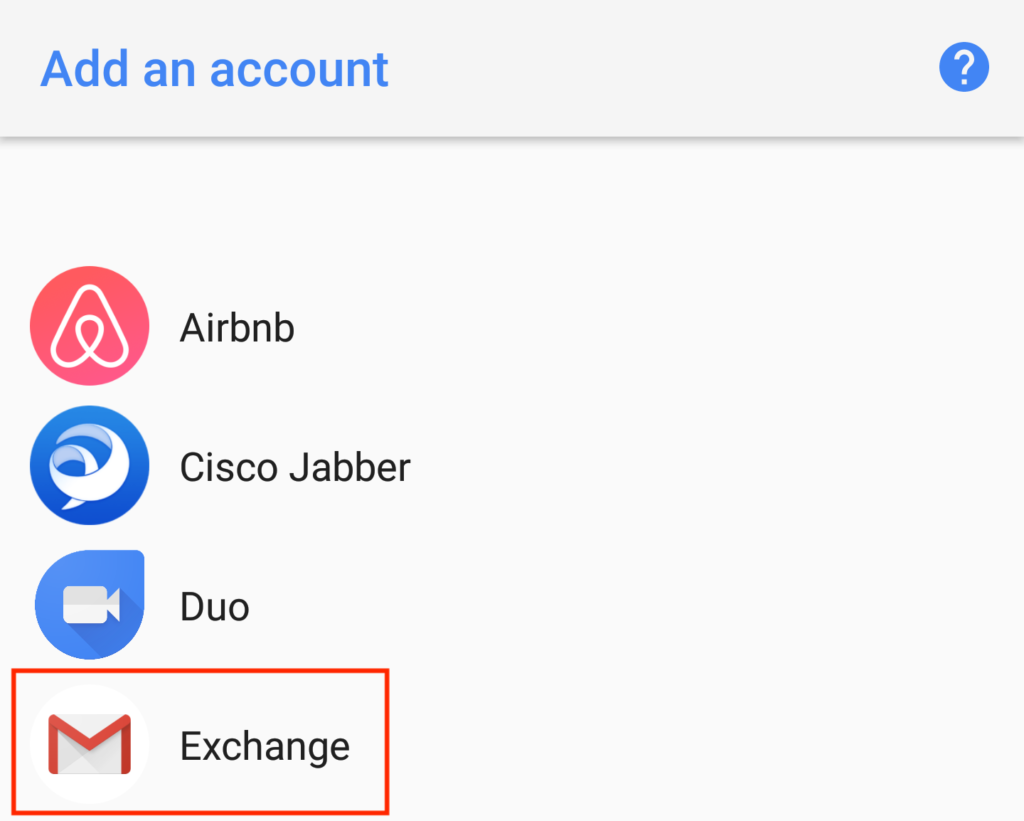
- From the list of account types, select Exchange.
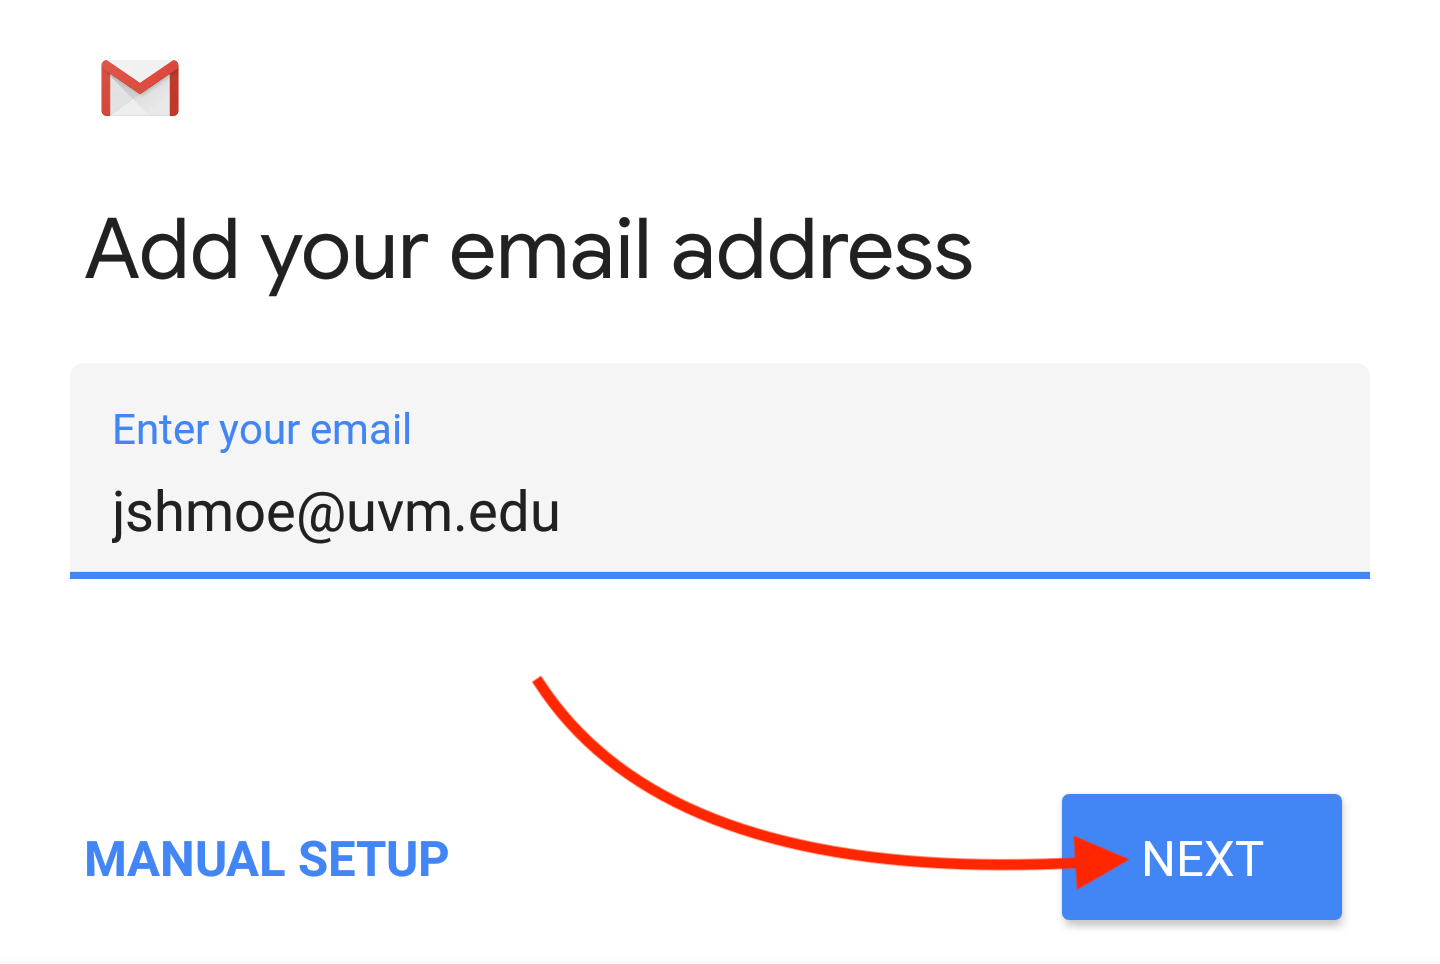
- Enter your UVM email address in NetID@uvm.edu format. Then tap Next.

- Proceed through UVM Single-Sign On and Duo.
- You may be asked several security-related questions:
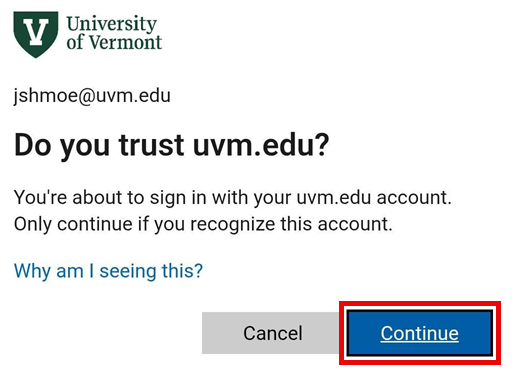
- You may be asked if you trust uvm.edu. Tap Continue.
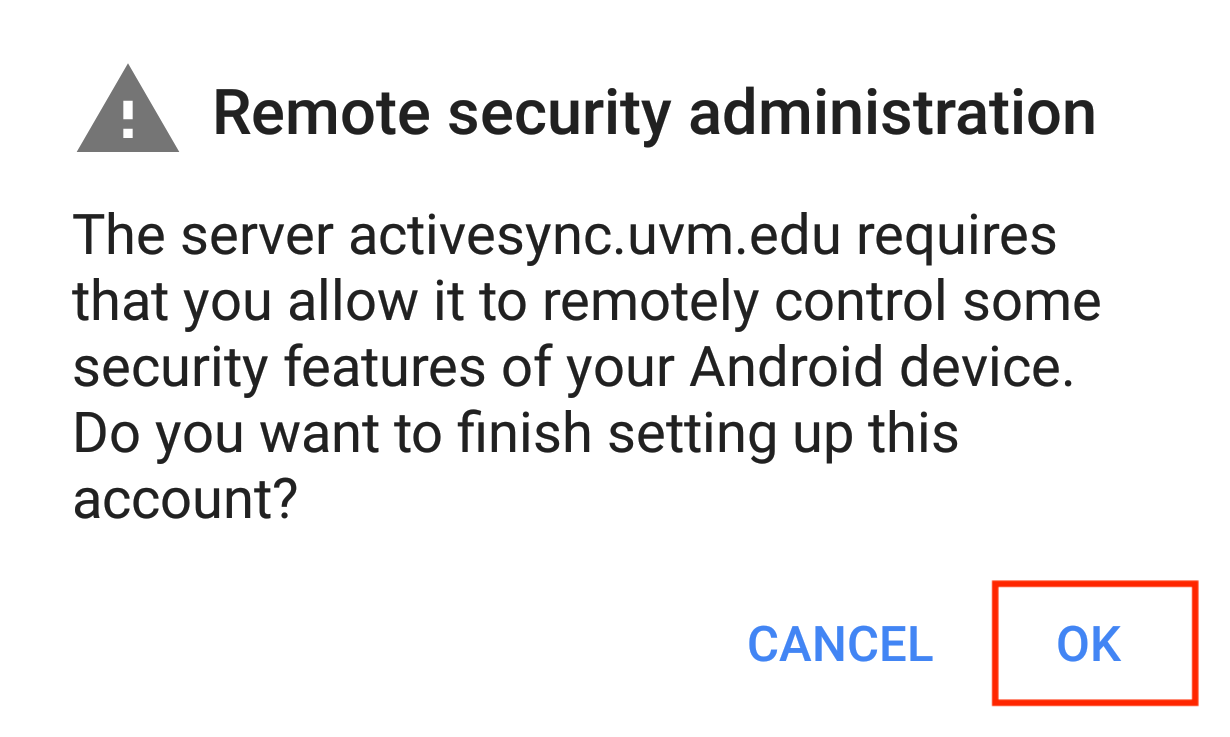
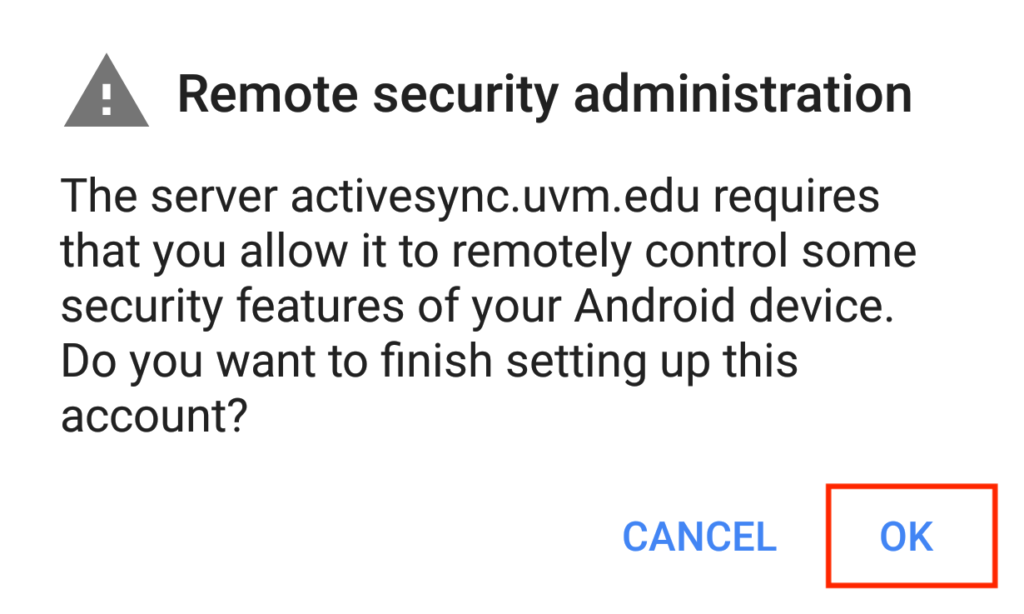
- You may receive a Remote Administration request. Tap OK.
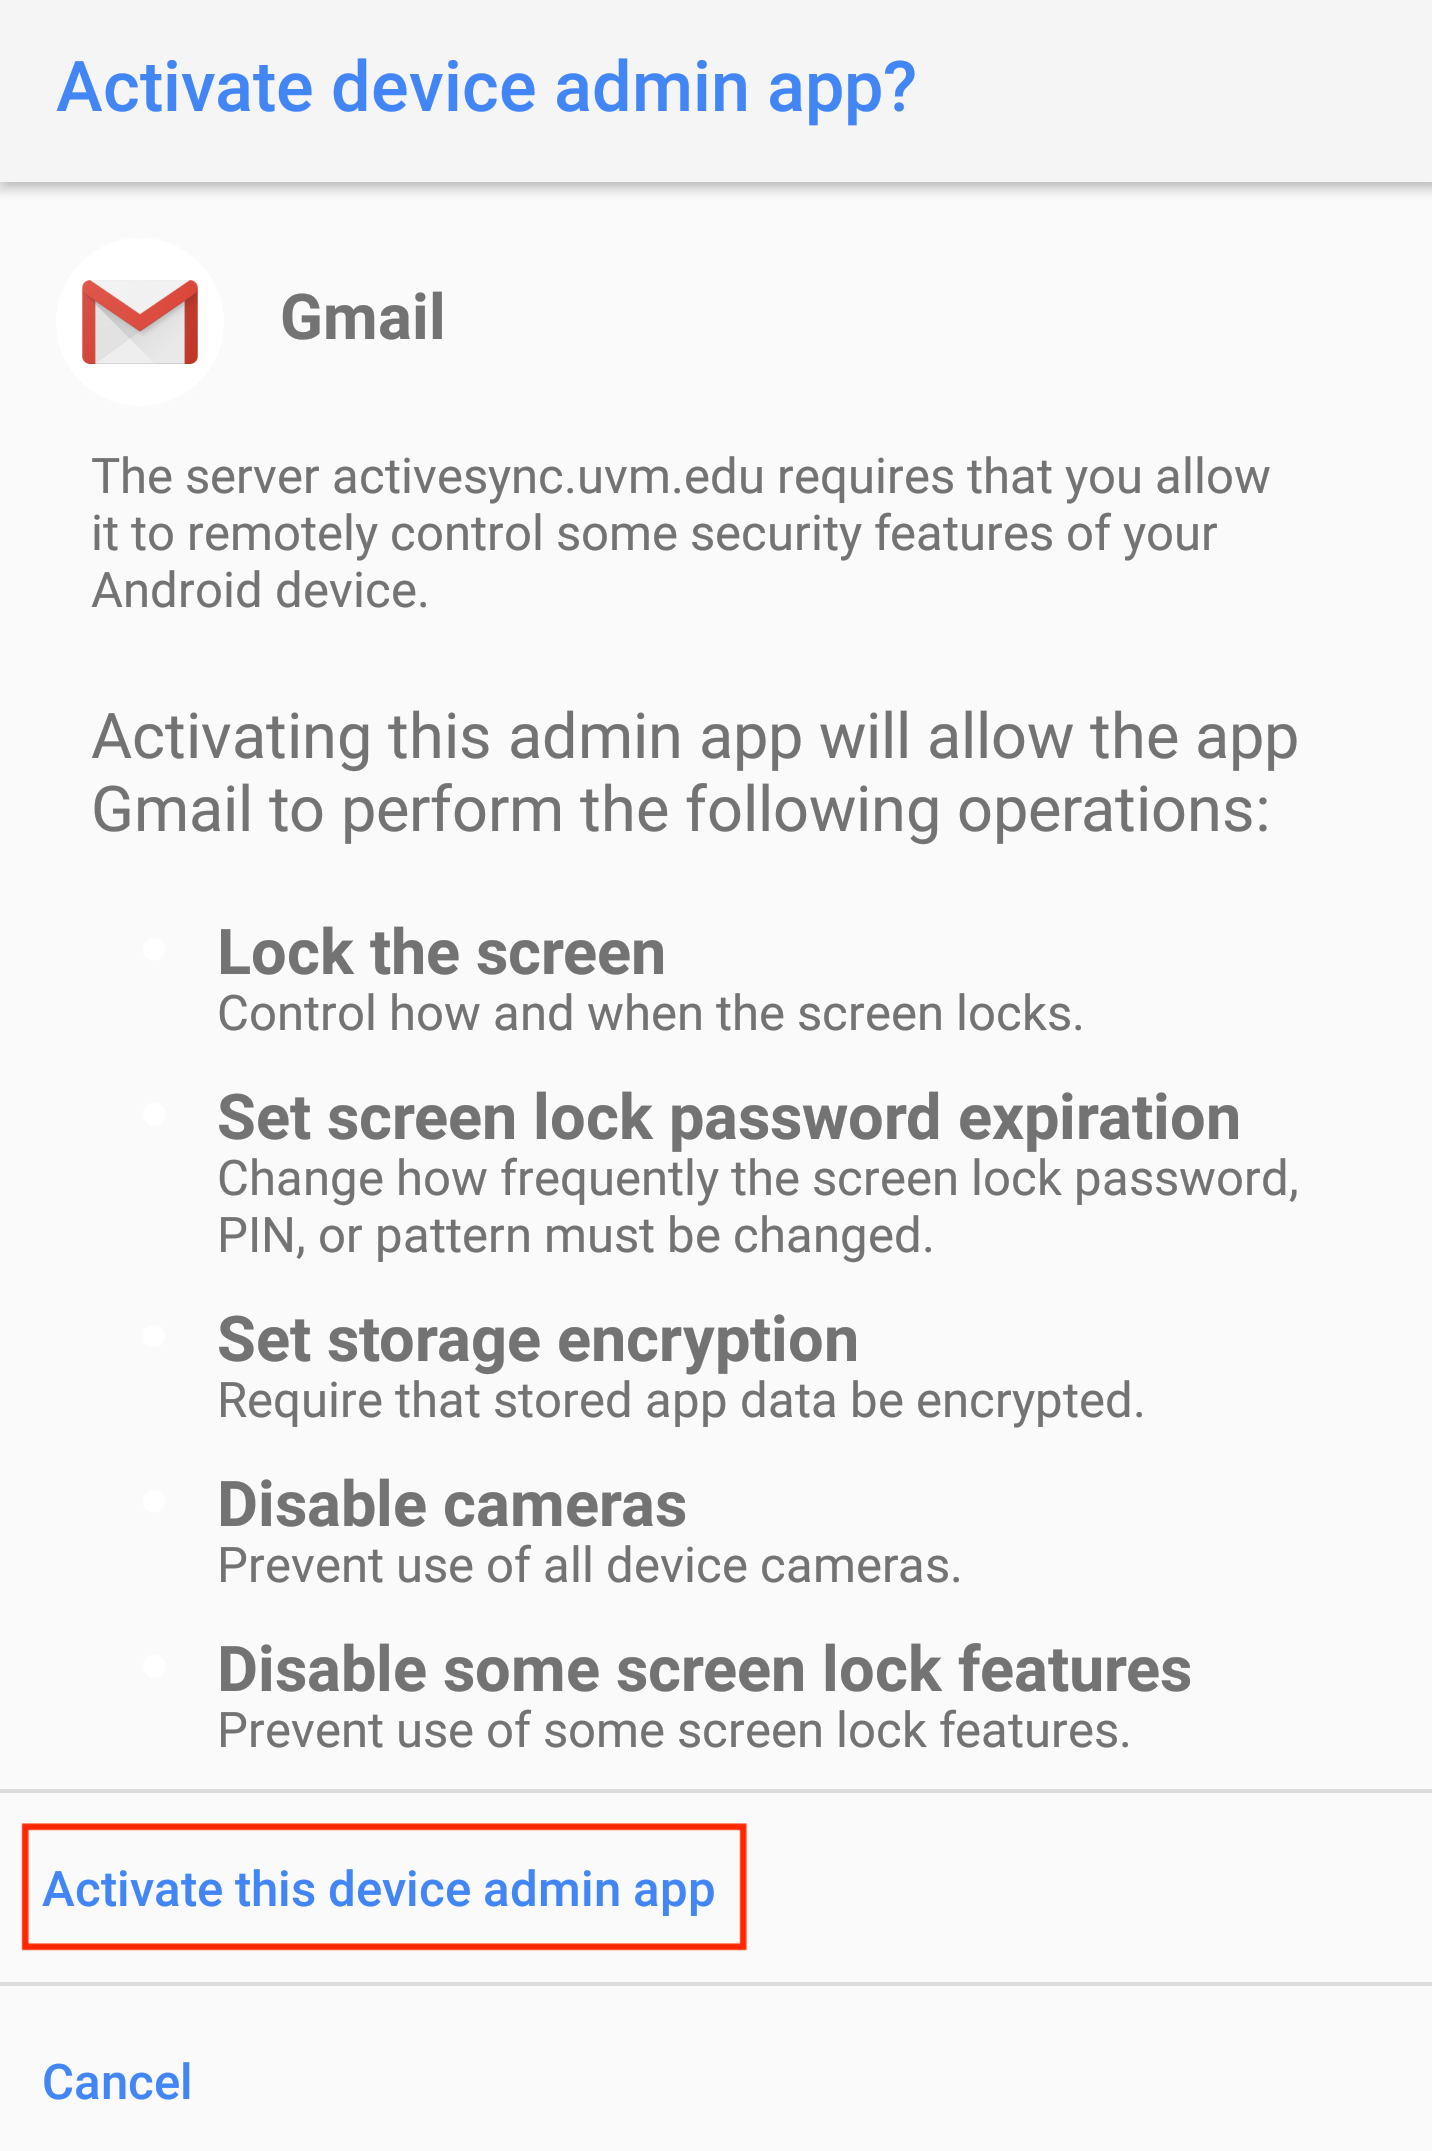
- You may be asked to Activate device admin app. Scroll down and tap Activate this device admin app.

- You may be asked if you trust uvm.edu. Tap Continue.
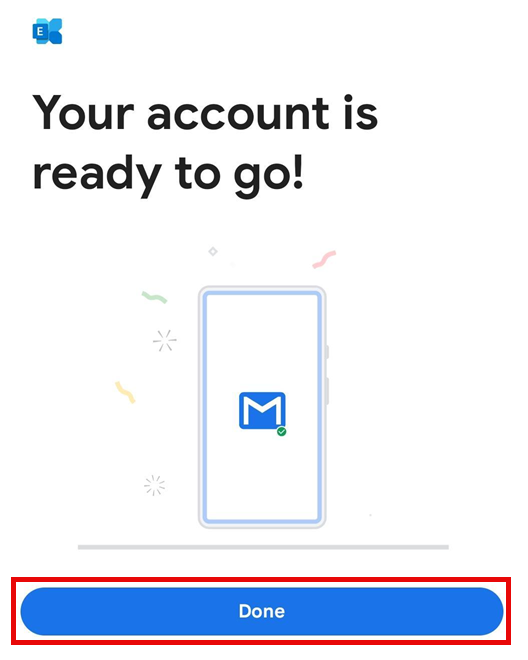
- Tap Done.