
When you get a brand new or recently-reimaged, UVM-managed computer, you’ll have to follow these steps before first-time use. This is known as the Out Of Box Experience, or OOBE.
Requirements
- UVM-managed PC with Windows Autopilot enrollment
- Windows 11 Operating System
- Wired or wireless network connection
Instructions
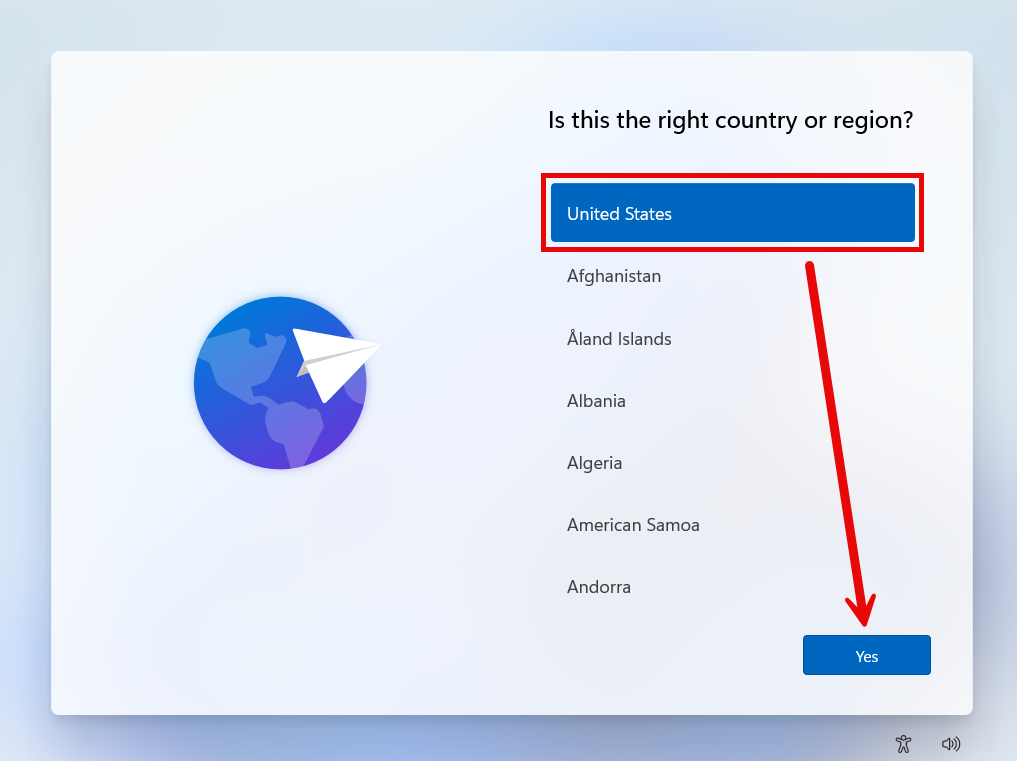
- Power on PC. If prompted, choose your country or region and click Yes. Otherwise skip to step 4.
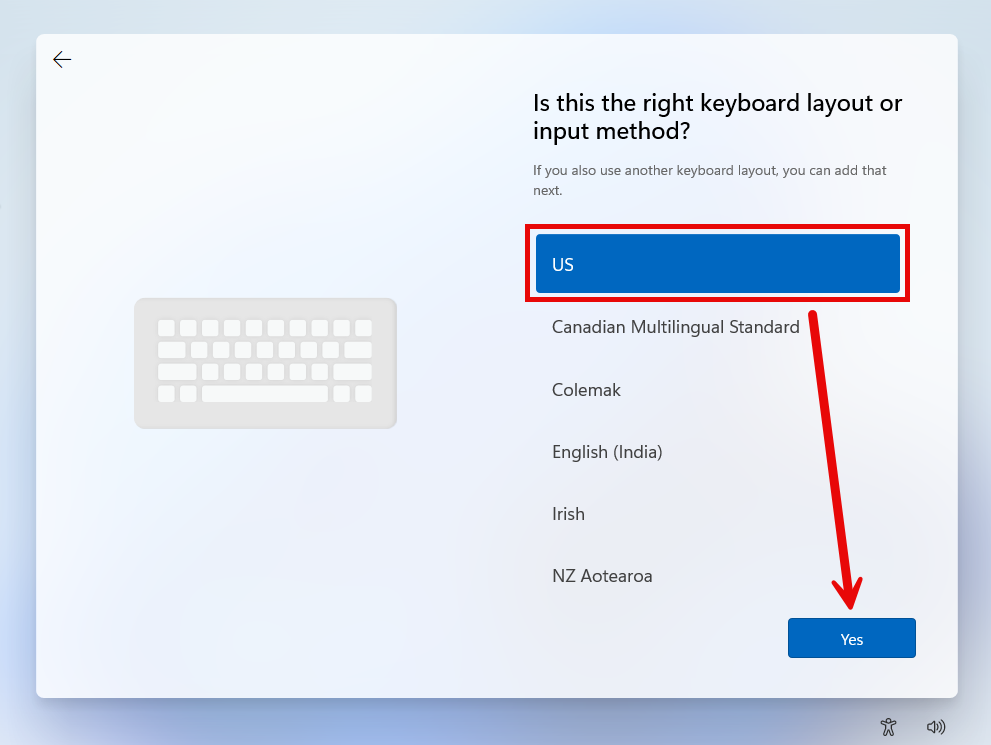
- Choose your keyboard layout and click Yes.
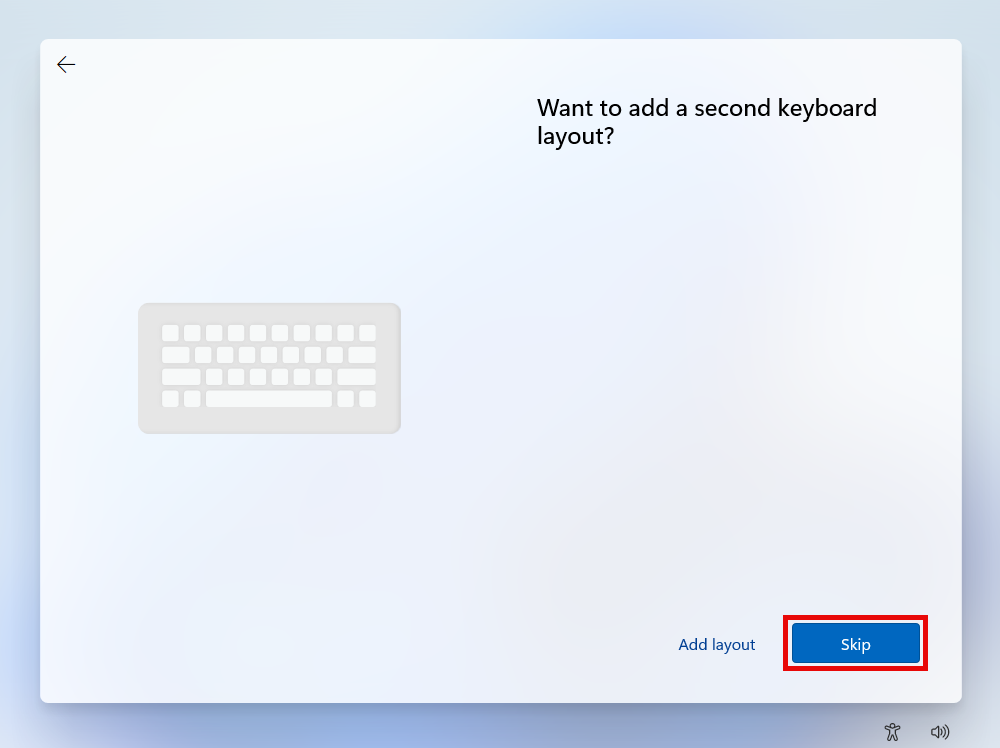
- If you use multiple different keyboards in different languages, you can select Add layout now. Otherwise, click Skip.
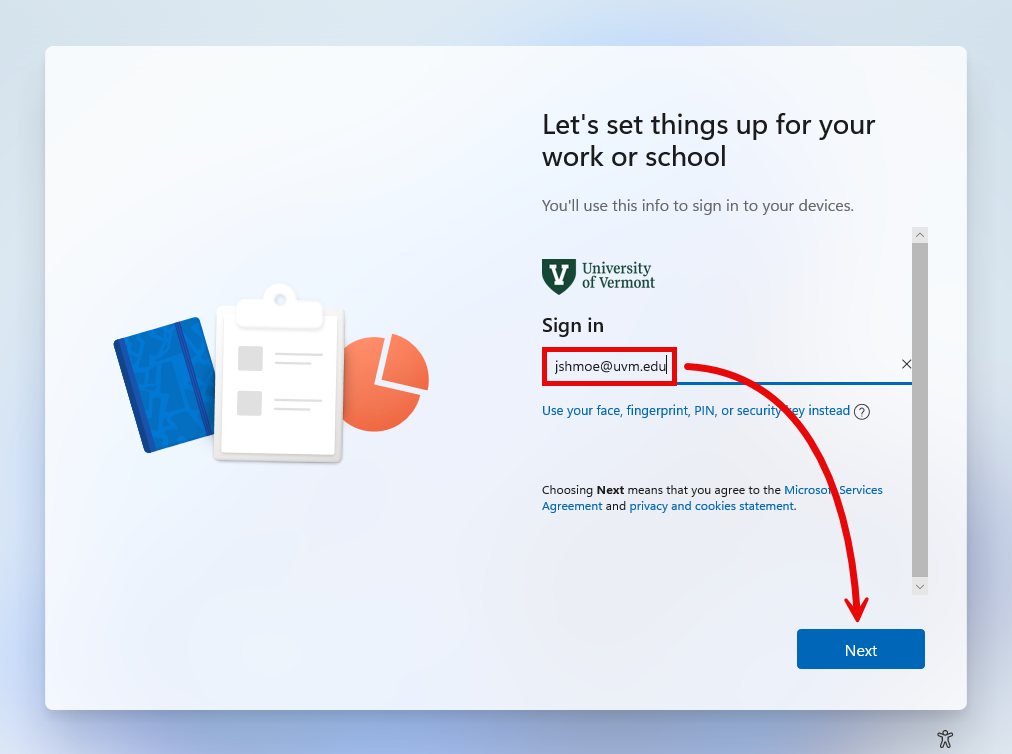
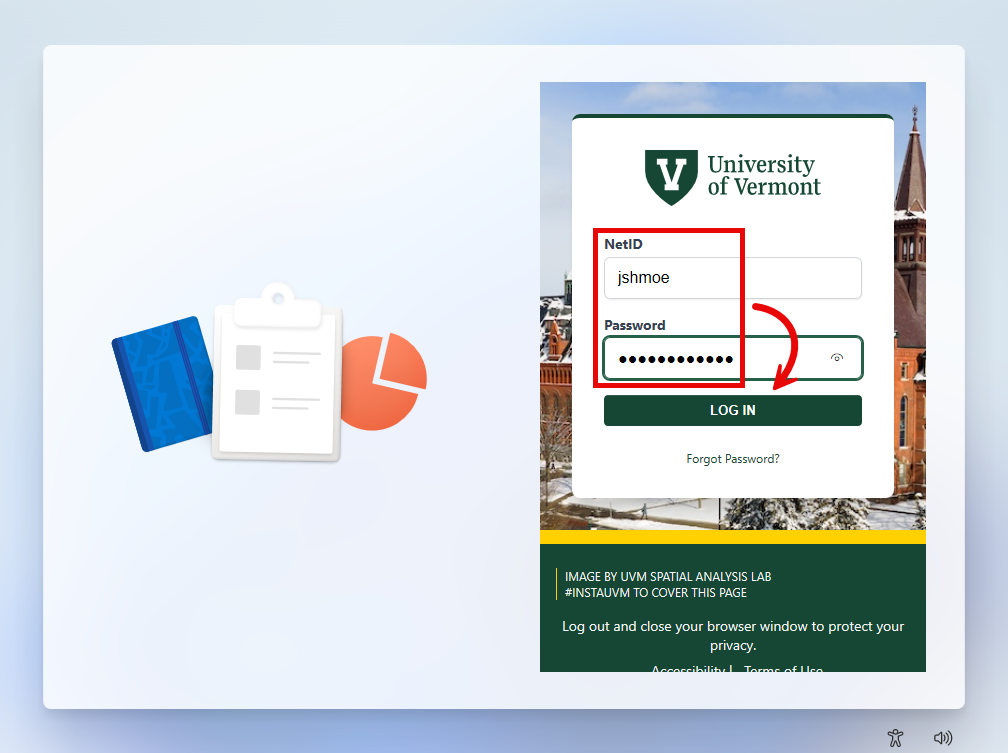
- After a check for updates and a possible restart, the device will say Let’s set things up for work or school. Enter your NetID@uvm.edu and click Next.
- Enter your NetID and Password and click LOG IN.
- If prompted, respond to the Duo Multifactor Authentication steps. If this is your device, click Yes, this is my device.
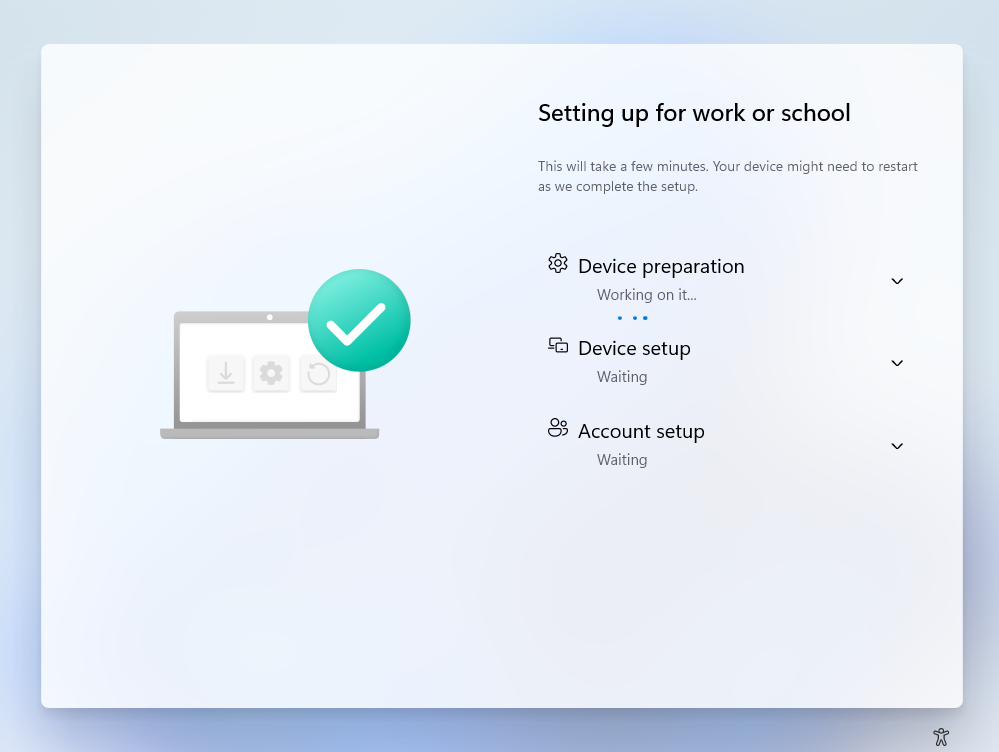
- After the sign in process, the Device preparation and Device setup screen may appear and could take 5-20 minutes to complete. Your computer may restart.
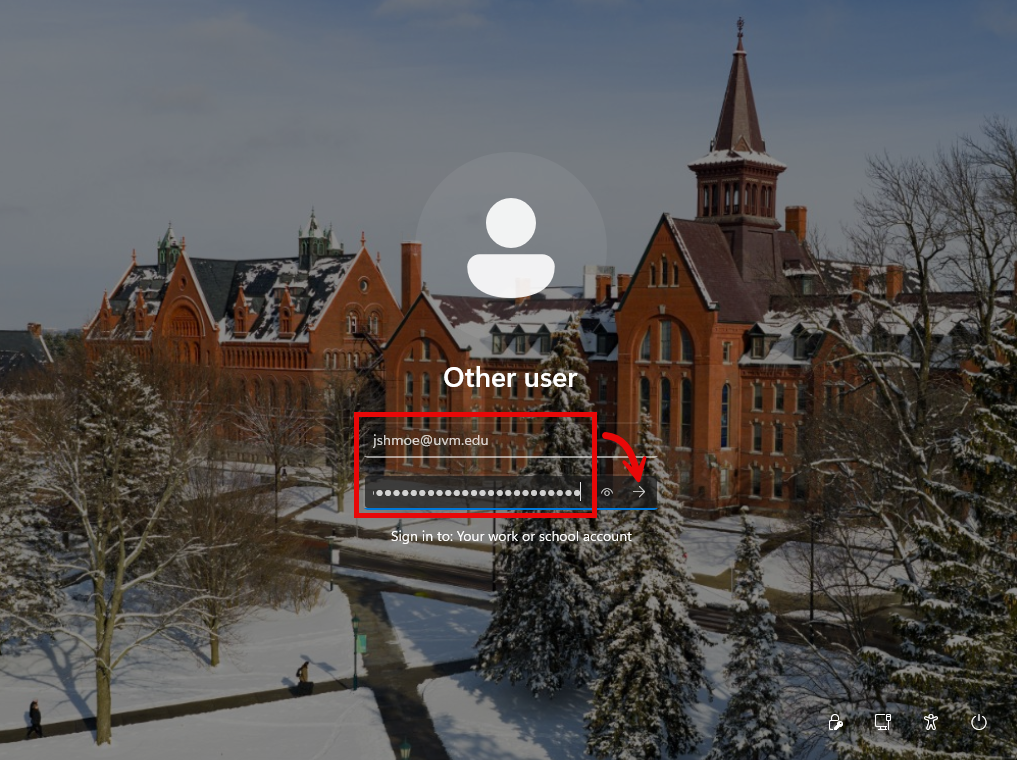
- Eventually, you will see the Windows login screen. Log in with your with your NetID@uvm.edu and Password once more.
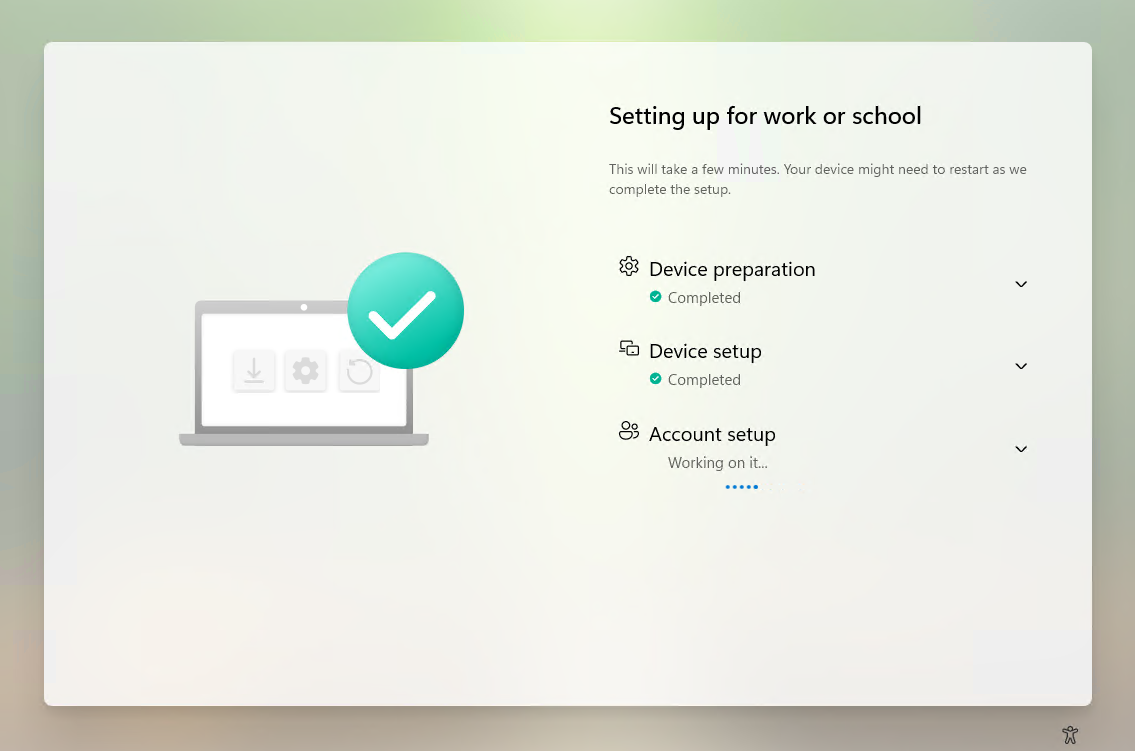
- Wait for the Account setup to complete.
- When the Desktop Background appears, the OOBE is complete, and your device is ready to use.

Post-Setup Tips
Company Portal
Company Portal is an app installed on all UVM-managed Windows PCs. Company Portal should be your method of choice for installing additional software on your computer. AppsAnywhere and third-party websites should only be used for software that is not available through Company Portal. More information about Company Portal can be found here.
Admin Rights
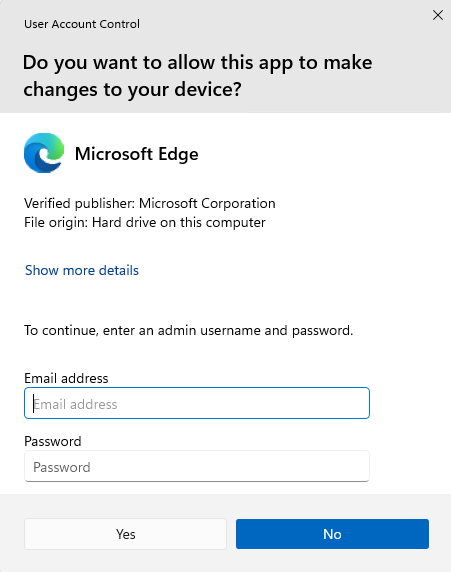
The NetID account used to sign in during the Out Of Box Experience above will automatically be granted local Administrator rights. If a Windows Security or User Account Control box appears during a software install or settings change, enter your NetID@uvm.edu and Password to proceed. If the Windows Security or User Account Control window appears and you weren’t expecting it, click No.
eduroam Wi-Fi
If you are unable to use a hard-wired Ethernet connection for internet access, and you are on campus, choose the eduroam wireless network. More information about eduroam can be found here.
Data Backup
Data you use for work at UVM should be stored in a UVM-managed storage system. Data stored locally should be stored in a location that syncs with OneDrive. Third-party cloud providers like Google Drive and iCloud should not be used to store UVM data and should not be synced to your UVM-managed computer. More information about OneDrive and other UVM Storage Solutions can be found here.