
UVM Streaming Media is a video and audio sharing tool similar to YouTube, in that:
- You can upload videos, add a title, tags, and assign categories to them.
There are two degrees of privacy settings. - You can search for videos, share, and embed them into Brightspace, WordPress, or other webpages.
- Viewers can click anywhere in the video for instant play.
- You can add captions by uploading .vtt or .srt files.
- You can upload avi, flv, mov, mp3, mp4, rm, wmv files and it will automatically transcode the files to mp4 (as YouTube does) to help ensure consistent delivery across all devices.
Uploading Content
To upload video or audio content to UVM Streaming,
- Go to https://streaming.uvm.edu/ and log in, by clicking on the Log In link on the upper right.
- Click on the Upload button on the top navigation bar.
- Click the Browse button to browse for the file on your computer.
- Enter a Title, Description, and a comma separated list of Tags.
- Click Upload Media.
Your video will begin processing shortly after this. Depending on the length/size of the video, it may take some time to complete. You will receive an email once the video has finished processing and is ready for viewing.
Uploading Captions
Captions should be uploaded for all videos used for educational purposes. Submit a Caption Request Form to get help with creating the captions for your video after you’ve uploaded it.
After they caption it, they will send you a file with an .srt or .vtt extension. To attach this captioning file to you video:
- Log in to UVM Streaming, click on My Media to find your video, and click Edit underneath the video.
- Under “Upload New Attachment” on the left, click the Browse button to find the .srt or .vtt file on your computer.
- Scroll down and click Save Changes.
- Select “Make this the default caption“
- Click Save Changes again.
Your video will now use this caption file as the default caption.
Replace a Video's Thumbnail/Poster Image
You can upload a new image to replace the thumbnail that is used for your media.
- Log in to UVM Streaming, click on My Media to find your video, and click Edit underneath the video.
- Under “Upload New Attachment” on the left, click the Browse button to find the image file on your computer.
- Scroll down and click Save Changes.
- Select “Use as thumbnail/poster.“
- Click Save Changes again.
Privacy Options
Anyone with a UVM NetID can upload videos. Anyone (in the world, that is) can browse and view videos unless you choose one of the following privacy options:
- you can restrict viewing to UVM eyes only, requiring a person to log in with their UVM NetID to view the video.
- you can set a video to “private” so it’s viewable only to those with a link to it, for example, within a Brightspace course.
Embedding Videos
Brightspace
- After uploading your media to UVM Streaming Media, click on the share tab on the video page and copy the embed code.
- In your Brightspace course, create a new module.
- Click on the “Source Code” button (it looks like two angle brackets, i.e. < >) , to open the HTML editing window.
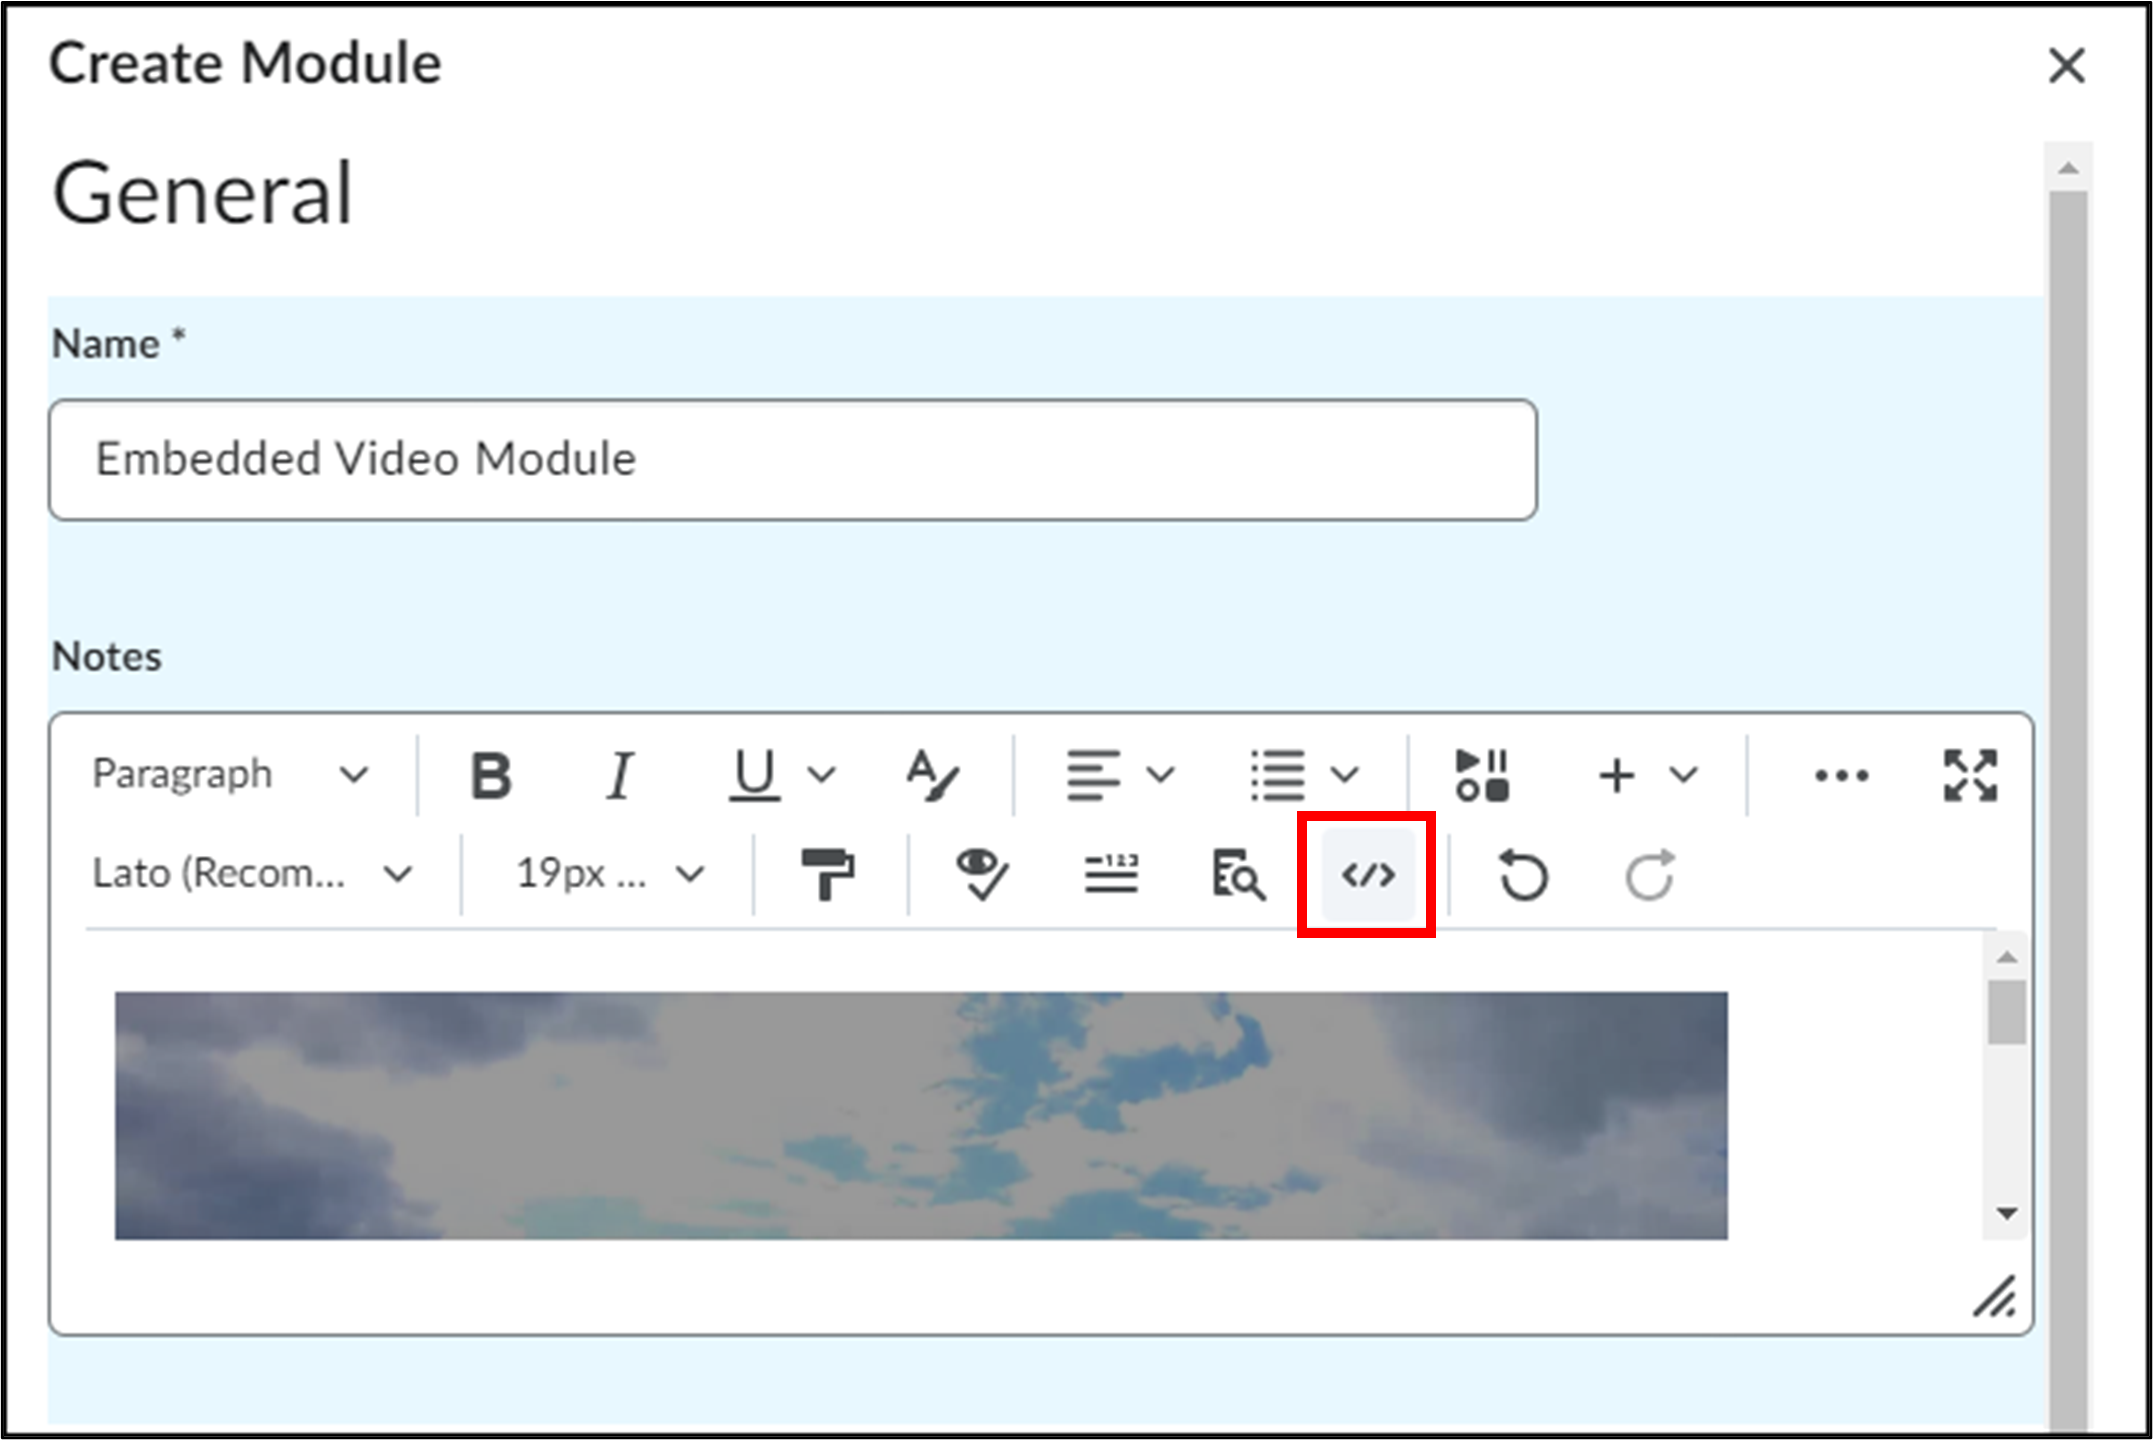
- Paste the copied embed code into the pop-up window and click Save.
- Complete the rest of the module creation and click Create when ready.
Embedding Media in WordPress
You can embed media on blog.uvm.edu or site.uvm.edu simply by pasting the “Auto-Embed Link” for the video into the editor when editing a WordPress page or post. Alternatively, you can paste the link into the “Embed” block-type like so:
- Go to the video’s page on UVM Streaming
- Click on the Embed/Share tab beneath the video
- Copy the URL under “Auto-Embed Link”
- Go to your WordPress blog post, and click the “+” icon to add a new block.
- Click Embed
- Paste the previosly copied Auto-Embed Link into the box, and click Embed.
Making Playlists
One way to organize your content is to group two or more videos into a playlist. There are two default playlists (Favorites and Watch Later), which you can use to easily save media you want to revisit. Saving to these playlists is as easy as clicking on he star or bookmark button under each video.
You can also create custom playlists. Custom playlists can be used, for instance, if you want to select a group of your videos for students to watch on a specific topic. To create a custom playlist:
- Log in to UVM Streaming, and find a video you want to add to a playlist.
- Click on the Playlists button beneath the video, and choose Create New Playlist.
- Enter a name for your playlist, and choose if you want it publicly visible/searchable.
- Click Create Playlist. The video will be automatically added to this playlist.
To add another video to this new playlist,
- Search or browse for the video you want to add.
- Click the Playlists button below this video, and select the playlist you created above.
You can edit and manage your playlists by clicking on the My Playlists link at the top of every page.
Getting Help
Faculty and TA’s may write to or visit Open Hours at CTL to get help. Students can contact The UVM Tech Team.