Permissions management is a crucial function for most SharePoint sites. This page will describe the typical process for creating and managing group permissions and individual file and folder access.
Managing Site-wide Permissions
Access in SharePoint is typically controlled using groups. A group is assigned a certain level of access, and users are manually added to that group.
There are several default groups, though you can create additional groups as needed.
Adding a User to a SharePoint Permission Group
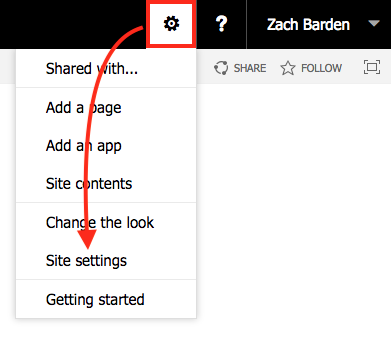
- Click the gear in the top right corner, then select Site settings.
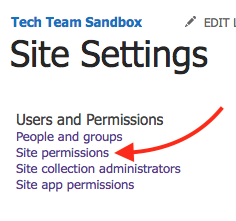
- Select Site permissions under the Users and Permissions header.
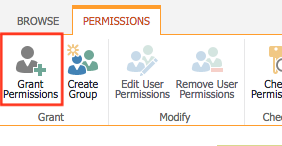
- You will now be taken to a list of permitted users and groups. Click Grant Permissions in the top left corner.
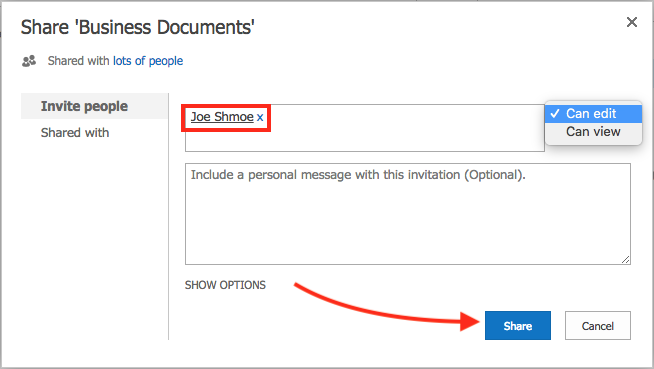
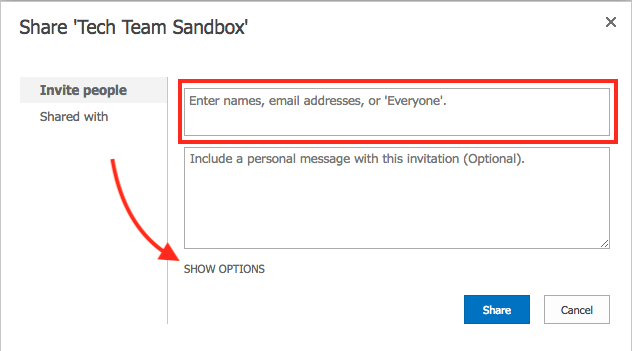
- Enter the names or UVM email addresses of the individuals you want to invite. Then, click Show Options toward the bottom of the window.
- Specify the group to which you want this person added under the “Select a group or permission level” section, then click Share.
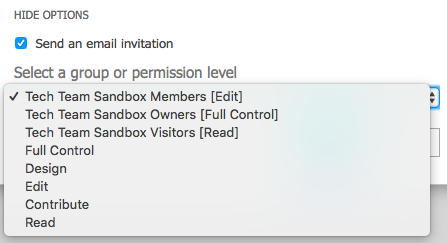
- Optional: You can add a user to your site without adding them to a group. Select the appropriate permission level and click Share.
- Optional: You can add a user to your site without adding them to a group. Select the appropriate permission level and click Share.
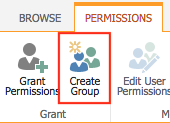
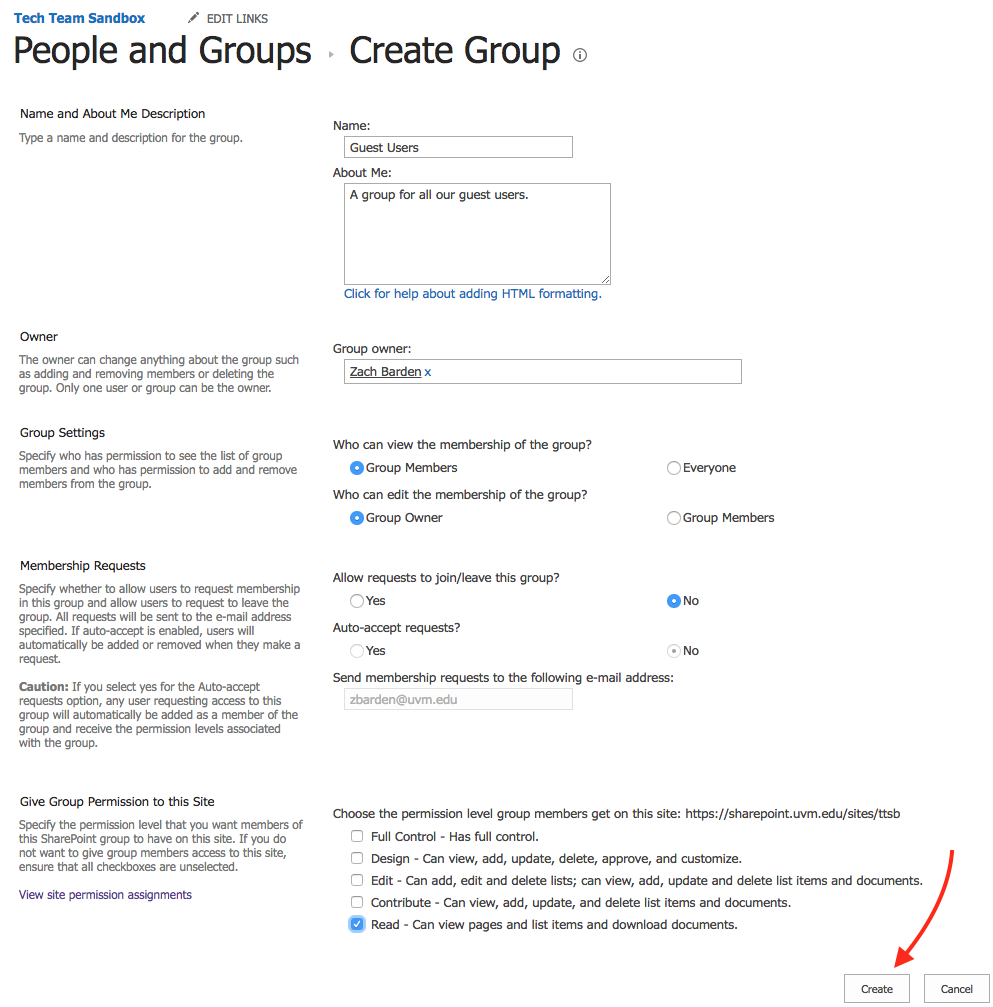
Creating a New SharePoint Group
Changing a Group's Permission Level
- Click the gear in the top right corner, then select Site settings.

- Select Site permissions under the Users and Permissions header.

- You will now be taken to a list of permitted users and groups. Click the box next to the group who’s permissions you want to edit, then click the Edit User Permissions button in the Ribbon.
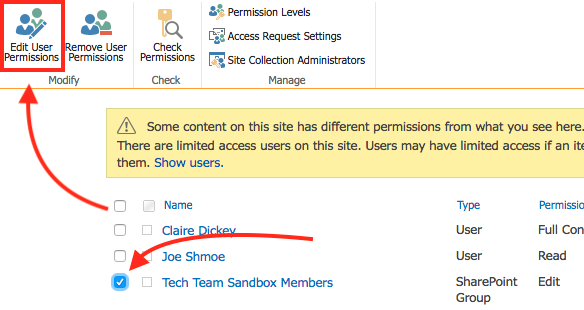
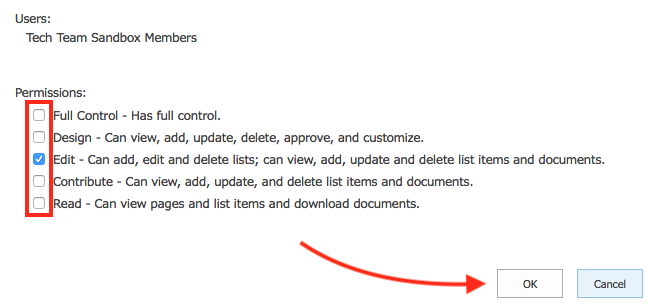
- Uncheck and check the appropriate permissions, then click OK.
Single File or Folder Permissions
Permissions in SharePoint are inherited; by default, any user granted permissions to your site will have access to every file and folder on that site.
If you require more granular permission management options, this section will instruct on how to grant access to or restrict access for specific files or folders.
The first step to individually managing a given file or folder’s permissions is to stop inheriting permissions.
Disabling Permission Inheritance
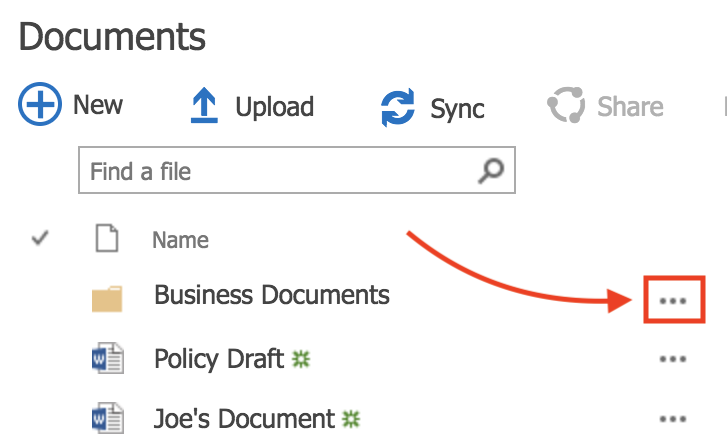
- Click the ellipsis next to the file or folder for which you want to disable permission inheritance.
- Click Share.
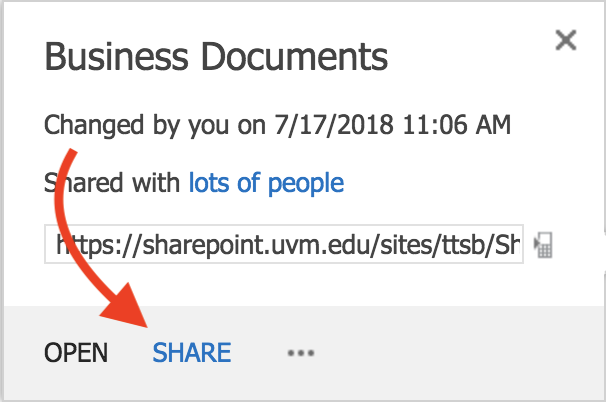
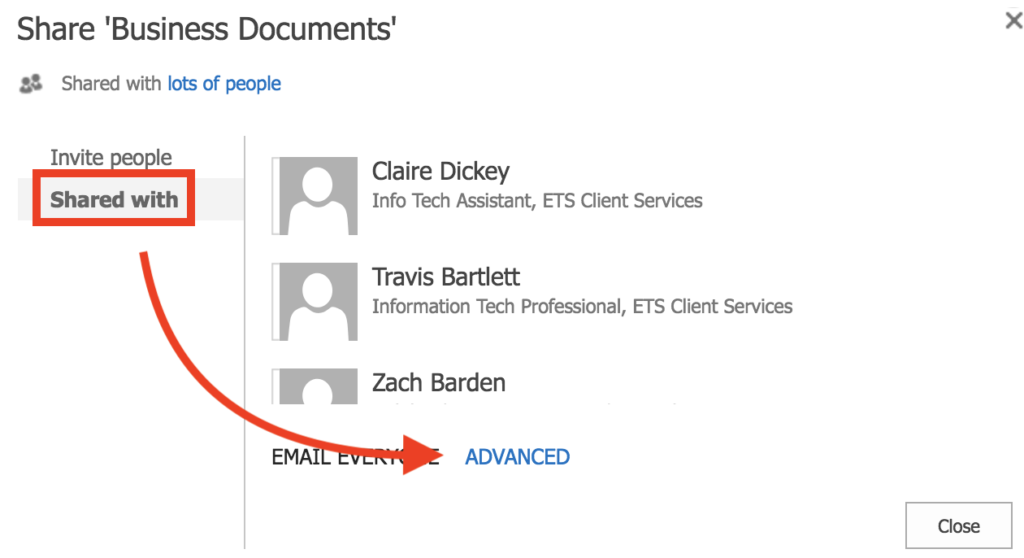
- Choose Shared with from the left side panel, then click Advanced.
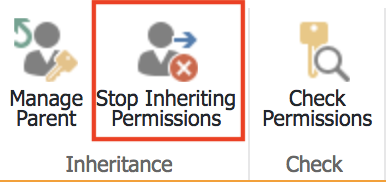
- You will now be brought to the permissions management page for your chosen file or folder. Click Stop Inheriting Permissions.
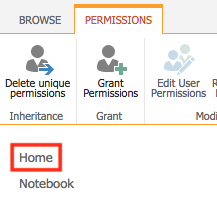
- Click Home in the left sidebar to return to your SharePoint site’s homepage.
Granting Access to a Single File or Folder
Restricting Access to a Specific File or Folder
- Click the ellipsis next to the file or folder for which you want to disable permission inheritance.

- Click Share.

- Choose Shared with from the left side panel, then click Advanced.

- You will now be brought to the permissions management page for your chosen file or folder. Find and select the user who’s access for this file or folder you wish to remove, then click Remove User Permissions from the Ribbon.

- Click Home in the left sidebar to return to your SharePoint site’s homepage.

Enabling Permission Inheritance
- Click the ellipsis next to the file or folder for which you want to re-enable permission inheritance.

- Click Share.

- Choose Shared with from the left side panel, then click Advanced.

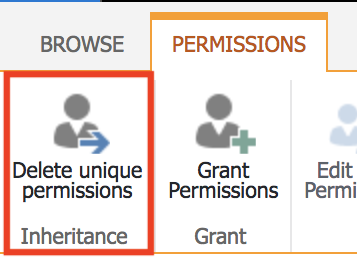
- You will now be brought to the permissions page for your chosen file or folder. Click Delete Unique Permissions and proceed through the prompt.
- Click Home in the left sidebar to return to your SharePoint site’s homepage.

Other
Accepting Access Requests
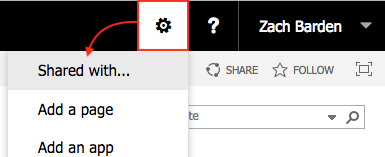
- Click the gear in the top right corner, then select select Shared with…
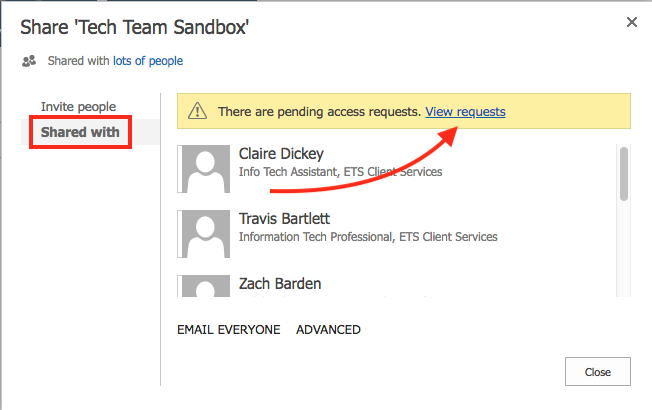
- Click the “Shared with” tab along the left side column, then click View requests.
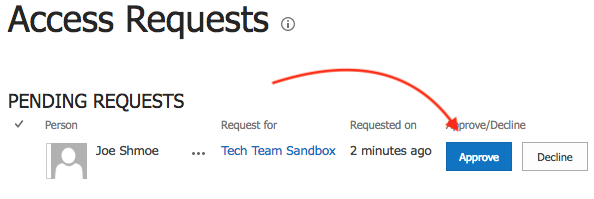
- You will be taken to the Access Requests page. Verify you recognize the person requesting access, then click Approve.
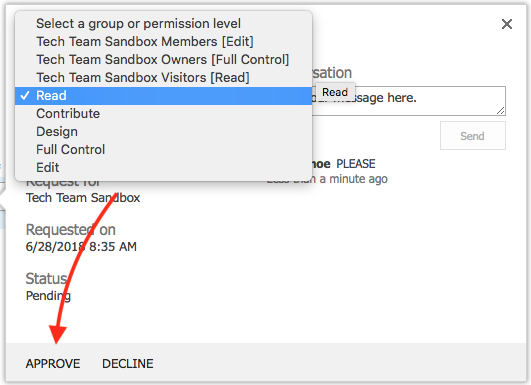
- Select the appropriate permission level under the “Permission” section, then click Approve.
Grant External Access to a SharePoint Site
You can share a SharePoint 2016 site with an external user, provided that user has a Sponsored UVM Guest account.
- If the external user doesn’t already have a Sponsored UVM Guest account, create one using our UVM Guest Accounts guide
- On the SharePoint 2016 site, click the gear in the top right corner, and then select Site settings

- Select Site permissions under the Users and Permissions header

- On the page showing a list of permitted users and groups, click Grant Permissions in the top left corner

- Enter the username generated for the Guest account (typically in the form of “YOURNETID.theirusername“), and then click SHOW OPTIONS toward the bottom of the window

- Select the appropriate permission level under the “Select a group or permission level” section, and then click Share
Permission Levels
Click here to view Microsoft’s documentation on Sharepoint Permission Levels.
| Permission Level | Description |
|---|---|
| View Only | Enables users to view application pages. The View Only permission level is used for the Excel Services Viewers group. |
| Limited Access | Enables users to access shared resources and a specific asset. Limited Access is designed to be combined with fine-grained permissions to enable users to access a specific list, document library, folder, list item, or document, without enabling them to access the whole site. Limited Access cannot be edited or deleted. |
| Read | Enables users to view pages and list items, and to download documents. |
| Contribute | Enables users to manage personal views, edit items and user information, delete versions in existing lists and document libraries, and add, remove, and update personal Web Parts. |
| Edit | Enables users to manage lists. |
| Design | Enables users to view, add, update, delete, approve, and customize items or pages in the website. |
| Full Control | Enables users to have full control of the website. |
