
It’s just as important to secure the data on your external hard drive as it is to secure the data on your computer’s internal drive, as these drives typically store the same data.
macOS
Ensure your External Drive is Properly Formatted
You must ensure your external drive is properly formatted so that macOS can read, write, and encrypt it.
To encrypt your drive:
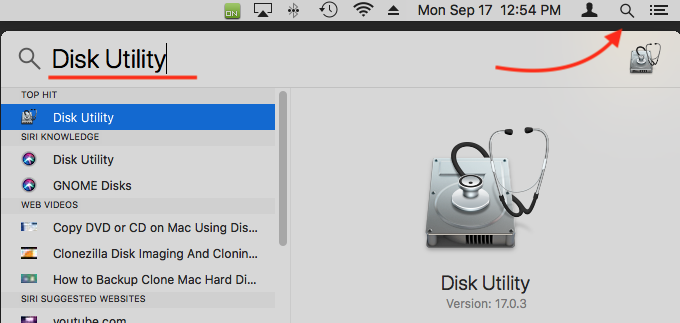
- Click the Spotlight Search magnifying glass, then search for and open Disk Utility.
- Find and select your external drive, then verify the drive’s format.
Acceptable formats include: HFS+, APFS, Mac OS Extended (Jornaled)
Formatting your External Drive for FileVault
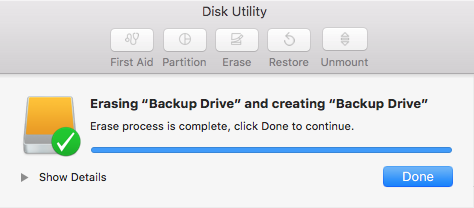
- Click the Spotlight Search magnifying glass, then search for and open Disk Utility.
- Select your external drive, then click Erase.

- Click the Format dropdown.
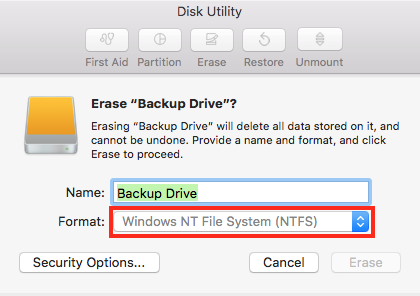
- From the list of available formats, select Mac OS Extended (Journaled, Encrypted) or APFS (Encrypted).

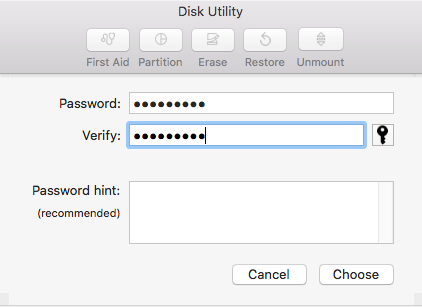
- Enter a secure, memorable password and the password hint as required, click Choose, then click Erase.
- The drive should now be reformatted and encrypted as required.
Encrypt with FileVault
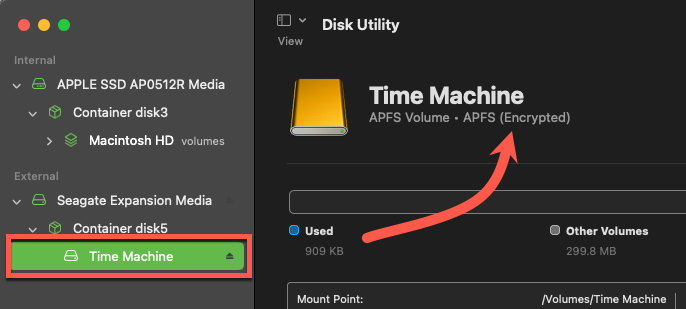
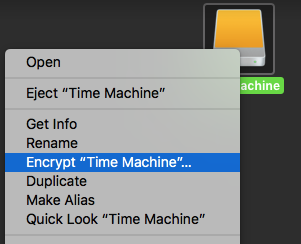
- You should see an icon on your desktop that looks similar to the images below.


- Right click on the external drive you would like to encrypt, then click the option marked Encrypt “Time Machine”.
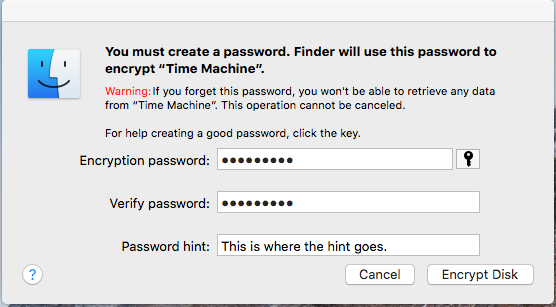
- Enter a secure, memorable password and the password hint as required, then click Encrypt Disk.
- The drive should now proceed through the encryption process. Verify the drive has encrypted by selecting the drive in Disk Utility.

Windows
Ensure your External Drive is Properly Formatted
If your drive is improperly formatted, in addition to limitations reading and writing to the drive, encryption may be impossible. You drive can be reformatted using the instructions in the next section.
- Open Windows Explorer, right click your external drive, then select Properties.

- Under the General tab, find the section marked File System
and verify it says NTFS. If your drive is improperly formatted, see the section below. Otherwise, skip to Encrypt with Bitlocker.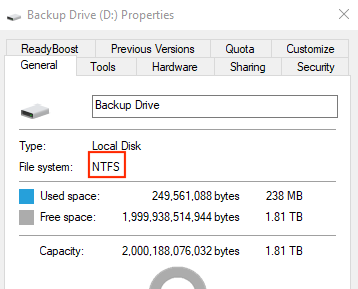
Formatting your External Drive for BitLocker
- Open Windows Explorer, right click your external drive, then click Format.
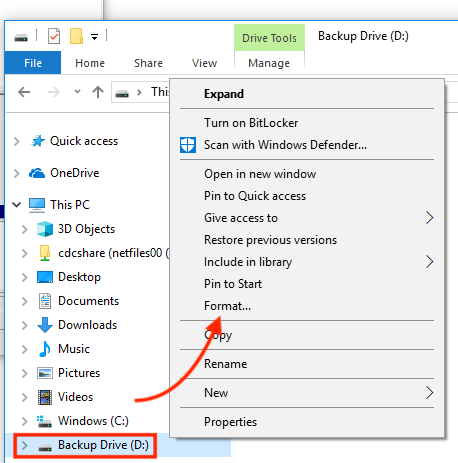
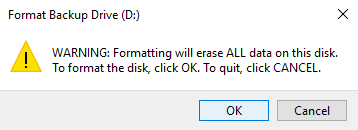
- This process will completely erase all data on your external hard drive. If this is acceptable, click OK.
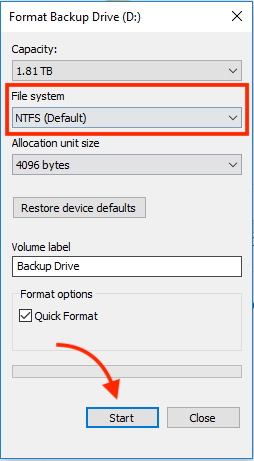
- Ensure the drop down under File System is NTFS, then click Start.
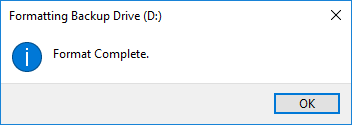
- After your drive has been successfully formatted, click OK, then continue to the next section.
Encrypt with BitLocker
- Open Windows Explorer, right click your External Drive, then select Turn on BitLocker.

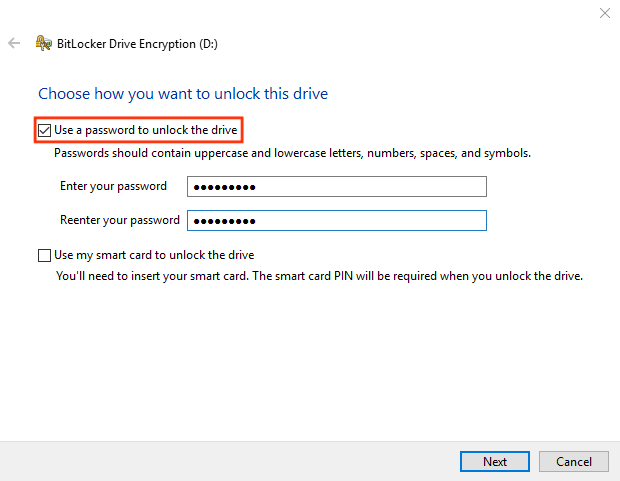
- Select Use a password to unlock the drive, enter a secure and memorable password as required, then click Next.
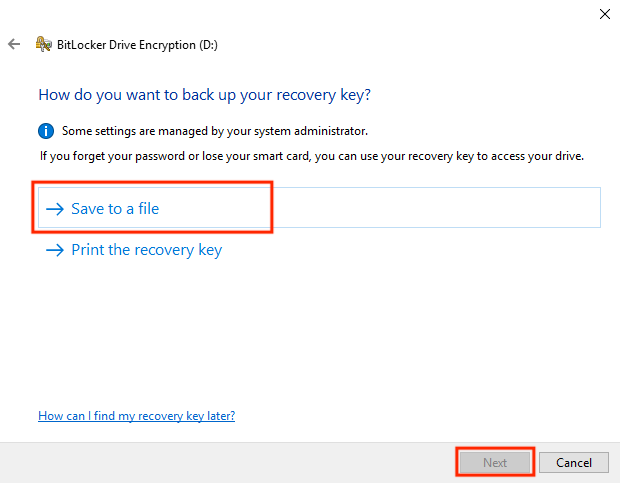
- Click Save to a file, then choose where to save your recovery key. The recovery key can be used if you forget your password.
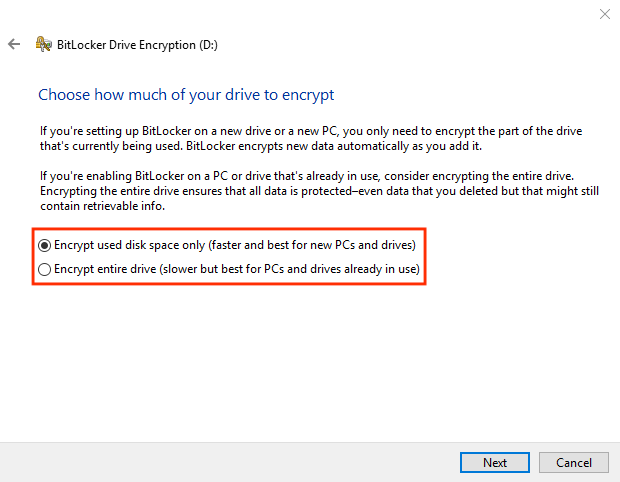
- Read through this page and select how to encrypt your drive, then click Next.
- Click Start encrypting.
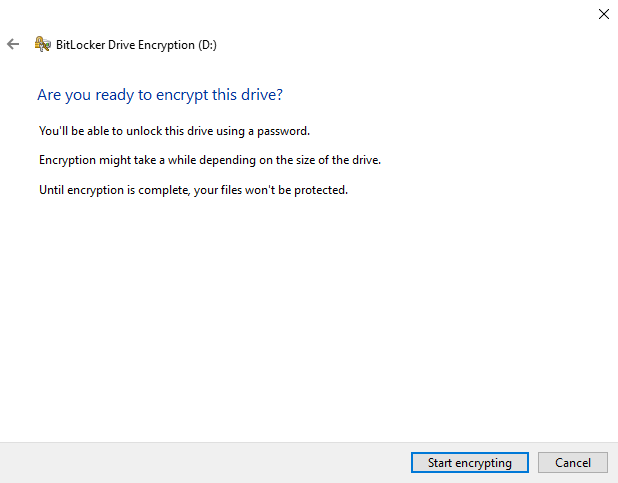
- Wait until the encryption has finished, and then click Close.
