
You may have been added to a team that is associated with a UVM course you signed up for in MyUVM. Class Teams are not much different from normal teams in Microsoft Teams, except that these are automatically generated for every UVM course.
Class Teams
Class Teams are similar to other teams in Microsoft teams, except that some sections and backend options are automatically selected or created. If one of your instructors activates their Class Team, it should generally appear similar to Class Teams activated by another instructors. Each one has a class notebook tab, a General channel, and a regular, automatically-maintained class roster.
Where do I find class materials and files?
Many of your class resources, such as your course syllabus, can be found in Brightspace as normal. Your instructor or TA may also store some of these materials in the Files tab in the Class Team.
To view files stored in the Class Team:
- Open Microsoft Teams.
- Find and select your Class Team. Typically, the name of the class team will include some course identifiers (course number, section, etc.) followed by the course name and CRN.
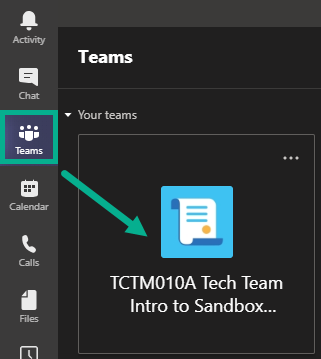
- Click the Files tab from the menu at the top of the Class Team

How do I chat or meet with other students?
Depending how the course is set up, your instructor may expect you to communicate with fellow students in a specific channel within the Class Team, as these messages will be visible to everyone. Other instructors may ask that you directly message your classmates.
Chats – Direct Messages
Chats can be one-on-one messages, or small groups can use them to collaborate or communicate. You can rename chats, search for content or messages in chats, share files with those groups, and much more.
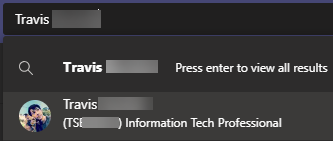
To start a chat with a classmate, search for their name or NetID in the search bar, then find and double click on them.
If you need to chat with multiple people, you can click this icon to add more to the conversation. 
Conversations – Channel Messages
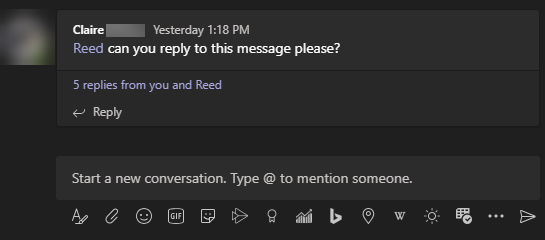
Every channel in Teams has a Posts tab. The conversations there have a few differences from the normal chat/direct messages, the main one being that Channel Messages are threaded into conversations.
When you create a new conversation, other members of the channel can see and Reply to that conversation. These messages will appear as replies to the conversation, which can be expanded or collapsed.
What is the Class Notebook
The Class Notebook is a OneNote digital notebook where students and instructors can store text, images, videos, attachments and more.
By default, the Class Notebook is located in the General channel of your Class Team, and is broken up into sections:
- The Collaboration Space, where everyone in your class can share, organize, or collaborate
- The Content Library, a where your instructors can share handouts (read-only for students)
- Your Student Notebook (marked by your name), a private space that is only accessible by you and the class instructors/TAs
Your instructor may have added some custom sections to the Class Notebook in the General channel. Additionally, every channel in your Class Team has it’s own dedicated section in the class notebook which can be viewed in the Collaboration space.
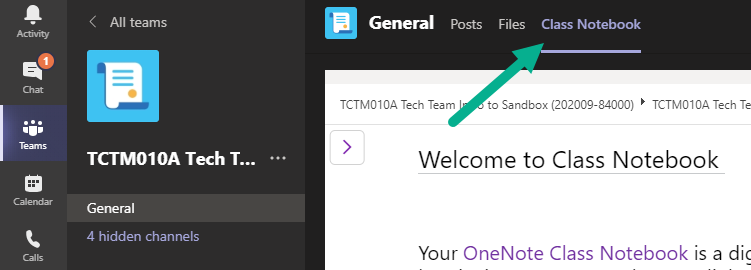
The main Class Notebook can be viewed from the General channel by following these steps:
- Open Microsoft Teams.
- Find and select your Class Team. Typically, the name of the class team will include some course identifiers (course number, section, etc.) followed by the course name and CRN.
- Click on the General channel from the list on the left side, then click on the Class Notebook tab.
In other channels, this tab is simply named Notes. Anything that is put in the the Notes section for these channels can be found later by looking in the main Class Notebook, under Collaboration Space. 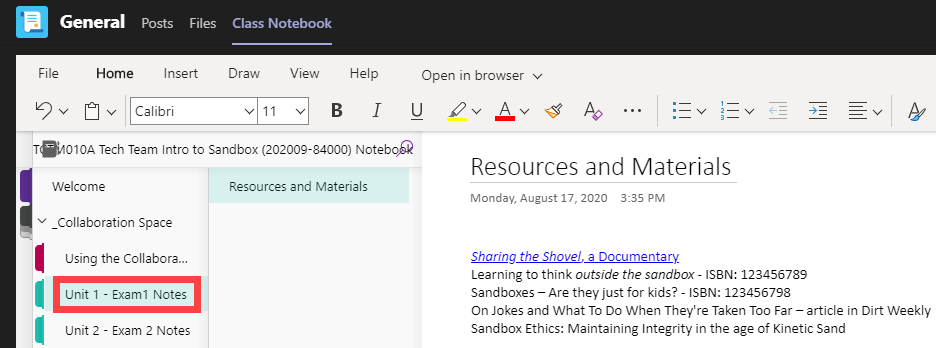
Teams Lectures and Meetings
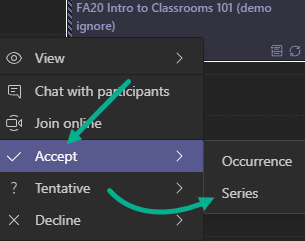
Accepting your Recurring Lecture Meetings
It’s important to accept your lecture meetings so they correctly appear on your calendar and send notifications.
- Open Microsoft Teams.
- In the Calendar section, make sure you are viewing the current day. Optionally, click Today.

- Right click on the lecture calendar event, then hover over Accept and click Series.

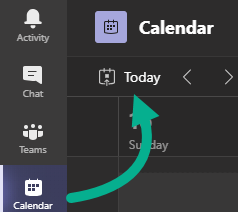
Attending your lecture through Microsoft Teams
- Open Microsoft Teams.
- In the Calendar section, make sure you are viewing the current day.
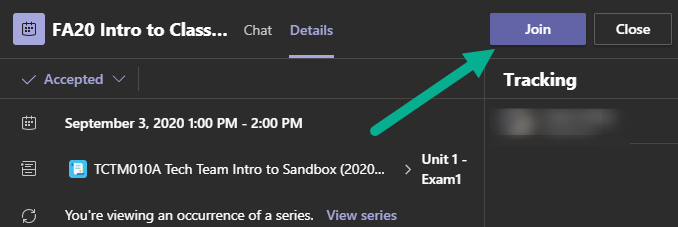
- Click on the lecture calendar event from your calendar.
- Click Join in the top right corner.
- Ensure your microphone and camera are toggled off, then click Join.


Viewing meeting chat
To view chat while in a meeting, click the Show conversation button on the meeting bar.
All participants of the meeting as well as members of the team channel will be able to see messages entered in this chat.
![]()
Raising your hand
Depending on the size of the meeting or lecture, it may be appropriate to just unmute your mic and speak up when you have a question. Alternately, you can use the Raise Hand feature in Teams to notify the instructor or TA that you have a question or comment.
You can raise your hand by click the hand raise icon from the top bar. After you’ve asked your question, make sure to lower your hand by clicking the icon again.
