
Brightspace does not have a Journal tool, but there are two tool options that can be used in Brightspace to recreate a journal-like experience.
Option 1: Discussions with single-member groups
This option is most appropriate if you want the journal assignment to elicit a dialogue between the instructor (or TA) and the student. This is a multi-step process:
Step 1: Set up the Groups
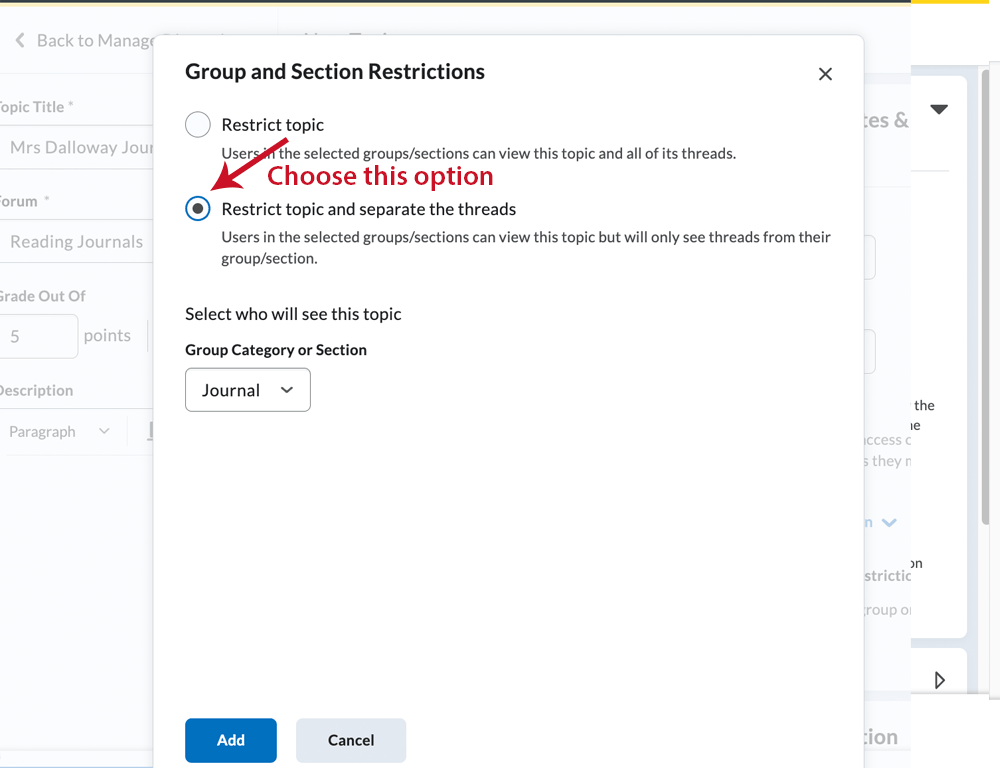
- The first step is to create single-member groups with the group tool. Every student will be in a group in which they’re the only member. This allows you to offer a private discussions that can be read by only the single student in that group as well as the instructor(s) and TAs. Students will not see each others’ groups.

- Go to Course Tools > Groups
- Click on New Category
- Give it a name, for example, “Private Groups”
- Under Enrollment Type, choose “Single user, member-specific groups”
- Click Save Your groups will be created momentarily.

Step 2: Set up the Discussion Forums and Topics
- In the top navbar of the course, click on Course Tools > Discussion. Create your journal forum by clicking “New” and “New Forum.” Give it a name such as Reading Journals or Weekly Journals. Don’t choose any options yet about making topics, just leave them unchecked, and click “Save and Close.”
- Now you’ll see your forum title. The next steps are about creating Topics in this forum and how you do this depends on your plan for the students’ journals.
Example 1 – Aggregate Journals: You want students to keep one journal all semester where they might post weekly. You will give them a single grade for the entire journal rather than for every entry. For this you’ll need one topic.Example 2 – Separately Graded Journals: You want to students to be graded uniquely for different journal entries. Say, they can choose to read 3 books from a list, and you want them to post their thoughts in 3 separate journal entries so you can grade them individually. For this you’ll need to make a few topics.
- Click the down arrow next to the forum title, and choose Add Topic.
- (See image for these next steps.)
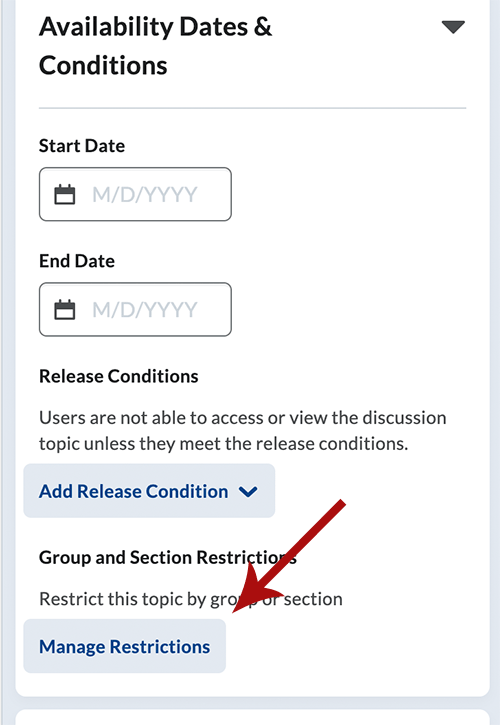
- Add title
- If you want to grade the topic entries, click where it says “ungraded” and enter points possible.
- Add the journal assignment description.
- On the right, select Availability Dates & Conditions.
- Select Manage Restrictions. (See image.)
Step 3: Grading
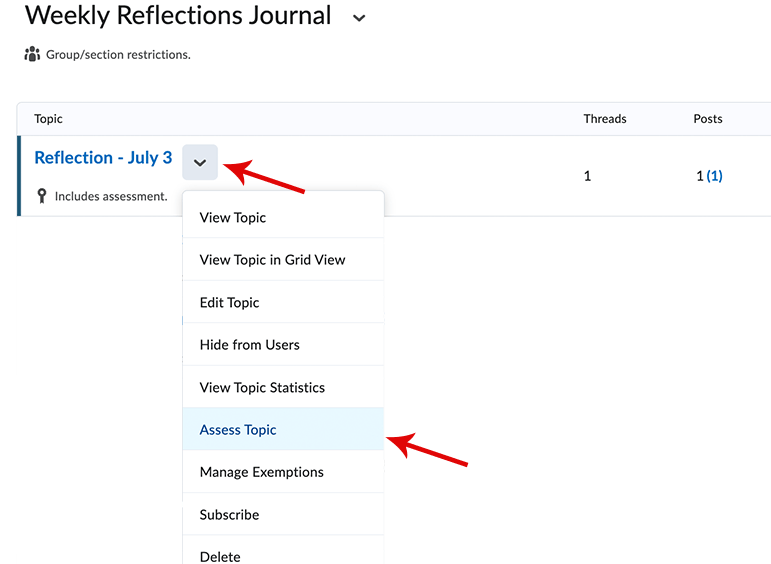
From the discussions main page, click the down arrow next to the topic title and choose “Assess Topic.” (See image.) Click on “Topic Score” for a student. If the student has posted multiple threads or replies to this topic, you’ll see them aggregated and can give them a single topic grade.
As mentioned above, if you want every thread to earn a separate grade, you need to make topics for each one.
(Alternative method: a few faculty have set up one topic and then graded threads cumulatively. For example, they create a single topic in which students are expected to post 8 threads over the semester with a possible total score of 8. Each time they post a new thread, their score is revised by adding another point to their existing grade. First thread, they would earn 1 point; second thread, it would be changed to 2. By the end of the semester they’d hopefully have 8 pts but if they missed some posts, it would be less. The disadvantage to that is after a first post, the student would see their grade as 1 out of 8, which could be confusing. It would also require repeated counting to make sure their grade is accurate.)
Option 2: Assignments Tool
If you don’t expect to have back and forth dialogue with students about their posts, a simpler option is just using the Assignment tool. See Brightspace Assignments.