Brightspace Email
Send:
You can send students emails from multiple places in your course (e.g., the Classlist, the Grade Book, the Assignment submission page) or by clicking the envelope icon in the top navigation bar of Brightspace.
View Sent: To see all the emails you’ve sent, there’s only one point of access:
- Click the envelope icon in the top navigation bar. This opens a new Compose New Message window.
- Click “Sent Mail” on the upper right side of the window.
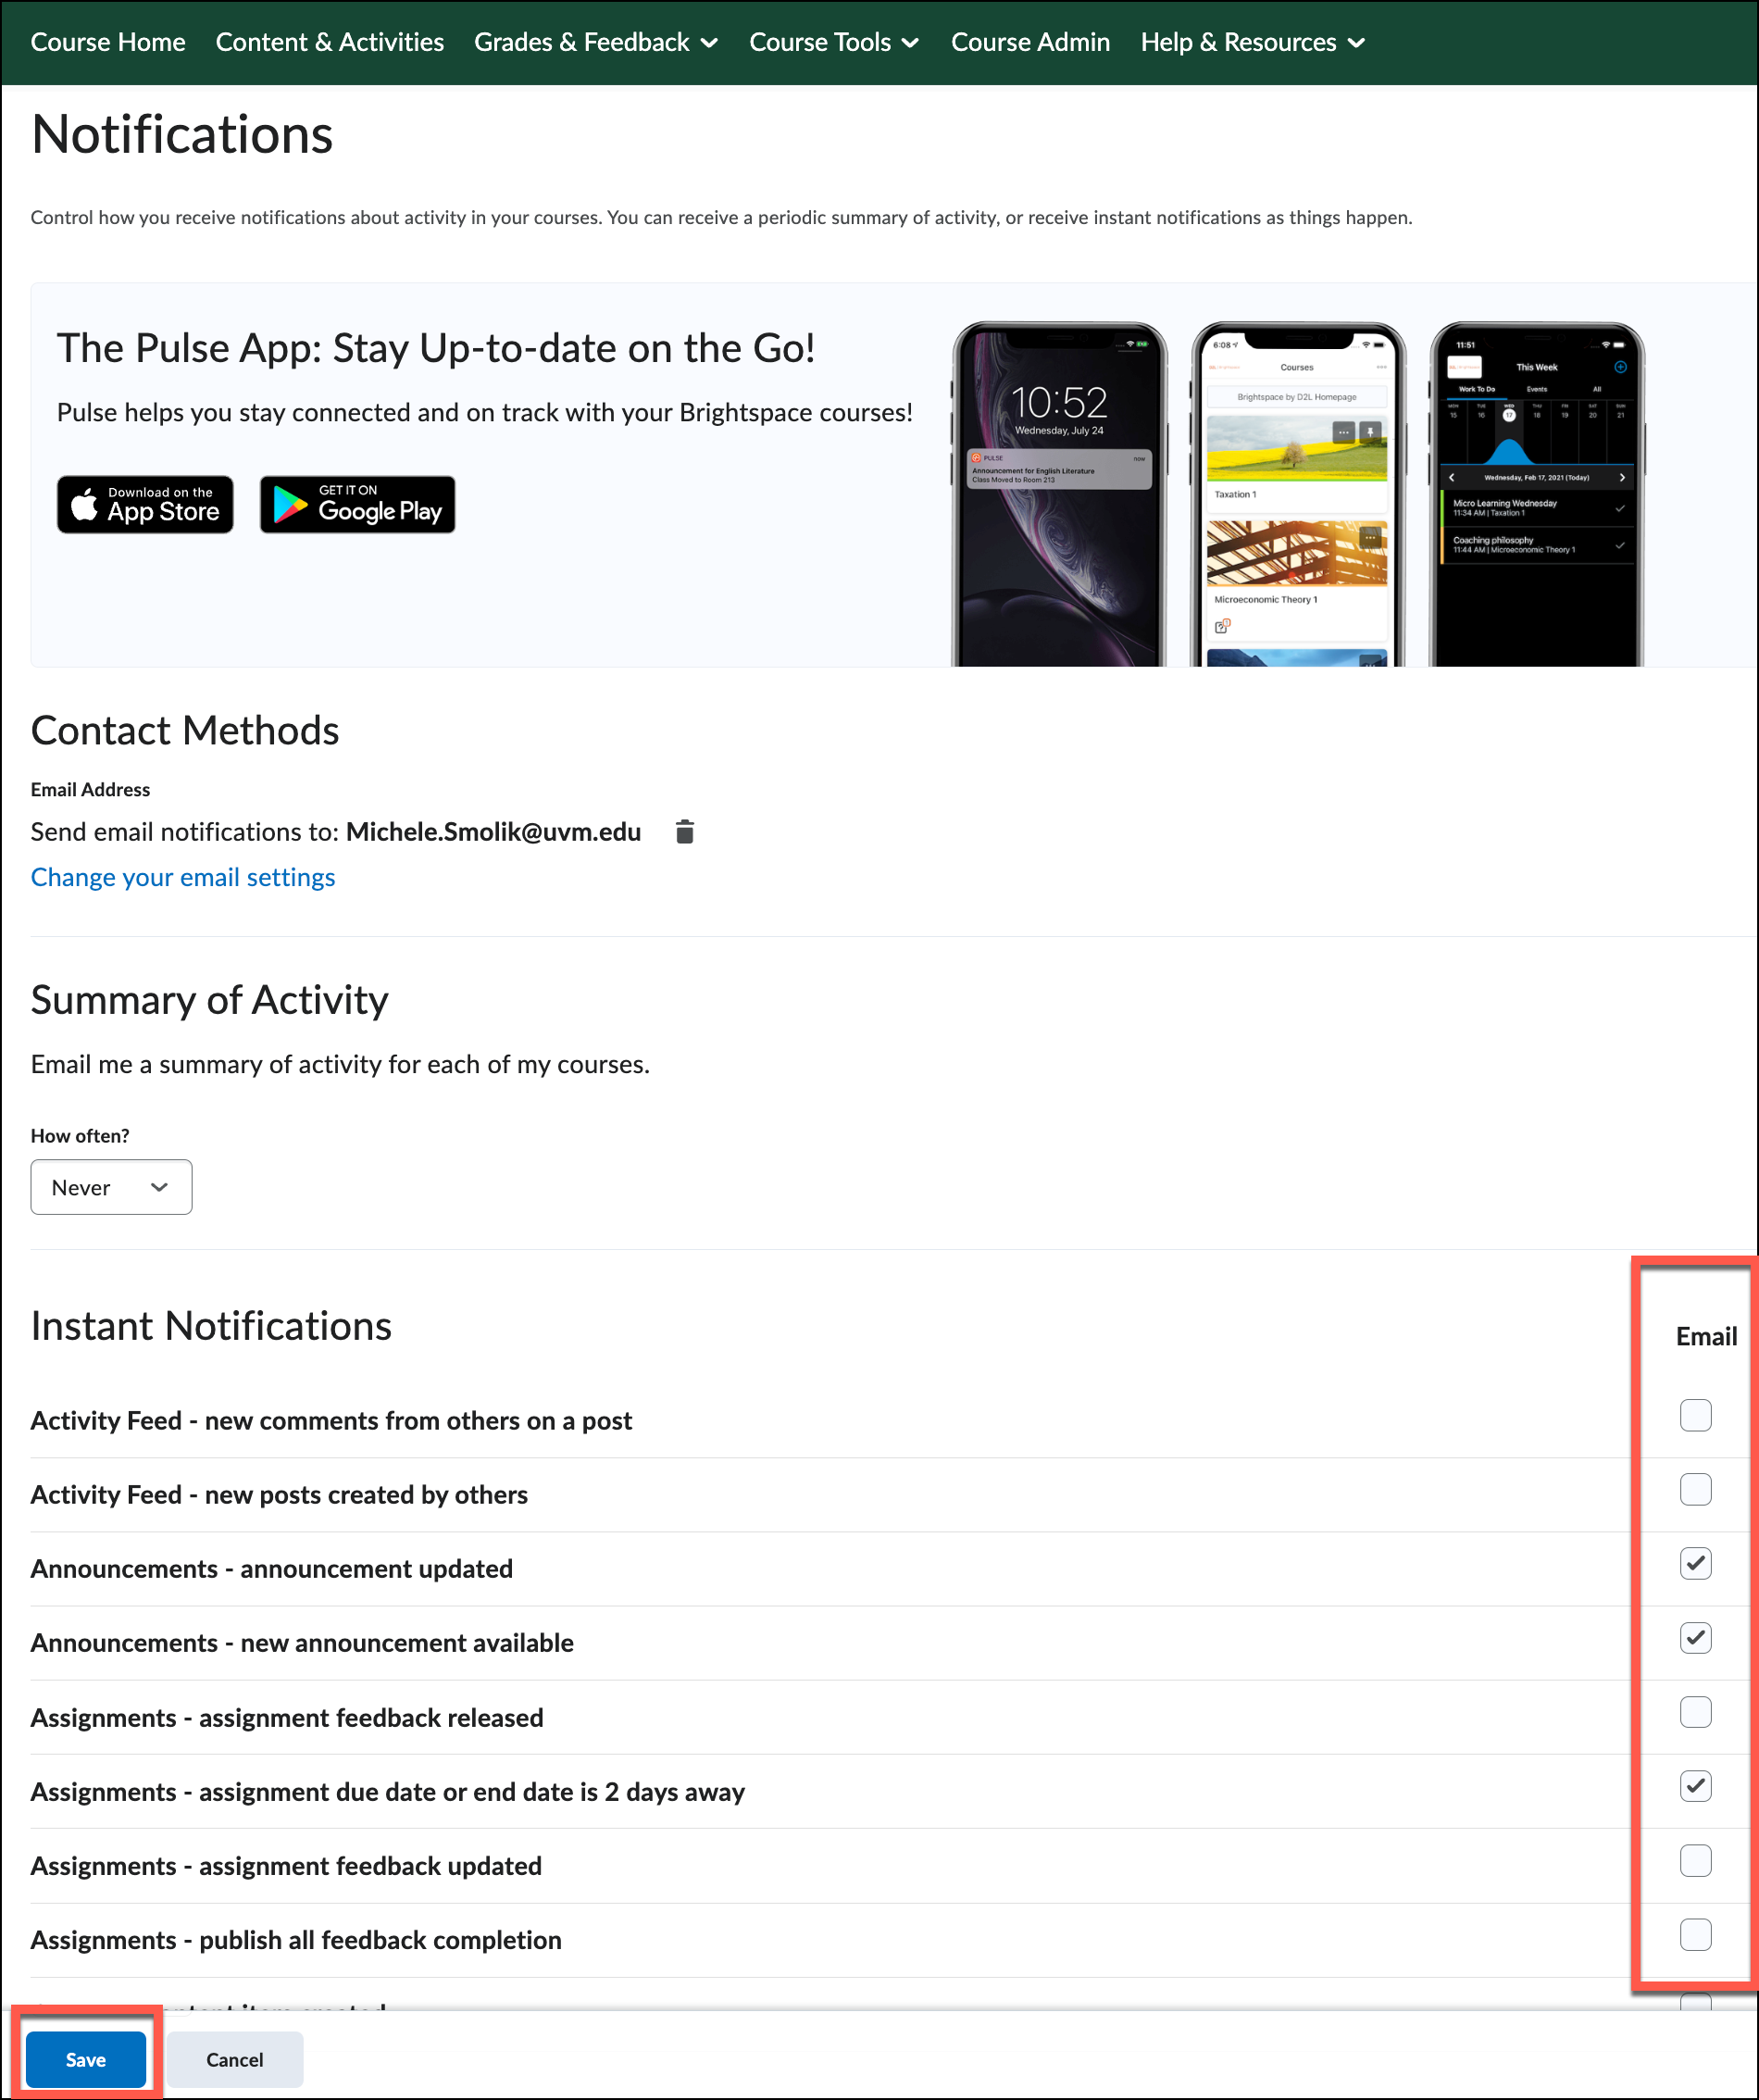
Notifications
You can receive periodic or instant information about activity in your course. To manage this, click on your name in the upper-right corner of the top navigation bar and choose Notifications. Both students and instructors can check which Instant Notifications they would like to receive.
NOTE: If you plan to post announcements in your Brightspace course, we recommend that you let your students know that they must leave two of the Instant Notification options – Announcements – new announcement available and Announcement – announcement updated – checked so they will receive an email when you post or edit an announcement.
Once you have indicated which Instant Notifications you would like to receive, click Save.
Profile
To personalize your Brightspace profile, click on your name in the upper right corner of the top navigation bar and choose Profile.
In the Profile window you can add a photo and descriptive information about yourself.

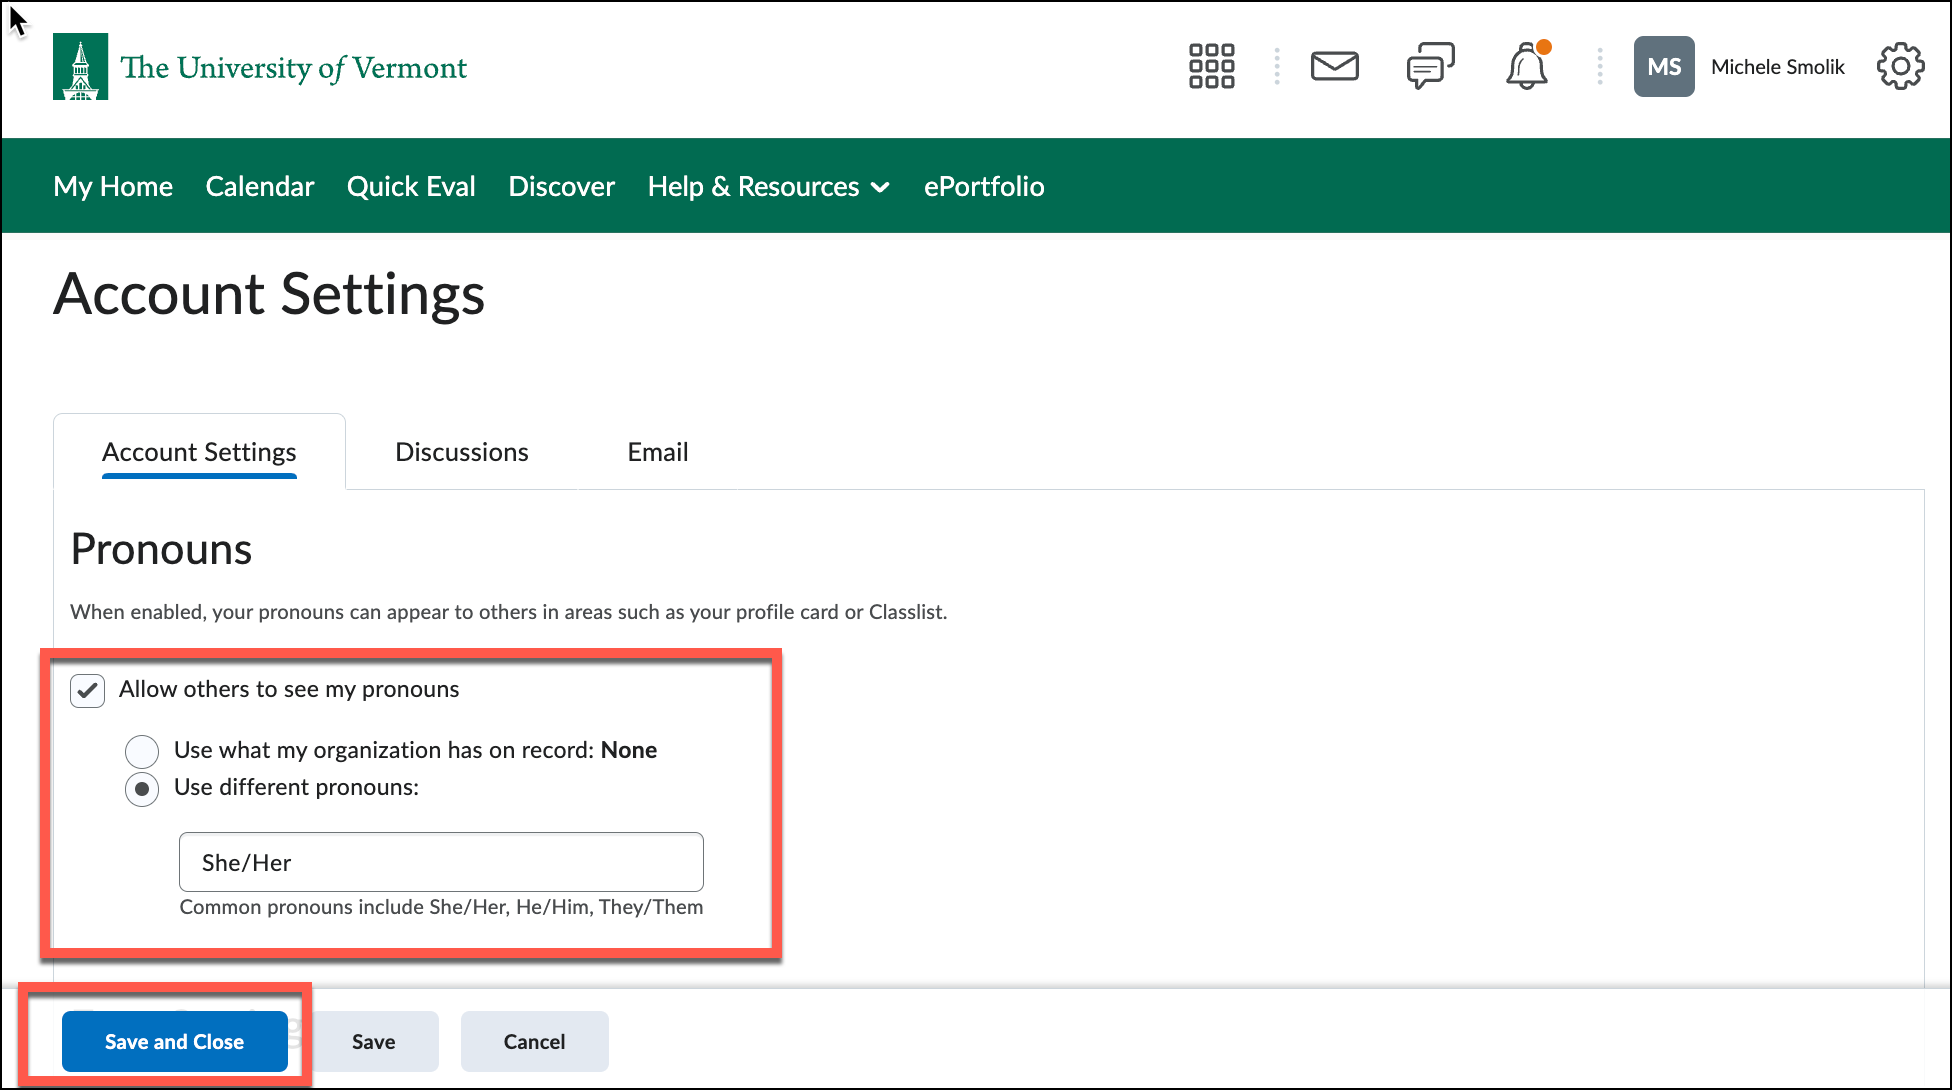
Account Settings
Account settings are personal and only affect your account. They do not change how students view the course. You can choose to display your pronouns, change the font size, and adjust language and time zone settings. Use the Discussions and Email tabs to personalize how discussions are displayed in Brightspace and to create an email signature.
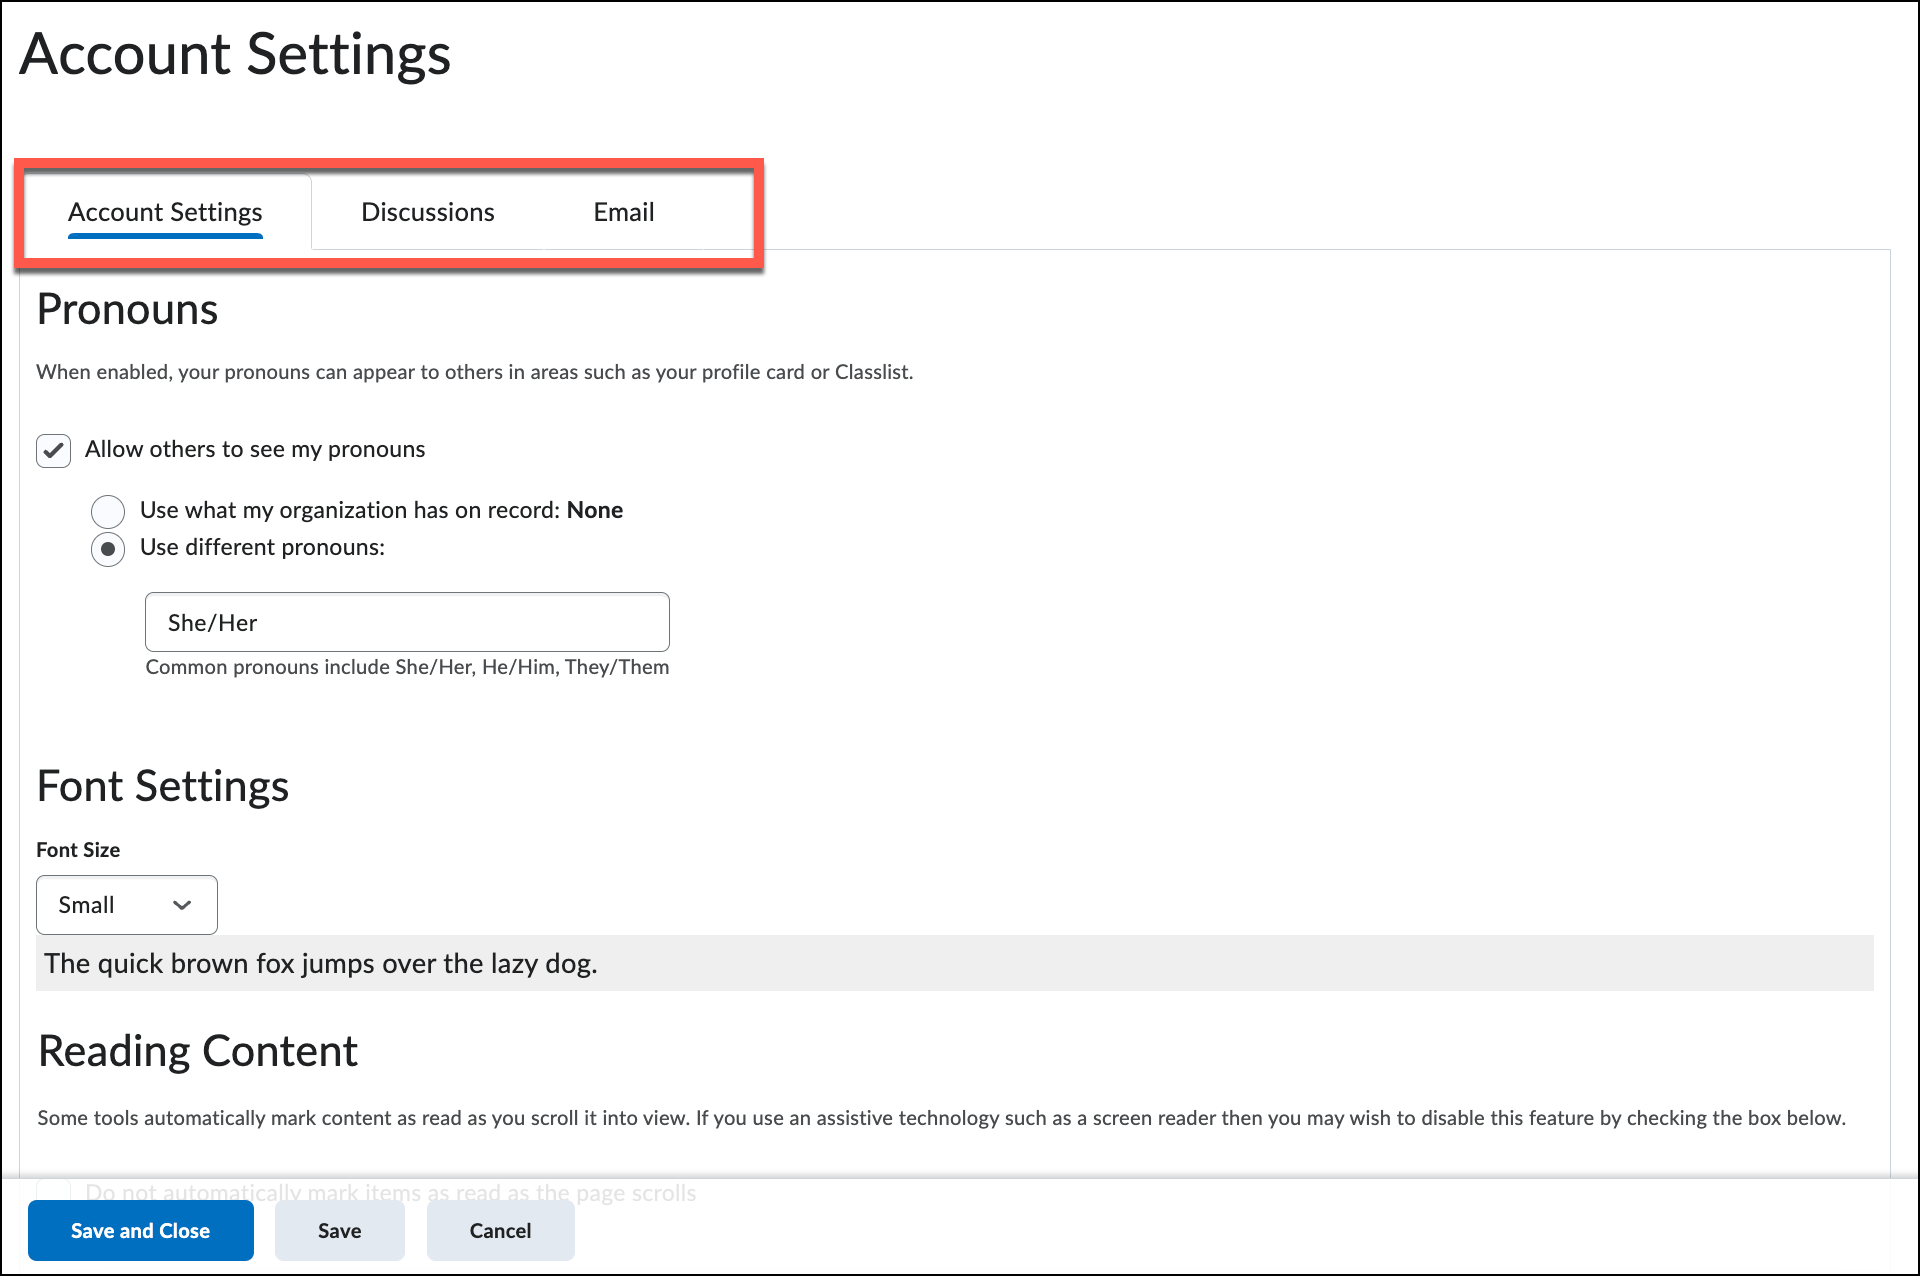
Displaying Pronouns in Brightspace
To display pronouns in Brightspace, click on your profile and select Account Settings. Click the box next to Allow others to see my pronouns, then select the Use different pronouns: option. Enter your preferred pronouns, and click Save and Close.