If you’d like to host office hours remotely, you can use Microsoft Teams. Schedule time or meet instantly with an individual, a small group, or a whole Team.
Schedule Meeting
Open Office Hours
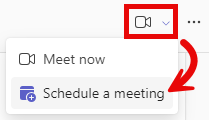
- In any Channel within your Class Team, click on the video camera icon at the top, right of the Posts tab and choose Schedule a Meeting.
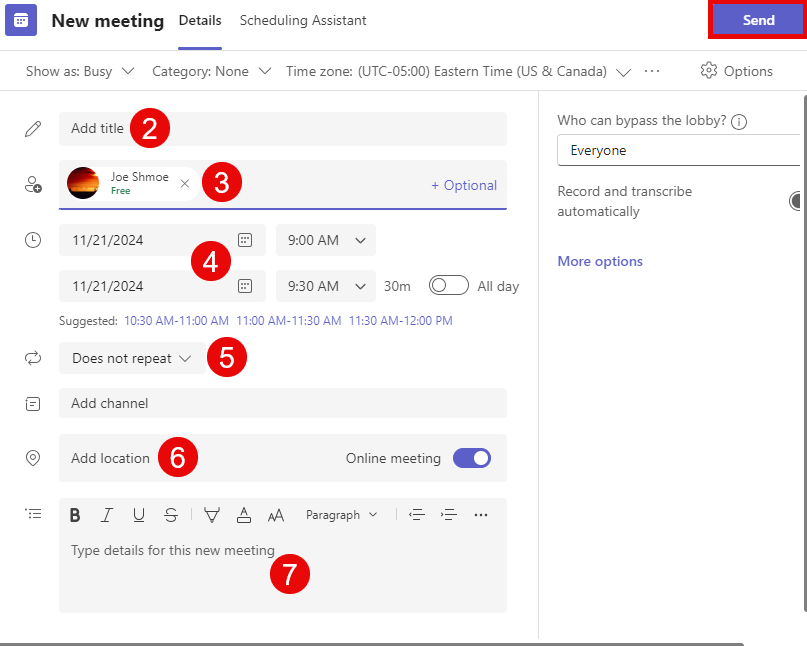
- Enter a descriptive name in the Add title field. I would choose “<course code> Office Hours“.
- Click Add required attendees only if you’d like to invite attendees who are not already enrolled in the course or part of the Team.
- Select the date, start time, and end time.
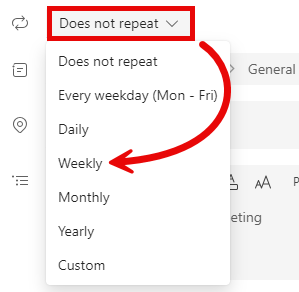
- If you’d like the meeting to recur, expand the drop-down menu which currently shows Does not repeat, and choose the desired recurrence frequency. Weekly is the most common choice for office hours.
- If you’d like the option for students to attend in-person, click Add location and type in your Building and Office number.
- Type details for this new meeting into the text box of the same name, or just click Send.
- All students in your Team will receive an email invitation, and the meeting will appear on their calendars in both Teams and Outlook. A post with the meeting details will also appear within the Channel where it was created.
- At the appropriate time, join the meeting. Your students will be able to do the same.
1:1 or Small Group Office Hours
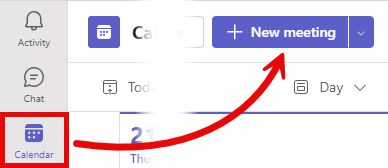
- Open your Teams Calendar, and click New meeting.
- Enter a descriptive name in the Add title field. I would choose “<course code> Office Hours with <name of group or individual>“.
- Click Add required attendees, and search for and then select their names as they appear in the drop-down menu one-at-a-time.
- Select the date, start time, and end time.
- If you’d like the meeting to recur, expand the drop-down menu which currently shows Does not repeat, and choose the desired recurrence frequency.
- If you’d like the option for students to attend in-person, click Add location and type in your Building and Office number.
- Type details for this new meeting into the text box of the same name, or just click Send.
- All invited attendees will receive an email invitation to the meeting, and it will appear on their calendars in both Teams and Outlook
- At the appropriate time, join the meeting. The invitees will be able do the same.
Meet Instantly
Instant Office Hours
- Select the Chat tab () and click the New Chat button ().

- Enter the name(s) of the person/people with whom you wish to meet in the “To:” field, selecting them as they appear in the drop-down menu.
- Once all the names have been entered, click into the “Type a message” field at the bottom of the window (this step is necessary to make the meeting options button appear).

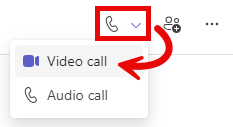
- Click the down-caret () to expand the More meet now options menu, and select Video call. If you click the phone icon instead of the chevron, it will start an Audio call.