

SharePoint Online is an online collaboration tool, with heavy integrations with other Microsoft 365 products like Word, Excel, PowerPoint, Teams, and OneDrive.
Create a Site
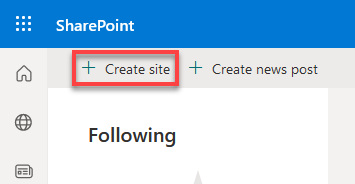
- Click Create site.
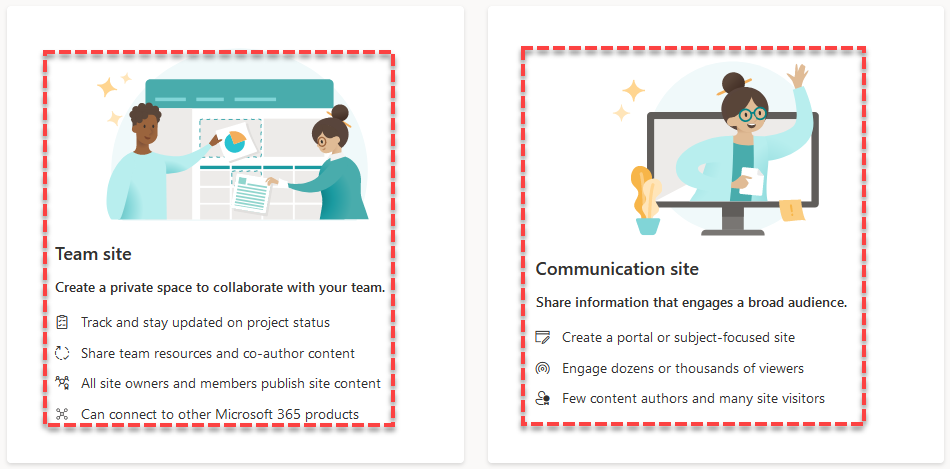
- Select a site type. Choose Team site to collaborate among Team members, or Communication site to broadcast information to larger audience.
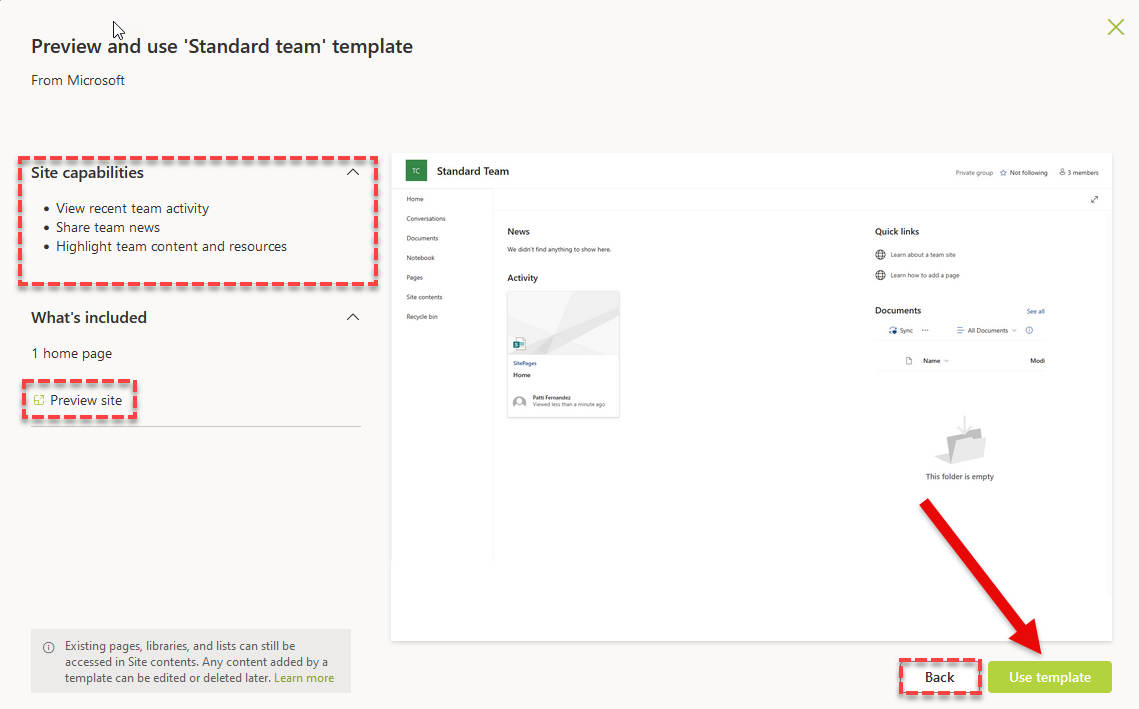
- Select a template to get you started. If you are unsure, I would suggest Standard team or Blank. You can apply a new site template later if needed.
- Review the Site capabilities for the selected template or Preview site. Then, click Back to select a different template, or Use Template to continue to the next step.
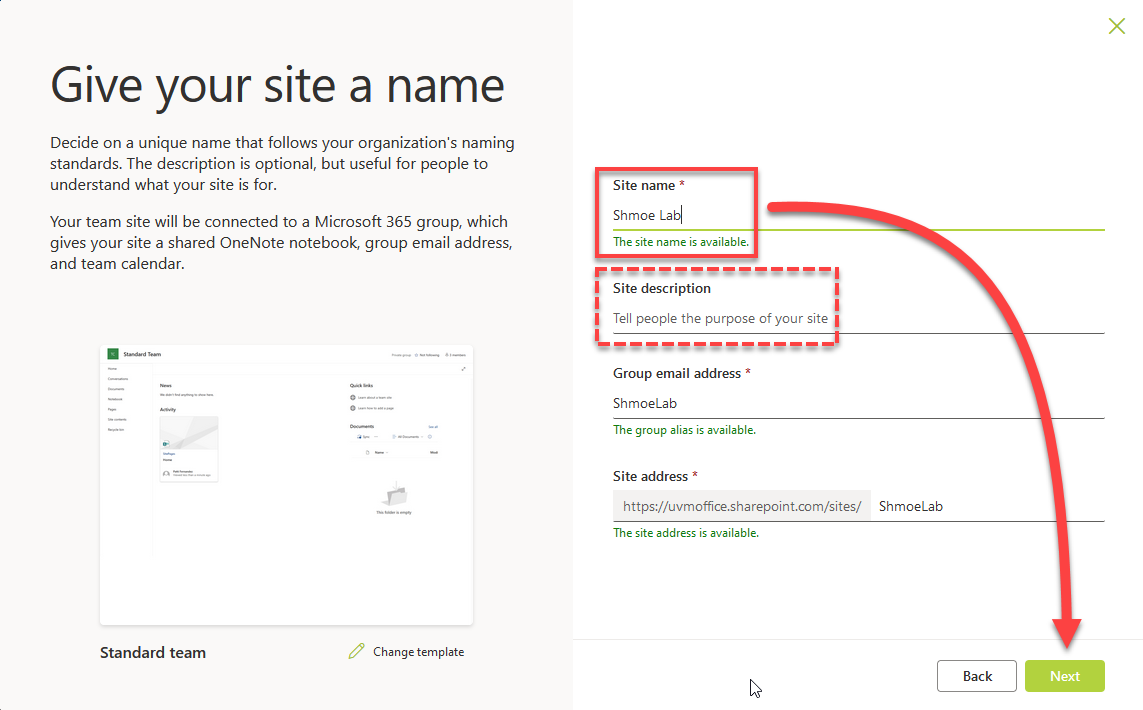
- Enter a name for your site. While it is possible to rename the site later, there are certain components on the back-end that can never change. For this reason, I recommend picking a unique, descriptive, and memorable name right from the start. It also makes sense in most cases to leave the email and site addresses that are generated automatically based on your Site name alone, but that is up to you. The Site description field is optional but recommended. Click Next.
- On the subsequent screen, you can probably ignore the choices and just click Next (unless you picked the wrong site type in step 2).
- Search for and select any number of UVM affliliates one at a time and choose their role (either Owner or Member).
- Click Finish.
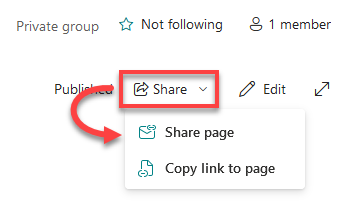
Share your Site
- Expand the Share drop-down in the upper-right corner of your site, and select Share page.
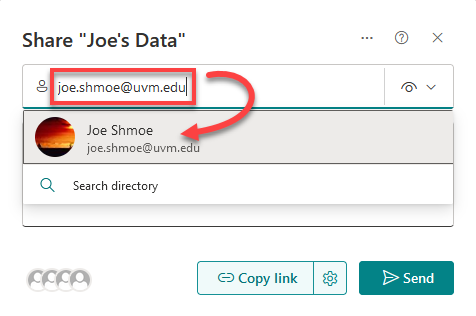
- Enter any number of email addresses into the Add a name field, selecting their accounts from the search results as they appear.
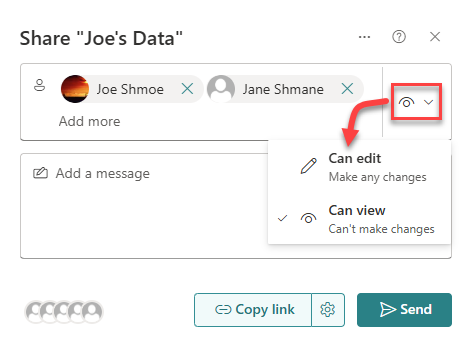
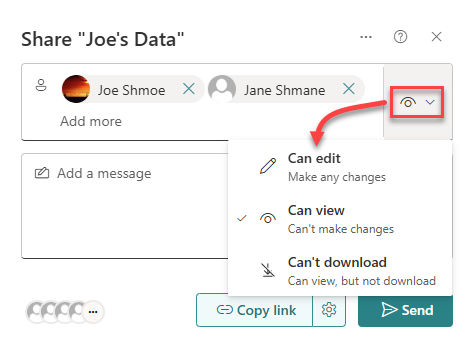
- Expand the / drop-down menu to the right and choose the level of access those accounts need.
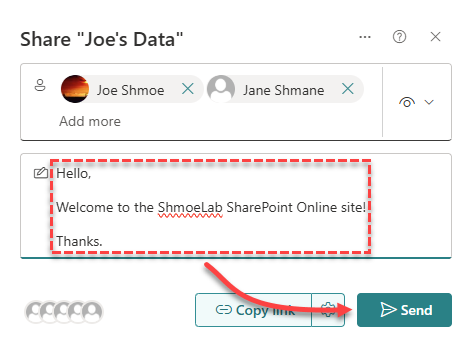
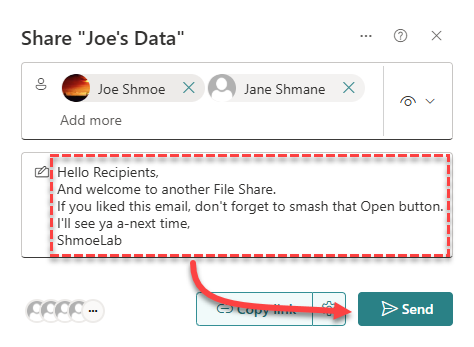
- Add an optional message to appear in the email to the new members, and click Send.
- Repeat steps 1-5 for any accounts that require a different level of access.
Share a File or Folder
- Hover over the file or folder you’d like to share and click the Share icon () that appears.

- Enter any number of email addresses into the Add a name field, selecting their accounts from the search results as they appear.
- Expand the // drop-down menu to the right and choose the level of access those accounts need.
- Add an optional message to appear in the email to the new members, and click Send.
- Repeat steps 1-5 for any accounts that need a different level of access.
SharePoint vs Teams vs OneDrive
SharePoint is a collaboration tool included in the Microsoft 365 software suite. It allows the creation of Sites, which are homepages that can be accessed either only by specified team members or a broader audience. Each Site includes a Document Library where team members can work simultaneously on the same files. Each Microsoft Team has its own associated SharePoint Site.
OneDrive is like a SharePoint Document Library that you are the only member of. You can still share individual files and folders from your OneDrive with others, but there are no members and there is no associated homepage.
Teams is a messaging app integrated with SharePoint and OneDrive to further enable cross-team file sharing and collaboration. Sharing files through the Chat tab in Teams utilizes your personal OneDrive documents library, while sharing to a Team automatically adds any files to that Team’s SharePoint Site.
When should you use SharePoint?
SharePoint could be used when one or more of the following conditions are true:
- You need to share files and collaborate with non-UVM affiliates.
- Your team needs to access the same files simultaneously and at any time, regardless of location or connection to the UVM network.
- Your data needs to be broadcast to a large population (i.e. people who are not part of your team).
SharePoint should not be used if any of the following conditions are true:
- The total size of your data exceeds 1TB. While exceptions can be made with the help of ETS depending on the case, consider a departmental Shared drive instead.
- Your data includes identifiable personal information protected by HIPAA.
- A grant for your research prohibits storing data in the cloud.
Sync a SharePoint Folder Locally
If you have the OneDrive client installed on your computer, you can sync a SharePoint Online site with your machine.
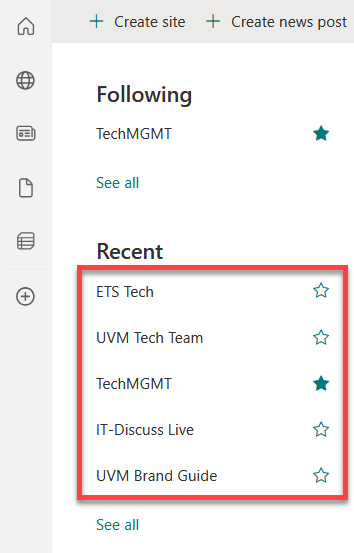
- Sign in to SharePoint Online at go.uvm.edu/sharepoint.
- Select a SharePoint site from the left side of the screen under Recent.

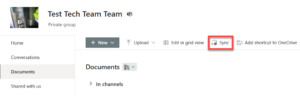
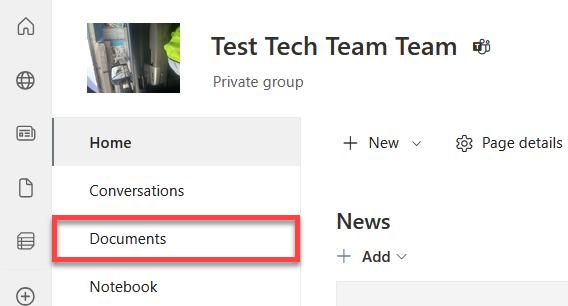
- After selecting a site, click Documents on the left side of the screen to open that site’s Documents library.

- At the top of the Documents library, click Sync.
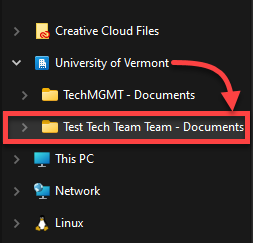
- Your OneDrive client should do the rest without any input. To confirm that everything worked, you can look in the File Explorer window and expand the University of Vermont workplace folder.

Stop Syncing (Windows)
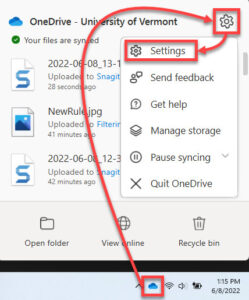
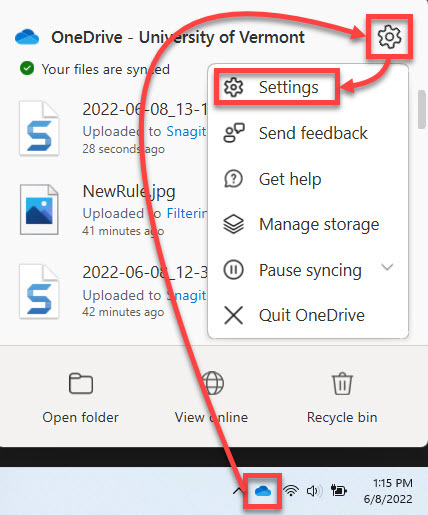
- Click the OneDrive icon in the taskbar, click the gear icon, and then click Settings.
- In the Account tab, click Stop sync to the right of the location you would like to stop syncing.

- Click Stop sync in the confirmation window.
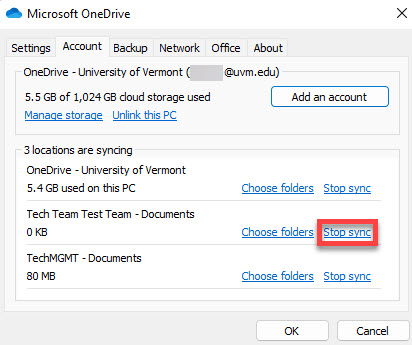
The folder and its contents will still be on your computer, but they will no longer sync with the SharePoint site.
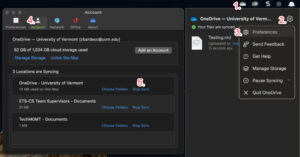
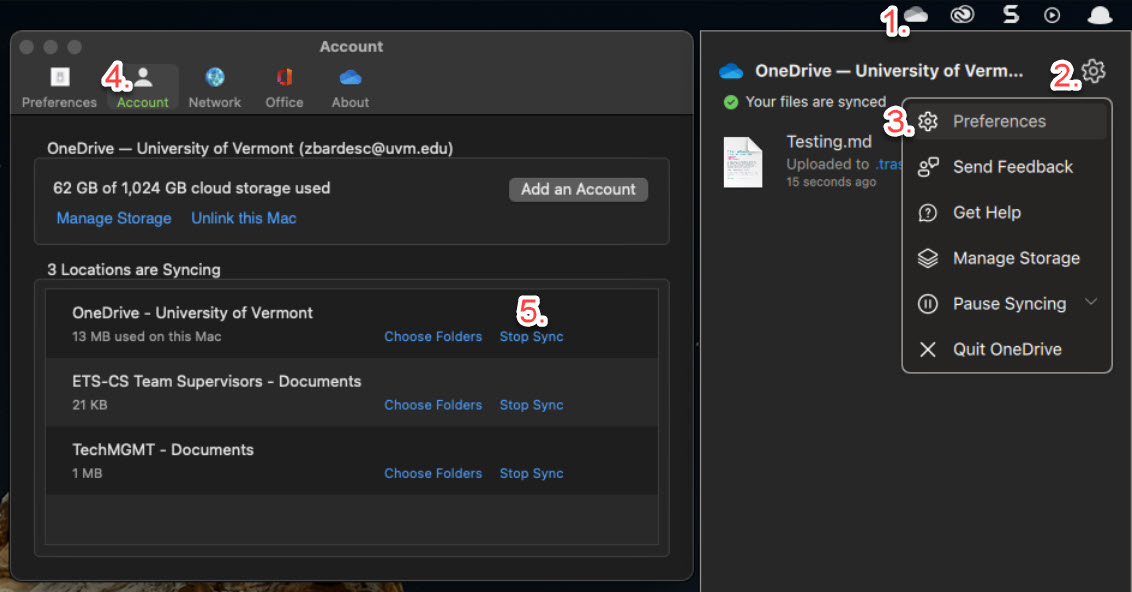
Stop Syncing (macOS)
- Click the OneDrive cloud icon on the menu bar in the top-right of your screen.
- Click the gear icon to show options.
- Select Preferences.
- Make sure you’re in the Account tab.
- Click Stop sync to the right of the location you would like to stop syncing.
Additional Info
See UVM’s complete list of SharePoint documentation here, or Microsoft’s SharePoint help & learning page here.