UVM faculty and staff can create spaces in Brightspaces for educational or organizational purposes. This is a multi-step process that requires an initial enrollment in a special Brightspace course space and completion of a use agreement.
Note: Are you just looking for a space to explore/test/develop in? Find out how faculty and staff can create Sandbox spaces in Brightspace.
Course Creation
Courses for non-credit spaces can be created on-demand by enrolling in the Non-Credit Course Management Gateway course in Brightspace. You can then complete the questionnaire in that course to request approval. A link to the course creation tool will appear there once your request is approved.
I. Request access to course creation tool
- Step 1: Enroll into the Non-Credit Gateway course space.
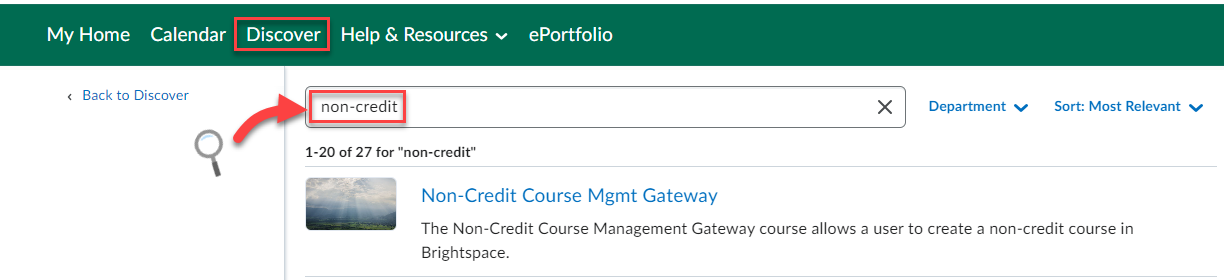
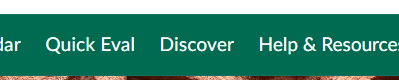
Click here to log in and access/enroll into the course directly. Alternatively, the gateway course can be found in the Discover tool. This can be accessed by clicking on Discover from the green Nav Bar on the Brightspace landing page, and searching for “non-credit”:
- Step 2: Complete the Use Agreement.
In the course, navigate to the Use Agreement quiz, which will ask you questions about how you plan to use the courses you are creating. The quiz also requires you to agree/acknowledge compliance with UVM policies.
II. Create a Course
Once your request is approved, you will see a new item/link appear in the content area titled “Create a Course“. Click the “Create Course” link, select your unit, and enter the course name on that page. Submitting the form will create a course space and automatically enroll you into it with instructor level permissions.
Course Management
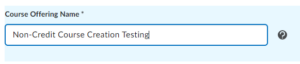
Change the Course Name
- Step 1: Find Course Offering Information. You will find the Course Offering Name in the Course Offering Information section of Course Admin (or the Course Availability option under Course Tools).

- Step 2: Update the Course Name. Enter the desired name for the course and save the changes.


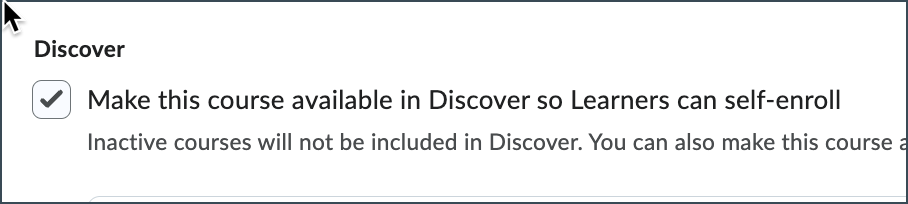
Confirm “Discover” Settings for Courses with Self-Enrollment
- Step 1: Discover Settings.
Find the Discover settings in the Course Offering Information section of Course Admin (or the Course Availability option under Course Tools). - Step 2: Check the Discover option. Users will need to self-enroll in your course. If you want users to be able to find your course (and then self-enroll) using the Discover tool, confirm that the checkmark “Make this course available in Discover so Learners can self-enroll” is checked.
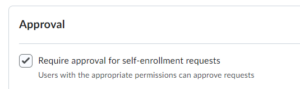
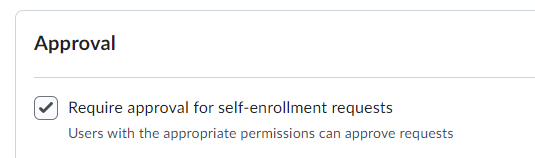
Set Up Enrollment Approval (Optional)
If you wish to restrict access to the course, you can enable approvals for self-enrollments. This will make it so participants have to request access to your course when enrolling. You as the instructor will need to approve these requests in order for them to access the course.
- Step 1: Navigate to Course Offering Information. Find the Discover settings in the Course Offering Information section of Course Admin or Course Tools
- Step 2: Check the Require approval for self-enrollment requests.
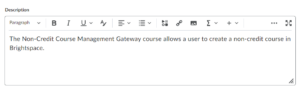
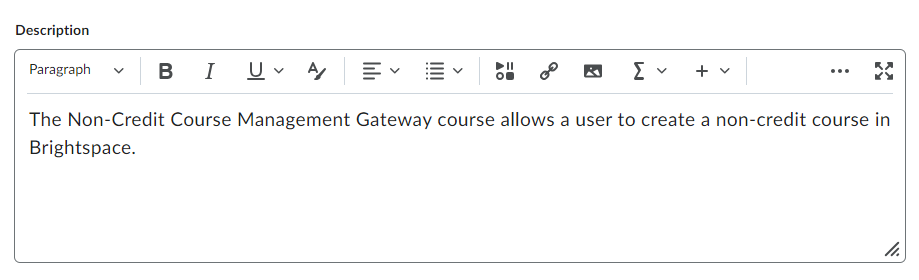
Add a Course Description for Discover view
You can add text descriptions for your course to help learners find your course using the Discover search tools.
- Step 1: Navigate to “Course Offering Information”. Find the Course Description in the Course Offering Information section of Course Admin (or the Course Availability option under Course Tools).
- Step 2: Fill out the course description. Enter a course description that will help learners find your course using the Discover search tools.
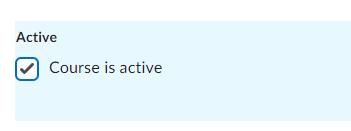
Make the Course Active
- Step 1: Active/Inactive SettingWhen you are ready, find the course Active setting in the Course Offering Information section of Course Admin or find it under Course Tools.
- Step 2: Make this course active, when you are ready. In order for learners to access the course, the course will need to be made active.
Note: This will cause the course to appear as searchable and enrollable in the “Discover” area of Brightspace. Only do this once you are ready for people to be able to see, search, and self-enroll in the course.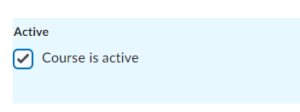
Enrollment Management
Participants can access non-credit courses either by self-enrolling or being added directly by the instructor. Self enrollment can be achieved using a link provided by the instructor, or by searching for the course in the Discover area of Brightspace.
Send users a Self-Enrollment link
An easy way to let users self-enroll in your course is to provide them with a self enrollment link. This will allow them to enroll without having to search for the course in the Discover tool. To get the self-enrollment link for your course,
- Go into your course and click on Course Tools -> Self-Enrollment Link.
- Click the “Copy” button.
- Paste the link into an Email, Teams Channel, or however you are communicating with your future participants.
Note: You will need to make the course active before users can self-enroll in it.
Enroll an Existing User
Instructors can manually enroll existing NetIDs into these self-enrollment courses.
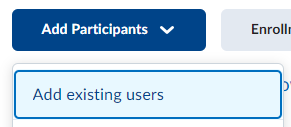
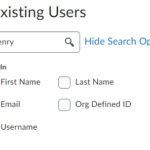
- Step 1: Navigate to the Classlist.Locate the Classlist in Course Admin.
- Step 2: Add Existing user. Click Add Participants and select Add existing users.
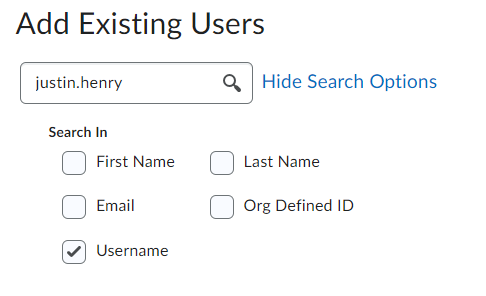
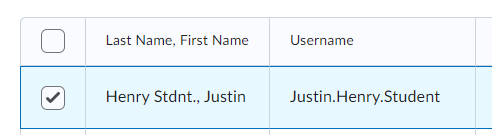
- Step 3: Search for and Select the User. Locate the user that you are adding using the Add Existing Users search. Use any search term and search locations that make sense for your use. In the results list below select the user you want to enroll.
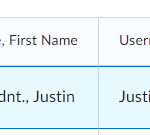
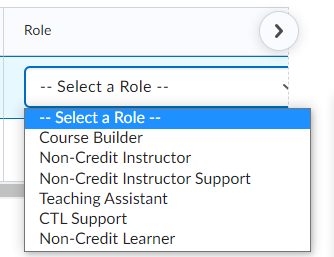
- Step 4: Select their Role. In the “Role” column, select which role the user needs to be enrolled in. Please note, that the roles that you have the permissions to enroll are included in this list and it is subject to change. This method can be used to add an Instructor (if you are creating the course for someone else), learners, and support staff.

- Step 5: Complete the enrollment. Once the role is selected click “Enroll Selected Users”
This will be done immediately.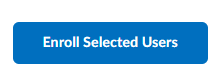
View Pending Enrollment Approval Requests
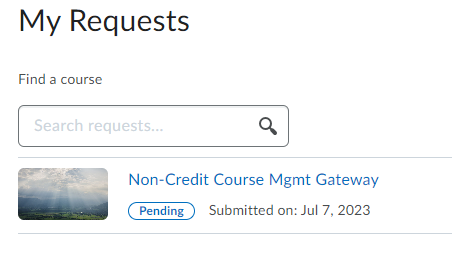
- Step 1: Navigate to Discover. Navigate to the Discover tool and select the “My Requests” icon

- Step 2: View Your Requests.
This will bring up a listing of all requests. From here you can select the request you would like to manage.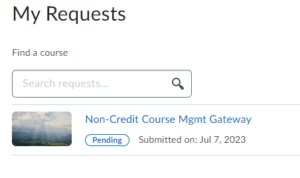
- Step 3: View or Change Request.
Click on the request you would like to manage. From here you can view the request information or withdraw it if you no longer wish to enroll.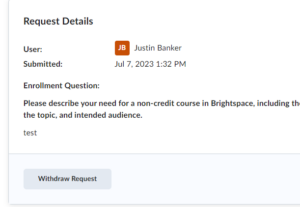

Self-Enrolling into a Non-Credit Course as a Participant
If you haven’t been provided a direct link to the course, you may need to search for it in the Discover area in Brightspace:
- Step 1: Go to the Discover Tool. Navigate to the Discover tool on the NavBar.

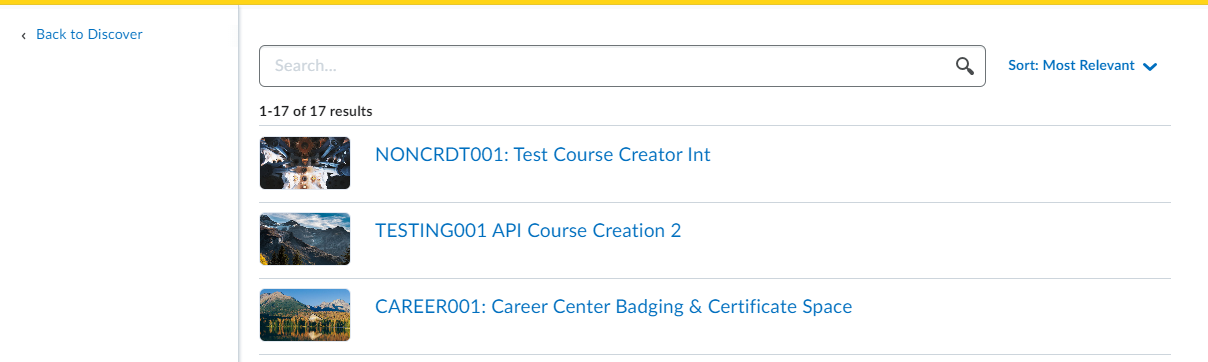
- Step 2: Search/Browse Discover Use the Search, View All, or Browse All Content to bring up the Discover search page seen below. If you started a search you will see your results here. If you arrive from View All or Browse All Content, you will see a list of all available Discover courses which can then be searched or sorted.

If the course requires approval to enroll, you may need to wait for approval before accessing the course. Additionally, some courses require you to answer an enrollment question when submitting an enrollment request.
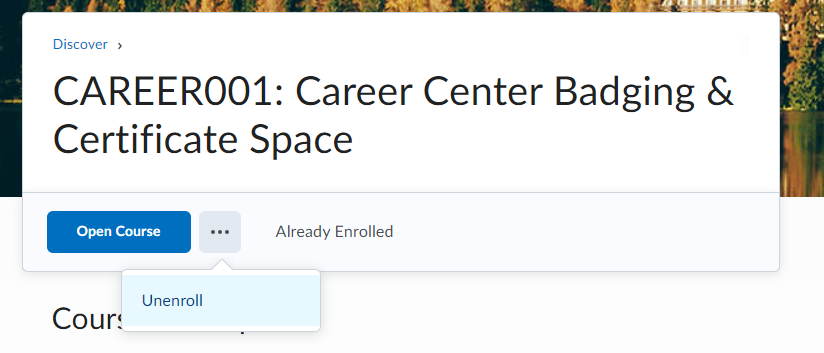
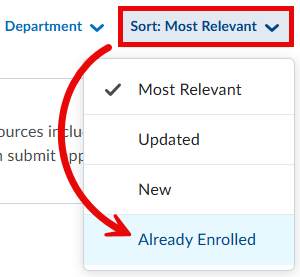
Unenroll from a Discover/Self-Enrollment Course
- Step 1: Navigate to the Discover tab. Click Discover.
- Step 2: Show all courses. Click Browse All Content.
- Step 3: Filter by Already Enrolled. Click Sort, and then Already Enrolled.
- Step 4: Search for the course. Enter all or part of the course name into the Search box and hit Enter.
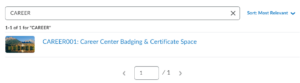
- Step 5: Select the course.
- Step 6: Unenroll from the course. Click the ellipsis next to the Open Course button, select the unenroll option, and then click Submit.