
![]() Managed Software Center (MSC) is an open-source software deployment tool for macOS. It is sometimes referred to as “Munki,” which is the name of the backend process that runs it.
Managed Software Center (MSC) is an open-source software deployment tool for macOS. It is sometimes referred to as “Munki,” which is the name of the backend process that runs it.
Managed Software Center is where UVM macOS users can obtain and update campus-licensed software such as Microsoft Office applications, JMP, SPSS, Endnote, and more. For all intents and purposes it is a custom UVM app store.
Managed Software Center comes pre-installed on UVM owned laptops that have been enrolled in the Apple DEP program, but can also be installed manually as needed.
Get Started
Install software using Managed Software Center
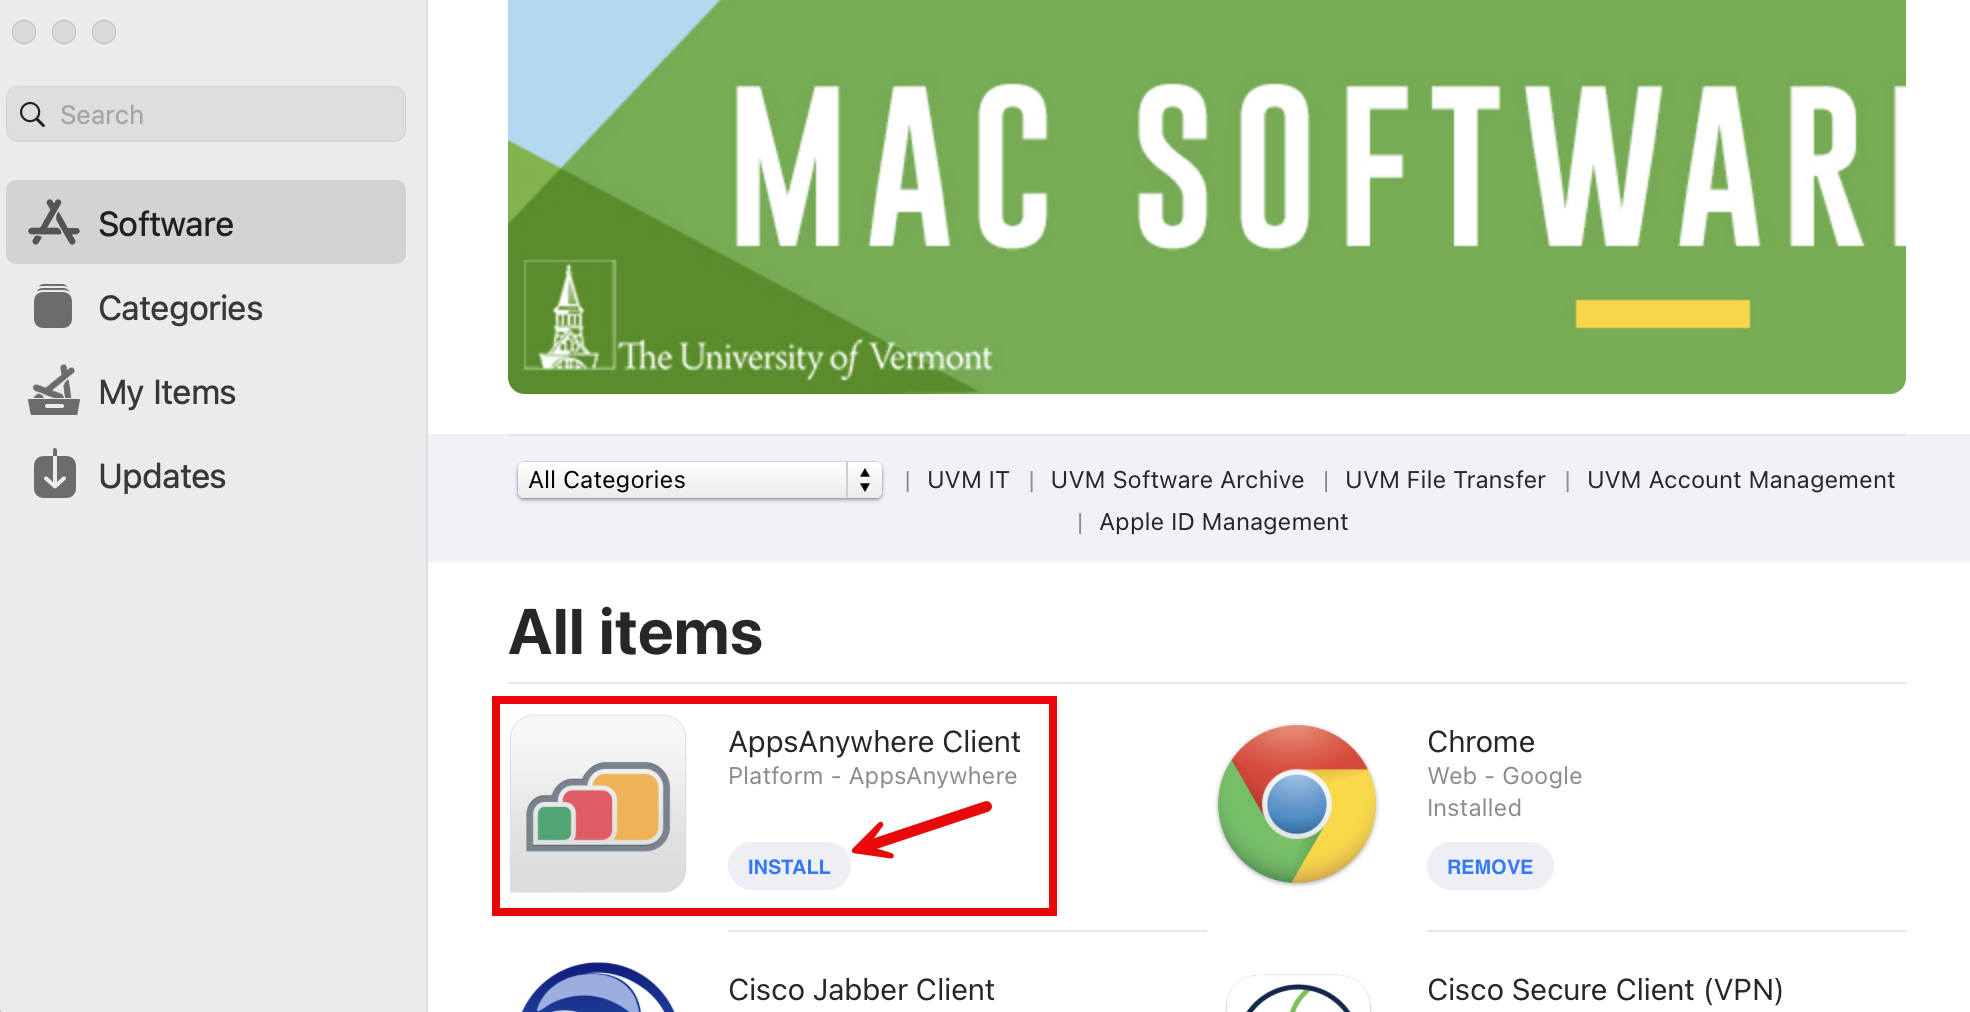
- Navigate to your Applications folder and open the Managed Software Center app.
- Locate the software you’d like to install. Click the “Install” button beneath the application to start the installation process.
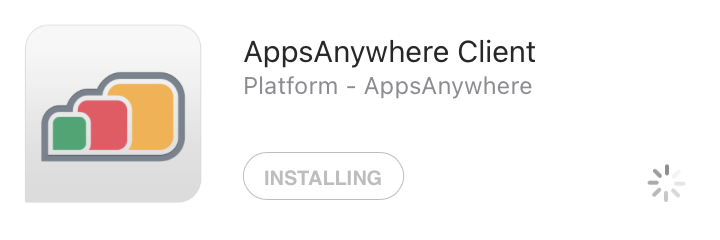
- A Downloading message will appear, followed by Installing, and finally Installed.


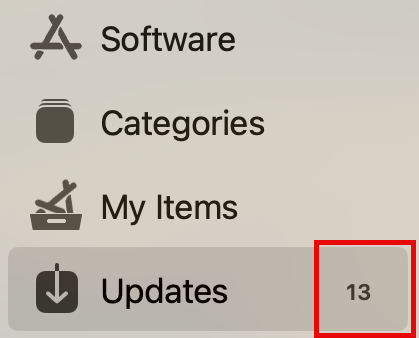
- If there are any updates pending, indicated by a number next to the Updates tab on the navigation menu on the left side of the window, proceed with the update process below before installing any new software.
Installing updates through Managed Software Center
- Navigate to your Applications folder and open the Managed Software Center app.
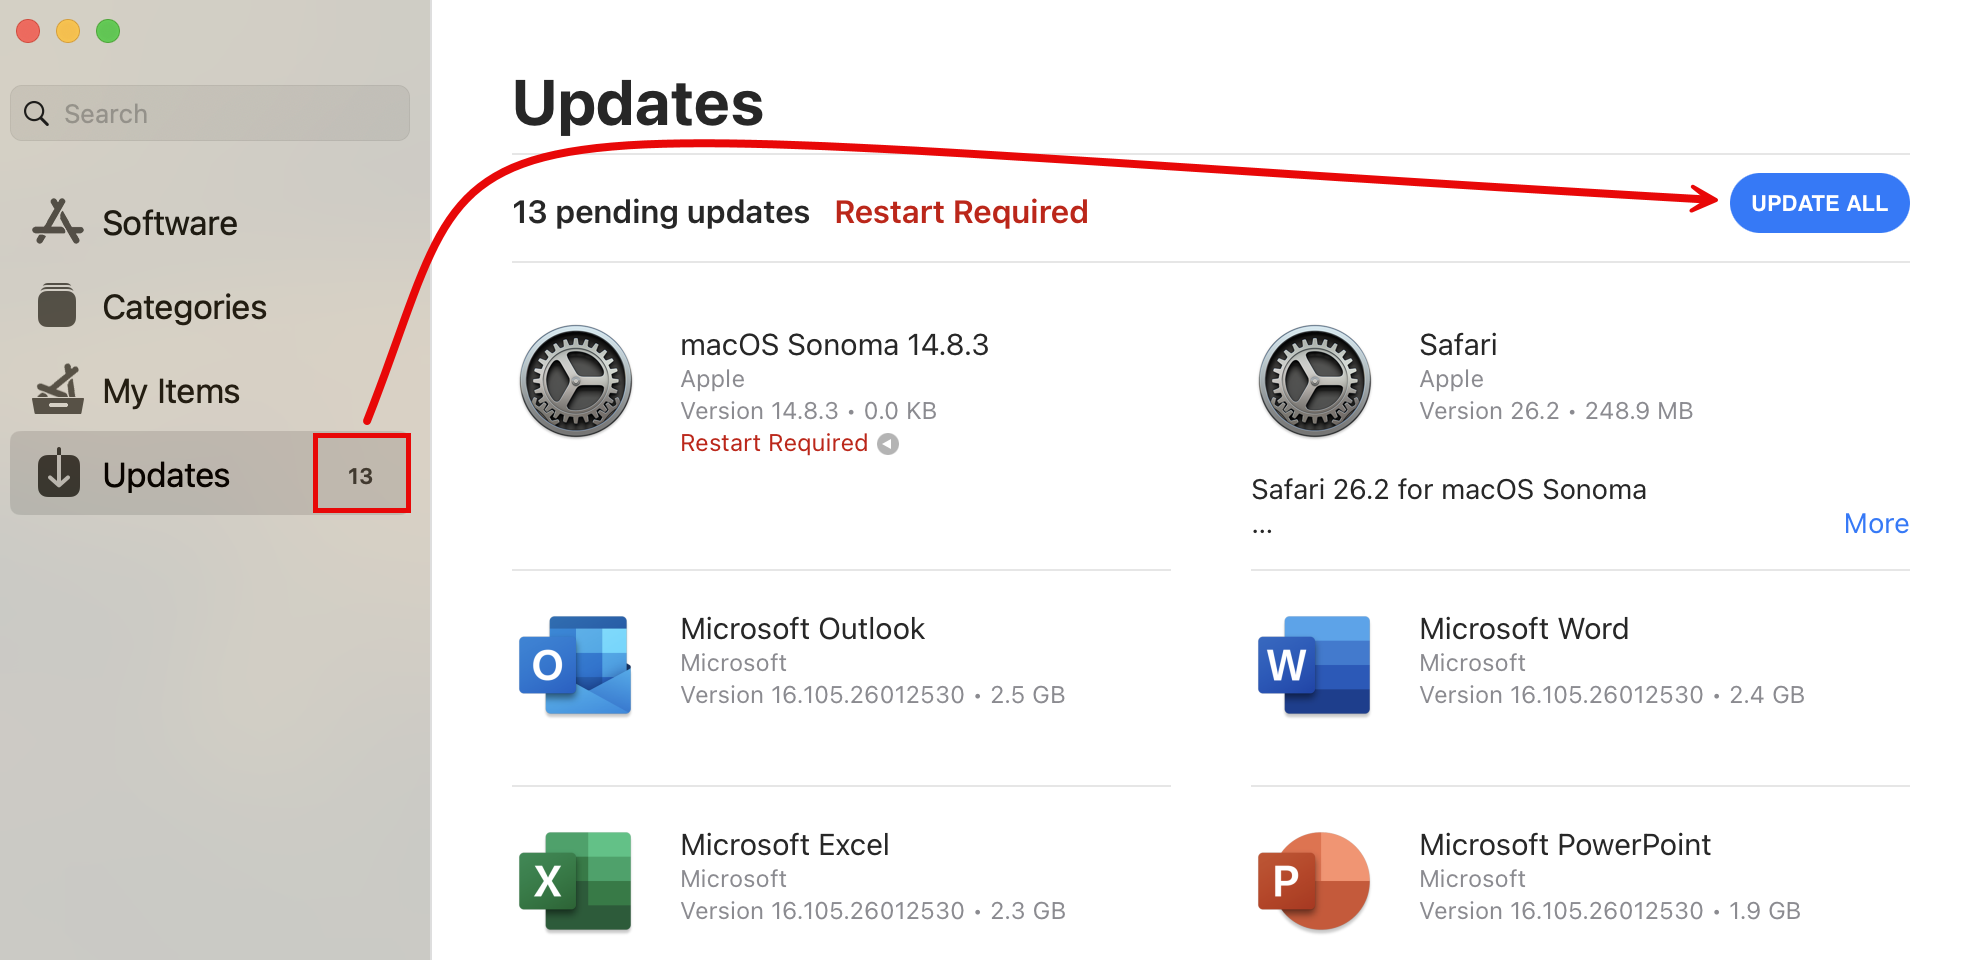
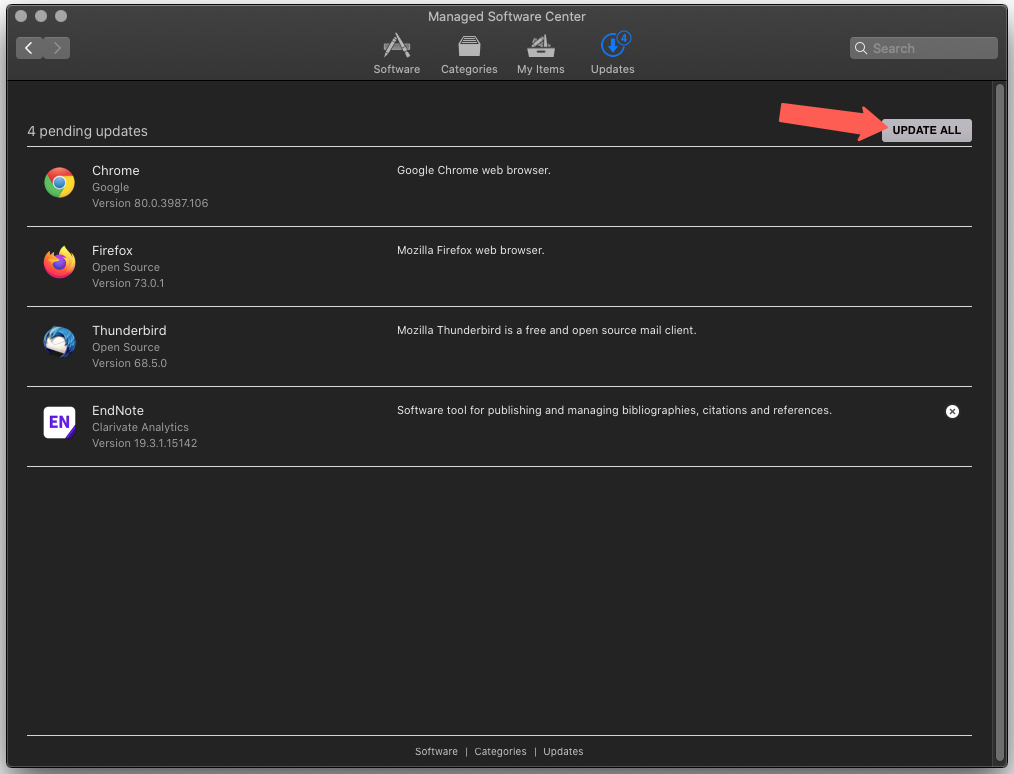
- Select the Updates tab from the toolbar on the left of the Managed Software Center window.
- All available updates will be displayed, including any pending software installations (although you may have to click CHECK FOR UPDATES or CHECK AGAIN first). Click the UPDATE ALL button.
FAQ and Troubleshooting
Skip OS Upgrade
If Managed Software Center presents you with an upgrade to a new version of macOS, but you just want to install security and application updates instead.
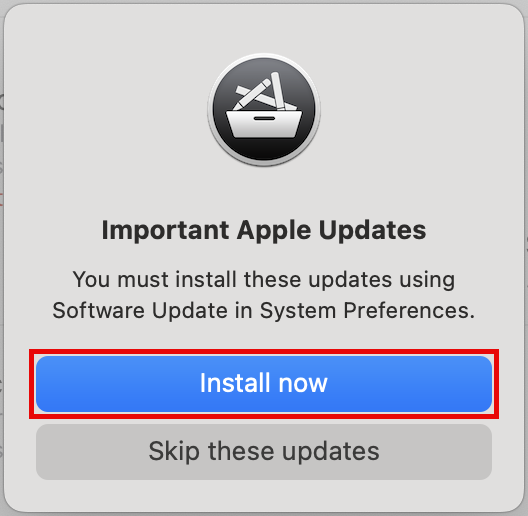
- Launch Managed Software Center, click Updates, and then click the UPDATE ALL button.
- Managed Software Center will tell you there are “Important Apple Updates” and that you must install them using Software Update in System Preferences. Click Install now.
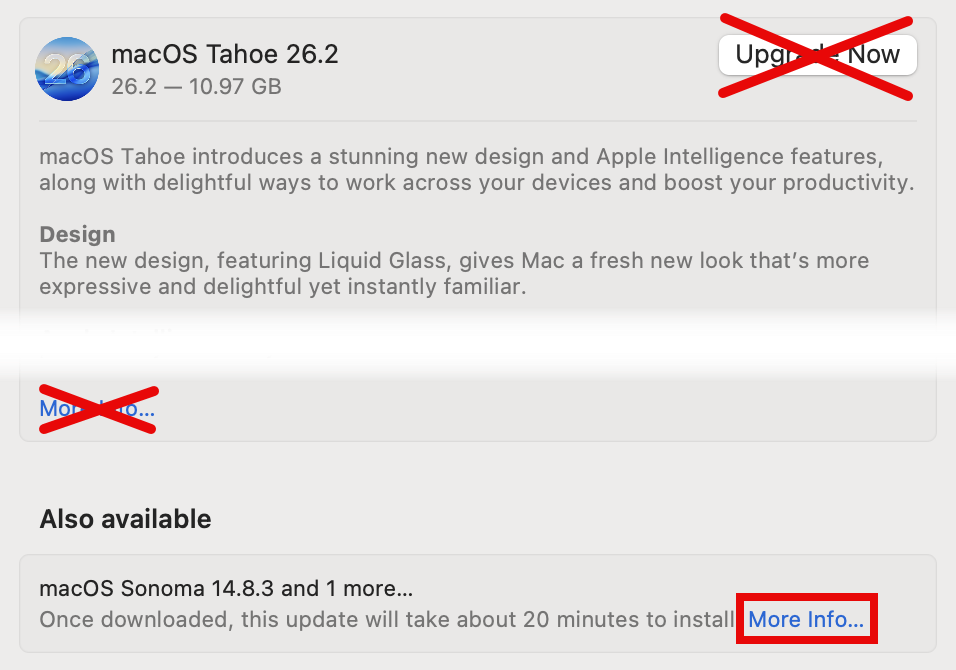
- You’ll be redirected to Software Update, where you may see an upgrade to the newest version of macOS available. Instead of clicking Upgrade Now, click the blue More Info… in the Also available section.
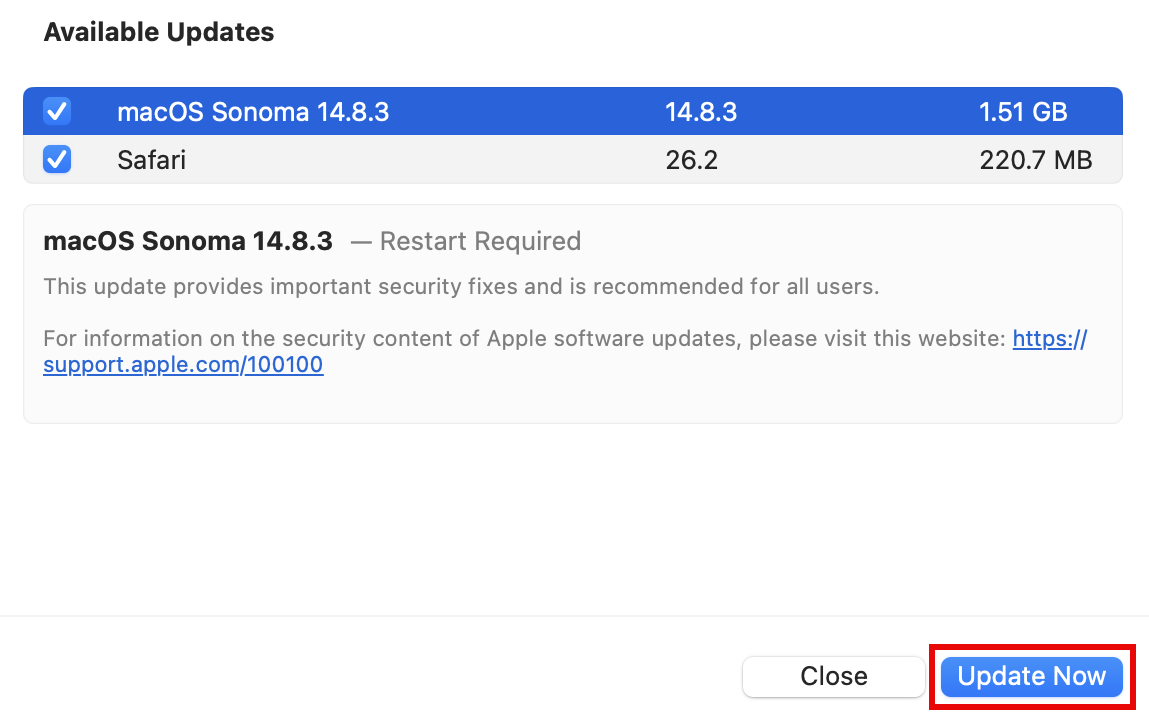
- Make sure all updates are selected, then click Install Now.
- Respond to the license agreement, enter an admin password for your computer, and restart the computer if prompted.
- If you had more than one update to install, it may only do one at a time. After restarting you should go back to System Preferences > Software Update and repeat the process.
- Finally, once Software Update has no further updates to perform, you should launch Managed Software Center and finish up any updates there
I don't have Managed Software Center on my computer - How do I get it?
Requirements:
- An active Internet connection
- If off-campus, you need to connect using the Cisco Secure Client VPN app.
- Part of the installation process will require you to reboot your Mac. Please save your work, then quit any applications you have open before proceeding.
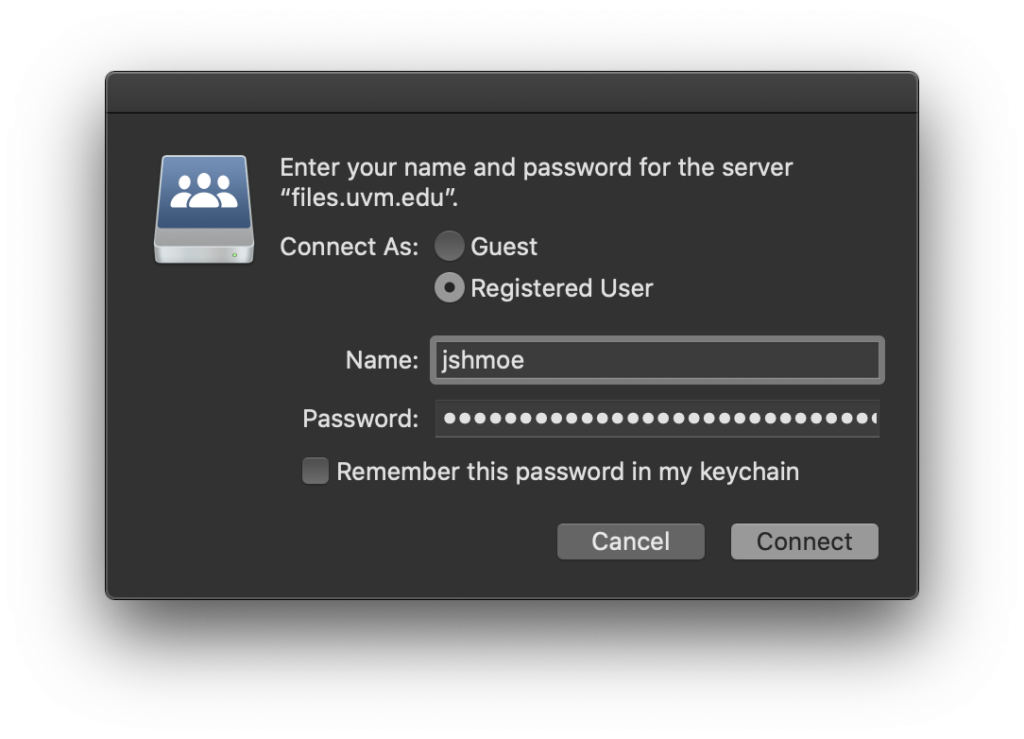
- Click the link below, then select “Open in Finder” to connect to the software share. You will need to enter your NetID and password to connect: cifs://files.uvm.edu/shared/software/Deploy/munki/
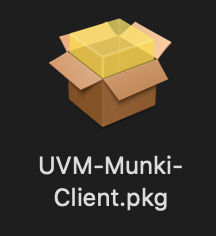
- Click-and-drag the UVM-Munki-Client.pkg file to the Desktop of your computer.
- Double-click the UVM-Munki-Client.pkg to start the installation process.
- Click “Continue“
- Click “Install“, you will receive a prompt to enter the password to your computer.
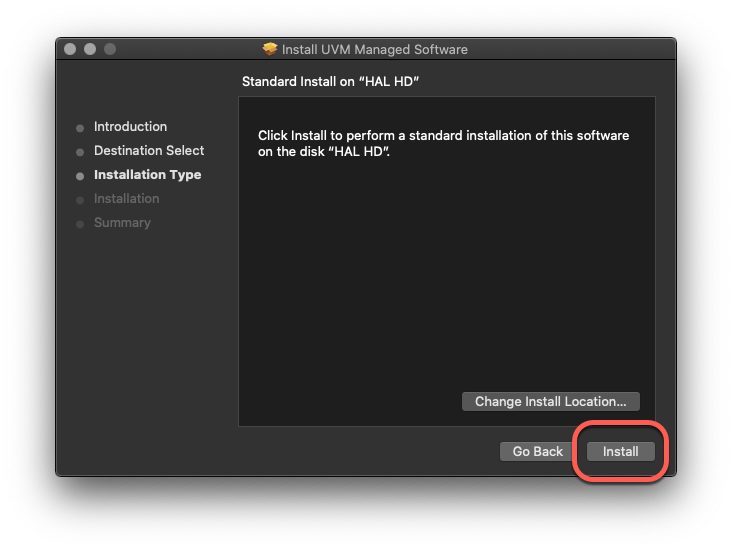
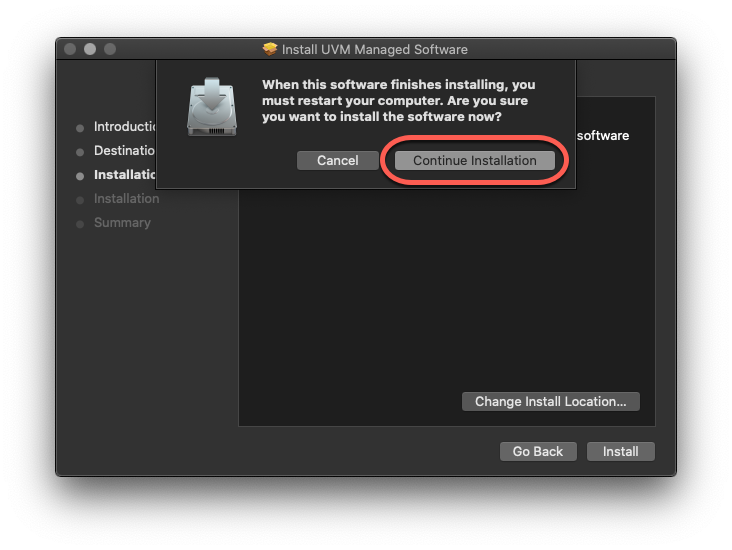
- The installer will remind you that a restart is required to complete the installation. Click “Continue Installation“.
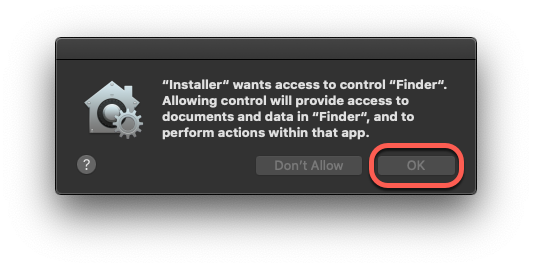
- Recent versions of macOS will prompt for additional permissions. Click “OK“.
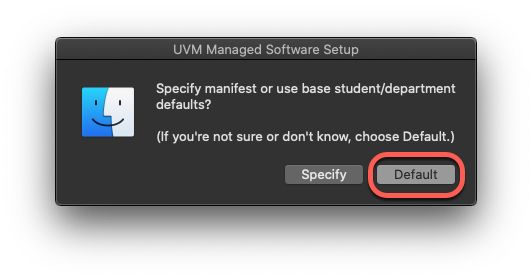
- The installer will prompt for a preferred software manifest. Choose “Default“.
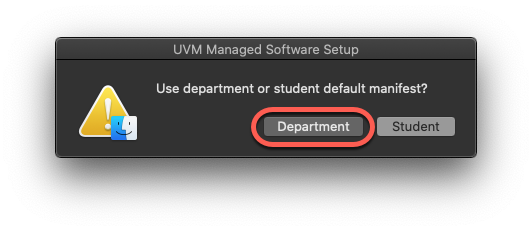
- Choose the “Department” manifest.
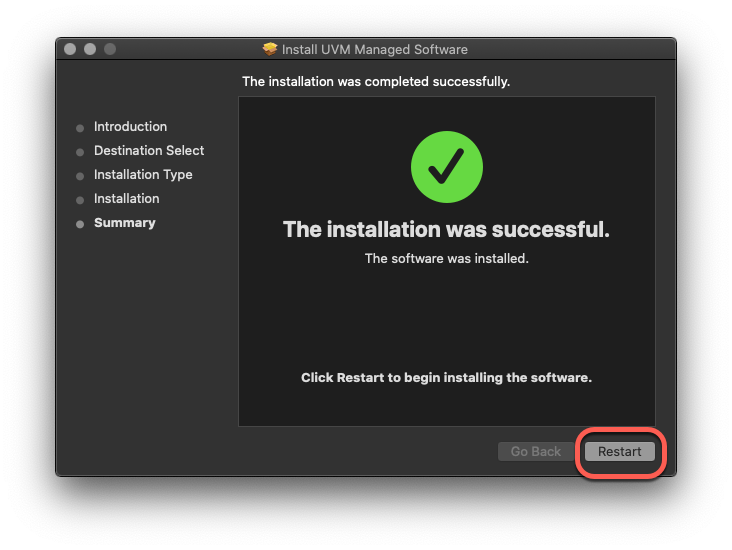
- Click “Restart” to complete the installation.

The My Items tab shows apps stuck on 'Downloading' or 'Will be installed'
Stuck on ‘Downloading’
- Some of these apps are many gigabytes (GB) in size and can take anywhere from seconds to several minutes to install. Larger applications like SPSS can take longer to download before beginning the install. The speed of the download depends on the quality of your network connection. Generally speaking, on-campus connections should be relatively speedy.
- If your network is slow or drops during install, the download may stop and fail to resume. In this case you can just click Cancel Install on the “My Items” tab then try again when you have a better internet connection or more time to wait for the download to complete.
Stuck on ‘Will be installed’
- The “Will be installed” status usual indicates that there are pending updates that also need to be applied before the installation of your new software will begin.
- To remedy this, save any open work and then click the “Update” tab at the top of the Managed Software Center window, then click the “Update All” button.
Where is the app I just installed?
Apps are installed to your “Applications” folder. If you can’t find it there, it may not be finished downloading and installing yet.
You can check the status of the installation in the “My Items” and “Updates” tab of Managed Software Center.