
The Brightspace Course Calendar is a useful tool for students, displaying due dates for assignments, when content will become available, office hours, visiting speaker presentations, and any other important course dates.
By default (and automatically) all Due Dates and Availability Dates (chosen by instructors in the settings area) appear in the Calendar. If instructors edit a Due or Availability Dates in the course, that change will be reflected in the Calendar. And, if those dates are edited in the Calendar, it will also change the date on in the course.
Add Due Dates (to populate the Calendar)
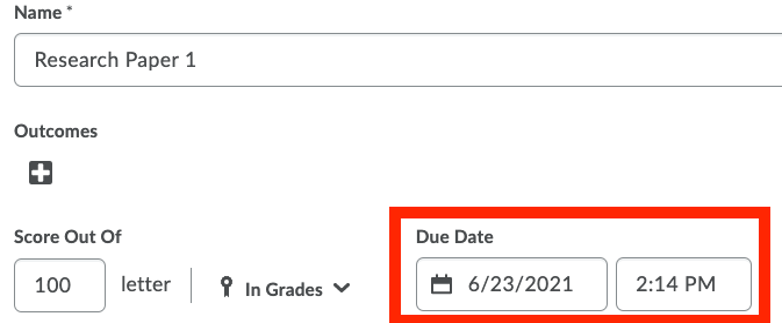
Assignments
The due date field is to the right on the main edit window right next to the “Score Out Of” field.
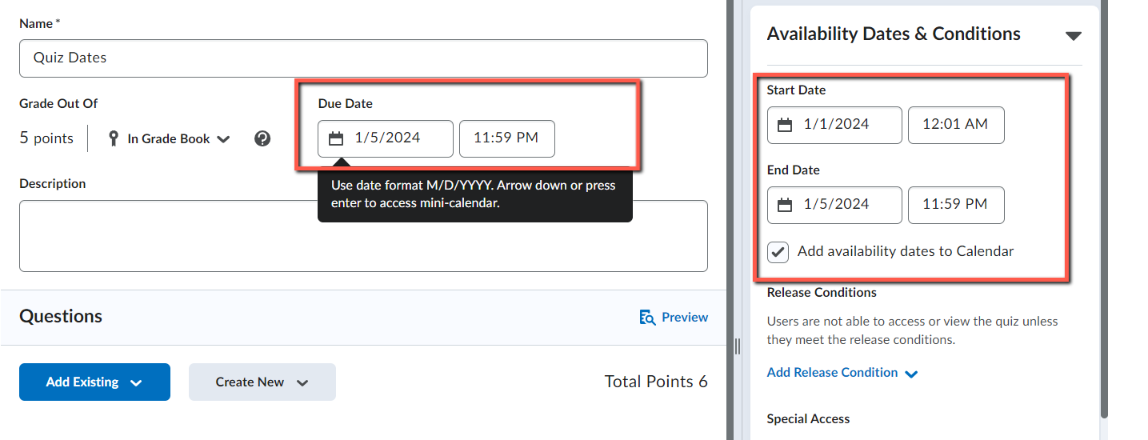
Quizzes
Similar to Assignments. the due date field is to the right on the main edit window and the start and end date settings in the Availability Dates & Conditions section.
If you check the box to include availability dates on students’ calendars, the start and end date will be listed in the calendar as distinct events.
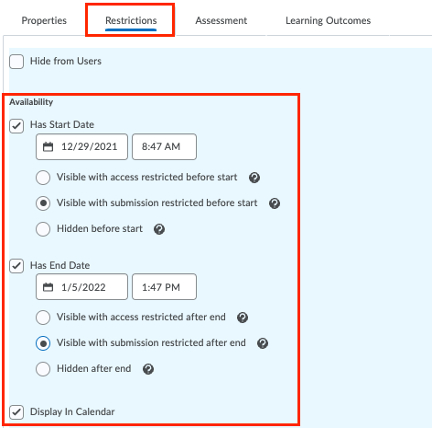
Discussions
Use Availability Dates to define the window the discussion topic is open for new posts. Availability Dates are found in the “Restrictions” tab when editing. Make sure to click on “Display in Calendar” after you fill out the Availability Dates.
Content Modules
- Navigate to the Module you want to add Availability and/or Due Dates to.
- Click “Add dates and restrictions…” This will prompt Brightspace to give you date fields.
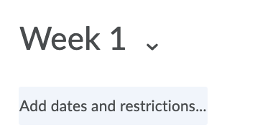
- Fill out the Start, Due, and/or End Date.
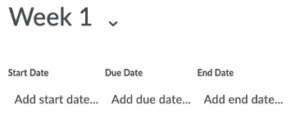
- Click the blue Update button when Due dates are entered.
Add Custom Events
Only instructors can add events to the course Calendars. While students can also add custom events, they only visible to themselves, not the entire class.
- To create custom events to the Calendar, go to the Calendar on the course home page.
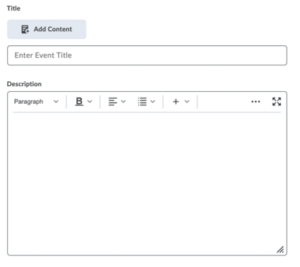
- Select the “Create Event” button to create your own event.

- Fill out the information for it, adding “Title” and a “Description.”
Additional Information
For more information, about the different calendar displays and how to add personal tasks, see documentation on the Brightspace Community site: