
Permissions management ensures team members have access to the Sites and the files they need, and ensures former team members no longer have access to data they don’t. This page describes the process.
Site-wide Permissions
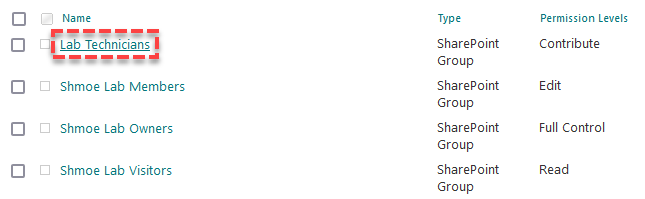
There are three default permissions groups that control access to a SharePoint Site:
- Visitors, who have read-only access,
- Members, who can create and edit files,
- and Owners, who have full control over the Site content and permissions.
Custom groups and permission levels can be created to fine tune access when those three default groups are not sufficient.
Add Member or Owner
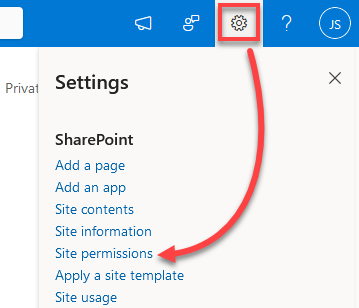
- Click the gear () in the top-right corner and select Site permissions.
- Click Add members and then Add members to group.
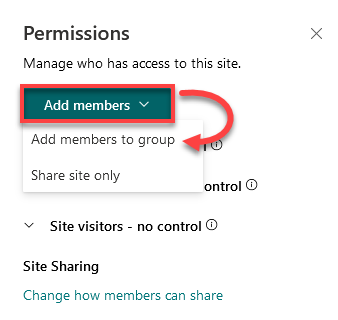
- Click Add members.

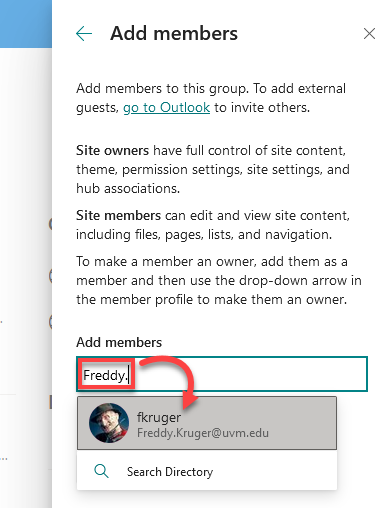
- Start typing a name or email address into the box and then select their account as it appears in the drop-down below.
- Click the down-caret () to the right of their currently-selected role and select the proper level of access.
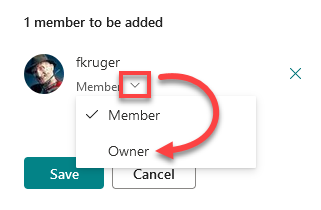
- Repeat steps 4 and 5 for any number of team members. Click Save.
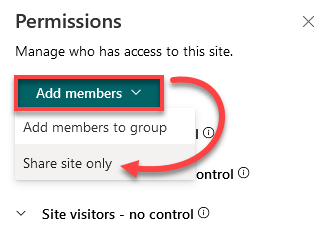
Add Visitor
- Click the gear () in the top-right corner and select Site permissions.
- Click Add members and then Share site only.
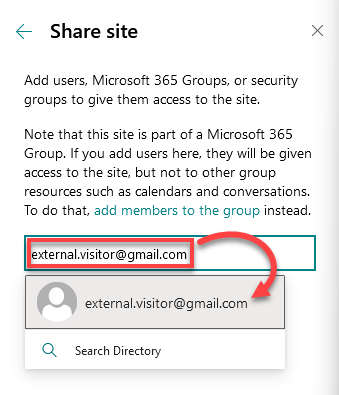
- Type an email address into the box and then select it from the search results that drop down.
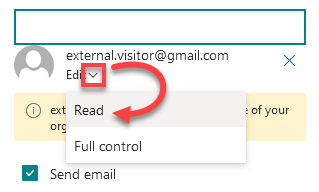
- Click the down caret () to the right of their currently-selected role and select Read. Repeat this step for any number of visitors.
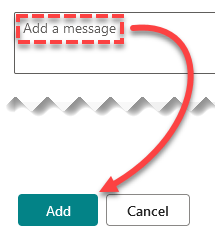
- Enter a message that the new group of visitors will receive via email, and click Add.
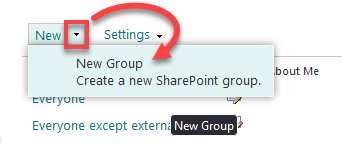
Create Custom Group
- Navigate to the following page, replacing MySite with the name of your SharePoint online site.
https://uvmoffice.sharepoint.com/sites/MySite/_layouts/15/groups.aspx
- Click New or click the down arrow ()and select New Group.
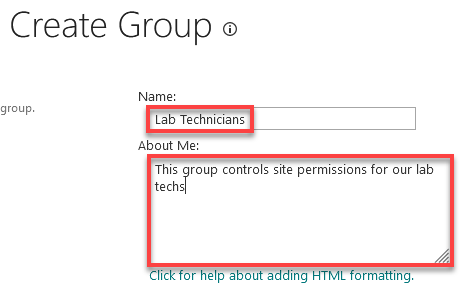
- Enter a Name for the new group and a Description of its purpose.
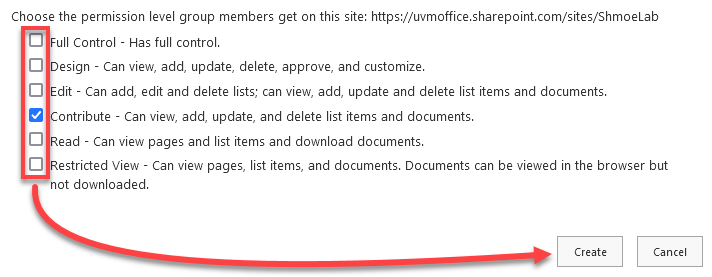
- Review the rest of the group settings as you scroll down to the permission level section. Select the appropriate permission level for future members of this group, and click Create.
Modify Group Membership
- Click the gear () in the top-right corner and select Site permissions.
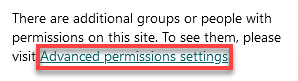
- Click Advanced permissions settings towards the bottom of the Permissions sidebar that appears.
- If you’ve previously created a group like in the instructions above, you’ll see it on the list of groups that loads now, along with the three default groups (unless previously deleted). Select the group you’d like to modify.
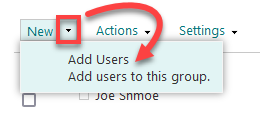
- To add new users, click New or click the down arrow() to the right and then Add Users.
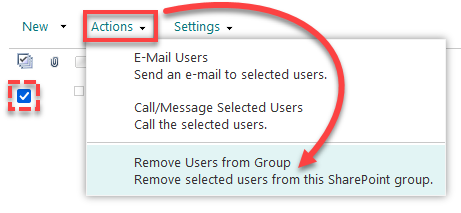
- To remove users, check the box () to the left of their name(s), click Actions, and select Remove Users from Group.
- To add new users, click New or click the down arrow() to the right and then Add Users.
Change Group Permission Level
- Click the gear () in the top-right corner and select Site permissions.
- Click Advanced permissions settings towards the bottom of the Permissions sidebar that appears.
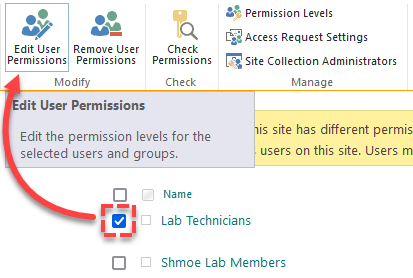
- Check the box () to the left of the group you’d like to modify and click Edit User Permissions.
- Uncheck any obsolete options, check the box to the left of the appropriate permission level for this group, and click OK.
Grant External Access
Granting External Access works the same as adding any other User to your SharePoint Site. See the Add Member or Owner, Add Visitor, or Grant Access to a Single File or Folder sections.
Single File or Folder Permissions
Permissions in SharePoint are inherited; by default, any user granted permissions to your site will have access to every file and folder on that site.
If you require more granular permission management options, this section will instruct on how to grant access to or restrict access for specific files or folders.
The first step to individually managing a given file or folder’s permissions is to stop inheriting permissions.
Disable Permission Inheritance
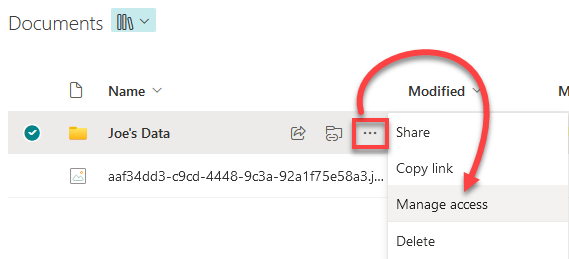
- Click the ellipsis () next to the file or folder for which you want to disable permission inheritance and select Manage Access.
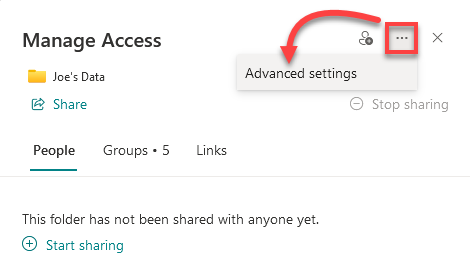
- Click the ellipsis () in the top-right corner of the Manage Access window, and select Advanced settings.
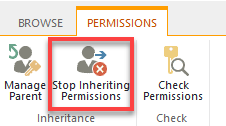
- Click Stop Inheriting Permissions.
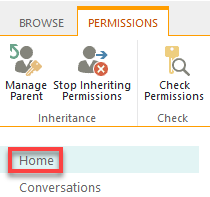
- Click Home from the sidebar below to return to your SharePoint site’s homepage.
Enable Permission Inheritance
- Hover over and click the ellipsis () next to the file or folder for which you want to enable permission inheritance, and select Manage access.
- Click the ellipsis () in the top-right corner of the Manage Access window, and select Advanced settings.
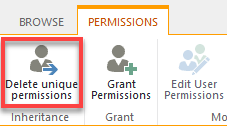
- You will now be brought to the permissions page for your chosen file or folder. Click Delete Unique Permissions and proceed through the prompt.
- Click Home from the sidebar below to return to your SharePoint site’s homepage.
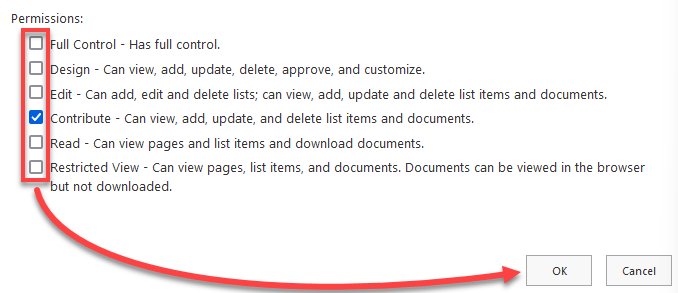
Grant Access to a Single File or Folder
- Click hover over and click the Share icon () to the right of the folder to which you want to grant permissions.

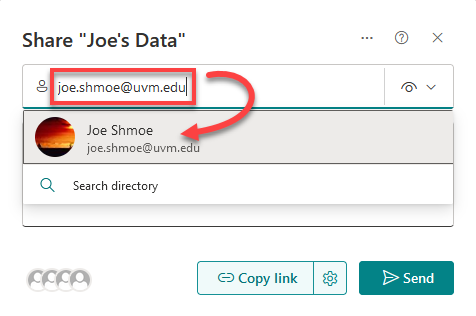
- Enter any number of email addresses into the Add a name field, selecting their accounts from the search results as they appear.
- Expand the // drop-down menu to the right and choose the level of access those accounts need.
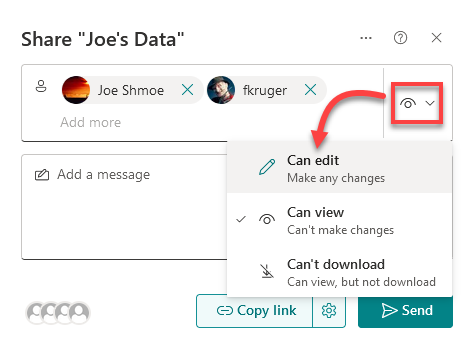
- Add an optional message to appear in the email to the new members, and click Send.
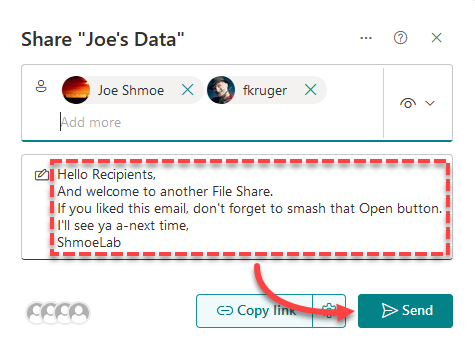
- Repeat steps 1-5 for any accounts that need a different level of access.
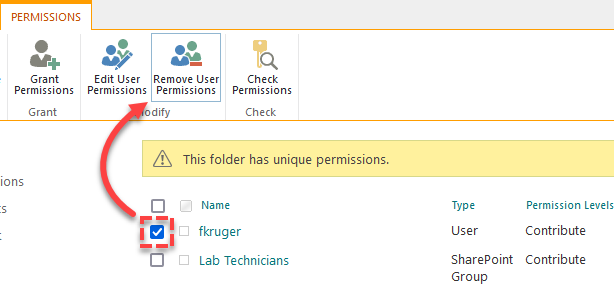
Restrict Access to a Specific File or Folder
- Hover over and click the ellipsis () next to the file or folder for which you want to disable permission inheritance, and select Manage access.
- Click the ellipsis () in the top-right corner of the Manage Access window, and select Advanced settings.

- Check the box(es) () to the left to any account(s) whose access to this file or folder should be removed, and click Remove User Permissions.
Anonymous Access
See the dedicated Anonymous Access to Files and Folders article for more details.
Other
Accept Access Requests
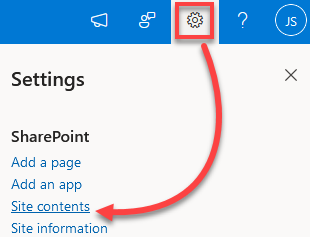
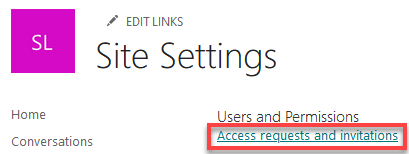
- Click the gear () in the top-right corner, and select Site contents.
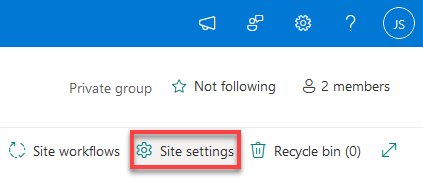
- Click Site Settings.
- Click Access requests and invitations.
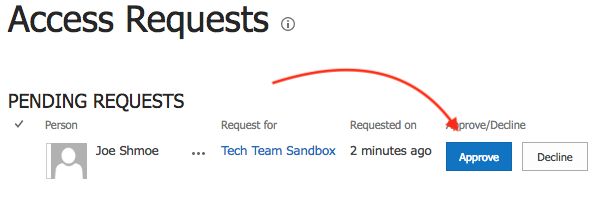
- You will be taken to the Access Requests page. Verify you recognize the person requesting access, then click Approve.
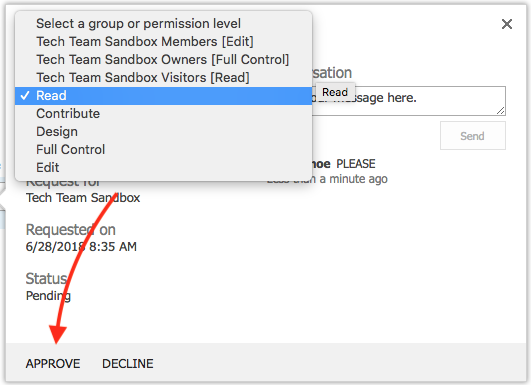
- Select the appropriate permission level under the “Permission” section, then click Approve.
Permission Levels
- Click the gear () in the top-right corner and select Site permissions.
- Click Advanced permissions settings towards the bottom of the Permissions sidebar that appears.
- Click Permissions Levels.
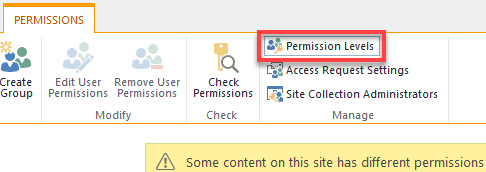
- From here you can view the Description of all Permission Levels for your Site, as well as Delete or Add custom Permissions Levels.
- To assign a permission level to a group of users, see https://www.uvm.edu/it/kb/?post_type=ht_kb&p=28934&preview=true#change-group-permission-level above.
Additional Info
See UVM’s complete list of SharePoint documentation here, or Microsoft’s SharePoint help & learning page here.