NOTICE:
This documentation pertains to the Red Hat 7 cluster, which is currently being deprecated.
For updated information, please refer to the new documentation for the Red Hat 9 cluster at:
https://www.uvm.edu/vacc/docs/start_guide/ondemand/
Open OnDemand (OOD) is a web interface to the VACC clusters. Based on the Open OnDemand portal created by the Ohio Supercomputer Center (OSC), it is NSF-funded and open-source. The UVM VACC OOD provides:
- File management
- Job management and monitoring
- Command-line shell access
- Access to interactive apps (e.g., Jupyter Notebook, RStudio Server, and MATLAB)
Access OOD
To access OOD:
- go to UVM VACC Open OnDemand
- log in with your UVM Netid and password
(your College of Medicine login username and password will not work)
Toolbar
Below is a screenshot of the OOD toolbar with dropdown link text:
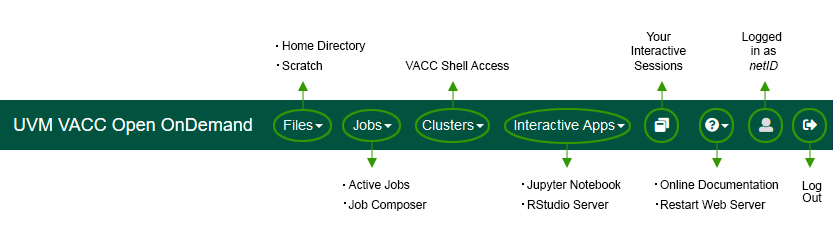
Files
When you click “Files” in the toolbar, you can choose to go to your home directory or your scratch directory. This is a screenshot of the Files interface:
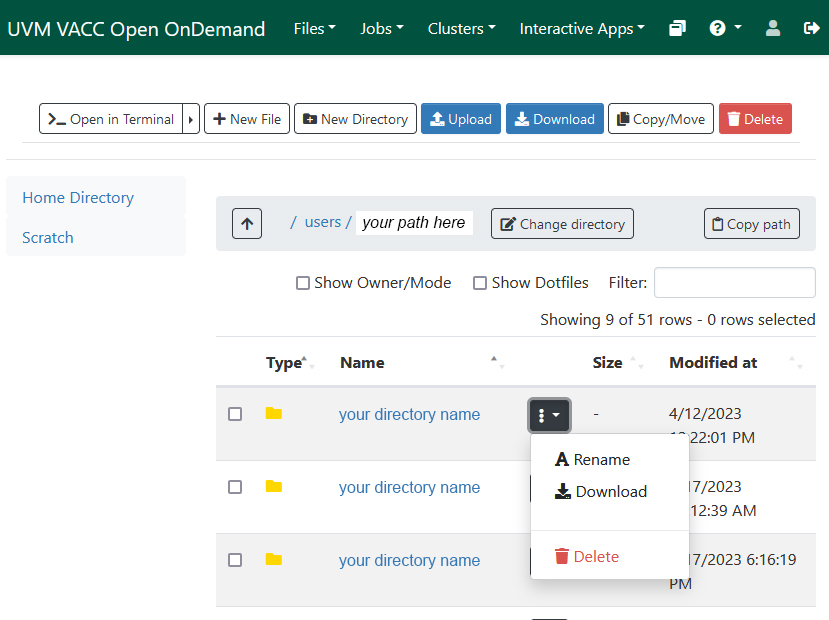
As you can see in the screenshot, the Files tool works like most file explorer applications, but has a few additional options. Files allows you to:
- Navigate between directories:
See “Home Directory” and “Scratch” on the left. You can also change the directory you’re currently in using the Change directory button to the right. You can copy the current path using the Copy path button. - Open in Terminal button:
Open the current directory in a terminal (command line shell). (Note: The terminal opens in a new window.) - New File and New Directory buttons:
Create a new file or create a new directory. - Upload and Download buttons:
Upload a file from your computer to the VACC, or download a file from the VACC to your computer. - Copy/Move button:
To copy or move files:
1. Select file using the check boxes to the left of the filenames.
2. Click the Copy/Move button, and those files will appear on the left.
3. Change to the directory where you would like the files placed.
4. Select either the Copy or Move button, and the chosen action will take place. - Delete button:
Delete a file or directory. You can also delete a file or directory by clicking on the button with three vertical dots to the right of the filename or directory name. - Dropdown button:
Next to each filename and directory name is a button with three vertical dots. When you click on this button, you have the option to Rename, Download or Delete.
Jobs
When you click Jobs in the toolbar, you can select either Active Jobs or Job Composer. (NOTE: Job Composer opens in a new window.)
Active Jobs allows you manage the jobs you have submitted using OOD. The Job Composer helps you create new Slurm batch jobs. For instructions on using the Job Composer, see OSC’s Job Management page.
Clusters
VACC Shell Access opens a terminal in a new window.
Interactive Apps
Currently, we provide Jupyter Notebook, RStudio Server, and MATLAB.
On the app pages, you will see dropdowns that allow you to select the resources you need to run your job. These resources are the same as those you would detail in a Slurm script, but your choices are limited by the selections we offer.
If you’re new to using the cluster, we recommend using the default resources we have provided. In other words, you don’t need to change any of the dropdowns.
Once you have selected the resources you need, click the blue “Launch” button:
![]()
You must wait until your session starts. You will see a message that says, “Please be patient as your job currently sits in queue. The wait time depends on the number of cores as well as time requested.”
Once your session has been allocated, the message changes to, “Your session is currently starting… Please be patient as this process can take a few minutes.”
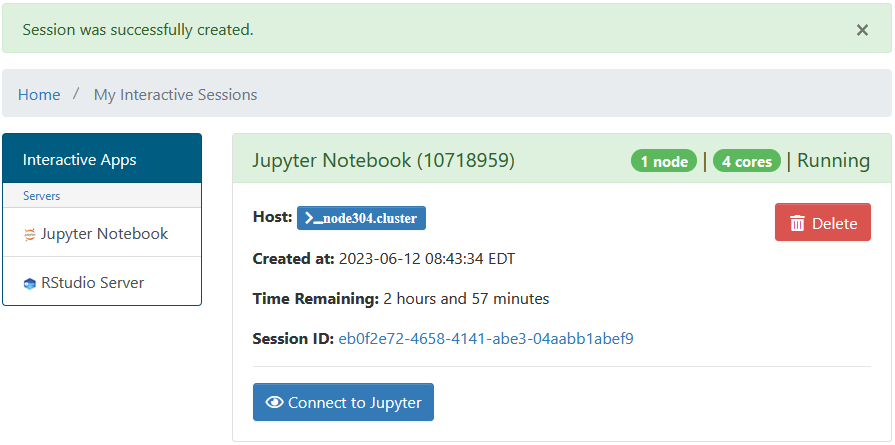
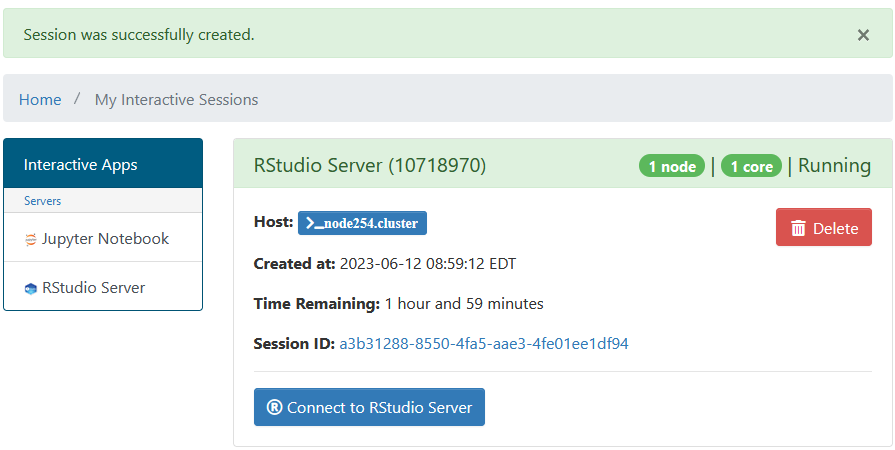
When your session has been created, you will see a blue “Connect to Jupyter” or “Connect to RStudio Server” button. Click the button and you will go to the app.
The app will open in a new window.
 My Interactive Sessions
My Interactive Sessions shows you the interactive session you have running and allows you to re-connect to the app or delete the session.
Help
The Online Documentation link opens the VACC Knowledge Base (in a new window), where you can find many answers to questions about using the VACC. Restart Web Server does exactly that. If you find the interface is not responding, this is a good option.