

![]()
The Panorama Factory Home
![]()
Search the Help Website
(requires internet access)
| Unless otherwise noted, images and
text are © 1999 John Strait, all
rights reserved. Unauthorized reproduction is a violation of copyrights. To
request permission for reproduction: jstrait@panorama factory.com |
|
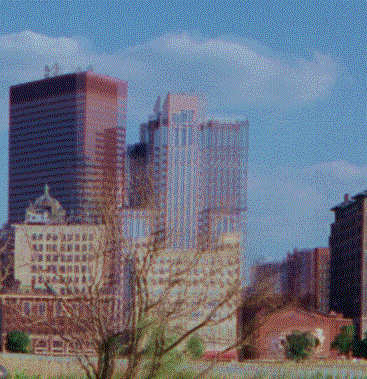
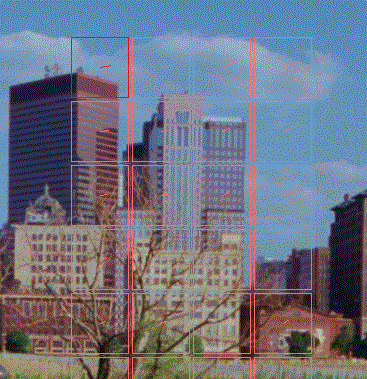
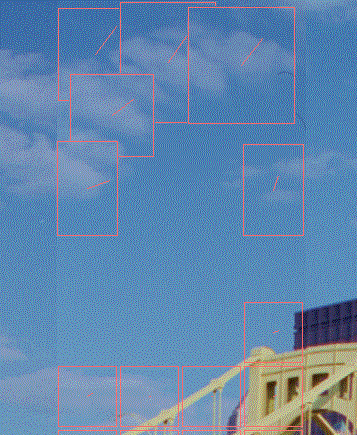
| You can judge how good a job The Panorama Factory did by looking at the consistency or inconsistency of the adjustments. The following example shows how The Panorama Factory can get confused in regions that have too little detail. |
| Removing tiles To remove the inconsistently adjusted tiles, move the mouse over the edge of
the tile and hold down the CTRL key to get the delete cursor Drawing new tiles You can draw new tiles by click-dragging when away from
existing tiles. The cursor shows an ordinary arrow |
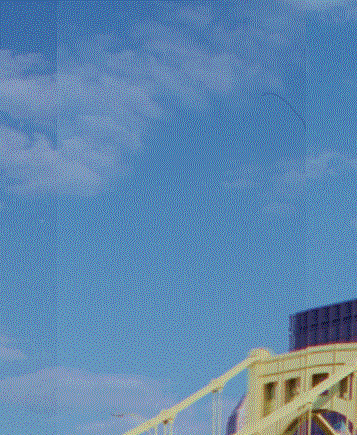
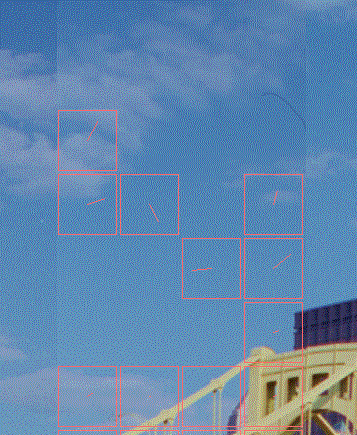
| Good places to draw tiles Sometimes you’ll have an overlap region that is so poor that you have to draw all the fine tuning tiles yourself. The best places to draw overlap tiles are where there are strong horizontal and vertical elements, e.g. a corner of a building or where sidewalk cracks intersect. Editing tiles When you draw a tile, The Panorama Factory tries to determine the alignment adjustment. You may disagree with its alignment. In this case, there are two strategies you can follow. You can edit the tile to stretch or shrink it and hope that
The Panorama Factory does a better job on the enlarged or reduced tile. To edit the tile,
move the cursor over a side or corner of the tile. The cursor changes to indicate that a
dragging operation will change the size of the tile: If you can’t convince The Panorama Factory to make the right adjustment you can adjust the tile manually with these steps:
The Panorama Factory fills in the gaps The Panorama Factory will fill in the adjustment between tiles by interpolating and extrapolating from the surrounding adjustments. This means that a few tiles may be enough in regions where the adjustment changes slowly, but more tiles are needed where the adjustment changes rapidly. Next seam... When you’re happy with the adjustment of the seam, use the Next seam command to advance to the next seam (to the right) or the Previous seam command to return to the previous seam (to the left). Approve When you’re happy with the all of the seams, use the Approve command to redraw the stitched image (or just double-click it from the computed thumbnails pane). Adjust blending region boundaries Sometimes an overlap region will have a ghost you just can’t eliminate with fine tuning. If an object (e.g. car or person) moved between the times you made the two photographs, its position and/or size will differ in the two images. There’s really no way to adjust the images so that features line this will align sharply. You can sometimes eliminate these ghosts by adjusting the boundaries of the blend region. You make these adjustments when you are looking at the entire
stitched image. The overlap regions are displayed as rectangle (see the Stitch command). Move the cursor over a side of the overlap
region that has the ghost. The cursor changes to indicate that dragging will change the
width of the rectangle: You can include or exclude portions of the lefthand image from the blending region by moving the left edge of the rectange. You can include or exclude portions of the righthand image by moving the other edge. You cannot, however, enlarge the rectangle beyond the boundaries of the image overlap. If you try, the rectangle edges will snap back. >> Step 5 - Crop the stitched image
|