Notice: Function _load_textdomain_just_in_time was called incorrectly. Translation loading for the knowall domain was triggered too early. This is usually an indicator for some code in the plugin or theme running too early. Translations should be loaded at the init action or later. Please see Debugging in WordPress for more information. (This message was added in version 6.7.0.) in /users/h/e/helpline/projects.helpline.w3.uvm.edu-root/wp-includes/functions.php on line 6121
Turning Off Email Forwarding and Redirection – *DEV* Knowledge Base
  1. Home
  2. Email and Calendar
  3. Turning Off Email Forwarding and Redirection
  1. Home
  2. Security
  3. Turning Off Email Forwarding and Redirection

Turning Off Email Forwarding and Redirection

Forwarding to non-UVM email services is prohibited

The University of Vermont’s Information Security Policy prohibits Faculty, Staff, and Employees from forwarding or redirecting UVM email to non-UVM email services (i.e. Google, Yahoo, etc).

Forwarding email to LCOM accounts (i.e., @med.uvm.edu) is permitted.

The method for turning off forwarding and redirection will differ based on how it was originally set up. If you can’t remember whether you used Exchange Online’s mail forwarding feature or an inbox rule, you can just try both methods.

Turn off forwarding

  1. In a web browser, navigate to Outlook Online.
  2. Log in with your NetID and password.NetID login screen
  3. Click the Gear icon near the upper-right corner to open the Settings menu.Exchange Online Settings icon.
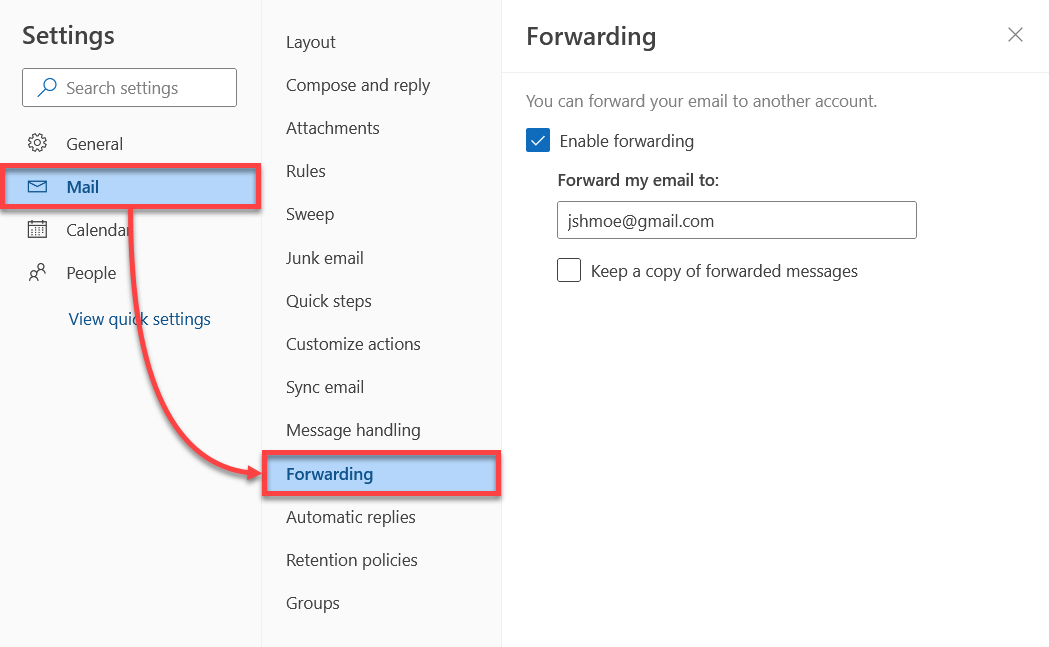
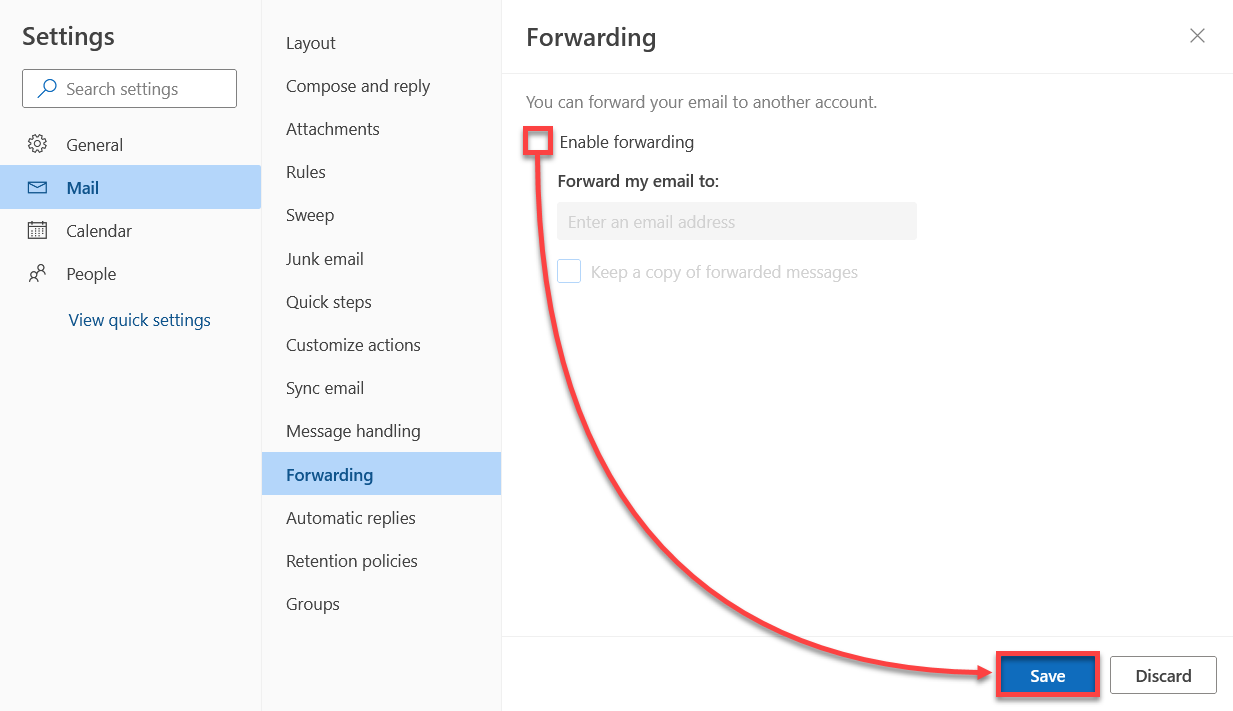
  4. Open the Mail tab on the left side, and then select Forwarding.Mail Forwarding Settings.
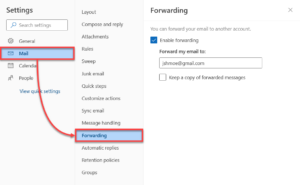
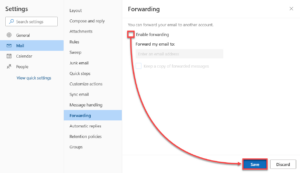
  5. Uncheck the box next to Enable forwarding and click Save.Turn off Mail Forwarding and Save.

That’s it! Thank you for complying with UVM Security Policy!

Remove an inbox rule

  1. In a web browser, navigate to Outlook Online.
  2. Log in with your NetID and password.NetID login screen.
  3. Click the Gear icon near the upper-right corner to open the Settings menu.Exchange Online Settings icon.
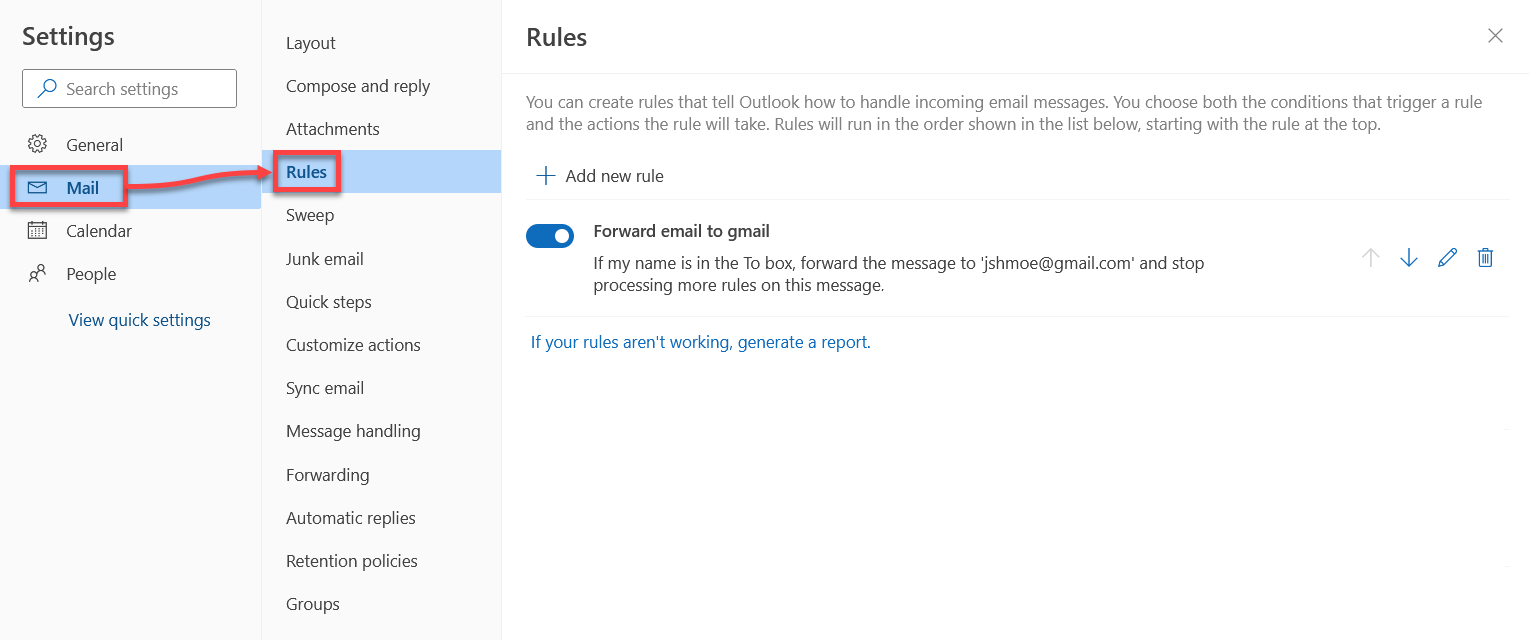
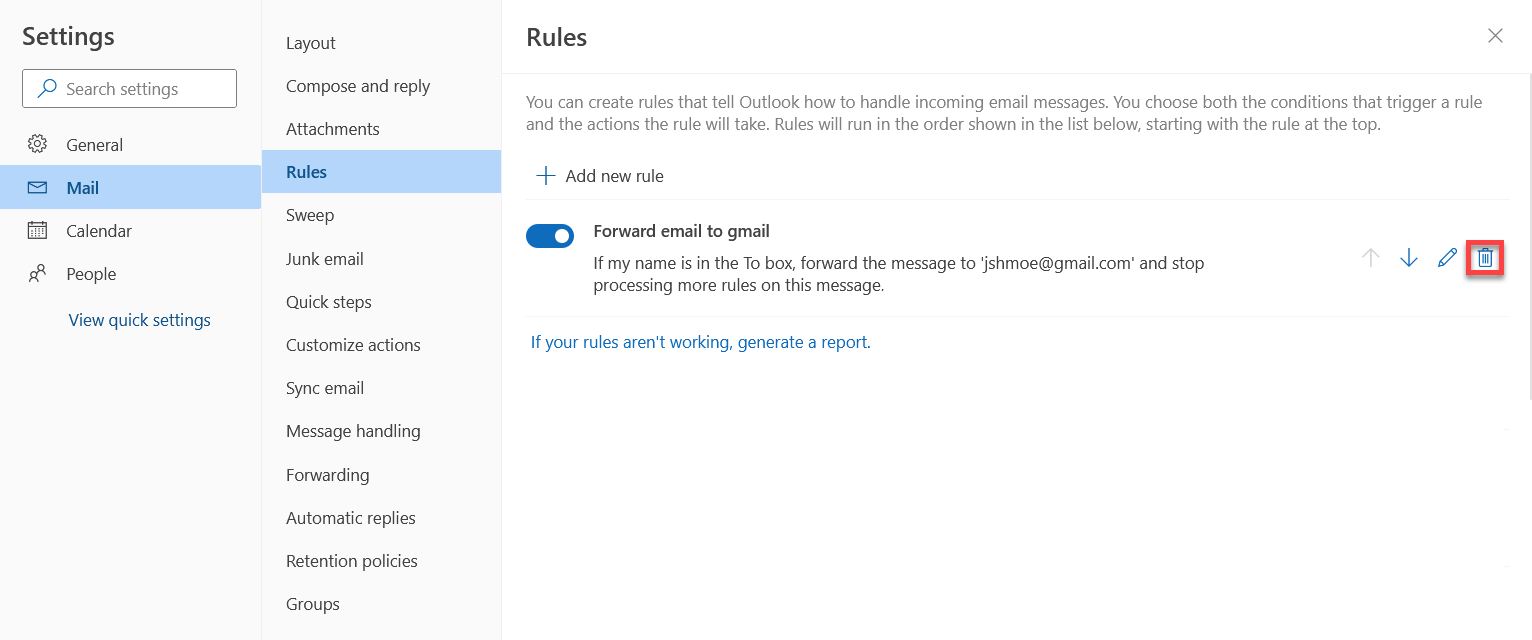
  4. Open the Mail tab on the left side, and then select Rules.Mail Rules.
  5. Click the Trash icon next to the rule you would like to delete.Trash Mail Rule.
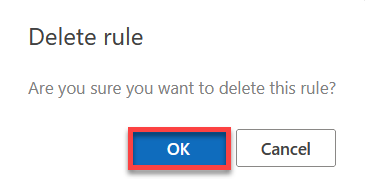
  6. Confirm that you would like to delete the rule by clicking OK.Confirm delete.

That’s it! Thank you for complying with UVM Security Policy!

Updated on June 3, 2025

Related Articles

Need Support?
This is the Dev Site
You shouldn't