Notice: Function _load_textdomain_just_in_time was called incorrectly. Translation loading for the knowall domain was triggered too early. This is usually an indicator for some code in the plugin or theme running too early. Translations should be loaded at the init action or later. Please see Debugging in WordPress for more information. (This message was added in version 6.7.0.) in /users/h/e/helpline/projects.helpline.w3.uvm.edu-root/wp-includes/functions.php on line 6121
Setting your Microsoft Profile Picture – *DEV* Knowledge Base
  1. Home
  2. Remote Instruction
  3. Microsoft Teams
  4. Setting your Microsoft Profile Picture
  1. Home
  2. Email and Calendar
  3. Setting your Microsoft Profile Picture
  1. Home
  2. UVM Web Services
  3. Setting your Microsoft Profile Picture

Setting your Microsoft Profile Picture

Contents

The instructions below detail the process of setting your Microsoft profile picture. This changes your picture in a number of areas, including Microsoft Teams.

Outlook Online

  1. Navigate to Outlook Online and log in with your UVM NetID and password.UVM NetID Login screen
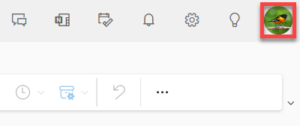
  2. Click your profile picture the top right corner to open the Account Manager drop-down.Account menu icon
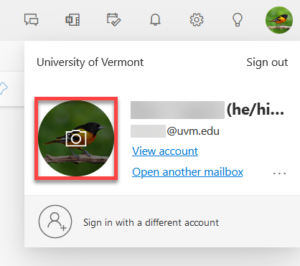
  3. Click your profile picture in the drop-down.Account drop-down
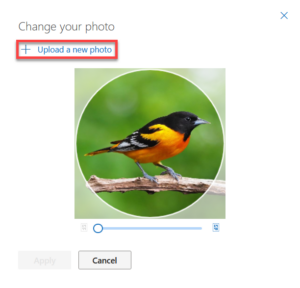
  4. Click Upload a new photo.Upload a new photo link
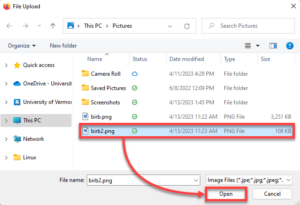
  5. Browse your computer for an image to upload, click the file to select it, and then click Open to upload the selected image.Open button
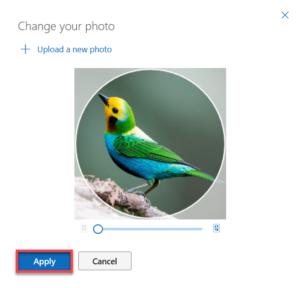
  6. Click Apply to set the image as your profile picture.Apply button
    Make image adjustments before applying

    You can click and drag the image to center it within the circle, and you can use the slider below the image to adjust the zoom level.

You should be all set! If you do not see your new profile picture in the top right corner, try reloading the page.

Updated on December 16, 2024

Related Articles

Need Support?
This is the Dev Site
You shouldn't