STEP 1: Make a MAIN MENU item
- Add content, make your new page/node
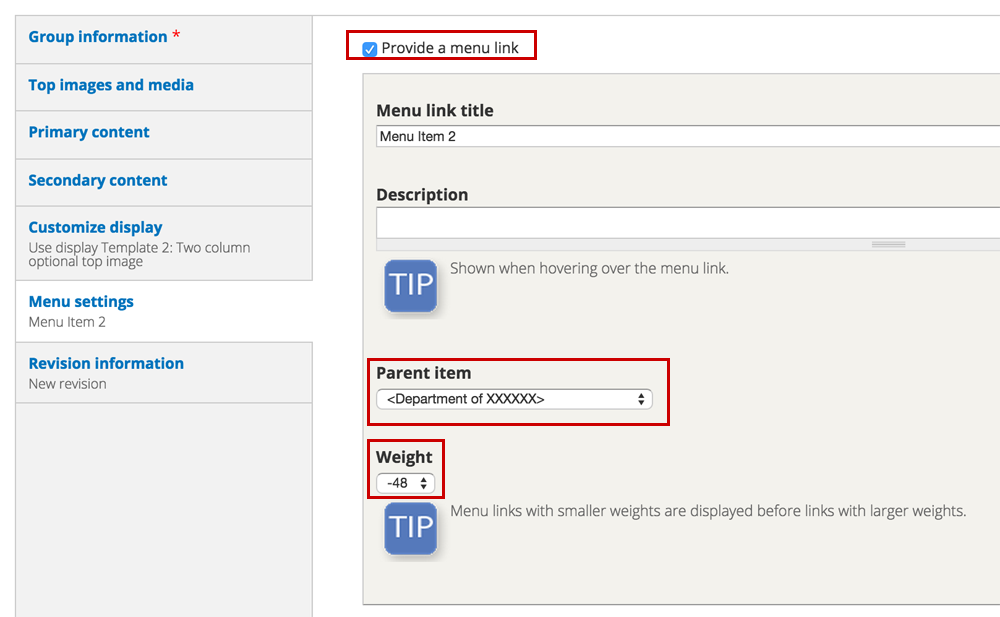
- When editing a draft of the node, there is a vertical tab on the left named “Menu settings.” Under this item, check the box to “Provide a menu link”
- Under parent item select either your group, or another menu item that you would like the current node to become a child of.
- Save and Publish your page
- Go into your Groups settings (admins) to reorder the order/appearance of the main menu
NOTE: The menu item will only show if the page is published.
Helpful screenshots
STEP 2: Make your menu TOGGLE
You now have to make a decision. Is the main menu item that you made a worthy landing page containing important content that you want to keep, or was it more of a placeholder for a main menu item?
No landing page necessary
- Go to "My Workbench"
- Select the link to your group under “My Groups” — note that this is different from “My Websites”
- On this page there are several tabs, select the “Group” tab.
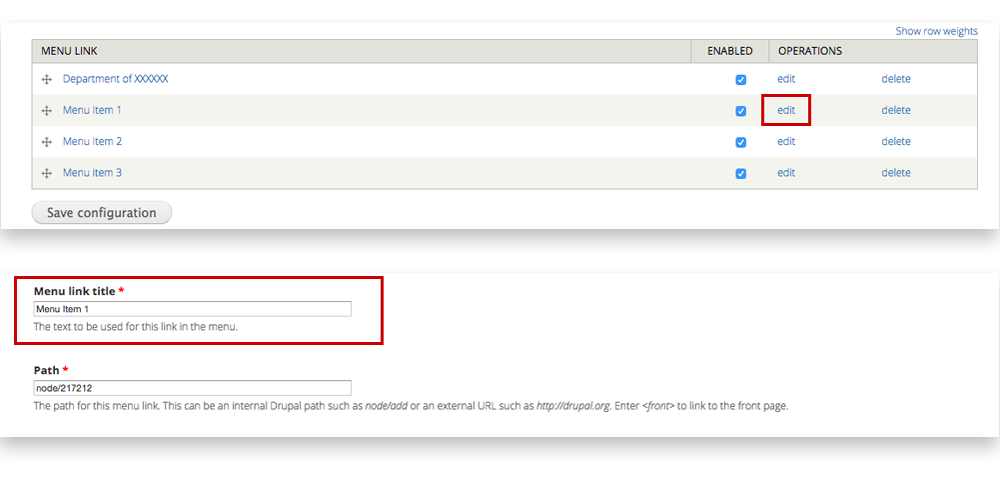
- Select the "Menus" link, then "List Links."
- Find the main menu item you are looking for (Note that this might not be in the location you want it, but you can read the four-sided arrow to drag/drop to its appropriate spot).
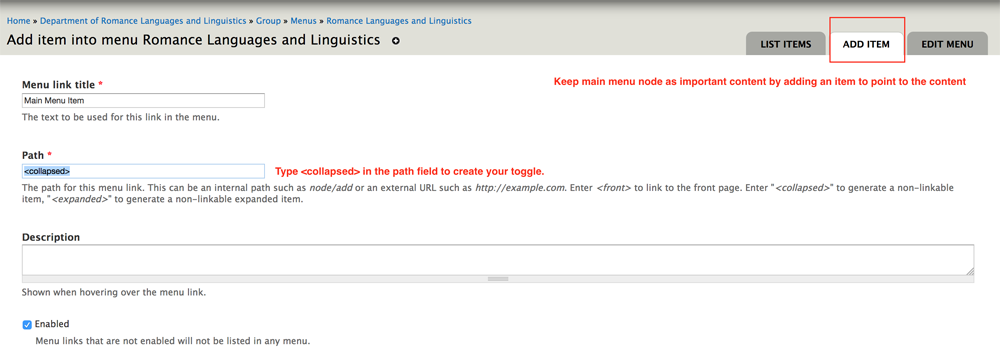
- "Edit" the main menu item link that you want to keep. In the path field, type: <collapsed>
- Save your work. You have created the main menu toggle and can begin adding submenu items (STEP 3).
Keep main menu node content as important landing page content
- Go to "My Workbench"
- Select the link to your group under “My Groups” — note that this is different from “My Websites”
- On this page there are several tabs, select the “Group” tab.
- Select the "Menus" link, then "List Links."
- Find the main menu item you are looking for (Note that this might not be in the location you want it, but you can read the four-sided arrow to drag/drop to its appropriate spot).
- "Edit" the main menu item link that you want to keep. Cut (Control + X) the node number and in its place type: <collapsed>
- Save your work.
- Because you want people to be able to find the node/text you just removed from the main menu toggle button, you’ll now recreate this page. From the Group Menu page, "Add Link" in top right tab. You can duplicate the name of the main menu toggle item or give it another appropriate name like “Overview” or “Welcome” — after all, the content being linked to is the content that used to be on this main menu page.
- You’ll now paste (Control + V) the node/xxxxx path into the path field.
- Save. You should be able to return to the main menu now and find that your menu item is a toggle, NOT a link, but you’ve created a link beneath it to the relevant content.
Helpful screenshots

Is there a choice for a menu to remain expanded?
Though the preferred method is to collapse your menu (long, expanded menus are not ideal), you still have the choice to expand it. Instead of using <collapsed> in the link field, use <expanded>.
STEP 3: Make SUBMENU items
These two steps go hand-in-hand because you don't need a toggle if you don't have a submenu.
- Add content, make your new page/node
- When editing a draft of the node, there is a vertical tab on the left named “Menu settings.” Under this item, check the box to “Provide a menu link."
- Under parent item, select the main menu item that you would like your submenu item to appear under.
NOTE 1: If you have not yet completed STEP 2 to turn your main menu item into a toggle, then your main menu item will not appear in this drop down. - Save and Publish your page.
- Navigate to “My Workbench”
I am a group editor (no admin rights), how do I order my menu?
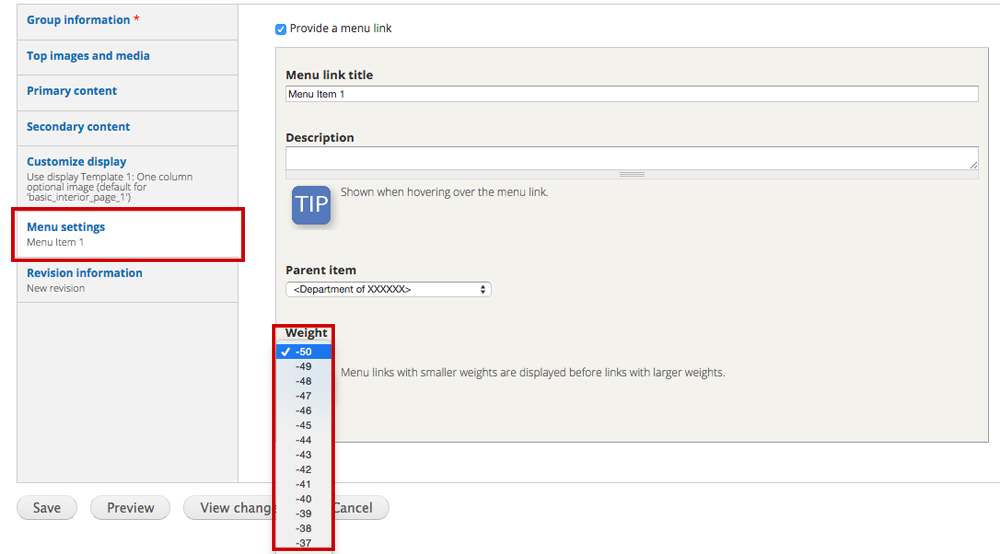
In the vertical tab "Menu settings" you can use the "Parent item" drop down to decide where a page falls in the order of your menu. Below that is a number ordering drop-down called "Weight"--not the most intuitive way to order a page, but this is a default Drupal function so here's our most simplistic description. The drop-down range is -50 to 50. Counterintuitively, the -50 number would place your page/node highest up on your menu. The 50 would place the number lowest on your menu (ie: Your "Contact Us" page). If you think that you're reordering some menu items correctly and you're not seeing the result you'd expect, do talk with your site's administrator/publisher. Any of the menu reordering that is done in the Groups interface (accessible by admins only), will override work done in this drop-down weight field.
Helpful screenshots:
I changed a menu node name (title of the page), but don’t see that change reflected in the menu. What do I do? (editors and admins)
You’ll need to also adjust the menu link title to reflect that change in the menu tab when you’re editing the node:
Helpful screenshots: