Outlook for Windows 2010 to Manage UVM Email
These steps were done from a
Windows 7 device. The steps in general
should be the same for other versions of Windows but may have different
appearances.
1.
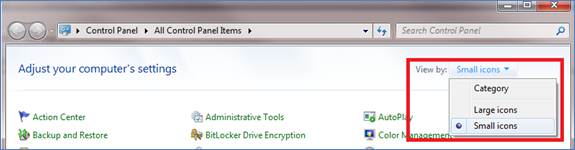
Open Control PanelàMail.
a.
To find ‘Mail’, you may need to toggle the ‘View
by’ to ‘Small Icons’
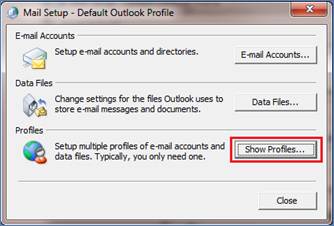
2.
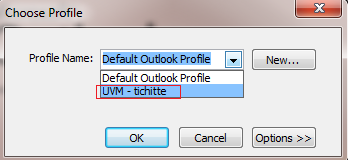
Click ‘Show Profiles’. In case you already have Outlook configured,
these instructions are going to create a new Profile.
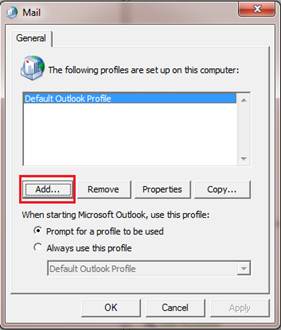
3.
Click ‘Add’ and confirm the ‘Prompt for a
profile to be used’ is selected (unless
you are sure you will only have one configured profile).
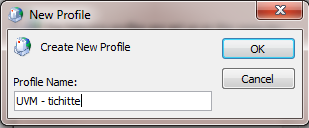
4.
Enter an appropriate name for this Outlook
Profile and click OK (e.g. UVM – YourUVMUserId)
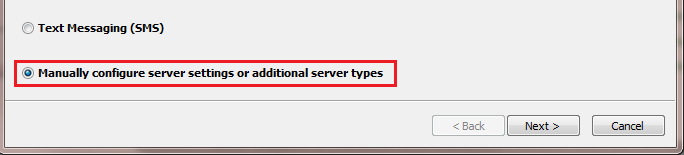
5.
Choose ‘Manually Configure Server Settings or
additional server types’ and click Next
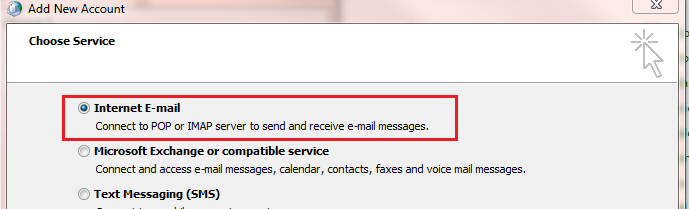
6.
Choose ‘Internet E-mail’ and click next
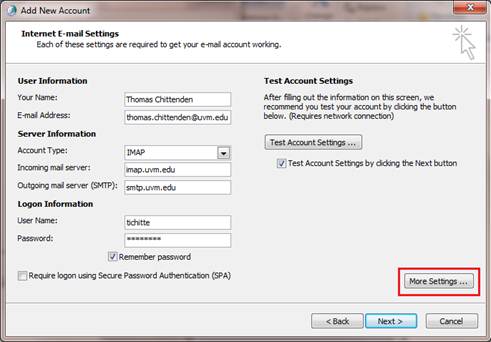
7.
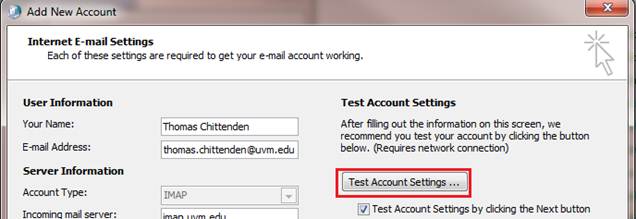
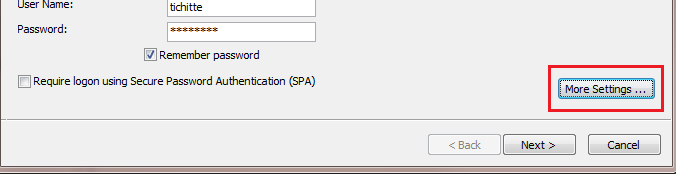
Enter your information and then click ‘More Settings…’
User Information
Your Name: John
Doe
E-mail Address: John.doe@uvm.edu
Server Information
Account Type: IMAP
Incoming mail server: imap.uvm.edu
Outgoing mail server (SMTP): smtp.uvm.edu
Logon Information
User Name: jdoe3
Password: <UVMPassword>
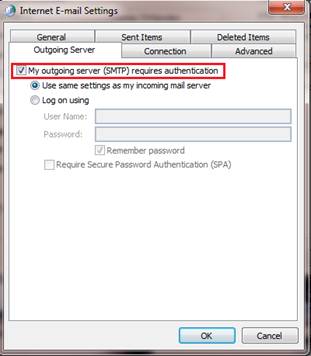
8.
On the ‘Outgoing Server’ tab, check the ‘My
Outgoing server(SMTP) requires authentication
----------------VERY IMPORTANT SETTINGS----------------------
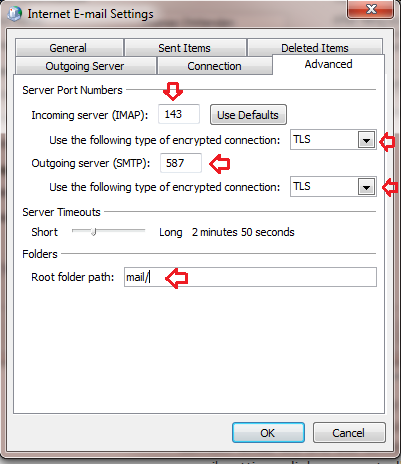
9.
On the Advanced tab, change the type of TCP port
for communicating with the servers:
Incoming server (IMAP): 143 -
Type of encrypted connection TLS
Outgoing server (SMTP): 587 -
Type of encrypted connection TLS
NOTE: Some students have
reported problems getting IMAP/TLS to work…if so, select SSL for IMAP instead
of TLS
NOTE: Setting the Root
Folder Path to ‘mail/’ was previously a required setting but is no longer
necessary.
NOTE: Changing the
encryption type to TLS will reset the port number so be sure SMTP is set to
587!
10.
Click OK to close the additional settings
interface.
11.
Click ‘Test Account Settings…’. You will/may be prompted for your credentials
twice, enter your UVM credentials. If
unsuccessful, open the More Settings … interface and double check settings from
previous steps. Also confirm your UVM NetID password is correct.
This can be reset at www.uvm.edu/account
12.
Once successful, click OK through all of the
open windows and launch Outlook (choose the newly created UVM profile).
If the settings worked, you should
now see your UVM email using Outlook 2010.
Two additional configurations are very important; location for sent
items to be saved AND directory lookup.
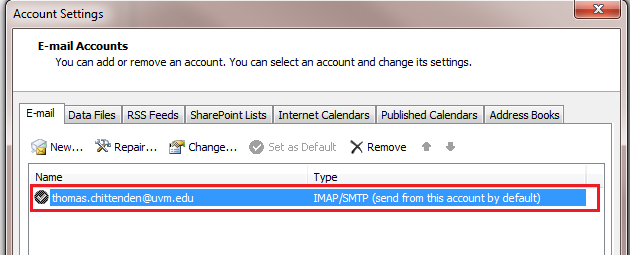
13.
Open FileàAccount
Settings
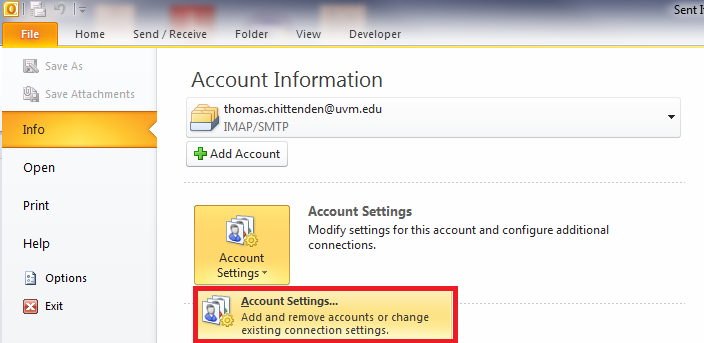
14.
On the Email tab, double click the account in
the list
15.
Click on ‘More Settings’
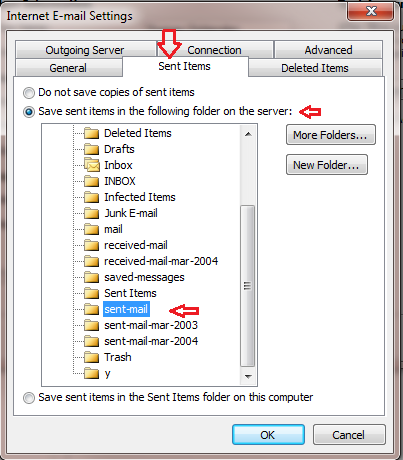
16.
On the ‘Sent Items’ tab, choose ‘Save sent items
in the following folder on the server:’ and choose the ‘sent-mail’ folder
17.
Click OK through all the windows…now your sent
emails will be saved in your Mail account so they are accessible for future
reference.
18.
Open the Account Settings interface again (FileàAccount Settings) and
open the tab called ‘Address Books’
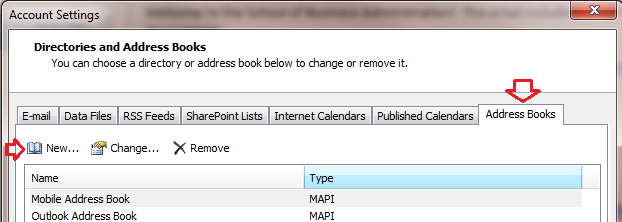
19.
On the Address books tab, click ‘New…’
20.
Choose ‘Internet Directory Service (LDAP) and
click Next
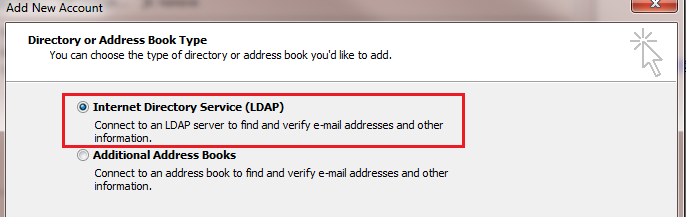
21.
In the Server Name, enter ldap.uvm.edu and then click
‘More Settings…’

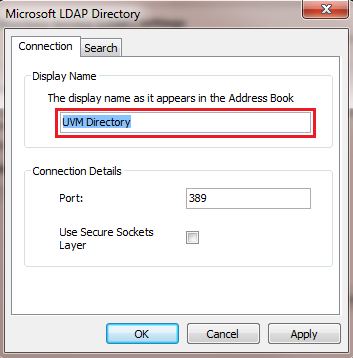
22.
Change the display name to ‘UVM directory’
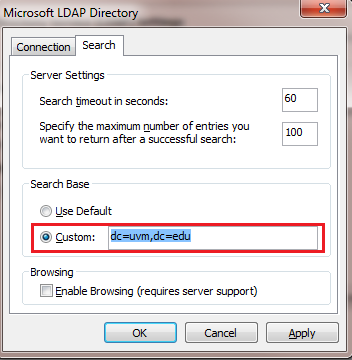
23.
IMPORTANT: On the Search tab, change the ‘Search Base’
to be ‘Custom’ and enter dc=uvm,dc=edu
That should be enough to have your Outlook 2010 client
configured for your UVM mail account. If
problems arise, reach out to your support desk for assistance.