Part I: SharePoint
SharePoint is a web-based
collaboration service designed for small, medium and large enterprises to
manage content, documents and digital collaboration. The UVM SharePoint hosted service
(sharepoint.uvm.edu) offers a secure, directory integrated platform for
students at UVM to share and collaborate on course work or any University
related effort.
Objective:
This lab is
designed to have a team of three to five students create a team SharePoint
workspace on sharepoint.uvm.edu, connect to the space using their personal
computing devices, customize the site, upload content, post announcements and
provision access to the instructor of the course.
Deliverable:
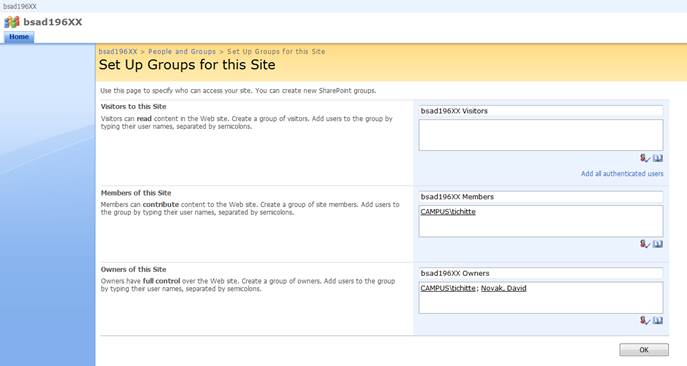
Add your instructor to have
Full Control over this team site (add to the Site Owners group). Send an email to your instructor with a link
to your team site. CC all team members
in the group.
Lab
Requirements
This lab is best
performed using the latest version of Internet Explorer available. Many features of SharePoint require the
browser to be IE (Internet Explorer).
You may use any browser you like to access SharePoint or to complete
this lab but know that the screenshots demonstrating the steps are using Internet
Explorer so you are encourage to use this browser for these steps.
Step 1 – Create a Team
Site
1.
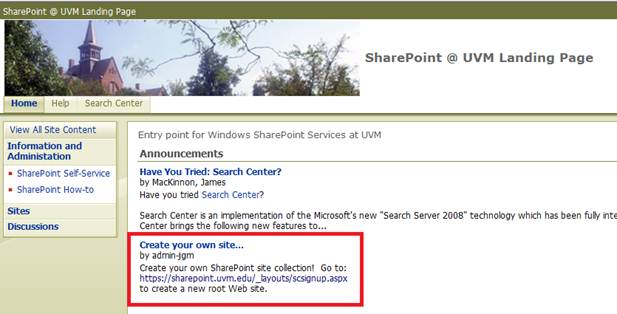
Open
http://sharepoint.uvm.edu
2.
The
second announcement on the main page should read ‘Create Your Own Site…’ Click on the link in the announcement to https://sharepoint.uvm.edu/_layouts/scsignup.aspx
3.
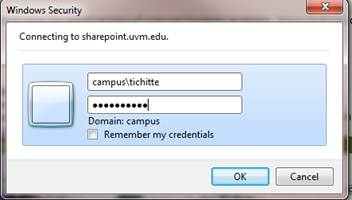
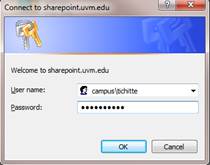
You
will then be prompted for your UVM credentials. NOTE: Be sure to qualify your name with CAMPUS\
4.
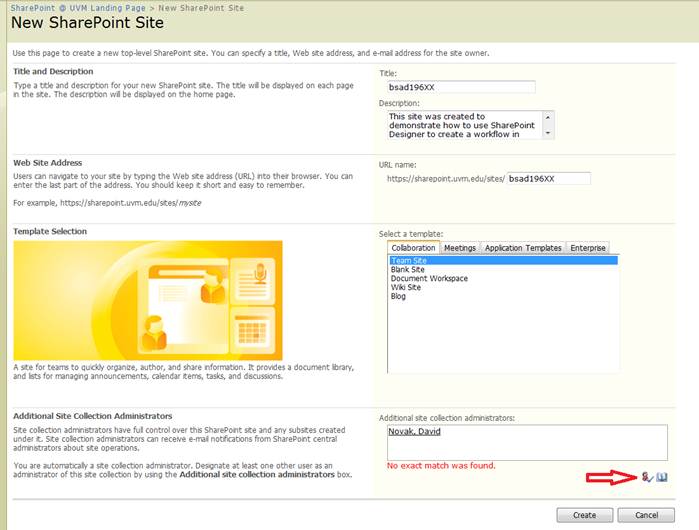
Enter
appropriate information. It is important
to choose a site Title and URL Name that is unique and easy to remember. It is also a good idea to NOT use capital
letters, spaces or punctuation in the URL name.
Choose a simple descriptive name like bsad96team1.
NOTE: REMEMBER your site
URL. You will need to know this to
access the site.
5.
Enter
the UVM net ID for your partners in the ‘Additional Site Collection
Administrators’ to grant them full control.
The icon of a person with checkbox next to it is a great tool to resolve
net IDs to their accounts.
6.
NOTE
the URL name you enter in the Website address section. This is the URL you will need to access this
space in the future AND to connect SharePoint Designer to this space.
7.
In
the next permissions window, add the same accounts to the ‘Owners’ group as
well.
8.
Click
OK and your site should now be available for all accounts granted permissions
to access.
Step 2 – Customize the Site
1. Have each member of the team
logon to the site created in step 1 by opening a browser and entering the URL
address.
2. When prompted for your
credentials enter your UVM username and password WITH ‘CAMPUS\’ qualifying your
username
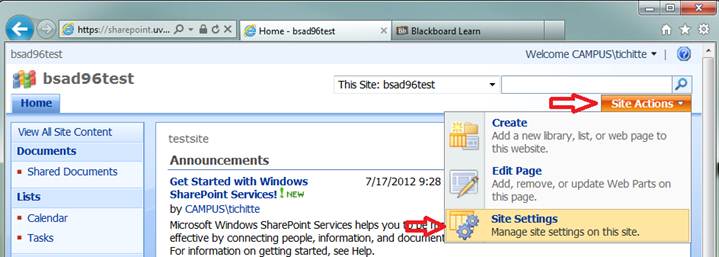
3. After logging into your team
site, find the drop down labeled ‘Site Actions’ in the top right corner of the
page and click on ‘Site Settings’
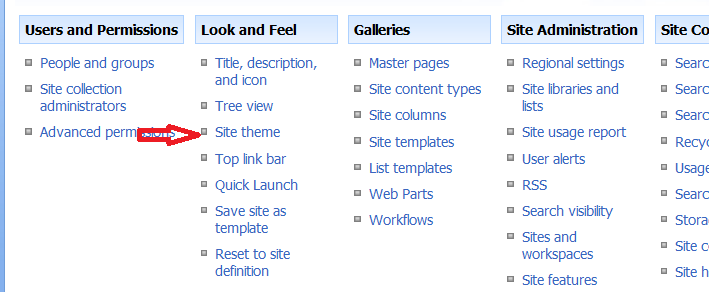
4. Under the ‘Look And Feel’
category, click on Site theme.
5. Choose a theme different
than the default theme and Apply.
6. On the Site Settings page,
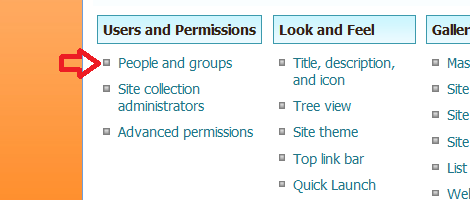
select ‘Peoples and Groups’ in the ‘Users and Permissions’ column.
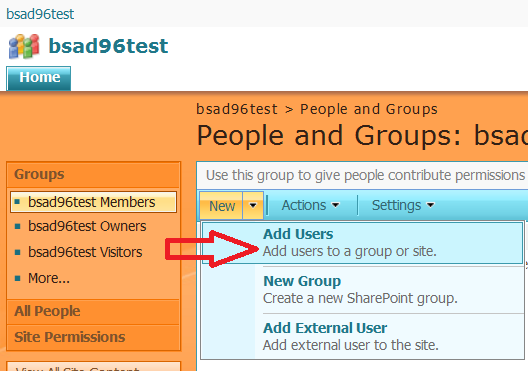
7. On the ‘New’ drop down,
select ‘Add User’
8. In the Users/Groups text
box, enter your UVM NetID (e.g. tichitte)
and click on the ‘Check Names’ icon.
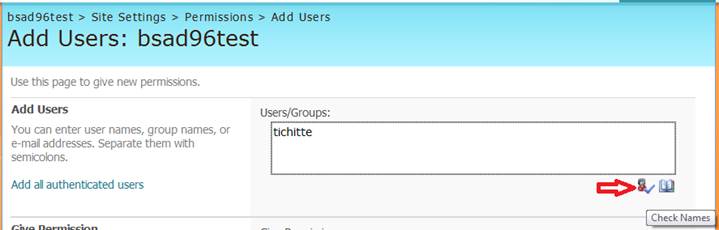
9. After clicking Check Names,
the tichitte entry should resolve to CAMPUS\tichitte.. Scroll
down the page and click OK.
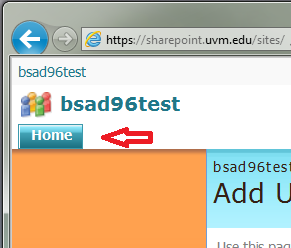
10. Click on the ‘Home’ button
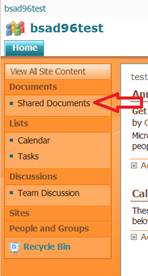
11. Open the Shared Documents
space in the left hand column.
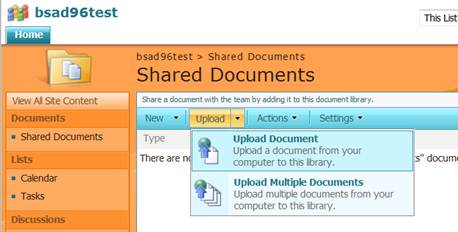
12. Using the Upload Document
drop down, have each group member upload a test document (PDF, word doc,
spreadsheet or .PPT) from their own workstation (lab machine
, PC or Mac).
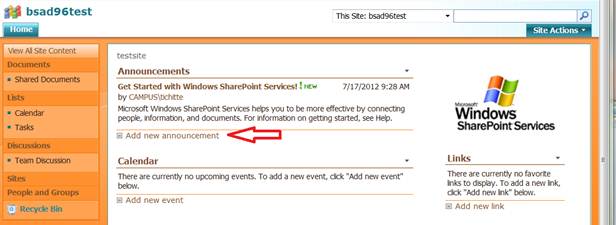
13. Return to the Home tab and using
the ‘Add New Announcement’ link have each team member create an announcement
stating what they will do before their next team meeting over the weekend.
14. Have one team member create
a new Calendar event item with the Time, Date and location of your next planned
team meeting.
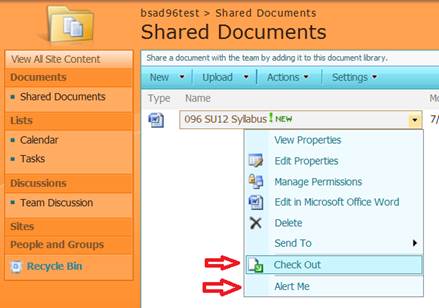
Use this team collaboration space to store all
project related files. The Share
Documents space has additional features to Check Out / Check In documents or to
configure ‘Alerts’ whenever documents are altered/uploaded….You are encouraged
to use as many of the share point features as you like.