A file containing a preconfigured profile for use at UVM must be
downloaded along with the client installer (and is found
here). This file must be placed in the following directory,
/etc/CiscoSystemsVPNClient/Profiles
after the client software is installed.
The necessary steps involved in the client software installation are
as follows:
| 1. |
Download the client software and the configuration profile from the
software download page. |
| 2. |
After downloading has finished, make sure files have been extracted from the download. You should have a folder on your desktop called "vpnclient" and a file called "uvm.pcf". |
| 3. |
You must be logged in to an account
that has Administrator privileges on the system in order to install the
VPN client software.
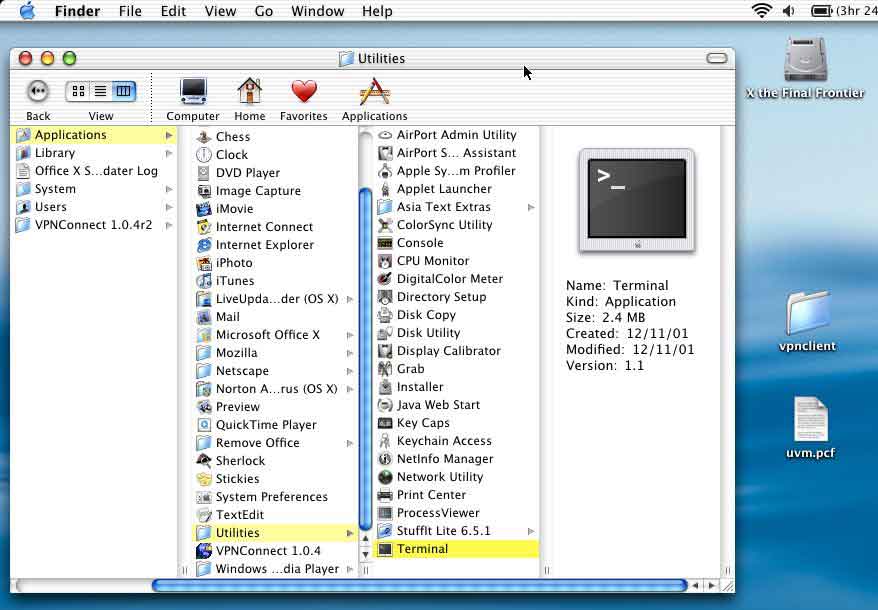
- Start a terminal session using the
"Terminal" application (found in "Applications" -> "Utilities").
|
| |
|
| |
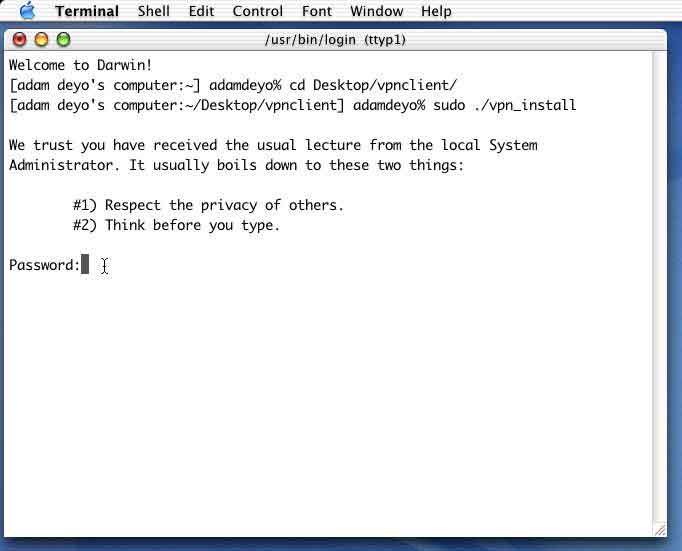
- Change the working directory to the "vpnclient" folder on the
desktop:
cd Desktop/vpnclient.
- Install the client software with this command:
sudo ./vpn_install.
You will be prompted to enter your password before the command can be
executed.
|
| |
|
| 4. |
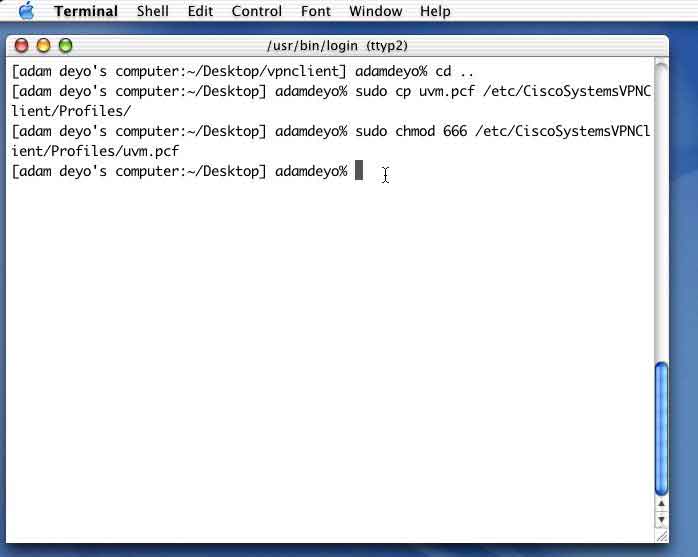
Copy the file (uvm.pcf) into the
/etc/CiscoSystemsVPNClient/Profiles
directory and change its file permissions. Assuming you are still in the
"vpnclient" folder and the
configuration file is on your desktop, the necessary commands are:
cd ..
sudo cp uvm.pcf
/etc/CiscoSystemsVPNClient/Profiles
sudo chmod 666
/etc/CiscoSystemsVPNClient/Profiles/uvm.pcf
(Tip: Instead of typing the entire directory path yourself, press the Tab
key after typing two or three characters of each subdirectory name. For
example, type sudo cp uvm.pcf /etc/Cis then press the Tab key
to fill out the rest of the directory name. Then continue with Pr and
press the Tab key again.)
Now, the first time you enter your username (when prompted by the
client), it will be saved in the configuration file.
|
| |
|
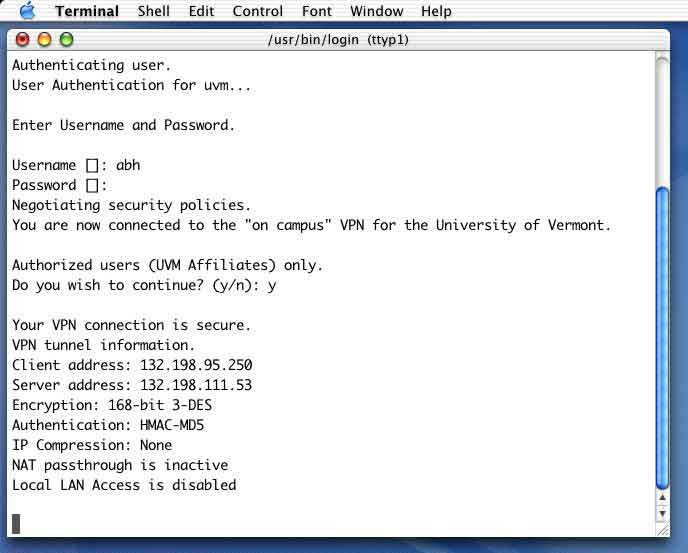
| 5. |
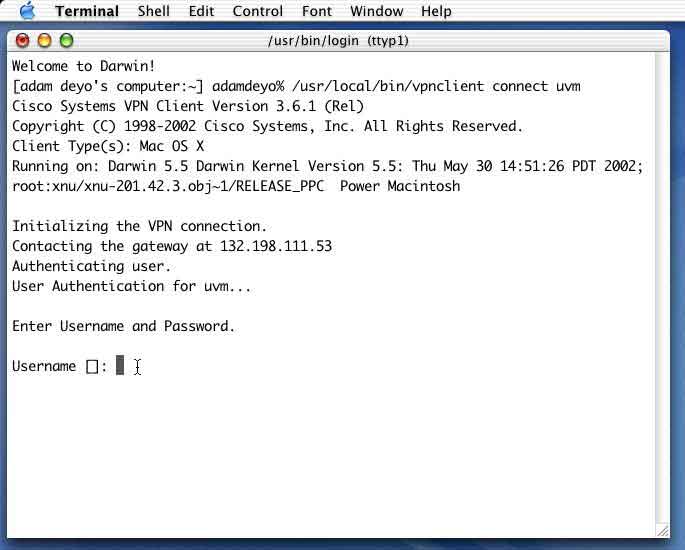
Restart your system. Start a terminal session using the "Terminal"
application.
Start the VPN client software and follow the
prompts:
/usr/local/bin/vpnclient connect uvm .
You must respond "y" when asked "Do you wish to continue? (y/n):" in
order to complete the connection.
|
| |
|
| |
|
| |
Once the client has made a secure connection to the VPN concentrator, you
can minimize the Terminal window, but do not end your terminal session
because that will terminate the client and disconnect your secure
connection. When you want to stop the client, type Ctrl-c in the
terminal window and then "exit".
|